ClearOne CONVERGE Pro 2 Quick Start Manual
Touch panel controller
Hide thumbs
Also See for CONVERGE Pro 2:
- Reference manual (330 pages) ,
- Quick start manual (12 pages) ,
- Installation manual (11 pages)
Table of Contents
Advertisement
Quick Links
Advertisement
Table of Contents

Related Manuals for ClearOne CONVERGE Pro 2


Summary of Contents for ClearOne CONVERGE Pro 2
- Page 1 Touch Panel Controller for CONVERGE Pro 2 ® Quick-Start Guide...
-
Page 2: Table Of Contents
DhCP ........... 13 onfigure thernet uSing iP ..........13 onfigure thernet uSing a tatiC ................14 ate anD CONNECT TO a CONVERGE PRO 2 .......... 18 mOuNTING OPTIONs ..............20 ............20 lear abletoP ount ............. 21 lear ount VeSa m .............. -
Page 3: Introduction
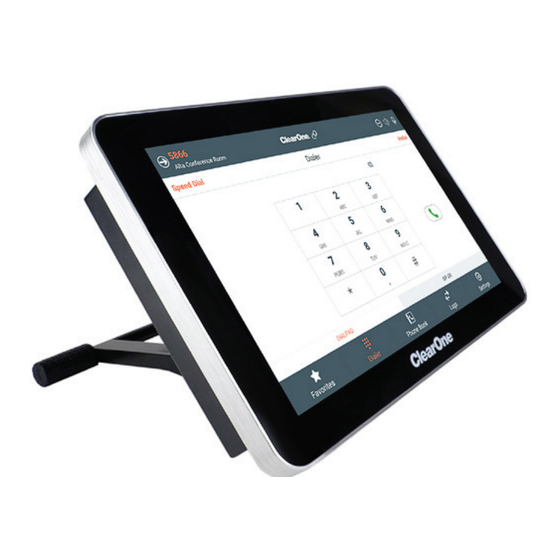
Quick-Start Guide INTROduCTION Congratulations on your purchase of a ClearOne Touch Panel Controlerr for the CONVERGE Pro 2. ® The Touch Panel Controller is a highly intuitive 10-inch, touch-screen device that allows users to control their audio conference, including managing contacts and placing and controlling calls. Flexible connectiv- ity options and a choice of tabletop, wall, or VESA mounting options offer an integrator-friendly solution that fits perfectly in any space. -
Page 4: Components Included
TOUCH PANEL CONTROLLER COmPONENTs INCludEd Touch Panel Controller Wi-Fi antenna and Dust Cap (for use when the antenna is not attached) AC Power Adapter... -
Page 5: Providing Power
PROVIdING COmmuNICaTIONs In order for a Touch Panel Controller to work, it must be connected to a CONVERGE Pro 2 (CP2) device. In order for the telephony-specific Dialer functions to work, the Touch Panel Controller must be connected to a CONVERGE Pro 2 device that is either VoIP or Telco capable. - Page 6 TOUCH PANEL CONTROLLER By serial connection, using the DB9 RS232 port to connect the Touch Panel Controller directly to a CP2: CONVERGE Pro 2 Legend Power Options: A. Power Adapter B. PoE Injector C. PoE Ethernet Touch Panel Controller D. Power over P-link...
- Page 7 Quick-Start Guide By serial connection via a CP2 GPIO or USB Expander, using a serial cable attached to the Phoenix Euroblock Adapter accessory: CONVERGE Pro 2 Legend Beamforming Mic Array 2 CP2 GPIO Expander Rear Panel Power Options: A. Power Adapter B.
- Page 8 TOUCH PANEL CONTROLLER By Wi-Fi connection: CONVERGE Pro 2 Network Switch Legend Power Options: A. Power Adapter B. PoE Injector C. PoE Ethernet D. Power over P-link Wi-Fi Router Touch Panel Controller NOTE: If you connect the device by both Ethernet and wi-fi, the Ethernet connection...
- Page 9 Quick-Start Guide By Ethernet connection, by attaching a CAT5e or CAT6 cable to the RJ45 port at the bottom of the device: CONVERGE Pro 2 PoE-capable Network Switch Legend Power Options (if not using a PoE- capable Switch): A. Power Adapter B.
-
Page 10: Power And Communication Accessories
CAT6 Ethernet 910-3200-204-150 CAT6 Ethernet cable. Cable, 150 ft. (45.7m) CAT6 Ethernet 910-3200-204-200 CAT6 Ethernet cable. Cable, 200 ft. (61m) NOTE: for detailed examples of combining power and communications, see the Touch Panel Controller for CONVERGE Pro 2 User Manual. -
Page 11: Configure Device Settings
Quick-Start Guide CONfIGuRE dEVICE sETTINGs Depending on how you’re connecting to a CONVERGE Pro 2, there are some device settings you need to configure. If you’re connecting via Wi-Fi or Ethernet using a static IP address, you must configure the relevant network settings. - Page 12 TOUCH PANEL CONTROLLER If it’s not already selected, tap wifi and make sure the wifi On switch is turned on. Tap the name of the network you want to connect to. The Password dialog box appears:...
-
Page 13: Configure Ethernet Using Dhcp
Quick-Start Guide Type the password for the selected network in the Password field. If you need to configure a proxy or set a static IP address, check the advanced options check box. Configure advanced options as needed. Tap Connect. Configure Ethernet using dHCP If you’re planning to connect the Touch Panel Controller to a CONVERGE Pro 2 via Ethernet using DHCP , no further configuration is required. -
Page 14: Set Date And Time
• You can have the Touch Panel Controller get the date and time from a connected CONVERGE Pro 2 device • If you are connected to a network via Wi-Fi or Ethernet, you can have the Touch Panel Controller get the date and time and time zone automatically via the network connection •... - Page 15 CONVERGE Pro 2 to which it connects, select synchronize date/Time with CONVERGE Pro 2. NOTE: In order for the correct time to be retrieved from the CONVERGE Pro 2, you must have configured the date and time correctly on the CP2 device. On a CP2 you can either set the date and time manually or have the device get the date and time using the Network Time Protocol.
- Page 16 TOUCH PANEL CONTROLLER To set the time zone manually, turn off the automatic time zone switch. The Select time zone option becomes available. Tap select time zone. The Select time zone screen appears. Select a time zone from the list. To set the date and time manually, turn off the Automatic date &...
- Page 17 Quick-Start Guide 10. Choose the correct date, then tap OK. 11. Tap set Time. The Set time dialog box appears: 12. Choose the correct time, then tap OK. 13. Tap the Back button at the bottom of the screen to return to the Settings screen.
-
Page 18: Connect To A Converge Pro 2
Type the IP address or domain name of the CP2 device in the Telnet IP address or fQdN field. Enter the Telnet username and password for the CP2 device in the Telnet username and Telnet Password fields. The default username for a CP2 is “clearone” and the default password is “converge”. - Page 19 21. Tap the link icon next to the connection you just created to connect to the CP2 device. NOTE: for more detailed instructions on creating a link to a CP2, see the Touch Panel Controller for CONVERGE Pro 2 User Manual.
-
Page 20: Mounting Options
• ClearOne Tabletop Mount • ClearOne Wall Mount • Third-party VESA Mount ClearOne Tabletop mount Kit ClearOne offers a tabletop mount kit (Part No. 910-3200-502): NOTE: for detailed installation instructions, see the Touch Panel Controller Tabletop Mount Kit Installation Guide. -
Page 21: Clearone Wall Mount Kit
Any VESA standard 75mm x 75mm mount can be used with the Touch Panel Controller. mounting Holes The Touch Panel Controller has two sets of 75mm x 75mm mounting holes, as shown below: NOTE: ClearOne recommends using the upper mounting holes for wall mounts and the lower mounting holes for tabletop mounts. -
Page 22: Clearone Contacts
Tel: 801-975-7200 Tel: 801.974.3760 Toll free: 800-945-7730 e-mail: tech.support@clearone.com fax: 801-303-5711 International Tel: +801.974.3621 e-mail: global@clearone.com © 2017 ClearOne, Inc. All rights reserved - http://www.clearone.com/. Information in this document is subject to change without notice. QSG-0035-001 Revision 1.1, July 2017...
Need help?
Do you have a question about the CONVERGE Pro 2 and is the answer not in the manual?
Questions and answers