Chapters
Table of Contents

Related Manuals for 3Com WL-607


Summary of Contents for 3Com WL-607
-
Page 1: Quick Installation Guide
3Com AP9152 802.11n 2.4/5GHz Single-Band Access Point Quick Installation Guide Model WL-607 3CRWE915275 / 3CRWE9152A75 BOM: 3104XXXX Manual Version: APW100 www.3com.com 3Com Corporation 350 Campus Drive, Marlborough, MA, USA 01752 3064... - Page 2 3Com Corporation. 3Com Corporation reserves the right to revise this documentation and to make changes in content from time to time without obligation on the part of 3Com Corporation to provide notification of such revision or change.
- Page 3 It is the policy of 3Com Corporation to be environmentally-friendly in all operations. To uphold our policy, we are committed to: Establishing environmental performance standards that comply with national legislation and regulations. Conserving energy, materials and natural resources in all operations.
-
Page 4: About This Manual
About This Manual Organization 3Com AP9152 802.11n 2.4/5GHz Single-Band Access Points Quick Installation Guide is organized as follows: Chapter Contents Introduces the hardware specifications, LEDs, and 1 Product Overview interfaces of the 3Com AP9152. Specifies temperature humidity Preparing requirements, power supply for installing the 3Com Installation AP9152. -
Page 5: Obtaining Documentation
Convention Description configuration with ease. Obtaining Documentation You can access the most up-to-date 3Com product documentation on the World Wide Web at this URL: http://www.3com.com. -
Page 6: Table Of Contents
Table of Contents 1 Product Overview ....................... i Introduction ......................i Hardware Specifications ..................i LEDs ....................... i Interfaces ....................... ii 2 Preparing for Installation ..................iii Unpacking and Inspection ..................iii Temperature and Humidity Requirements ............iii Power Supply ......................iii 3 Installing the AP ....................... -
Page 7: Product Overview
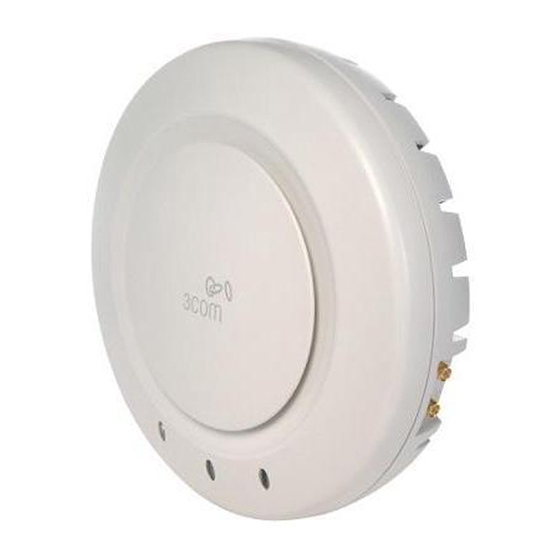
Appendix A Product Overview Introduction The 3Com AP9152 is an 802.11n access point (AP) product developed by 3Com Corporation. The AP9152 ships as a FAT AP to provide wireless access independently without any access controller or serve as a FIT AP (managed) and operate with wireless local area network (WLAN) switches or access controllers to provide wireless access for WLAN users. -
Page 8: Interfaces
Color State Description Steady on The power supply is normal. POWER Green The power supply is poorly connected or is working abnormally. Steady on The Ethernet interface is in the link-up state. 10/100M The Ethernet interface is in the link-down (Ethernet Green state. -
Page 9: Preparing For Installation
Note: The AP9152 provides a reset button and a security slot. Descriptions of the interfaces on the AP9152: Interface Standards and Description silkscreen protocols The console interface is used for device CONSOLE RS/EIA-232 configuration and management. IEEE802.3 The Ethernet interface can serve as an uplink ETHERNET IEEE802.3u interface to access the Internet and as a PoE... -
Page 10: Installing The Ap
Appendix C Installing the AP Note: 1) Make sure that no metal particles (such as screws) fall into the Ethernet or console interfaces during installation. 2) Before installing the AP9152 to the wall-mounting bracket, connect the network cable. The network cable can only be UTP cat-5. 3) Before connecting the console cable to the AP9152 for debugging or pressing the reset button, you need to remove the device from the wall-mounting bracket. - Page 11 Step1 Place the wall-mounting bracket tightly against the wall where the AP is to be mounted and mark the locations to drill holes for installing the screws. Then use a drill with a bit of 6 mm (1/4 in) in diameter to drill holes in the wall. The hole pattern must be identical with that in the wall-mounting bracket.
- Page 12 Figure2 Install the wall-mounting bracket of the AP9152 (1) Drill hole (2) Wall anchor (3) Wall-mounting bracket (4) Key-hole clip (5) Screw Step1 Adjust the position of the wall-mounting bracket and tighten the screws. Note: Install the wall-mounting bracket with the arrow on the bracket pointing upwards. Installing the AP on the wall-mounting bracket Step1 Align the AP with the key-hole clips on the wall-mounting bracket and hang the AP on the bracket.
- Page 13 Figure3 Fix the AP9152 onto the wall-mounting bracket Note: Rotating the AP9152 clockwise installs the device, while rotating it counterclockwise uninstalls it. Locking the AP onto the wall-mounting bracket (optional) The AP9152 has a security slot on the upper left side, which can be used to lock the AP to a fixed object to prevent theft.
-
Page 14: Mounting The Ap On A Ceiling
Mounting the AP on a ceiling Note: 1) To use this installation method, make sure that the thickness of the ceiling is less than 18 mm (0.71 in), and the ceiling can bear the weight of at least 5 kg (11.02 lb.). -
Page 15: Mounting The Ap To A T-Rail
Figure6 Mount the wall-mounting bracket on the ceiling (1) Bolt inside the ceiling (2) Washer (3) Nut (4) Wall-mounting bracket (5) Bolt cap (6) Key-hole clip Step3 Mount the AP9152 to the wall-mounting bracket. For details, refer to Installing the AP on the wall-mounting bracket. Mounting the AP to a T-Rail Note: The width of the T-rail must be in the range of 14 mm (0.55 in) to 24 mm (0.94). - Page 16 Figure7 T-rail holder (1) T-rail clip (2) M4×8 screw nut (3) M3×6 screw nut (4) Clip holder (5) M4×8 screw (6) M3×6 screw (7) Mounting hook (8) T-rail holder (9) Before installing to the T-rail, loosen the screw nuts until the screw heads are lower than the upper edge of the nuts.
-
Page 17: Power Supply By Poe
Figure8 Mount the AP to the T-rail (1) M3×6 screw (2) T-rail (3) Mounting hook (4) T-rail holder (5) Mounting clip (6) Wall-mounting bracket (7) Screw hole (8) M4×8 screw (9) Key-hole clip (10) M4×8 screw Power Supply by PoE Power is supplied to the AP9152 through a PoE module or PoE switch. -
Page 18: Connecting To The Ap
Appendix D Connecting to the AP To connect to the AP, you must first determine the AP’s IP address in one of these ways. Approved Channels Use of this product is only authorized for the channels approved by each country. For proper installation, select your country from the country-selection list. -
Page 19: Converting Your Managed Ap (Fit) To A Stand-Alone Ap (Fat)
Converting your Managed AP (FIT) to a Stand-alone AP (FAT) If you plan to run this AP in stand-alone mode, without a wireless controller, go to the web page at http://www.3com.com to get the FAT firmware and instructions. Converting your Stand-alone AP (FAT) to a Managed AP (FIT) -
Page 20: A Regulatory Compliance Information
Appendix E Regulatory Compliance Information Regulatory compliance standards Table1 Regulatory compliance standards Discipline Standards FCC Part 15.207 & 15.209 & 15.247& 15.205 & 15.407 FCC Bulletin OET-65C IC RSS 210 ETSI EN 300 328 ETSI EN 301 893 EMC & RF EN 60601-1-2 EN 61000-3-2 EN 61000-3-3... - Page 21 R&TTE declaration statements: 3Com Coporation tímto prohlašuje, že tento RLAN device je ve shodě Česky se základními požadavky a dalšími příslušnými ustanoveními směrnice [Czech] 1999/5/ES. Undertegnede 3Com Corporation erklærer herved, at følgende udstyr Dansk RLAN device overholder de væsentlige krav og øvrige relevante krav i...
- Page 22 Hereby, 3Com Corporation, declares that this RLAN device is in English compliance with the essential requirements and other relevant provisions of Directive 1999/5/EC. Por medio de la presente 3Com Corporation declara que el RLAN Español device cumple con los requisitos esenciales y cualesquiera otras [Spanish] disposiciones aplicables o exigibles de la Directiva 1999/5/CE.
- Page 23 [Swedish] relevanta bestämmelser som framgår av direktiv 1999/5/EG. Íslenska Hér með lýsir 3Com Corporation yfir því að RLAN device er í samræmi [Icelandic] við grunnkröfur og aðrar kröfur, sem gerðar eru í tilskipun 1999/5/EC. 3Com Corporation erklærer herved at utstyret RLAN device er i Norsk samsvar med de grunnleggende krav og øvrige relevante krav i direktiv...
-
Page 24: Eu Country Restriction In 2.4Ghz Band
3Com AP9152 Dual Band 802.11n PoE Access Point (3CRWE915275, M/N :WL-607) at that location and consult the local technical support staff responsible for the wireless network. -
Page 25: Weee Directive-2002/96/Ec
Allowed Allowed Channel Frenquecy Countries Numbers Bands Austria, Belgium, Bulgaria, Cyprus, Czech 36,38,40,44,46,48,5 Republic, Denmark, Estonia, Finland, France, 2,54,56,60,62,64,10 5.15-5.35& Germany, Greece, Hungary, Iceland, Ireland, 0,102,104,108,110,1 Italy, Latvia, Liechtenstein, Lithuania, 5.470-5.725 12,116,118,120,124, Luxembourg, Malta, Netherlands, Norway, 126,128,132,134,13 Poland, Portugal, Slovakia, Slovenia, Spain, 6,140 Sweden, Switzerland, U.K. -
Page 26: Rf Requirements
These limits are designed to provide reasonable protection against harmful interference in a residential installation. This equipment generates, uses, and can radiate radio frequency energy and, if not installed and used in accordance with the instructions, may cause harmful interference to radio communications. However, there is no guarantee that interference will not occur in a particular installation. -
Page 27: Industry Canada
Industry Canada RF Compliance This Class B digital apparatus complies with Canadian ICES-003. Cet appareil numérique de la classe B est conform à la norme NMB-003 du Canada. This device complies with RSS 210 of Industry Canada. Operation is subject to the following two conditions: (1) this device may not cause interference, and (2) this device must accept any interference, including interference that may cause undesired operation of this device. -
Page 28: Brazil Rf Compliance
This equipment complies with IC radiation exposure limits set forth for an uncontrolled environment. End users must follow the specific operating instructions for satisfying RF exposure compliance. This equipment should be installed and operated with minimum distance 20cm between the radiator and your body. Brazil RF Compliance Este produto está... -
Page 29: Register Your Product
More information on 3Com maintenance and Professional Services is available at http://www.3com.com/ Contact your authorized 3Com reseller or 3Com for a complete list of the value-added services available in your area. Troubleshoot Online You will find support tools posted on the 3Com web site at http://www.3com.com/... -
Page 30: Telephone Technical Support And Repair
To send a product directly to 3Com for repair, you must first obtain a return authorization number (RMA). Products sent to 3Com, without authorization numbers clearly marked on the outside of the package, will be returned to the sender unopened, at the sender’s expense.
Need help?
Do you have a question about the WL-607 and is the answer not in the manual?
Questions and answers