3Com 3CRWE825075A User Manual
User guide
Hide thumbs
Also See for 3CRWE825075A:
- Conversion manual (10 pages) ,
- User manual (93 pages) ,
- Configuration manual (10 pages)
Table of Contents

Related Manuals for 3Com 3CRWE825075A


Summary of Contents for 3Com 3CRWE825075A
-
Page 1: User Guide
User Guide Wireless LAN Access Points 8250/8500/8750 3CRWE825075A 3CRWE850075A 3CRWE875075A (Models WL-450, WL-462, WL-463) Version 2 http://www.3com.com/ http://www.3com.com/support/en_US/productreg/frontpg.html/ Published January, 2004 Version 2.3.12... - Page 2 3Com Corporation. 01752-3064 3Com Corporation reserves the right to revise this documentation and to make changes in content from time to time without obligation on the part of 3Com Corporation to provide notification of such revision or change.
-
Page 3: Table Of Contents
Contents Introduction Product Features Security Performance and Reliability Manageability Wireless Network Standards Far-Reaching 802.11g High-Performance 802.11a Network Configuration and Planning Ad Hoc Wireless LAN Infrastructure Wireless LAN Infrastructure Wireless LAN for Roaming Wireless PCs Terminology Installing the Access Point Installation Requirements Power Requirements Safety Information Deciding Where to Place Equipment and Performing A Site Survey... - Page 4 System Configuration Using the 3Com Wireless Device Manager Launching a Wireless Device Configuration Using the Pre-IP Configuration Wizard Configuration Login Setting the Country Code Basic Setup Advanced Setup Identification TCP/IP Settings DHCP Client Secure Web Server Connection RADIUS Authentication Filter Control...
- Page 5 Troubleshooting Technical Support Obtaining Support for your Product Register Your Product to Gain Service Benefits Purchase Value-Added Services Where To Go For Help Troubleshoot Online Access Software Downloads Contact Us Telephone Technical Support and Repair Regulatory Compliance Information Index...
-
Page 6: Introduction
NTRODUCTION The 3Com® Wireless LAN Access Points 8250, 8500, and 8750 offer a dual-mode architecture that supports 802.11g, 802.11a and 802.11b wireless users on a single device. This means you can mix and match radio bands to meet different coverage and bandwidth needs within the same area. -
Page 7: Security
100 meters (328 feet). ECURITY 3Com offers one of the most robust suite of standards-based security on the market today. To protect sensitive data broadcast over the wireless LAN, 3Com supports Wireless Equivalent Privacy (WEP) RC4 40/ 64-bit, 128-bit and 152-bit shared-key encryption. -
Page 8: Wireless Network Standards
need to consider AC power outlet locations. PoE support makes it easier than ever to overcome installation problems with difficult-to-wire or hard-to-reach locations. IRELESS ETWORK TANDARDS Understanding the characteristics of the 802.11g and 802.11a standards can help you make the best choice for your wireless implementation plans. 802.11 EACHING 802.11g operates in the 2.4 GHz band at up to 54Mbps. -
Page 9: Network Configuration And Planning
Supporting a dense user base confined to a small coverage area. Because 802.11a has a greater number of non-overlapping channels, you can pack more access points in a tighter space. ETWORK ONFIGURATION AND LANNING The wireless solution supports a stand-alone wireless network configuration as well as an integrated configuration with 10/100 Mbps Ethernet LANs. -
Page 10: Infrastructure Wireless Lan For Roaming Wireless Pcs
The infrastructure configuration not only extends the accessibility of wireless PCs to the wired LAN, but also increases the effective wireless transmission range for wireless PCs by passing their signal through one or more access points. A wireless infrastructure can be used for access to a central database, or for connection between mobile workers, as shown in the following figure. -
Page 11: Terminology
File Server Desktop PC Switch Notebook with Wireless PC Card Adapter <BSS2> Switch Access Point Notebook with Wireless PC Card Adapter Access Point <ESS> <BSS1> Seamless Roaming PC with Wireless PCI Adapter ERMINOLOGY Access Point—An internetworking device that seamlessly connects wired and wireless networks. - Page 12 ESS—Extended Service Set. More than one BSS is configured to become an ESS. LAN mobile users can roam between different BSSs in an ESS (ESS-ID, SSID). Ethernet—A popular local area data communications network, which accepts transmission from computers and terminals. Infrastructure—An integrated wireless and wired LAN is called an infrastructure configuration.
-
Page 13: Installing The Access Point
The cable must be long enough to reach the power supply or the power-over-Ethernet LAN port. If you use the 3Com power supply, you need an additional Ethernet cable to connect the access point to the LAN. To access and use the Web configuration management system, you need a computer that is running Internet Explorer 5.0 or newer and one of the following operating... -
Page 14: Power Requirements
The access point complies with the IEEE 802.3af power-over-Ethernet standard. It receives power over standard category 5 straight (8-wire) Ethernet cable. Installation requires the use of either the 3Com power supply provided or IEEE 802.3af compliant power supply equipment (output power rated 48 V dc @ 350 mA maximum). Such equipment must be safety certified according to UL, CSA, IEC or other applicable national or international safety requirements for the country of use. -
Page 15: Deciding Where To Place Equipment And Performinga Site Survey
If your location includes these kinds of obstructions, you may need to add additional access points to improve coverage Configuring a wireless LAN can be as easy as placing a 3Com Wireless Access Point in a central area and making the necessary connections to the AP and the clients. -
Page 16: Before You Begin
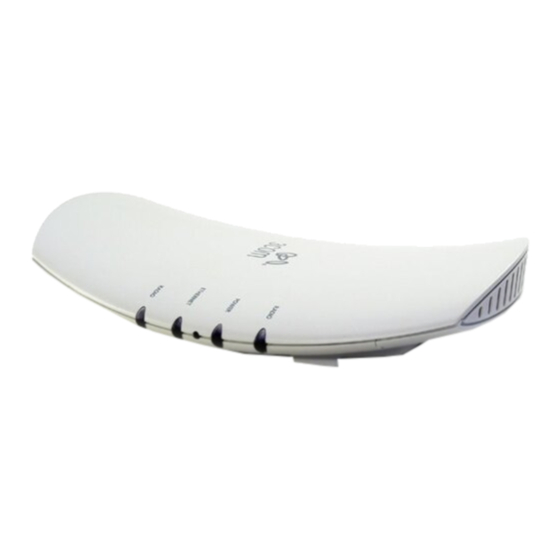
Regulatory restrictions dictate that when this device is operational, the minimal body-to-antenna distance is 1 Meter (3 Feet). EFORE EGIN Record the access point MAC address in a safe place before the access point is installed in a hard-to-reach location. The MAC address is printed on the back of the access point housing. -
Page 17: Connecting Power
5 straight (8-wire) Ethernet cable. There are two ways to supply power to the access point: Use the 3Com Integrated Power-over-Ethernet power supply. In this case, you need to supply a second Ethernet cable to connect to the wired LAN. -
Page 18: Using The Power Supply
Connect the access point directly to your own power-over-Ethernet hub or switch, which must also comply with the IEEE 802.3af standard. If you supply your own Ethernet cable for connecting power, be sure that it is standard category 5 straight-through (8-wire) cable that has not been altered in any way. -
Page 19: Using A Power-Over-Ethernet Lan Port
If your LAN equipment complies with the IEEE 802.3af power-over-Ethernet standard, you can connect the access point directly to a LAN port. For example, the illustration above right shows a connection through a 3Com Ethernet Power Supply to a 3Com SuperStack Switch. - Page 20 Install the mounting plate as shown in the following illustration, on either a stud (or other hard wall surface), or onto drywall. If installing into a stud or other If installing into drywall, use 3 plastic anchors and 3 screws. secure vertical surface, use 2 screws.
-
Page 21: Flat Surface Installation
Position the access point at an angle to the mounting plate bayonet connection and turn the unit clockwise until it snaps into place, as shown below. Leave at least 13 cm (5 in.) length. Hold the access point at an angle. Turn Ethernet cable may be routed through clockwise to engage and secure it on center opening or through the side. -
Page 22: Selecting And Connecting A Different Antenna Model
For maximum efficiency, use the shortest antenna cable possible. Antenna cables induce signal loss, which will limit the radiated power output and range of the access point. Of the options available, we recommend the 3Com 6-foot Antenna Cable (3CWE480). - Page 23 Back Back Position the antenna so that there are minimal obstacles between it and any client with which it will communicate. While maintaining a direct line of sight between the antenna and a client is not strictly necessary, such an arrangement helps to ensure a strong signal.
-
Page 24: Power Settings On The Access Point For External Antennas
OWER ETTINGS ON THE CCESS OINT FOR XTERNAL NTENNAS 2.5dBi 4dBi 8dBi (3CWE492) (3CWE490, (3CWE491, 3CWE497) 3CWE498) 6 ft 100% 100% 100% (3CWE480) 20ft 100% 100% 100% (3CWE481) 50 ft 100% 100% 100% (3CWE482) European Community 2.5dBi 4dBi 8dBi 13dBi (3CWE492) (3CWE490, (3CWE491,... - Page 25 IP devices, including 3Com wireless access points. It is not required for access point management. 3Com Site Survey Tool. This utility assists in selecting the best location for your access point before installing the device permanently. Use the Site Survey Tool to determine if the intended mounting locations will provide adequate coverage with good signal strength and quality.
-
Page 26: System Configuration
EVICE ANAGER After the 3Com Wireless Device Manager is installed, ensure that the device to be configured is either wired to the network, associating with the wireless network, or connected directly to the computer, and connected to power. If more than one device using the factory default name is connected, make a note of the MAC address of the device you want to select so that you can identify it in the device manager. - Page 27 Next. The 3Com Web Configuration Management System main screen appears in your Web browser. The following table describes the functions of the buttons in the 3Com Wireless Infrastructure Device Manager window. Button...
-
Page 28: Using The Pre-Ip Configuration Wizard
-IP C SING THE ONFIGURATION IZARD You can only configure devices that are on the same subnet as your computer. To configure a device on a different subnet, you must first assign it an IP address on the same subnet as your computer. After you launch the configuration, you can change settings as usual. -
Page 29: Basic Setup
ASIC ETUP For a basic configuration, use the Setup Wizard as described below. At any time, you can click Home to return to the Home page of the configuration interface. If you want to configure more advanced features, click Advanced Setup in the Home page. -
Page 30: Advanced Setup
Default Gateway—The default gateway address is optional, but may be required by your Internet Service Provider. Primary DNS Address and Secondary DNS Address—The Domain Name Servers (DNS) map numerical IP addresses to the equivalent domain name (for example, www.3Com.com). Your internet service provider should provide the IP... -
Page 31: Secure Web Server Connection
address of one or more domain name servers. Enter those addresses in Primary DNS Address and Secondary DNS Address fields. ECURE ERVER ONNECTION This option controls whether Secure Socket Layer (SSL) technology is used to encrypt information between the computer and the device during a configuration session. By default this option is Off. -
Page 32: Authentication
In the RADIUS Authentication section, enter the required parameters for a primary and secondary RADIUS authentication server. In the RADIUS Accounting section, click the Enable radio button, then enter required parameters for a primary and secondary RADIUS accounting server. When you are finished configuring items on this page, click Apply. The parameters are described below. - Page 33 Configure the options as described below. When you are finished, click Apply. MAC Authentication— Selecting MAC authentication allows you to define access permission and precedence. Options are: Local MAC— With this option, the MAC address of the associating station is compared against the local access control list.
- Page 34 Field Default Description Broadcast Key Refresh Rate 0 Defines how long the RADIUS server will (minutes) refresh the primary broadcast key. Session Key Refresh Rate Defines how long the RADIUS server will (minutes) dynamically re-assign a session key to a connected client station.
-
Page 35: Filter Control
Parameter Description MAC Address Enter the MAC address of a client for the access control. You can find the MAC address of a network card as follows: Windows 95/98/ME—Click Start/Run. Type winipcfg and press Enter. The MAC address is in the Adapter Address section. Windows NT4/2000/XP—At the command prompt, type ipconfig /all and press Enter. -
Page 36: Security Filters
VLAN Switch ports must be tagged ports that match the VLAN ID on the Access Point. Associated client VLAN IDs will appear in the Syslog file in ASCII Decimal format. When VLAN filtering is enabled, the access point queries the server for the VLAN IDs of associating clients and saves the VLAN IDs. -
Page 37: Filtering By Ethernet Protocol Type
the airport. However the client to client blocking feature of the AP will only block communications to other clients associated with the same AP. And will not block client to client of another AP communications. By using the Uplink Filtering function of the AP communications to all other clients of all other AP’s on the same sub net can be blocked. -
Page 38: Administration
string for authentication. Select SNMP Enable and enter data into the fields as described below. When you are finished, click Apply. Location—Specifies the access point location. Contact—Sets the system location string that describes the system location. (Maximum length: 255 characters) Community Name (Read Only)—Specifies a community string with read-only access. -
Page 39: System Log
To back up a configuration — Type the IP address of the TFTP server and a name for the backup file in the spaces provided. Click Basic (to save a partial configuration) or Complete (to save an entire configuration) and click Backup Configuration. -
Page 40: Status
To set up a server for event logs: Select System Log Setup Enable, select a logging severity level from the pulldown list, enable the Logging Host and Logging Console, and enter the IP address of the server in the space provided. To designate an SNTP server for obtaining the date and time: Select SNTP Server Enable and enter the IP addresses for primary and secondary SNTP servers in the spaces provided. - Page 41 SSID—Enter the Service Set ID (up to 32 alphanumeric characters). Clients must set their SSIDs to match the access point. The SSID is case sensitive. Closed System— Enabling this option will not publicly broadcast the SSID. Turbo Mode (802.11a only)—Turbo Mode is an enhanced wireless LAN operating mode that can provide a higher data rate.
-
Page 42: Security
Fragmentation of the PDUs (Package Data Unit) can increase the reliability of transmissions because it increases the probability of a successful transmission due to smaller frame size. If there is significant interference present, or collisions due to high network utilization, try setting the fragment size to send smaller fragments. This will speed up the retransmission of smaller frames. -
Page 43: Configuring Authentication
Shared Key—If Shared Key is enabled, Encryption must also be enabled as described in “Configuring Encryption” on page 43. 128-Bit Dynamic Security Link—This option can only be used with other 3Com Wireless LAN devices. The user name and password set on the access point must match those set on the clients. -
Page 44: Wpa Configuration
The following sections describe how to configure each type of encryption. When you are finished configuring the encryption, click Apply. WPA Configuration To configure WPA encryption: Under WPA Configuration, click the Required check box if you want to limit access to clients using WPA encryption. If you also want to allow WEP clients, do not check this box. -
Page 45: Wep Configuration
Select the Key Type. Hexadecimal (0~9, A~F; for example, D7 0A 9C 7F E5) Alphanumeric (0~9, A~F; for example 01234) 3Com Passphrase(a string, described below) Enter the keys in their fields. 64-bit—Each key contains 10 hexadecimal digits or 5 alphanumeric characters. -
Page 46: How To Setup The Access Point For Radius Authentiction
3Com Passphrase—This encryption string is for use only with other 3Com Wireless LAN devices. It is a case-sensitive string between 6 and 30 characters long. To enter the string, click 3Com Passphrase. Then type any combination of letters and numbers in the Key 1 field and click Apply. -
Page 47: How To Setup The Access Point For Wpa With 802.1X Session Keys
e WEP Configuration has at least one valid WEP key. f Click on Apply. 11 The Access Point is now configured for RADIUS Authentication. 802.1 OW TO SETUP THE ACCESS POINT FOR WITH ESSION KEYS Using the Wireless Infrastructure Device Manger access the configuration screen for the AP8x00/AP82x0. -
Page 48: How To Setup The Access Point For Wpa With Pre-Shared (Psk) Key
g Click on Apply. 11 The Access Point is now configured for WPA Authentication over 802.1x. OW TO SETUP THE ACCESS POINT FOR WITH (PSK) K HARED Using the Wireless Infrastructure Device Manger access the configuration screen for the AP8x00/AP82x0. Enter your User Name and Password and click LOGIN (Default: admin with no password) Select Advanced Setup. -
Page 49: Wpa Configuration For Windows Xp
WPA C ONFIGURATION FOR INDOWS The following table shows how to configure the access point to support the various authentication and encryption options available for Windows XP Wireless Zero Configuration. The following notes apply to configuring the access point for WPA under Windows A WPA-capable wireless network interface card is required. - Page 50 Windows XP Wireless Zero Configuration Access Points 8200/8250/8500/8700/8750 Authentication Encryption Authentication Encryption Other WPA-PSK Not available on 8200 TKIP Open System Enable WPA Configuration: Required Multicast Cipher Mode: TKIP WPA Key Management: WPA-PSK Select Key Type and enter Pre-Shared Key Open System Enable WPA Configuration:...
-
Page 51: Troubleshooting
ROUBLESHOOTING If you have difficulty with the 3Com Wireless LAN access point, first check the following items in the configuration: Radio Settings page: Ensure that the SSID is the same on clients and the access point. Security page: Ensure that Encryption is the same on clients and the access point. - Page 52 After you specify an IP address In the 3Com Device Manager window click the Refresh for an access point, the 3Com button to refresh the Wireless Network Tree. Then click the...
- Page 53 1 Close your browser. 2 Return to the 3Com Device Manager Wireless Network Tree and click Refresh. 3 Select the access point and click Configure to start a new configuration session.
-
Page 54: Obtaining Support For Your Product
3Com Extended Warranty and Professional Services is available at http://www.3com.com/ HERE Contact your authorized 3Com reseller or 3Com for additional product and support information. You will find support tools posted on the 3Com web site at www.3com.com ROUBLESHOOT NLINE 3Com Knowledgebase helps you troubleshoot 3Com products. -
Page 55: Access Software Downloads
When you contact 3Com for assistance, please have the following information ready: To send a product directly to 3Com for repair, you must first obtain a return authorization number (RMA). Products sent to 3Com, without authorization numbers clearly marked on the outside of the package, will be returned to the sender unopened, at the sender’s expense. - Page 56 Pakistan +61 2 9937 5083 You can also obtain support in this region using the follwoing email, apr_technical_support@3com.com Or request a repair authorization number (RMA) by fax using this number: + 65 543 6348 Europe, Middle East, and Africa Telephone Technical Support and Repair...
- Page 57 You can obtain support in this region using the following URLs: Latin America. Spanish speakers, enter the URL: http://lat.3com.com/lat/support/form.html Portuguese speakers, enter the URL: http://lat.3com.com/br/support/form.html English speakers in Latin America should send e-mail to: lat_support_anc@3com.com Or call using the following numbers Antigua...
-
Page 58: Regulatory Compliance Information
1 meter. This product does not contain any user serviceable components. Any unauthorized product changes or modifications will invalidate 3Com’s warranty and all applicable regulatory certifications and approvals. This product must be installed by a professional technician/installer. - Page 59 Industry Canada Notice (Applicable to Use Within Canada) This device complies with Canadian RSS-210. To prevent radio interference to the licensed service, this device is intended to be operated indoors and away from windows to provide maximum shielding. Equipment (or its transmit antenna) that is installed outdoors is subject to licensing. The installer of this radio equipment must ensure that the antenna is located or pointed such that it does not emit RF field in excess of Health Canada limits for the general population;...
- Page 60 Countries: Allowable Frequencies of Operation: Greece. No 5 GHz operation allowed at this time. European Community—CE Notice (WL-463, 802.11g Radio Module) Marking by the symbol: indicates compliance with the essential requirements of Directive 73/23/EC and the essential requirements of articles 3.1(b), 3.2 and 3.3 of Directive 1999/5/EC.
- Page 61 Consult user documentation for information on how to configure this product. Safety Compliance Notice This device has been tested and certified according to the following safety standards and is intended for use only in Information Technology Equipment which has been tested and certified to these or other equivalent standards: UL Standard 60950, 3rd Edition / CSA C22.2 No.
- Page 62 31 broadcast key refresh rate 34 3Com 3CDaemon Server Tool 25 3Com Network Supervisor 25 3Com Passphrase encryption 46 3Com Wireless Infrastructure Device Manager 25, 26 802.11a, turbo mode 41 cable 13 802.1x reauthentication refresh rate 34 change password 38 802.1x setup 33...
- Page 63 14 power 14 requirements 13 connecting 17 software utilities 24, 25 requirements 14 wall mount 19 supply, 3Com integrated 17, 18 IP address 30 power-over-Ethernet 17 refreshing after changing 27 preamble 42 troubleshooting 52 Pre-IP Configuration Wizard 27, 28...
- Page 64 RADIUS Authentication Setup Steps 46 RADIUS MAC authentication 33 reauthentication refresh rate 34 VLAN 36 recording MAC address 16 VLAN ID 36 Refresh button 27 resetting a bridge 31 resetting the access point 39 restore configuration 38 wall mount installation 19 RF preamble 42 web server, secure connection 31 roaming 10...
Need help?
Do you have a question about the 3CRWE825075A and is the answer not in the manual?
Questions and answers