
Subscribe to Our Youtube Channel
Related Manuals for Myron & Davis NV17

Summary of Contents for Myron & Davis NV17
-
Page 1: Navigation System
NV17 In-Dash Double Din Navigation System DVD | CD | MP3 | SD | USB | BLUETOOTH | SMARTLINK | NAVIGATION Operating Instructions... - Page 2 Warnings Thank you for purchasing this product. Do not change the fuse on the power Please read through these operating cord without professional guidance. Using instructions so you will know how to an improper fuse may cause damage to operate your model properly. Please keep this unit or even cause fire.
- Page 3 Precautions 1. Never disassemble or adjust the unit FCC Statement without any professional guidance. 1. This device complies with Part 15 of the For details, please consult any professional FCC Rules. car shop / dealer for inquiry. Operation is subject to the following two 2.
-
Page 4: Table Of Contents
Contents Before using ..........1 Selecting a track ........11 Front Panel ..........1 Fast forward/Fast backward ....11 Repeat play ...........11 Basic operations......... 2 Random play .........11 Power on / off ......... 2 Search function ........11 Parking Brake Inhibit ......2 File List ..........11 Mute ............ -
Page 5: Before Using
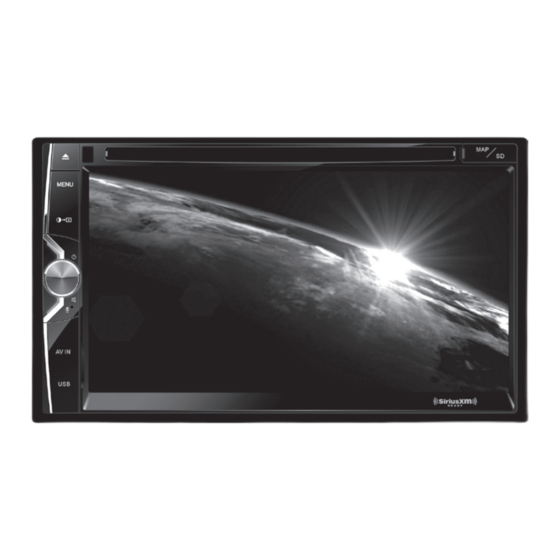
Before using Front Panel MENU Notice: The graphics in this manual are for reference purposes only and may differ somewhat from the actual unit. 1. [ ] Button Press to eject a disc. 2. [MENU] Button Press to display the main menu 3. -
Page 6: Basic Operations
Basic operations Power on / off To increase or decrease the volume level, turn the rotary encoder on the front panel. Press the [ ] knob to turn the unit on. The volume range is from "0" to "50". After The buttons on the front of the unit light up adjust, the TFT screen displays the volume for a moment and the current mode status... -
Page 7: Radio Mode
Radio mode Tuner Menu Select Radio as Playing Source Touch [Radio] on the main source menu. Select One Radio Band Touch the [ ] icon on the user interface to select one radio band among FM1, FM2, FM3, AM1 and AM2. Tune Auto Tuning Press and hold [... -
Page 8: Rbds
Radio mode Preset Station RBDS The unit has 5 bands, such as FM1, FM2, RBDS (Radio Broadcast Data System) FM3, AM1, AM2, and each band can store 6 transmits data to the radio which displays stations; hence the unit can store 30 stations information such as station identification, in total. -
Page 9: Bluetooth Mode
Bluetooth mode Bluetooth technology has the capability • T o ensure the best conversation quality/ to wirelessly synchronize and transfer performance, stay within 3 feet (1 meter) data among devices. The Bluetooth audio of the units microphone when talking. capabilities can be used for mobile phones •... -
Page 10: Disconnecting A Bluetooth Device
Bluetooth mode Making a Call 1. Select Bluetooth function in the home menu. 2. On Option page, see the "Phone Synch" item, and press "Synch" to synchronize the phone book with the BT. If you have many contacts, this may take up to 3-4 minutes. 3. -
Page 11: I-Mode (Siri) Mode
Bluetooth mode i-MODE (Siri) Mode Music Mode Connect your iPhone to the unit. 1. Pair your mobile phone to the unit. There are two methods to active Siri function. 2. Touch [BT Audio] on the main menu. 3. Touch the [ ] to start playback. -
Page 12: Playback
Playback Load a Disc 2. Insert a MicroSD card into the lower card slot. Play starts automatically. You can play video, audio or images stored on the following discs: Notes: • DVD Video, DVD-R, DVD-RW 1. If there are audio files supported in the •... -
Page 13: Repeat
Playback Repeat A-B 2. Select a folder, then touch the desired file. 3. Touch the file again to start play. You can repeat a specific of video file (repeat A-B). For Picture Files 1. Touch the screen to display control menu, 1. Touch [ ] to display all available picture if necessary. folders. 2. Touch [ ] to display the 2nd menu, if 2. -
Page 14: Playback Information
Playback Playback Information Zoom Touch the screen when playing back DVD You can zoom in pictures for a close view. and VCD discs and the 1. When you view pictures, touch the playback information will be displayed on the screen to display menu on the screen, if top area of the TFT. -
Page 15: Ipod/Iphone Operations
iPod/iPhone Operations Pausing play This unit supports only the following iPod/ iPhone models: 1. Touch the [ ] icon on the bottom of the · iPhone 6 Plus screen to pause play. · iPhone 6 [ ] appears on the screen. ·... -
Page 16: Smartlink
SmartLink Open the Source Menu and then touch Once the touch screen is calibrated, press [ SmartLink ] to enter SmartLink menu. “System settings” to return to the main SmartLink Connect page. Press “Mobile Home Page” to access your smart phone from the touch screen of the car device. -
Page 17: Siriusxm Satellite Radio Operations
SiriusXM Satellite Radio Operations SiriusXM® RADIO OPERATION Only SiriusXM® brings you more of what you love to listen to, all in one place. Get over 140 channels, including commercial- free music plus the best sports, news, talk, comedy and entertainment. Welcome to the world of satellite radio. -
Page 18: Switching To Siriusxm® Radio
SiriusXM Satellite Radio Operations Using Preset Channels Lock Icon - Touch to display the SXM Lock Screen. A preset is a channel name that is stored CHG PWD Icon - Touch to go to the change for instant access to that channel. Thirty password screen. -
Page 19: Locking Sxm Mature Channels
SiriusXM Satellite Radio Operations 3. Touch a category item. A channel list 1. Enter your 4-digit password and then screen appears. press the Ok icon. 4. Touch a channel to tune to that channel. 2. Touch the Unlock All icon. All channels are Touch the [ ] or [ ] icon to scroll up or... -
Page 20: Other Modes
Other modes Listen to other devices You can connect an external audio/video device to the unit. 1. Connect the external device with the supplied AV cable. 2. Touch the upper left corner to display the main menu. 3. Touch [AV-IN 1] or [AV-IN 2] to access external device. Reset Reset When the unit hangs up, you can reset it. -
Page 21: Setup
Setup Display system 1. Touch the upper left corner to display the main menu. 2. Touch [ The settings menu is displayed. Adjust general settings 1. Touch [ General ], if necessary. 2. Touch to highlight a setting. 3. Touch to display/select an option. 4. -
Page 22: Adjust Video Settings
Setup Adjust video settings 1. Touch [Video]. 2. Touch the option to setup. Video settings Options Description Disable video when driving. Parking Enable video when driving. When in Park “On” mode, the screen will display WARNING information if you play the video. The warning screen will prevent the driver from watching videos for safety. Adjust time settings 1. -
Page 23: Reset Siriusxm User Data
Setup Adjust sound settings 1. Touch [ Sound ]. 2. Touch an option repeatedly to select. 3. Touch blank area of the screen to exit. Audio settings Options Description Sub woofer Turn on or off the subwoofer. 80Hz Select a crossover frequency to set a cut-off frequency for the subwoofer’s LPF Sub woofer filter 120Hz (low-pass filter). -
Page 24: Select Preset Equalizer
Select preset equalizer 1. Enter the EQ setup mode Touch the [ ] icon in the user interface and the EQ setup interface will display on the screen. 2. Select EQ mode Touch to select a desired acoustical preset option ( User / Flat / Classic / Rock / Jazz / Techno / Pop ). -
Page 25: Troubleshooting
Troubleshooting What appears to be trouble is not always serious. Please check the following points before calling a service center. Problem Cause Corrective action General Unit fuse blown. Install new fuse with correct rating. Car battery fuse blown. Install new fuse with correct rating. Unit can not power on Illegal operation Reset the unit. - Page 26 Troubleshooting SiriusXM Advisory Messages Message Description Check the SiriusXM tuner connection on the back of the unit to ensure that its correctly Check Tuner connected. Ensure the SiriusXM antenna cable is connected to the SiriusXM tuner correctly. Check the SiriusXM antenna wire for breaks or sharp bends. Replace the antenna if Check Antenna necessary.
-
Page 27: Device Connections
Device connections Notes of connection ● This unit is designed to be used in a vehicle with a 12-volt battery and negative grounding. Before installing this unit to a recreational vehicle, a bus, or a truck, make sure the battery voltage is appropriate for this unit to be used, otherwise, install a transformer by professional to convert the output voltage to 12V. -
Page 28: Parking Brake Cable Connections
Device connections Parking brake cable connections Reverse driving cable connections EN - 24... -
Page 29: Specifications
Specifications General Reference Supply Voltage ..............12V(DC) Operating Voltage Range ............10.8 - 16.0V(DC) Max Operating Current .................15A Grounding System ................Negative Dimensions(WXHXD) ............178X100X162mm Weight(main unit) ..................1.85kg Signal Noise Ratio ..................≥55dB Residual Noise Sensitivity (S/N=30dB) ..........≤15dBμV Frequency Response (±3dB) ............30Hz~15KHz Station Seeking Level .............. -
Page 30: Wiring Diagram
Wiring diagram SiriusXM DVR BUS DVR VIDEO IN SmartLink Radio Antenna CAMERA-IN PARKING REVERSE AV-IN L(White) AV-IN R(Red) VIDEO IN(Yellow) P.CONT VIDEO-OUT KEY 1 KEY 2 LINE OUT RL(White) LINE OUT RR(Red) SUB OUT 1(Blue) SUB OUT 2(Blue) P.ANT LINE OUT FL(White) LINE OUT FR(Red) EN - 26... - Page 31 CLASS 1 LASER PRODUCT PN: 127075016752...
Need help?
Do you have a question about the NV17 and is the answer not in the manual?
Questions and answers
Hi i am looking for the NV17 harness