Table of Contents
Advertisement
Do NOT connect the unit to a computer with the USB cable until prompted to do so during
R
the setup of Multi-Function Station (CD-ROM).
Location selection:
The default setting is Germany.
To change the setting, see page 67 (feature #114).
R
Operating Instructions
Model No.
Multi-Function Printer
DP-MB311EU
Advertisement
Table of Contents

Subscribe to Our Youtube Channel
Related Manuals for Panasonic DP-MB311EU


Summary of Contents for Panasonic DP-MB311EU
-
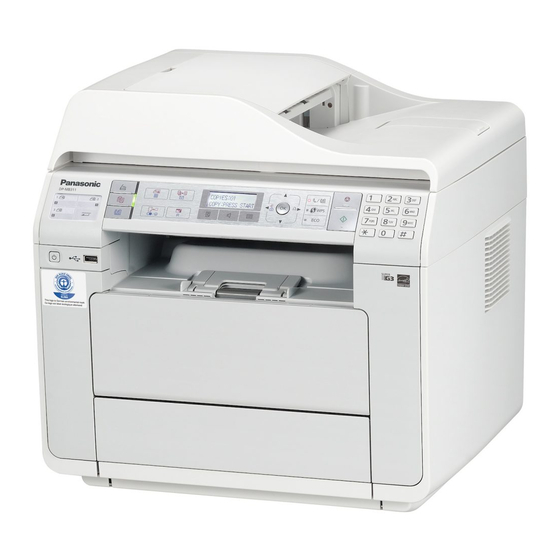
Page 1: Operating Instructions
Operating Instructions Multi-Function Printer DP-MB311EU Model No. Do NOT connect the unit to a computer with the USB cable until prompted to do so during the setup of Multi-Function Station (CD-ROM). Location selection: The default setting is Germany. To change the setting, see page 67 (feature #114). - Page 2 Caution: Copyright: R Do not rub or use an eraser on the printed side of R This material is copyrighted by Panasonic System the recording paper, as the print may smear. Networks Co., Ltd., and may be reproduced for Notice for product disposal, transfer, or return: internal use only.
- Page 3 Software are described in the 3. LICENCE Statement of Limited Warranty which was supplied During the terms of this EULA, Panasonic hereby with the hardware. With the exception of the grants to you and you agree to accept a limited,...
-
Page 4: Feature Highlights
Feature Highlights Feature highlights when using a computer Connecting the unit to a computer and a network allows you to use convenient features for scanning and fax sending/ receiving. nScan features Push scan Scan to a computer You can scan the document from unit and then send it to a computer (page 42). - Page 5 Feature Highlights nFax features Sending faxes PC fax sending You can send an electronic document as a fax message from your computer. For details about this feature, see “9.8 Sending an electronic document as a fax message from your computer” on page 63. Receiving faxes PC fax reception You can receive a fax document on your computer...
- Page 6 Feature Highlights Receiving faxes Fax to email address You can automatically transfer a received fax document (fax to email feature) to one or more email addresses. Transferred messages will not be deleted from the unit. To activate this feature, set the following beforehand: –...
-
Page 7: Important Information
R For optimal performance, genuine Panasonic toner cartridges and drum cartridges are recommended. We cannot be responsible for problems that may be caused by a non-Panasonic toner cartridge or drum cartridge: – Damage to the unit – Poor print quality... - Page 8 Important Information Toner cartridge R The unit should not be exposed to direct sunlight. R Do not place heavy objects on top of the unit. When R Do not leave the toner cartridge out of the protective you leave the unit unused for a long period of time, bag for a long time.
-
Page 9: Moving The Unit
Important Information – Copyright material or trademarks without the Moving the unit consent of the owner – Postage stamps and other negotiable The unit is heavy. It is highly recommended that two instruments people handle this unit. When moving the unit, hold both This list is not inclusive and no liability is of the side grips (A). -
Page 10: Table Of Contents
Table of Contents 1. Introduction 8. Telephone Number and Email Accessories Address Supplied accessories ........12 Character Entry Accessory information .........13 Character entry ...........53 Finding the Controls Storing, Editing and Erasing Items Button descriptions ........14 Storing telephone number and email address Overview .............16 in the address book ........55 Storing telephone numbers and email... - Page 11 Table of Contents 12. Help Reports and Displays 12.1 Report messages ........103 12.2 Display messages ........105 12.3 Network status codes ........110 Troubleshooting 12.4 When a function does not work ....111 13. Paper Jams Jams 13.1 Recording paper jam .........122 13.2 Document jams (Automatic document feeder) ............126 14.
-
Page 12: Introduction
1. Introduction 1.1 Supplied accessories 1. . Introduction Drum cartridge Toner cartridge (pre-installed *1*2 (starter) inside the unit) CD-ROM Quick installation (including driver guide for printer etc.) Important Operation panel information guide guide Telephone line Power cord cord *1 When using the unit for the first time, please use the starter toner cartridge. *2 Prints approximately 3,000 pages in accordance with ISO/IEC 19752 standard page. -
Page 13: Accessory Information
1. Introduction 1.2 Accessory information n Replacement accessory To ensure that the unit operates properly, we recommend the use of Panasonic toner and drum cartridges. Accessory Model No. (Part No.) Approximate yield (pages) Toner cartridge DQ-TCC008X 8,000 Drum cartridge DQ-DCC018X 18,000 *1 Declared yield value is in accordance with ISO/IEC 19752. -
Page 14: Button Descriptions
1. Introduction 1.3 Button descriptions Note: R The number H does not appear in the following table. Buttons Descriptions MfN (Broadcast) To send a document to multiple parties (page 58). MhN (Scan) To switch to the scan mode (page 22, 42). To select the contrast (page 45) and resolution (page 45) when MmN (Quality) copying. - Page 15 1. Introduction Buttons Descriptions MECON To turn the ecology mode setting ON/OFF (page 98). MWPSN To connect easily to a wireless LAN (page 24). To copy a document (page 45). To scan a document (push scan) (page 42). MxN (Start) To send a fax (page 57).
-
Page 16: Overview
1. Introduction 1.4.2 Rear view 1.4 Overview 1.4.1 Front view D EF LAN interface connector R 10 Base-T/100 Base-TX/1000 Base-T Rear cover Power inlet Power switch Telephone line socket USB port External telephone line socket ADF (Automatic Document Feeder) cover USB interface connector Output tray Document entrance... -
Page 17: Installation
R Do not add toner to the toner cartridge. We cannot be responsible for any damage to the unit or degradation of print quality which may occur from the use of a non-Panasonic toner cartridge and drum cartridge. Note: R Close the multi-purpose tray and output tray before... - Page 18 2. Installation Remove the protective sheet (A) from the drum Detach the orange protective cover (A) from the cartridge. toner cartridge. R Do not touch or scratch the drum surface. R Do not touch the roller. R “PAPER JAMMED” is displayed before the Hold the toner cartridge (A) by the centre handle, protective sheet is removed.
- Page 19 Note: R To ensure that the unit operates properly, we recommend the use of Panasonic toner cartridge and drum cartridge. See page 13 for accessory information. Waste disposal method Waste material should be disposed of under conditions which meet all national and local environmental regulations.
-
Page 20: Preparation
3. Preparation LAN cable (not supplied) 3.1 Connections R To assure continued emission limit compliance, use only shielded LAN cable. The cable should Caution: 3. . Preparation be a CAT 5 (Category 5) or higher for 10 Base-T/ R Never install telephone wiring during a lightning 100 Base-TX, or CAT 5e (Enhanced Category 5) storm. -
Page 21: Turning The Power On/Off
3. Preparation R If you use the unit with a computer and your Internet 3.2 Turning the power ON/OFF provider instructs you to install a filter, please connect it as follows. Turning the power ON 1. Press the power button (A). Turning the power OFF 1. -
Page 22: Selecting The Operation Mode
3. Preparation 3.3 Selecting the operation mode 3.4 Adjusting the volume You can select the desired mode by pressing one of the Important: following buttons: R Before adjusting the volume, set the operation mode to fax mode. If the MlN light is OFF, turn it ON by pressing MlN. -
Page 23: Initial Programming Of The Unit
3. Preparation 3.5.3 Your fax number 3.5 Initial programming of the unit You can program your fax number so that it appears on the top of each page sent. 3.5.1 Date and time MtN A MBNM1NM0NM3N A MOKN We recommend setting the date and time. The other Enter your fax number, up to 20 digits. -
Page 24: Configuring The Unit To Access The Lan
3. Preparation To correct a mistake in the IP address, subnet mask, 3.6 Configuring the unit to access or default gateway the LAN Press MFN or MEN to move the cursor to the incorrect number, and make the correction. You can use a computer connected to the LAN for some features of this unit (printer, scanner, etc.). -
Page 25: Required Computer Environment
2. Enter the network name (SSID). A MOKN drivers) 3. Press MCN or MDN repeatedly to display the desired Panasonic Multi-Function Station software enables the connection type. A MOKN unit to carry out the following functions: 4. Press MCN or MDN repeatedly to display the desired –... - Page 26 3. Preparation – Storing, editing or erasing items in the address book The [Connection Type] dialogue box appears. using your computer For USB connection: – Programming the features using your computer 1. [Connect directly with a USB cable.] A – Assigning a password and printing confidential or [Next] sensitive documents (Secure Print) R The [Connect Device] dialogue box will...
- Page 27 3. Preparation setting tool after installing it via USB Important notice connection. When installing using a USB cable connection, a message may appear during the software installation. 3. When the setup program starts, follow the on-screen This is normal and the software will not cause any instructions.
-
Page 28: Starting Multi-Function Station
Station To uninstall the software You must be logged in as an administrator in order to [Start] A [All Programs] A [Panasonic] A the uninstall Multi-Function Station. unit’s name A [Multi-Function Station] [Start] A [All Programs] A [Panasonic] A the R Multi-Function Station will appear. - Page 29 3. Preparation R To start the configuration web page (page 90). For Windows XP: 1. [Control Panel] A [Network and Internet [Settings] (page 29) Connections] A [Internet Options] A R To change the general settings. [Programs] A [E-mail] R To change the settings for scanning. 2.
-
Page 30: Recording Paper And Documents
4. Recording Paper and Documents 4.1.1 Standard input tray 4.1 Recording paper R Depending on the type of paper, the loaded paper R For number of sheets the unit can load, see may exceed the upper limit mark ( ). In this case, 4. - Page 31 4. Recording Paper and Documents Pinch the knob (A), and slide the input tray extender R If necessary, slide the recording paper guides to (B) to the appropriate position. adjust the width to the size of the recording paper. R Make sure that the recording paper is under the paper limit mark (A), and the paper should not be loaded over the snubbers (B).
- Page 32 4. Recording Paper and Documents Caution for the standard input tray 4.1.2 Multi-purpose tray R Do not drop the standard input tray. R The unit is set for printing A4-size plain paper by default. – To use other paper sizes, change the recording paper size setting (feature #381 on page 71).
- Page 33 4. Recording Paper and Documents R Please make sure that the pickup lever (A) is firmly Expand the multi-purpose tray. raised when setting the recording paper. If the pickup lever is not raised, raise the pickup lever. Adjust the width of the guides (A) to the size of the recording paper.
-
Page 34: Document Requirements
4. Recording Paper and Documents Note: 4.2 Document requirements R If you are using small recording paper, opening the top cover lets you remove it more easily. 4.2.1 Effective scanning area Effective scanning area is shown by the shaded area. Scanner glass: 4 mm 208 mm... -
Page 35: Setting Documents
4. Recording Paper and Documents – Maximum document size Note: R Confirm that there are no documents in the automatic document feeder. R Place the original onto the scanner glass gently. To avoid malfunction, do not press down too firmly. R If the original is a book thicker than 15 mm, do not close the document cover. - Page 36 4. Recording Paper and Documents R For A6 size documents, always insert the R Do not set documents that do not satisfy the document in portrait direction (insert long edge requirements of size and weight. Make a copy of the into the feeder).
-
Page 37: Printer
5. Printer Recording paper type Media type 5.1 Printing from Windows Thick paper [Thick Paper] applications 105 g/m² to 165 g/m² 5. . Printer You can print a file created in a Windows application. For Label [Label] example, to print from WordPad, proceed as follows: Envelope [Envelope] Open the document you want to print. - Page 38 5. Printer For details about the number of sheets the unit can – Envelope YOUKEI #4/#10/DL load, see page 136. Do not use the following types of labels: – Labels that are wrinkled, damaged or separated from the backing sheet. –...
-
Page 39: Easy Print Utility
(the side where the stamp is placed) second. 5.2 Easy Print Utility By printing using the Panasonic Easy Print Utility instead of the printer driver, you will have access to many useful Clasp... -
Page 40: Direct Printing From A Usb Memory Device
R The [Print] dialogue box will appear. code for direct printing from a USB memory device. If the department code does not match, 4. Select [Panasonic Easy Print Driver] as the active or the department code restricts the print mode, printer. - Page 41 5. Printer page 71 or feature #382 on page 72) and the – “LONG EDGE”: For long edge binding. media type (feature #383 on page 72, feature – “SHORT EDGE”: For short edge binding. #384 on page 72 or feature #385 on 2.
-
Page 42: Scanner
6. Scanner 6.1 Scanning from the unit (Push To scan 2-sided originals: Scan) 1. MrN 6. . Scanner 2. Press MCN or MDN repeatedly to select the desired You can easily scan a document by using the operation binding of the original. panel on the unit. - Page 43 6. Scanner R When scanning to USB memory, the scanned Available formats for scan image save image will be saved to a USB memory device. Scanning mode TIFF JPEG Be sure to remove the USB memory device from the USB port of the unit after all operations are complete. “VIEWER”...
-
Page 44: Scanning From A Computer (Pull Scan)
6. Scanner R The scanned image will be displayed in the 6.2 Scanning from a computer [Quick Image Navigator] window after scanning (Pull Scan) and saving to the import folder is complete. R To cancel scanning while the documents are Note: being scanned, click [Cancel]. -
Page 45: Copier
7. Copier To select the contrast 7.1 Making a copy Adjust this setting depending on the darkness or lightness of the document. 5 levels (low to high) are 7. . Copier 7.1.1 Basic procedures for making a copy available. 1. Press MmN repeatedly to display “CONTRAST”. If the MiN light is OFF, turn it ON by pressing MiN. -
Page 46: More Copying Features
7. Copier Example: 150 % enlarged copy 7.2 More copying features Using the scanner glass (A): R Make sure that the MiN light is ON. Original document Enlarged copy 7.2.1 Zoom copy (enlargement / reduction) Set the original (page 35). Press MqN repeatedly to select the zoom rate that fits the size of your document and recording paper. - Page 47 7. Copier – Long edge Note: R 2-sided copy is not available for the quick ID copy feature (page 48), image repeat feature (page 48) or poster feature (page 49). R You can save the previous duplex setting (feature #470 on page 80). To make 2-sided originals into 1-sided copies –...
- Page 48 7. Copier Image repeat feature: To copy a single document Set the original (page 35). repeatedly onto one page. MFN A “COLLATE”. Set the original (page 35). Press MCN or MDN repeatedly to display “ON”. R The scanning area changes according to the selected setting in step 4.
- Page 49 7. Copier For quick ID copy feature Original document Page layout “4 in 1” Original document Page layout “2 in 1” “LANDSCAPE” “PORTRAIT” “8 in 1” “4 in 1” “LANDSCAPE” “PORTRAIT” 7.2.5 Poster feature (Scanner glass only) You can make copies divided into 2 (“1 X 2”), 4 (“2 X “8 in 1”...
- Page 50 7. Copier Note: Original document Page layout R This feature cannot be used when your original “4 in 1” “PORTRAIT” document size or the recording paper size is set to R This feature cannot be used when the duplex feature (page 46), or ecology mode’s duplex (page 98) is activated.
- Page 51 7. Copier 7. After you finish copying, press MwN to reset this the memory becomes full while storing, if “1” is feature. selected in step 5, the unit will print out only the stored pages. If “ALL” is selected in step 5, the unit will cancel the printing.
-
Page 52: Copy Reservation
7. Copier Enter the desired margin width using the dial keypad. A MOKN If necessary, enter the number of documents (up to 99). A MxN After you finish copying, press MwN to reset this feature. Note: R To automatically reduce the copies according to the set margin, see feature #474 on page 80. -
Page 53: Telephone Number And Email Address
8. Telephone Number and Email Address 8.1 Character entry The dial keypad is used to enter characters and numbers. 8. . Telephone Number and Email Address – Press MFN or MEN to move the cursor. – Press the dial keys to enter characters and numbers. –... - Page 54 8. Telephone Number and Email Address “POLISH” W X Y Z Ź A Ą B C Ć D E Ę F 3 G H I 4 J K L Ł 5 M N Ń O Ó P Q R S Ś T U V 8 Ż...
-
Page 55: Storing Telephone Number And Email Address In The Address Book
8. Telephone Number and Email Address Enter the name, up to 16 characters (see page 53 for 8.2 Storing telephone number and character entry). A MOKN email address in the address If necessary, enter the telephone number, up to 32 digits. -
Page 56: Programming Items Into The Broadcast Memory
8. Telephone Number and Email Address Press MCN or MDN repeatedly to display the desired Press MgN, then press the desired station key. item. A MOKN A MBN R The number in brackets indicates the number of R To cancel erasing, press MwN. registered items. -
Page 57: Fax
9. Fax To send 2-sided originals 9.1 Basic procedure for sending a 1. Set the original in the automatic document feeder (page 35). 9. . Fax 2. MrN If the MlN light is OFF, turn it ON by pressing MlN. 3. -
Page 58: Sending The Same Document To Pre-Programmed Parties (Broadcast Transmission)
9. Fax Printing a sending report Fax auto redial A sending report provides you with a printed record of If the line is busy or if there is no answer, the unit will transmission results. To print the sending reports, make automatically redial the number 2 or more times. -
Page 59: Selecting The Way To Use Your Unit
9. Fax 9.3.3 Use as a telephone and/or fax (TEL/FAX 9.3 Selecting the way to use your mode) unit Your situation Depending on your situation, you can select the way you You want to answer phone calls yourself and receive prefer to use your unit. -
Page 60: Receiving A Fax Automatically : Auto Answer On
9. Fax 9.4 Receiving a fax automatically : 9.5 Receiving a fax manually : Auto answer ON Auto answer OFF Important: 9.4.1 Activating FAX ONLY mode R Use this mode with an extension telephone. Press MvN repeatedly to display “FAX ONLY MODE”. 9.5.1 Activating TEL mode R The display will show the ring count in FAX ONLY mode. - Page 61 9. Fax R To answer using another telephone connected to 9.5.2 Activating TEL/FAX mode the same telephone line as this unit, lift the handset and talk to the other party. Make sure feature #404 is set to “TEL/FAX” beforehand (page 75). Press MvN repeatedly to display “TEL/FAX MODE”.
-
Page 62: Using The Unit With An Answering Machine
9. Fax Make sure each of the following is unique: 9.6 Using the unit with an – the remote access code of the answering answering machine machine – the fax activation code (feature #434 on page 77) 9.6.1 Setting up the unit and an answering Note: machine R If the call is a phone call, the answering machine will... -
Page 63: Sending An Electronic Document As A Fax Message From Your Computer
9. Fax 9.8 Sending an electronic 9.9 Receiving a fax on your document as a fax message from computer your computer You can receive a fax document on your computer. The received fax document is saved as an image file You can access the fax function from a Windows (TIFF-G4 format). -
Page 64: Web Fax Preview
9. Fax Press MCN or MDN repeatedly to select the desired 9.10.2 Displaying a received fax document on computer. the web browser R You can display IP address of the selected computer by pressing MEN. Important: R Make sure that the unit is idle. MOKN A MtN Start Multi-Function Station. -
Page 65: Internet Fax
9. Fax In this case, data will be transferred to your computer Using address book using PC FAX feature, then the transferred data will be Press MCN or MDN repeatedly to display the desired item. deleted from your unit automatically. The same data will Using the one-touch dial feature also be sent to your email address, so you can check your messages daily, preventing the unit from running... - Page 66 9. Fax Press MpN repeatedly to select “EMAIL RECEIVE”. R The unit receives any Internet faxes from the email server, and prints them.
-
Page 67: Programmable Features
10. Programmable Features 10.1 Programming from the unit 10. . Programmable Features Press MBN and the 3-digit code (page 67 to page 89). Press the appropriate selection to display the desired setting. R This step will vary depending on the feature. MOKN Press MtN to exit. - Page 68 10. Programmable Features Feature Code Selection Recall/Flash time #121 The recall/flash time depends on your telephone exchange or host PBX. M0N “900ms” M1N “700ms” M2N “600ms” M3N “400ms” M4N “300ms” M5N “250ms” M6N “200ms” M7N “160ms” M8N “110ms” M9N “100ms” (default) MGN “90ms”...
- Page 69 10. Programmable Features Feature Code Selection Change password #155 To change the password for feature programming via remote operation. 1. MtN A MBNM1NM5NM5N A MOKN 2. Enter the current password. A MOKN R The default password is “1234”. 3. Enter a new 4-digit password using 0-9. A MOKN 4.
- Page 70 10. Programmable Features Feature Code Selection Job end #174 To set the unit to alert you with a beeping sound after a print job is finished. notification M0N “OFF” (default) M1N “ON” Note: R This setting is valid for the following: –...
- Page 71 10. Programmable Features Feature Code Selection Paper size in the #380 To set the recording paper size in the standard input tray. standard input M0N “16K” tray M1N “LETTER” M2N “LEGAL” M3N “A4” (default) M4N “A5” M6N “B5(ISO)” M7N “B5(JIS)” MGN “FOLIO/FS”: F4, Folio, Foolscap MBN “OFICIO”: Mexico Oficio, India Legal Note:...
- Page 72 10. Programmable Features Feature Code Selection Paper size in the #382 To set the recording paper size in the lower input tray. lower input tray M0N “16K” M1N “LETTER” M2N “LEGAL” M3N “A4” (default) M4N “A5” M6N “B5(ISO)” M7N “B5(JIS)” MGN “FOLIO/FS”: F4, Folio, Foolscap MBN “OFICIO”: Mexico Oficio, India Legal Note:...
- Page 73 10. Programmable Features Feature Code Selection Custom size 1 for #391 To customise the recording paper size for copying. copying 1. MtN A MBNM3NM9NM1N A MOKN 2. Enter the custom size width (210.0 - 215.9 mm), using the dial keypad. A MOKN 3.
- Page 74 10. Programmable Features Feature Code Selection Toner save #482 To set the toner save feature. When “ON” is selected, the toner cartridge will last longer. M0N “OFF” (default) M1N “ON” Note: R This feature may lower the print quality by reducing toner consumption. R This setting is valid for copying, and when the unit prints reports/lists.
-
Page 75: Fax Features
10. Programmable Features 10.1.2 Fax features Feature Code Selection TEL/FAX delayed #212 If you use an extension telephone in TEL/FAX mode, select the desired number ring count of times the extension telephone rings before the unit answers the call. M1N “1” M2N “2”... - Page 76 10. Programmable Features Feature Code Selection Overseas mode #411 If you cannot send a fax overseas even if the number is correct and the line is connected, activate this feature before sending the fax. This feature improves the reliability by reducing the transmission speed. Calling charges may be higher than usual.
- Page 77 10. Programmable Features Feature Code Selection Fax number #422 When “ON” is selected, if you dial a fax number manually using the dial keypad, re-entry you have to re-enter the number and press MxN. When the 2nd entry number matches the 1st entry number, you can send the fax. M0N “OFF”...
- Page 78 10. Programmable Features Feature Code Selection Silent fax ring #436 To change the number of times the unit rings while in TEL/FAX mode. count M3N “3” (default) M4N “4” M5N “5” M6N “6” M7N “7” M8N “8” M9N “9” Note: R See page 61 for details.
- Page 79 10. Programmable Features Feature Code Selection Web fax preview #450 To set the web fax preview access code. access code 1. MtN A MBNM4NM5NM0N A MOKN 2. Enter the password (feature #155 on page 69). A MOKN 3. Enter the web fax preview access code, up to 8 characters, using the English alphabet and numbers (see page 53 for character entry).
-
Page 80: Copy Features
10. Programmable Features 10.1.3 Copy features Feature Code Selection Input tray setting #460 To set the input tray to use for copy. for copy M1N “#1” (default): Standard input tray M2N “#2”: Multi-purpose tray M3N “#3”: Lower input tray M4N “#1+#2+#3”, “#1+#2”, “#1+#3” or “#2+#3” *1 These options are displayed only when the paper size (feature #380 on page 71, feature #381 on page 71 or feature #382 on page 72) and the media type (feature #383 on page 72, feature #384 on page 72 or feature #385 on... -
Page 81: Pc Print Features
10. Programmable Features 10.1.4 PC print features Feature Code Selection Input tray in PCL #760 To set the input tray in PCL. M1N “#1” (default): Standard input tray M2N “#2”: Multi-purpose tray M3N “#3”: Lower input tray M4N “#1+#2+#3”, “#1+#2”, “#1+#3” or “#2+#3” *1 These options are displayed only when the paper size (feature #380 on page 71, feature #381 on page 71 or feature #382 on page 72) and the media type (feature #383 on page 72, feature #384 on page 72 or feature #385 on... - Page 82 10. Programmable Features Feature Code Selection Font number in #769 To set the font number to be used in PCL printing. The unit assigns a number to each font. 1. MtN A MBNM7NM6NM9N A MOKN 2. Enter the font number from “000” to “056”, using the dial keypad. R The default setting is “000”.
- Page 83 10. Programmable Features Feature Code Selection Error page #777 When “ON” is selected, the unit will print the error information after a processing printing problem related to the page description language (PCL or PostScript) occurs. M0N “OFF” (default) M1N “ON” Emulation setting #779 To set the emulation (printer language).
- Page 84 10. Programmable Features 10.1.5 Scan features Feature Code Selection Scan mode #493 To set the scan mode for Push Scan. See page 42 for details. M1N “VIEWER” (default) M2N “FILE” M3N “EMAIL” M4N “OCR” M5N “EMAIL ADDRESS” M6N “FTP SERVER” M7N “SMB FOLDER”...
-
Page 85: Lan Features
10. Programmable Features 10.1.6 LAN features Feature Code Selection DHCP mode #500 When “ENABLED” is selected, the following will be allocated automatically using a DHCP (Dynamic Host Configuration Protocol) server. – IP address – Subnet mask – Default gateway M0N “DISABLED” M1N “ENABLED”... - Page 86 10. Programmable Features Feature Code Selection Network status #526 To view the network status. See page 110 for details. IP filtering #532 When “ENABLED” is selected, the unit will deny/approve access from the pre-programmed IP patterns. You can program whether to deny or approve IP addresses.
- Page 87 10. Programmable Features Feature Code Selection All FTP/SMB #578 To erase all FTP destinations and SMB folder destinations stored in the unit. address erase R Disconnect the following cables before activating this feature. – Telephone line cord – USB cable –...
- Page 88 10. Programmable Features 10.1.7 USB print features Feature Code Selection Number of copies #660 To set the number of copies to print. in USB print 1. MtN A MBNM6NM6NM0N A MOKN 2. Enter the desired number of copies from “01” to “99”, using the dial keypad. R The default setting is “01”.
- Page 89 10. Programmable Features Feature Code Selection Display sort #672 M0N “OFF” setting in USB M1N “NAME ORDER”: The files and folders will be sorted alphabetically by name. print M2N “DATE ORDER” (default): The files and folders will be sorted by date. Note: R Selecting “NAME ORDER”...
-
Page 90: Programming Through A Web Browser
10. Programmable Features 10.2 Programming through a web browser You can change features through the web browser interface instead of the unit. Start Multi-Function Station. A [Device] A [Configuration Web Page] R You can also access the unit by entering its IP address in a web browser. Select the desired category from the menu bar. - Page 91 10. Programmable Features Feature Selection Setting the fax to email Select email destinations where you want to automatically send received fax destinations documents to (up to 6 destinations). Important: R Program the email server settings (page 93), and the email destinations (page 95) beforehand.
-
Page 92: Network Features
10. Programmable Features Feature Selection Setting the information When you send scanned files to an SMB folder, you can register the SMB folder for scan to SMB folder destinations (up to 6 destinations) to the unit through the web browser interface. 1. - Page 93 10. Programmable Features Feature Menu Selection Setting the default [IPv6] Enter the default router address for IPv6. Consult your router for IPv6 service provider or network administrator for details. Setting the information [FTP FEATURE] Enter the FTP server information to send scanned for scan to FTP server images from the unit to an FTP server.
- Page 94 10. Programmable Features Feature Menu Selection Registering [EMAIL FEATURE] 1. Start Multi-Function Station. destinations for the 2. [Device] A [Configuration Web Page] A error notify feature [Network] 3. Type “root” as the user name, then enter the password (feature #155 on page 69). A [OK] 4.
- Page 95 10. Programmable Features 10.2.3 Directory (address book) features You can register, edit or erase items in the address book, etc., in [Directory] menu. Feature Selection Registering and editing Register email address and telephone number. These items can be used as email address and destinations for the following features.
- Page 96 10. Programmable Features Feature Selection Registering and editing Register email address and telephone number. These items can be used as email address and destinations for the following features. Make sure that address book editing on web telephone number in the (feature #567 on page 86) is set to “ENABLED”...
-
Page 97: Useful Information
11. Useful Information R If a printing error occurs, the Device Monitor will start 11.1 Status of the unit automatically and display the error information. R For details, see the help file by selecting [Help] from Multi-Function Station. 11. . Useful Information 11.1.1 Using Remote Control 11.1.3 Using the web browser You can easily operate the following functions from your... -
Page 98: Ecology Mode
11. Useful Information 4. Select [FAX FEATURE] from the menu. 11.4 Cancelling the operations 5. Click [List] next to [JOURNAL]. 6. The journal report will be displayed. You can cancel the current operation from the unit. You can also select the desired operation to cancel. 7. - Page 99 11. Useful Information Setting mode restriction for departments To set or edit the mode restriction through the web browser interface Important: Important: R Make sure feature #154 is set to “ON” beforehand (page 98). R Make sure feature #154 is set to “ON” beforehand (page 98).
-
Page 100: Mobile Printing
™ The application is available for iOS and Android computer’s name. A MOKN devices. You can download "Mobile Print" (Panasonic 3. Enter the secure print password you assigned on application) from the App Store (iOS) or Google Play your computer. A MOKN ™... -
Page 101: Usb Memory Device
11. Useful Information R When disposing or giving away the USB memory To print the remaining documents from the unit device, we recommend to erase the stored data. 1. Press MEN repeatedly to display “PROOF PRINT”. The data that is stored on a USB memory device A MOKN is the sole responsibility of you, the customer. - Page 102 11. Useful Information Select [Properties] from the [Organize] menu. Caution for the lower input tray R The printer properties window will appear. R Do not drop the lower input tray. For Windows 7/Windows 8: Right-click the unit’s icon. A [Printer properties] R The printer properties window will appear.
-
Page 103: Report Messages
12. Help 12.1 Report messages To indicate the unit’s fax transmission/reception status, one of the following messages will be printed on the sending 12. . Help and journal reports (page 58). Message Code Cause & Solution COMMUNICATION ERROR 40-42 R A transmission or reception error occurred. Try 46-72 again or check with the other party. - Page 104 12. Help 12.1.1 Internet fax report messages (error code list) If an Internet fax could not be sent or received, an error code is displayed on the journal and sending report. If you cannot solve the problem by the following instructions, consult your network administrator. Error Code Cause Solution...
-
Page 105: Display Messages
12. Help 12.2 Display messages 12.2.1 General messages To indicate the unit’s status, one or more of the following messages will appear on the display. Display Cause & Solution “CALL SERVICE” R There is something wrong with the unit. Contact our service personnel. “CHANGE DRUM”... - Page 106 12. Help Display Cause & Solution “DRUM LIFE LOW” R The drum cartridge is reaching the end of its life. If you don’t have a new cartridge handy you should buy one as soon as possible as your current cartridge is near the end of its useful life. “DRUM LIFE OVER”...
- Page 107 12. Help Display Cause & Solution “POLLING ERROR” R The other party’s fax machine does not offer the polling function. Check with the other party. “REDIAL TIME OUT” R The other party’s fax machine is busy or has run out of recording paper. Try again.
- Page 108 12. Help Display Cause & Solution “USB MEMORY NO RESPONSE” R The USB memory device is not responding. Use another USB memory device. “USB MEMORY NOT R The USB memory device has been removed from the unit. Reinsert it. INSERTED” R There is no USB memory device inserted in the unit.
-
Page 109: Interface Messages
12. Help 12.2.2 Interface messages Display Cause & Solution “CONNECT ERROR” R IP address of the server or network configuration is incorrect. Consult your network administrator. R The server is down. Consult your network administrator. “DATA ERROR” R The cable between the unit and the computer is not connected correctly. Check the connections (page 20, 26). -
Page 110: Network Status Codes
12. Help 12.3 Network status codes You can confirm the detailed network status when a message is displayed during PC scan (page 109), or when a network feature does not work properly. MtN A MBNM5NM2NM6N A MOKN R The network status code is indicated. Code Status Cause... -
Page 111: When A Function Does Not Work
12. Help 12.4 When a function does not work 12.4.1 General Problem Cause & Solution The unit does not work. R Check the connections (page 20, 26). The recording paper exit fills R High humidity may cause the recording paper to curl. Try turning the paper up quickly or the recording over and re-inserting it. -
Page 112: Printing Problems
12. Help Problem Cause & Solution I forgot the password for R You may have changed the feature programming password. If you do not feature programming via remember it, assign a new password using feature #155 (page 69). When remote operation. required to enter the current password, enter “0101”... - Page 113 A [Add PCL Printer Driver] in the installation menu. R To uninstall the PCL printer driver, click [Control Panel] A [Uninstall a program] A [Panasonic PCL printer driver] A [Uninstall]. R The PCL driver can be found in the following folder on the supplied CD-ROM.
- Page 114 12. Help 12.4.3 Scanner Problem Cause & Solution I cannot scan. R When scanning at a high resolution, a large amount of available memory is required. If your computer warns that there is insufficient memory, close other applications and try again. R Select a lower resolution and try again.
- Page 115 12. Help 12.4.5 Fax Problem Cause & Solution I cannot send documents. R The telephone line cord is connected to the [EXT] socket on the unit. Connect to the [LINE] socket (page 20). R The other party’s fax machine is busy or has run out of recording paper. Try again.
- Page 116 12. Help Problem Cause & Solution The other party complains R The memory is full of received documents due to a lack of recording paper that they cannot send a or a recording paper jam. Load paper (page 30) or remove the jammed document.
- Page 117 12. Help Problem Cause & Solution I cannot erase a received fax R View, print or save a received fax document before erasing (page 64). document on the web browser. 12.4.6 Using a USB memory device Problem Cause & Solution I cannot save the data to a R There is no USB memory device inserted in the unit.
- Page 118 12. Help 12.4.7 Network Problem Cause & Solution I cannot operate the following R If the LED (Orange) is not illuminated, confirm the LAN cable is connected functions. to the LAN port of the main board correctly. The cable should be a CAT 5 (Category 5) or higher for 10 Base-T/100 Base-TX, or CAT 5e (Enhanced –...
- Page 119 12. Help Problem Cause & Solution The [Windows Security Alert] R Click [Keep Blocking] and run the Windows Firewall Setting Tool to allow dialogue box appears and the data transmission for Multi-Function Station (page 120). asks if I want to block [PCCMFLPD] and I cannot operate the following functions after installing the...
- Page 120 R The [Windows Firewall] dialogue box will appear. 3. Click the [Exceptions] tab. 4. Confirm that [Panasonic Trap Monitor Service] and [Panasonic LPD] are displayed and checked on the [Programs and Services] list. To confirm the security settings (For Windows Vista users)
- Page 121 Select [Modify Utilities] or [Add Multi-Function Station Driver]. Then follow the on-screen instructions. Important: R For users of versions prior to 1.12, download the latest software as follows, then install it. [Start] A [All Programs] A [Panasonic] A the unit’s name A [Support Web Page]. Then follow the on-screen instructions.
-
Page 122: Paper Jams
13. Paper Jams Case 1: 13.1 Recording paper jam When the recording paper has jammed near the standard input tray: 13. . Paper Jams 13.1.1 When the recording paper has jammed 1. Press the release button (A) to make open the bottom cover of the unit (B) halfway. - Page 123 13. Paper Jams Case 2: Caution: When the recording paper has jammed inside the R The fuser unit (B) gets hot. Do not rear cover: touch it. 1. Open the rear cover (A). Note: R The area near the rear cover (C) may also get warm.
- Page 124 13. Paper Jams 5. Close the rear cover firmly. 3. Remove the drum cartridge (A). Case 3: When the recording paper has jammed inside the front cover: 1. Press the button (A) and open the front cover. 4. Remove the jammed paper. R If the bottom edge of the recording paper (A) is under the roller, push the recording paper 2.
- Page 125 13. Paper Jams towards the back of the machine until it is 13.1.2 When the recording paper is not fed released and then pull it out. into the unit properly The display will show the following: – “CHECK PICK UP INPUT TRAY #1” Pull the standard input tray completely out.
-
Page 126: Document Jams (Automatic Document Feeder)
13. Paper Jams Note: 13.2 Document jams (Automatic R If the message is still displayed, check the recording paper specifications and re-install recording paper. document feeder) See page 32 for details. The display will show the following: – “REMOVE DOCUMENT” Caution: R Do not pull out the jammed document forcibly before lifting the ADF cover. - Page 127 13. Paper Jams Remove the jammed document (A) carefully. When the document has jammed near the When the document has jammed near the document exit: document entrance: R If you cannot remove the jammed document, open the internal cover (B), remove the R If you cannot remove the jammed document (A), document (A), then close the cover.
-
Page 128: Cleaning
14. Cleaning Hold the document cover while cleaning the white 14.1 Cleaning the white plates and plates (A) and the scanner glass (B). glass 14. . Cleaning Clean the white plates and glass when a black line, a white line or a dirty pattern appears on: –... -
Page 129: Cleaning The Document Feeder Rollers
14. Cleaning Open the internal cover (A). 14.2 Cleaning the document feeder rollers Clean the rollers when documents frequently misfeed, or when a line or a dirty pattern appears on documents. Caution: R Do not use paper products, such as paper towels or tissues for cleaning. -
Page 130: Cleaning The Recording Paper Feeder Rollers Of The Multi-Purpose Tray
14. Cleaning Close the internal cover and ADF cover. You can clean the recording paper feed rollers (A) with a cloth lightly moistened with water, and let all parts dry thoroughly. Turn the power switch ON. 14.3 Cleaning the recording paper feeder rollers of the multi-purpose tray Clean the recording paper feeder rollers when... -
Page 131: Cleaning The Drum Cartridge
14. Cleaning inside of the drum cartridge to maintain the print Pull the standard input tray (A) until it clicks into quality. place, then pull it completely out, lifting the front part of the tray. R A cleaner for the drum cartridge is supplied with the replacement toner cartridge. -
Page 132: General Information
15. General Information 15.1 Specifications Item Specifications 15. . General Information Applicable lines Public Switched Telephone Network Width: Max. 216 mm Scanner glass Length: Max. 297 mm Document size Width: Max. 216 mm/Min. 125 mm Automatic document feeder Length: Max. 600 mm/Min. 105 mm Effective scanning width 208 mm Letter/Legal: 208 mm... - Page 133 15. General Information Item Specifications Scan to FTP server memory capacity 10 MB in total or 100 pages, whichever limit is reached first. Scan to SMB folder memory capacity 10 MB in total or 100 pages, whichever limit is reached first. Scan to USB memory capacity 100 pages Laser output...
- Page 134 15. General Information Item Specifications Communications TCP/IP, SMTP, POP3, SMTP AUTH, POP before SMTP protocol MIME Base 64 Content-type: Image/TIFF Email format Multipart/mixed (text/plain, Image/TIFF) attachment file format RFC3949 (RFC2301), TIFF-FX minimal set Profile: TIFF-F Encoding scheme: MH/MR/MMR Maximum document size (Width ´ Length): 216 mm ´ Data format Internet fax 600 mm...
- Page 135 15. General Information ITU-T No.1 Test Chart Note: R Design and specifications are subject to change without notice. R The pictures and illustrations in these instructions may vary slightly from the actual product. Recording paper specifications Item Specifications A4, Letter, A5, Legal, B5 (ISO/JIS), 16K, F4/Folio/Foolscap, Simplex Mexico Oficio/India Legal, Custom Paper size...
- Page 136 15. General Information Item Specifications A4, Letter, A5, Legal, B5 (ISO/JIS), 16K, F4/Folio/Foolscap, Simplex Mexico Oficio/India Legal, Custom Paper size A4, Letter, Legal, F4/Folio/Foolscap, Mexico Oficio/India Legal, Duplex Custom Lower input Simplex tray (Optional) Paper type Plain paper/Thin paper Duplex Simplex Paper weight 60 g/m²...
- Page 137 15. General Information Paper size (width ´ length) Item Specifications 210 ´ 297 mm 148 ´ 210 mm 105 ´ 148 mm 216 ´ 279 mm Letter 216 ´ 356 mm Legal 176 ´ 250 mm B5 (ISO) Plain paper/Thin paper/Thick 182 ´...
- Page 138 1.6 Document tray 1.7 Output tray1.8 Recording paper2. Preparation 2.1 Connections 2.2 Turning the power switch ON Help Button2.3 Help function Volume Thank you for purchasing a Panasonic fax machine. Things you should keep a record of Attach your sales receipt here.
-
Page 139: Information Of Copyrights And Licences
15. General Information 15.2 Information of copyrights and licences "This product includes cryptographic software written by Eric Young (eay@cryptsoft.com)" The word 'cryptographic' can be left out if the rouines from the library being used are not cryptographic related :-). "This product includes software written by Tim Hudson (tjh@cryptsoft.com)" R This product includes any other Open Source Software. -
Page 140: Index
16. Index #442 PC fax setting: 78 16.1 Index #443 PC fax reception: 63 #448 Fax preview mode: 64 #450 Web fax preview access code: 79 #451 Fax receive notify: 79 #101 Date and time: 23 #452 Fax to email address setting: 79 #102 Your logo: 23 #458 All received fax erase: 79 #103 Your fax number: 23... - Page 141 16. Index #767 Line per page in PCL: 81 Poster: 49 #768 Font source in PCL: 81 Proof set: 48 #769 Font number in PCL: 82 Quick ID: 48 #770 Font pitch/point in PCL: 82 Reserve: 52 #771 Symbol set in PCL: 82 Zoom: 46 #772 Line breaks in PCL: 82 Copy features: 80...
- Page 142 16. Index Fax send notify (Feature #429): 77 Mobile printing: 100 Fax to email address: 64 Mode restriction Fax to email address setting (Feature #452): 79 Activating (Feature #154): 98 Flash time (Feature #121): 68 Administrator code (Feature #151): 68 Frame margin (Feature #474): 80 Counter view (Feature #479): 99 Friendly reception (Feature #438): 78...
- Page 143 16. Index Printer test: 97 Set fax default (Feature #459): 79 Programming: 67 Setup list: 97 Proof Print: 100 SMB folder information: 92 Pull scan: 44 SMB folder list: 97 Scan application: 44 SSID search (Feature #584): 25 Viewer: 44 Storing Push scan: 42 Address book: 55...
- Page 144 PNQX7191ZA D0215HH0...
Need help?
Do you have a question about the DP-MB311EU and is the answer not in the manual?
Questions and answers