Xplore iX104C5 User Handbook Manual
Hide thumbs
Also See for iX104C5:
- User handbook manual (100 pages) ,
- Reviewer's manual (40 pages) ,
- Manual (11 pages)
Table of Contents
Advertisement
Advertisement
Table of Contents

Subscribe to Our Youtube Channel
Related Manuals for Xplore iX104C5


Summary of Contents for Xplore iX104C5
- Page 1 User Handbook 4th Ed. Working Draft 12/20/2010...
-
Page 3: Table Of Contents
Optional accessories..........16 Contacting Xplore – service and questions......17 Getting Started Front view . - Page 4 Adjusting microphone volume – Windows XP ....50 Adjusting microphone volume – Windows 7....50 iX104C5 User’s Handbook...
- Page 5 Tips for conserving battery power ....... . . 65 iX104C5 User’s Handbook...
- Page 6 Calibrating the digitizer..........85 Calibrating the digitizer: iX104C5 – Windows XP ....86 Calibrating the digitizer: iX104C5 –...
- Page 7 Contents Troubleshooting Using BIOS and AOS Functions Disabling the Auto Power feature ........100 Enabling automatic LCD backlight control .
-
Page 8: Ix104C 5 User's Handbook
User’s Handbook... -
Page 9: Disclaimer
Copyright © 2003-2010 Xplore Technologies Corp. All rights reserved. No part of this publication may be copied, reproduced, or translated, without the prior written consent of Xplore Technologies. No part of this publication may be stored or transmitted in any electronic form without the prior consent of Xplore Technologies. -
Page 10: Declaration Of Conformity
Address: 14000 Summit Drive, Suite 900, Austin, Texas 78728 Telephone: 512.336.7797 Declares that product: Model Series: iX104C5 complies with Part 15 of the FCC Rules. This device complies with Part 15 of the FCC rules. Operation is subject to the... - Page 11 Radio signals from your tablet will not affect the operation of most modern equipment, but certain electronic equipment, including automotive systems, may not be shielded against radio signals from your tablet. Check with the manufacturer of your motor vehicle or the manufacturer’s representative to determine whether using the tablet will present any safety issues.
- Page 12 Do not use any dock or any other accessory or attachment that is not manufactured or supplied by Xplore or an authorized Xplore accessories supplier. Use of any accessory or attachment that is not supplied or approved for use with the tablet by Xplore is not permitted because it may cause hazards.
- Page 13 User’s Handbook...
-
Page 14: Welcome
Based on years of experience in rugged mobile applications, the iX104C5 is designed to withstand the abuses of everyday wear and tear. Advanced technology, innovative design, and a rugged case are just a few highlights of your iX104C5 system. -
Page 15: About Your Computer
Welcome About your computer ® The iX104C5 is a high-performance tablet PC that runs on Microsoft ® Windows 7 32 bit and 64 bit operating systems. Of course, they are ® ® downwards compatible with Microsoft Windows XP operating system. -
Page 16: Package Contents
Welcome All iX104C5 tablets have been engineered and tested to meet Military Standards for Environmental Extremes (MIL STD 810G). Your tablet includes the following features that make it exceptionally rugged and durable: Durable, long-lasting, dense magnesium enclosure ■ Interior and exterior multi-layer magnesium frames and cavities ■... -
Page 17: Optional Accessories
■ Additional accessories Top mounted Fast-Lock GPS II ■ Non rugged USB Optical Disk Drive ■ USB rugged, backlit keyboard (83 key) ■ Replaceable Drive Cartridges ■ Active stylus ■ XPL Fast Track GPS II module ■ iX104C5 User’s Handbook... -
Page 18: Contacting Xplore - Service And Questions
If you purchased your tablet from an authorized Xplore dealer, contact the dealer for service and support. If you purchased your tablet directly from Xplore, use any of the following methods to contact Xplore for service and support: Web site http://www.xploretech.com... - Page 19 User’s Handbook...
-
Page 20: Getting Started
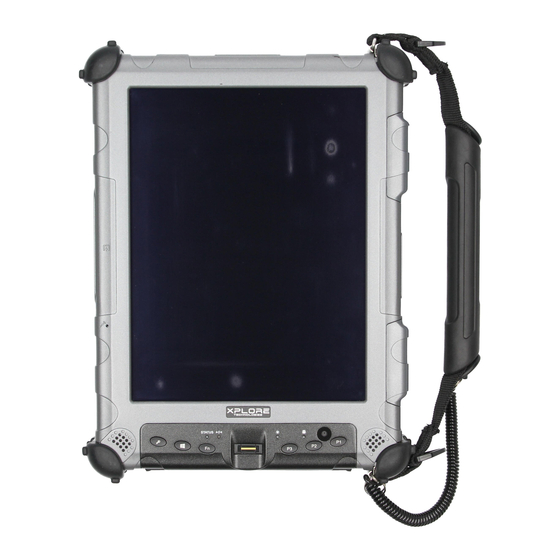
Reset switch (On/Off)/Resume key is not effective. (See page 32.) Indicates the computer status (on, off, etc.). (See page 26.) Status indicator Enable you to listen to stereo audio files. Sealed to provide protection from the Speakers environment. iX104C5 User’s Handbook... - Page 21 Chapter 1. Getting Started Front view Auto Light sensor Detects ambient light conditions. SSD indicator Indicates hard drive activity. (See page 26.) Fingerprint scanner Enables you to use fingerprint verification features. (See page 43.) iX104C5 User’s Handbook...
-
Page 22: Back View
Powers the computer when AC power is unavailable. Digital Camera A 3 Mega-Pixel auto focus camera for taking color or black & white images or video and and drive carrier the user accessible drive carrier for SSD and HDD storage options iX104C5 User’s Handbook... -
Page 23: Top View
Helps prevent the computer from overheating by forcing heat away from the computer. (Do not block the vents.) XPL 2 Port A port that permits connection of special devices made expressly for the iX104C5 Kensington™ lock slot Connector for the optional Kensington MicroSaver™ or equivalent compatible security cable. -
Page 24: Bottom View
For connecting a standard RJ-45 connector to the tablet’s internal local area LAN connector network (LAN) card For an external monitor or projection panel. External monitor connector (Optional) 9-pin serial port For connecting terminals or other devices that use the RS-232, RS-422, or RS-485 data transfer standard. iX104C5 User’s Handbook... -
Page 25: Left Side View
Chapter 1. Getting Started Bottom view Bottom view Docking connector for the optional Xplore Tablet Dock Guide pin receptacles Docking connector Enables you to connect the optional xStand Desktop Docking Station or xDock Vehicle Docking Stations. Guide pin receptacles Help assure a secure connection of the optional xStand or xDock. - Page 26 Top view Top view XPL 2 expansion port Bumpers Bumpers Fabricated from rugged material. Raised to help protect the computer from damage. A port that permits connection of special devices made expressly for the iX104C5 XPL expansion port iX104C5 User’s Handbook...
-
Page 27: Led Indicators
The computer is on and is in Suspend mode. Thermal control blue, blinking The computer is on and is in Warm-up mode, with the LCD and backlight off. After the system has warmed to a safe level, the LCD and backlight turn iX104C5 User’s Handbook... - Page 28 Plug the computer into an AC/DC power source or install a charged battery. The computer has encountered a fault and is not operating normally. Contact your computer support personnel, such as your help desk. iX104C5 User’s Handbook...
-
Page 29: Quick-Start Guide
This section is a quick guide to using the main features of your tablet. (See Chapter 2 for detailed information.) Application, Windows, and hot keys Hot key 1 Ctrl-Alt-Delete (Secure Attention Sequence) key Screen Rotation Hot key 2 Function Hot key 3 Fingerprint scanner iX104C5 User’s Handbook... - Page 30 Fingerprint scanner. Open Help, or perform a user-definable function. To define a function, see “Programming hot keys” on page 70. Open Internet Explorer, or perform a user-definable function. Open your email application, or perform a user-definable function. iX104C5 User’s Handbook...
- Page 31 “Programming hot keys to start applications, open documents, or go to a Web site” on page 71). iX104C5 Dual Mode: Select Auto-Sense mode, Active mode, or Touch mode. This determines the input devices you can use. In Auto-Sense mode, you can use the pen, your finger, or another similar device interchangeably.
-
Page 32: Using The Tablet
When the computer is off, the Status LED is off. Make sure the battery is charged or that the computer is plugged in to an external power source. Press the Power On/Off/Suspend/Resume button. Power On/Off, Display Toggle and Suspend/Resume button iX104C5 User’s Handbook... -
Page 33: Turning Off The Computer
“Turning off the you cannot turn off the computer,” press the Reset switch. (Use the stylus or a similar computer by any other means, because you may instrument to press the switch). lose unsaved data. Reset switch iX104C5 User’s Handbook... -
Page 34: Suspending And Resuming Operation
If you have set your computer to turn power off (in the Power Options utility in Windows Control Panel), you cannot suspend operation. To change power settings, see “Using power options – Windows XP” on page 58 or “Using power options – Windows 7” on page 62. iX104C5 User’s Handbook... -
Page 35: Suspending Operation
You must use a software application to suspend the computer. For more information, contact your help desk or your iX104C5 dealer. If your computer is connected to a network, the network may automatically log you off after a period of inactivity while system operation is suspended. - Page 36 Status LED Method 2 – Windows 7 From the Windows Start menu, press the right arrow in the lower right corner. Press Sleep. When operation is suspended, the Status LED displays a continuous yellow light. Status LED iX104C5 User’s Handbook...
-
Page 37: Resuming Operation
Power (On/Off)/Backlight (On/Off)/Resume button. Note: Press the button only once. Power (On/Off)/ Backlight (On/Off)/ Resume button Approximately 60 seconds later, the computer resumes normal operation. When the Status LED displays a continuous green light, you can begin using the computer. iX104C5 User’s Handbook... -
Page 38: Using The Pen
Chapter 2. Using the Tablet Using the pen Using the pen You can use the pen to select items and to navigate through programs. All iX104C5 Models: For more information about Dual Mode tablet input You can use any of the following input methods:... -
Page 39: Selecting Auto-Sense, Active, Or Touch Mode
Chapter 2. Using the Tablet Using the pen Selecting Auto-Sense, Active, or Touch mode If your computer is the iX104C5 Dual Mode or iX104C5 Dual Mode Lite, use the Fn-P2 key combination to select Auto-Sense mode (the default mode), Active-only mode, or Touch-only mode. -
Page 40: Using The Digitizer To Perform Mouse Functions
Tap the pen tip once on the object. (left button click). Perform a double-click. Quickly tap the pen tip twice on the object. Perform a right-click. All iX104C5 Models: right-click Touch mode: icon In the Windows taskbar, press the right-click icon; then click the object. -
Page 41: Changing The Pen Double-Click Speed
In the Control Panel window: If your computer is an iX104C5: Click the Pen and Input Devices icon. If your computer is an iX104C5 Dual Mode: Press the Pen and Input Devices icon. In the Pen Options tab, select Double-tap. -
Page 42: Positioning The Pen And Pen Tether
Using the pen Positioning the pen and pen tether The pen tether helps prevent the loss of your pen. The following illustrations show how to position the pen and pen tether. Tether anchored at the top pen tether iX104C5 User’s Handbook... - Page 43 Chapter 2. Using the Tablet Using the pen Tether anchored on the side tether iX104C5 User’s Handbook...
-
Page 44: Using The Fingerprint Scanner
Start > All Programs > Protector Suite 2009 > User Enrollment and follow the wizard’s instructions. For more information about using the fingerprint scanner, see the Protector Suite QL User’s Guide PDF included on your hard disk in the Protector Suite QL folder. iX104C5 User’s Handbook... -
Page 45: Changing The Screen Orientation
Chapter 2. Using the Tablet Changing the screen orientation Changing the screen orientation To rotate the screen orientation from portrait (vertical) to landscape (horizontal) mode or from landscape to portrait mode, press the screen rotation key. landscape mode portrait mode iX104C5 User’s Handbook... -
Page 46: Adjusting The Screen Brightness
Windows taskbar; then use the slider bar to make the adjustment. Brightness control icon Windows 7 To adjust the screen brightness: Click Start. Open the Control Panel. Double-click the Windows Mobility Center icon. Use the Display brightness slider to adjust the brightness. Display brightness slider iX104C5 User’s Handbook... -
Page 47: Enabling Automatic Backlight Control
When the Auto Light sensor is enabled, the computer automatically controls the amount of backlight sent to the screen to provide optimum brightness for the lighting conditions in which you are working. Auto Light sensor To enable automatic backlight control, see page 100. iX104C5 User’s Handbook... -
Page 48: Optimizing Screen Settings For Outdoor Use
Click Change desktop background. In the Location area, select Solid Colors. For the background color, select white; then click In the Appearance and Personalization window, click Customize Colors. Select Frost. Move the Color intensity slider bar to the far right; then click OK. iX104C5 User’s Handbook... -
Page 49: Docking The Tablet
Docking the tablet Docking the tablet If you have the optional xStand office dock or xDock vehicle dock, connect it to the tablet at the docking port. (See the iX104 Docking Stations Handbook.) Docking port Guide pin receptacles iX104C5 User’s Handbook... -
Page 50: Connecting Devices
Contact your local help desk or Xplore reseller. Connecting to a local area network Connect a local area network (LAN) cable’s RJ-45 connector to the internal LAN interface card. -
Page 51: Connecting An External Microphone
Press the Windows Start key; then open the Control Panel. In the Control Panel window, double-click the Sound icon. In the Sound Properties window, click the Recording tab. Select Microphone; then press Properties. Select the Levels tab. Adjust the microphone volume or boost. Click OK. iX104C5 User’s Handbook... -
Page 52: Connecting A Headphone Or Speakers
Click the audio icon in the Status area of the Windows taskbar. The volume control area opens. If the Mute button indicates that sound is muted, click the button to turn on the sound. Move the slider bar up or down to increase or decrease the volume. iX104C5 User’s Handbook... -
Page 53: Connecting A Monitor Or Projection Panel
Activating the monitor or projection panel To change the video output to the monitor or projection panel: Press the Fn-P1 key combination. To change the video output back to the computer: Press the Fn-P1 key combination again. iX104C5 User’s Handbook... -
Page 54: Connecting A Device To The Optional Serial Port
If your tablet includes the optional serial port, you can connect a terminal or other device that uses the RS-232, RS-422, or RS-485 data transfer standard. Optional 9-pin serial port Connecting an XPL snap-on expansion module XPL2 expansion port (shown with optional GPS II) iX104C5 User’s Handbook... -
Page 55: Using The Battery
Status LED flashes green. (If the battery charge is higher than 90%, the battery will not charge, preventing battery overcharge.) Check the level of charge. (See “Checking battery power status” on page 60.) The charging process continues until the battery charge reaches 100%. iX104C5 User’s Handbook... -
Page 56: If You Have An External Battery Charger
Save your work and close all running programs; then shut down the computer or put the computer in Hibernation mode (see “Suspending operation” on page 34). Note: To avoid losing unsaved data, wait until the computer has completed switching to Suspended mode before removing the battery. iX104C5 User’s Handbook... - Page 57 Pull the battery away from the computer and remove it. Note: After removing the battery, you must replace the battery or connect the computer to an external power supply within or the computer completely loses power. 3 to 5 minutes iX104C5 User’s Handbook...
-
Page 58: Installing The Battery
Discarding batteries Dispose of batteries in accordance with your local government regulations. Under federal, state, or local law, it may be illegal to put batteries in the trash. Contact your system administrator, municipal waste disposal department/provider for information. iX104C5 User’s Handbook... -
Page 59: Using Power Options - Windows Xp
Chapter 2. Using the Tablet Using power options – Windows XP Using power options – Windows XP and Windows 7 Displaying power options On the Windows taskbar, click the battery icon. The Power Options Properties window opens. iX104C5 User’s Handbook... -
Page 60: Changing The Computer's Power Schemes
In the Power Options Properties window, select the Power Schemes tab; then select options from the drop-down lists. Changing battery alarm settings In the Power Options Properties window (page 58), select the Alarms tab; then use the slider bars to change the alarm settings. iX104C5 User’s Handbook... -
Page 61: Checking Battery Power Status
Meter tab. The window shows the amount of power left in the battery. Selecting power settings In the Power Options Properties window (page 58), select the Advanced tab; then select the power settings options you want to use. iX104C5 User’s Handbook... -
Page 62: Enabling Hibernation Mode
Chapter 2. Using the Tablet Using power options – Windows XP Enabling Hibernation mode In the Power Options Properties window (page 58), select the Hibernate tab; then check the Enable Hibernation check box. iX104C5 User’s Handbook... -
Page 63: Using Power Options - Windows 7
The following window opens: Select one of the following power plans: Balanced – A balance between computer performance and battery life. Power Saver – Longer battery life and lower performance. High performance – Higher performance and shorter battery life. iX104C5 User’s Handbook... -
Page 64: Selecting Power Options
Using power options – Windows 7 Selecting power options On the Windows taskbar, right-click the battery icon. Select Power Options. The following window opens. Under the selected power plan, press Change plan settings. Select the power options you want to use. iX104C5 User’s Handbook... -
Page 65: Selecting Power (On/Off)/Backlight(On/Off)/Resume Button Options
To change what happens when you press the button: On the Windows taskbar, right-click the battery icon. Select Power Options. The following window opens. Press Choose what the power buttons do. Select the options you want to use. iX104C5 User’s Handbook... -
Page 66: Tips For Conserving Battery Power
Hibernation mode. (See “Enabling Hibernation mode” on page 61.) Adjust power options to automatically conserve power. (See ■ “Using power options – Windows XP” on page 58 or “Using power options – Windows 7” on page 62.) iX104C5 User’s Handbook... -
Page 67: Accessing The Hard Disk Drive Carrier
WARNING Failure to follow this procedure can result in damage to the case and the cover, which is not covered under the Xplore Technologies warranty. Xplore recommends that you use an approved Xplore Technologies service center for this procedure. -
Page 68: Re-Installing The Hard Disk Drive Carrier
Insert the drive with smooth edge into the bay at a slight angle. Press down until the carrier clicks into place, while pinching the two center pins. If your machine had the screws in place, re-attach them. Note: Do not use power tools. iX104C5 User’s Handbook... -
Page 69: Accessing The Microsd & Sim Compartment
WARNING Failure to follow this procedure can result in damage to the case and the cover, which is not covered under the Xplore Technologies warranty. Xplore recommends that you use an approved Xplore Technologies service center for this procedure. Turn off the computer. -
Page 71: Programming Hot Keys
Chapter 2. Using the Tablet Programming hot keys Programming hot keys Xplore pre-programs the P1, P2, and P3 hot keys and Function mode hot key combinations to perform certain functions by default. However, you can program them to perform different functions, as described in this section. -
Page 72: Programming Hot Keys To Start Applications, Open Documents
Programming hot keys Programming hot keys to start applications, open documents, or go to a Web site In the Status area of the Windows taskbar, click the iX104C5 Configuration icon. The Launch Button QuickShow dialog box opens. Click the Configure button. - Page 73 Chapter 2. Using the Tablet Programming hot keys Click the Change button next to the key or key combination you want to program. The following options appear: Click Launch an Application, Document or Web site. The following options appear: iX104C5 User’s Handbook...
- Page 74 Click Change. To open a document: In the Click Open a Document. Press Browse to find the document you want the hot key or Function mode hot key combination to open. (For example: spreadsheet.xls, airports.doc, wiringdiagram.jpg) Click Change. iX104C5 User’s Handbook...
- Page 75 Press Browse to find the URL of the Web page you want the hot key or Function mode hot key combination to open. (For example: http://www.xploretech.com) Click Change. Program more hot keys, or click Close to close the Panel Control Center window. iX104C5 User’s Handbook...
-
Page 76: Programming Hot Keys To Perform Pre-Defined Functions
Chapter 2. Using the Tablet Programming hot keys Programming hot keys to perform pre-defined functions In the Status area of the Windows taskbar, click the iX104C5 Configuration icon. The Launch Button QuickShow dialog box opens. Click the Configure button. The Panel Control Center window opens. - Page 77 Chapter 2. Using the Tablet Programming hot keys The following options appear: Click Start a pre-defined function. In the Function selection drop-down list, select an option. Program more hot keys, or click Close to close the Panel Control Center window. iX104C5 User’s Handbook...
-
Page 78: Programming Hot Keys To Perform Other Key Functions
Chapter 2. Using the Tablet Programming hot keys Programming hot keys to perform other key functions In the Status area of the Windows taskbar, click the iX104C5 Configuration icon. The Launch Button QuickShow dialog box opens. Click the Configure button. - Page 79 Chapter 2. Using the Tablet Programming hot keys The following options appear: Click Press a key or key combination. The following options appear: iX104C5 User’s Handbook...
- Page 80 To cause the hot key to perform the paste function (Ctrl-V): Check the Ctrl check box; then click the V key. Program more hot keys, or click Close to close the Panel Control Center window. iX104C5 User’s Handbook...
- Page 81 User’s Handbook...
-
Page 82: Maintaining The Tablet
Do not disassemble the computer. ■ Keep the computer at least 5 inches (13 centimeters) away from ■ any electrical appliance that generates a strong magnetic field, such as a motor, magnet, TV, refrigerator, or large audio speakers. iX104C5 User’s Handbook... -
Page 83: Preventing The Computer From Overheating
To prevent the computer from overheating, do not obstruct the computer’s air vents. air vent area Air flow iX104C5 User’s Handbook... -
Page 84: Storing The Computer
The screen protector is a durable, replaceable writing surface that protects the display screen from abrasion. To obtain additional screen protectors, check with your reseller, or go to the Xplore Web site at www.xploretech.com for ordering information. Additional information about installation is included with the screen protectors. -
Page 85: When To Replace The Pen
With use, the pen tip may become worn and can scratch the screen. If your pen exhibits one of the following problems, replace the pen: The pen does not move freely across the screen. ■ The pen does not perform as expected. ■ iX104C5 User’s Handbook... -
Page 86: Calibrating The Digitizer
You are using the computer for the first time. ■ The previous user of the computer writes with the opposite hand ■ or at a different pen angle. The computer has not been used for some time. ■ The computer has been serviced. ■ iX104C5 User’s Handbook... -
Page 87: Calibrating The Digitizer: Ix104C5 - Windows Xp
Chapter 3. Maintaining the Tablet Calibrating the digitizer Calibrating the digitizer: iX104C5 – Windows XP Follow these instructions if your computer is running Windows XP. From the Start menu, select Control Panel. The Control Panel opens. Tablet and Pen Settings icon Click the Tablet and Pen Settings icon. - Page 88 In the Calibration area drop-down list, select the mode for which you want to calibrate the pen: Landscape or Portrait; then click Calibrate. The Calibration program starts. Follow the instructions that appear on the screen. When you finish, click OK. iX104C5 User’s Handbook...
-
Page 89: Calibrating The Digitizer: Ix104C5 - Windows 7
Chapter 3. Maintaining the Tablet Calibrating the digitizer Calibrating the digitizer: iX104C5 – Windows 7 Follow these instructions if your computer is running Windows 7. From the Start menu, select Control Panel. The Control Panel opens. Tablet PC Settings icon Double-click the Tablet PC Settings icon. - Page 90 Chapter 3. Maintaining the Tablet Calibrating the digitizer In the General tab, press the Calibrate button. Follow the instructions that appear on the screen. When you finish, click OK. iX104C5 User’s Handbook...
-
Page 91: Calibrating The Digitizer: Ix104C5 Dual Mode - Windows Xp
Chapter 3. Maintaining the Tablet Calibrating the digitizer Calibrating the digitizer: iX104C5 Dual Mode – Windows XP Follow these instructions if your computer is running Windows XP. In Active mode, you can use only the stylus included with the computer as the pointing device. - Page 92 In the Calibration area drop-down list, select the mode for which you want to calibrate the pen: Landscape or Portrait; then click Calibrate. The Calibration program starts. Follow the instructions that appear on the screen. When you finish, click OK. iX104C5 User’s Handbook...
- Page 93 From the Start menu, select All Programs > Touch Utility. The Touch Utility window opens. Click the appropriate Calibration button. Note: Xplore Technologies recommends 5 Pt or 9 Pt calibration, for greater accuracy. The Calibration program starts. Follow the instructions that appear on the screen.
-
Page 94: Calibrating The Digitizer: Ix104C5 Dual Mode - Windows 7
Chapter 3. Maintaining the Tablet Calibrating the digitizer Calibrating the digitizer: iX104C5 Dual Mode – Windows 7 Follow these instructions if your computer is running Windows 7. In Active mode, you can use only the stylus included with the computer as the pointing device. - Page 95 Chapter 3. Maintaining the Tablet Calibrating the digitizer The Tablet PC Settings window opens. In the General tab, press the Calibrate button. The Calibration program starts. Follow the instructions that appear on the screen. When you finish, click OK. iX104C5 User’s Handbook...
- Page 96 From the Start menu, select All Programs > Touch Utility. The iTouch window opens. Calibration buttons Select the Device tab. Select the appropriate calibration button. Note: Xplore Technologies recommends 5 Pt or 9 Pt calibration, for greater accuracy. Press Exit. iX104C5 User’s Handbook...
- Page 97 User’s Handbook...
- Page 98 The computer is powered on, running under battery power, and the The Status LED is red, blinking. charge level in the battery is at a minimum warning level. Plug the computer into an AC/DC power source or install a charged battery. iX104C5 User’s Handbook...
-
Page 99: A Troubleshooting
· The brightness may be set too low, causing the screen to appear too dark. To change system brightness, press the Fn and Start keys to open the Xplore menu and adjust the brightness. (See page 30.) · An external monitor may be selected. Press the Fn and P1 keys to select the computer display screen. -
Page 100: Using Bios And Aos Functions
· Press for less than one second for Release Press once to exit Shifted mode. F11 function. (Lock Fn) Function · Press longer to enable Shifted mode. Enter Multi Boot mode. Change a BIOS setup value. Ctrl+Alt+Del Reboot. Enter Enter. iX104C5 User’s Handbook... -
Page 101: Disabling The Auto Power Feature
Follow these steps to enable automatic LCD backlight control: When the computer is booting, press the P2 button to start the BIOS Setup Utility. Select the Main tab. In the LCD Backlight Control drop-down list, select Automatic. Click OK. iX104C5 User’s Handbook... -
Page 102: C Glossary
Bits Per Second (BPS). In serial transmission, the instantaneous bit speed with which a device or channel transmits a character. Card. Synonym for board; see board. Compact Disk-Read Only Memory (CD-ROM). Stores data on metal-plated plastic discs. iX104C5 User’s Handbook... - Page 103 2. To physically connect one system or device to another to exchange information. 3. The point of contact between user, the computer, and the program (for example, the pen/stylus or a menu). iX104C5 User’s Handbook...
- Page 104 Program. A set of instructions a computer can execute to tell the system what to do and how to do it. Random Access Memory (RAM). A hardware component of your computer that temporarily stores active program code and data. iX104C5 User’s Handbook...
- Page 105 Solid State Drive. a data storage device that uses solid-state memory to store persistent data. An SSD emulates a hard disk drive interface, thus easily replacing it in the iX104C5. Status Indicator (LED). a light above the LCD screen which indicates the current status of a particular device or hardware component.
-
Page 106: Hardware Specifications
RAM Options 4GB, 8GB DDR III (optional) L2 Cache 4MB smart cache BIOS ROM 8Mbit (FWH) 32GB, 64GB 160GB SSD – RAID 0/1 support Storage 160GB 1.8” HDD, MSATA Drive options * Varies according to your computer’s configuration. iX104C5 User’s Handbook... - Page 107 - Vertical: 10 degrees (min.) - Contrast Ratio: Typ. 500:1, Min 100:1 VRAM Intel i7 delivers low-power, high-performance 3D/2D graphics, video, and display capabilities. Intel HD graphics with Dymanic Frequency delivers graphics performance boost to graphics intensive applications. iX104C5 User’s Handbook...
- Page 108 · 7.4V @ 7600mAh (56 Whr) · Warm-swappable · Recharge Time: 3.5 hours (90%) · Life: Up to 4.5 hours. (Battery life is dependent on operating system, power management, and applications in use.) · Suspend Life: Min. 5 days iX104C5 User’s Handbook...
- Page 109 -40⁰ to 167⁰ F (-40⁰ to 75⁰ C) Humidity 0% to 95% non-condensing Shock/Drop Four-foot drop to concrete, operating, on all surfaces, edges and corners Vibration 0.04g^2/Hz, 20 Hz - 1000 Hz -6dB/octave 1000 Hz - 2000 Hz iX104C5 User’s Handbook...
- Page 110 European Union Directive 2004/108/EC RTT&E 301 489-17 TUV Bauart, RoHS 2002/95/EC, WEEE Safety IEC600950-1 2 Ed, EN60950-1 2 Ed, UL60950-1 2 Ed: CB scheme with CE Mark. UL1604, ATEX, IECEX ETL Listed: ANSIISA-12.12.01-2007, C22.2 No. 213 M1987 iX104C5 User’s Handbook...
- Page 111 Appendix D. Hardware Specifications Operating system Operating Systems · Microsoft Windows XP Professional Tablet PC Edition · Microsoft Windows 7, 32 and 64 bit iX104C5 User’s Handbook...
-
Page 112: Agency Notices
(1) this device may not cause harmful interference, and (2) this device must accept any interference received, including interference that may cause undesired operation. Modifications not expressly approved by Xplore Technologies could void this user’s authority to operate the equipment. Note: This equipment has been tested and found to comply with the limits for a Class B digital device, pursuant to Part 15 of the FCC Rules.. - Page 113 RF energy for the general population. The guidelines are based on the safety standards previously set by both U.S. and international standards bodies: American National Standards Institute (ANSI) IEEE. C95.1-1992 ■ National Council on Radiation Protection and Measurement (NCRP). ■ Report 86. 1986 iX104C5 User’s Handbook...
- Page 114 Repairs to telecommunication equipment should be made by a Canadian authorized maintenance facility. Any repairs or alterations not expressly approved by Xplore or any equipment failures may give the telecommunication company cause to request the user to disconnect the equipment from the telephone line.
- Page 115 In the event of system disposal, observe the following information regarding proper procedures in the State of Vermont. The liquid crystal display (LCD) lamps used in this system contain mercury. In the event of system disposal, be sure to follow local guidelines. iX104C5 User’s Handbook...
-
Page 116: Configuring Dual Mode Tablet Digitizer Input Methods
Configuring Dual Mode Tablet Digitizer Input Methods This section explains how to use the BIOS Setup Utility and the Panel Control Center to configure the iX104C5 Dual Mode tablet digitizer input settings. Use the BIOS Setup Utility to set the default input method. -
Page 117: Using The Bios Setup Utility To Set Input Method Defaults
If your computer is running Windows 7: From the Start menu, select BIOS Setup Utility. The BIOS Setup Utility window opens. In this appendix, Windows VIsta screens are shown. If your computer is running Windows XP, your screens look a little different. iX104C5 User’s Handbook... -
Page 118: Selecting The Digitizer Input Method
Note: This is the default setting. Enables touch input only. Active digitizer, pen Touch Only inputs, and Auto Sense are all disabled. Enables inputs from the active pen only. Touch Digitizer Only input and Auto Sense are disabled. iX104C5 User’s Handbook... -
Page 119: Setting Digitizer Input Method Security
BIOS settings. Setup Utility will open. User password set The user cannot change Only the supervisor can the input settings. change the input settings. Click OK. Reboot the computer. iX104C5 User’s Handbook... -
Page 120: Using The Panel Control Center To Configure Temporary Changes
In the Windows taskbar, click the Panel Control Center icon. Panel Control Center icon Click the Configure button. Click the Change button next to the P key for the function you want to change. Check Start a pre-defined function; then click Next. iX104C5 User’s Handbook... - Page 121 BIOS Setup Utility, toggles from Auto to Digitizer Only to Touch Only. Touch Panel Toggle If the digitizer input method is set to Auto or Touch Only in the BIOS Setup Utility, temporarily disables touch only. Click Close. iX104C5 User’s Handbook...
-
Page 122: Summary: Dual Mode Digitizer Input Method Settings
BIOS Setup Utility Panel Control Center Digitizer Selection Pre-defined Function On-screen description value value when key is pressed Notes “Digitizer Only” Digitizer Only Digitizer Selection Input is possible only from peripherals and the digitizer. Digitizer is functional. iX104C5 User’s Handbook... - Page 123 BIOS Setup Utility Panel Control Center Digitizer Selection Pre-defined Function On-screen description value value when key is pressed Notes “Digitizer Only” Digitizer Only Touch Screen Toggle Input is possible only from peripherals and the digitizer. Touch screen is disabled. iX104C5 User’s Handbook...
- Page 124 BIOS Setup Utility Panel Control Center Digitizer Selection Pre-defined Function On-screen description value value when key is pressed Notes “Touch Panel only” Touch Only Digitizer Selection Input is possible only from peripherals and touch. Touch is functional. iX104C5 User’s Handbook...
- Page 125 Touch Panel Toggle Turns the Touch Screen on or off. “Touch Panel on” Note: If Touch Screen is off and the computer goes into standby or hibernate mode, Touch Screen automatically turns on when operating mode returns to normal. iX104C5 User’s Handbook...
- Page 126 Table 13 Settings: Auto/Digitizer Only/Touch Only settings BIOS Setup Utility Panel Control Center Digitizer Selection Pre-defined Function On-screen description value value when key is pressed Notes “Auto” Auto Digitizer Selection Rotates through each mode, “Digitizer only” displaying each mode in turn. “Touch only” iX104C5 User’s Handbook...
-
Page 127: Sample Implementations
Note: If the user already exists, the setting the administrator has set replicates to all the users of the computer. Sample 2 To set the tablet to the following configuration: Default digitizer input control is Auto Sense. ■ iX104C5 User’s Handbook... - Page 128 Use the Panel Control Center to set one of the P keys to Digitizer Selection. Use the Add new user function to create a user account. Note: If the user already exists, the setting the administrator has set replicates to all the users of the computer. iX104C5 User’s Handbook...
- Page 129 User’s Handbook...
-
Page 130: Index
28 calibrating 85 descriptions 29 using to perform mouse functions 39 Function double-click, performing with pen 39 description 29 dragging and dropping, performing with pen 39 location 28 Dual Mode tablet digitizer input method, setting up 115 iX104C5 User’s Handbook... - Page 131 23 Status LED meanings 26 Power On/Off/ Suspend/Resume key left button click, performing with pen 39 location 22 local area network (LAN), connecting to 49 power schemes, changing 59 logging on 29 power settings, changing 60 iX104C5 User’s Handbook...
- Page 132 XPL expansion module, connecting 53 serial port XPL expansion port, location 25 compatible devices 53 Xplore Tablet Dock location 53 docking connector location 24 speaker volume, adjusting 51 Xplore Technologies, contacting 17 speakers connecting 51 location 19 storing the computer 83 iX104C5 User’s Handbook...
- Page 133 User’s Handbook...
Need help?
Do you have a question about the iX104C5 and is the answer not in the manual?
Questions and answers