Xplore iX104C5 User Handbook Manual
Computer
Hide thumbs
Also See for iX104C5:
- Reviewer's manual (40 pages) ,
- User handbook manual (135 pages) ,
- Manual (11 pages)
Table of Contents
Advertisement
Advertisement
Table of Contents

Related Manuals for Xplore iX104C5


Summary of Contents for Xplore iX104C5
- Page 1 USER’S HANDBOOK...
-
Page 3: Table Of Contents
Resuming operation ..........31 iX104C5 User’s Handbook... - Page 4 Discarding batteries ..........49 iX104C5 User’s Handbook...
- Page 5 Calibrating the digitizer..........73 Troubleshooting iX104C5 User’s Handbook...
- Page 6 Enabling automatic LCD backlight control ......78 Glossary Hardware Specifications Agency Notices iX104C5 User’s Handbook...
- Page 7 Trademarks Xplore and the Xplore logo are registered trademarks of Xplore Technologies Corp.; iX104, iX104C5, iX104C5 Lite, and iX104C5 Dual Mode are trademarks of Xplore Technologies Corp. Kensington and MicroSaver are registered trademarks of the Kensington Technology Group.
-
Page 8: Declaration Of Conformity
Address: 14000 Summit Drive, Suite 900, Austin, Texas 78728 Telephone: 512.336.7797 Declares that product: Model Series: iX104C5 complies with Part 15 of the FCC Rules. This device complies with Part 15 of the FCC rules. Operation is subject to the... - Page 9 (for example, if you rest the tablet on your lap for a long time), your skin may suffer low-heat injury. In addition, be careful when you remove a PC card that has been used for a long time, because the card may be hot. iX104C5 User’s Handbook...
- Page 10 User’s Handbook...
-
Page 11: Welcome
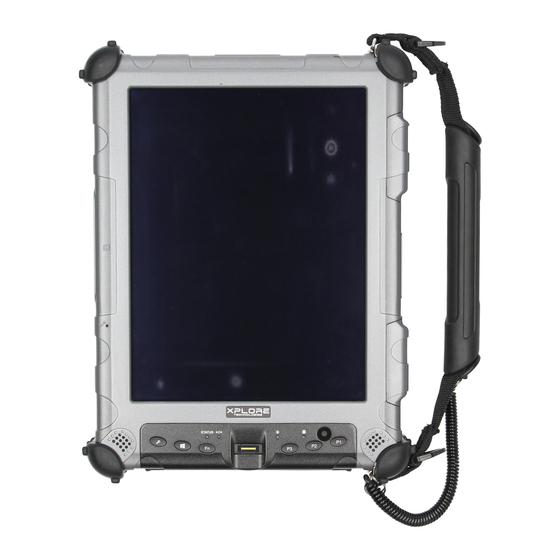
Advanced technology, innovative design, and a rugged case are just a few highlights of your system. iX104C5 Tablet with enhanced performance antenna Note: This handbook assumes that you have basic experience ® ® using computers and Microsoft Windows iX104C5 User’s Handbook... -
Page 12: About Your Computer
Bumper system and gasket protection mechanisms ■ Specialized drive technology ■ Removable, dual, Solid State Drive (SSD) cartridge ■ Integrated, protected wireless LAN and WAN antennas for dual ■ mode operation Locked-in-place memory, cables, and connectors ■ Proprietary thermal management system ■ iX104C5 User’s Handbook... -
Page 13: Package Contents
Desktop Docking Station ■ xDock Vehicle Docking Station ■ Carrying cases Shoulder cases ■ Portfolio case ■ Dockable case ■ Memory 2, 4, or 8 GB RAM ■ 40, 80, or more GB Solid State Drive (SSD) ■ iX104C5 User’s Handbook... - Page 14 Extended life battery pack (68.5 watt hours) ■ Auto adapter (cigarette lighter adapter) ■ Additional accessories Top-mounted Fast-Lock GPS II Pro (submeter accuracy) ■ Non-rugged USB optical disk drive ■ USB rugged, backlit keyboard (83-key) ■ Replaceable drive cartridges ■ Active stylus ■ iX104C5 User’s Handbook...
-
Page 15: Contacting Xplore - Service And Questions
1-512-336-7791 Before you contact Xplore, have the following information ready so that the customer support representative can quickly provide a solution: Product name: iX104C5 Product serial number Purchase date Conditions under which the problem occurred Any error messages that were displayed Type of device connected, if any iX104C5 User’s Handbook... - Page 16 User’s Handbook...
-
Page 17: Getting Started
Enables you to turn off the computer when using the Power (On/Off)/Backlight (On/Off)/Resume key is not effective. (See page 28.) Status indicator Indicates the computer status (on, off, etc.). (See page 22.) Speakers Enable you to listen to stereo audio files. Sealed to provide protection from the environment. iX104C5 User’s Handbook... -
Page 18: Back View
For optional wireless LAN and WAN models, protect and secure the radio antennas (accessible by authorized service personnel only). The main device you use to enter data and control applications (instead of a mouse or a keyboard). Also called the stylus. See “Using the pen” on page 32. iX104C5 User’s Handbook... -
Page 19: Left Side View
Helps prevent the computer from overheating by forcing heat away from the computer. (Do not block the vents.) XPL side port Permits connection of special devices made expressly for the iX104C5. Kensington™ lock slot Connector for the optional Kensington MicroSaver™ or equivalent compatible security cable. -
Page 20: Right Side View
(LAN) card 9-pin serial connector Serial connector for connecting terminals or other devices that use the RS-232, RS-422, or RS-485 data transfer standard, or an optional connector for an external optional external monitor monitor or projection panel. connector iX104C5 User’s Handbook... -
Page 21: Bottom View
Note: See “Optional accessories” on page 13. Top view XPL expansion port Bumpers Bumpers Fabricated from rugged material. Raised to help protect the computer from damage. XPL expansion port A port that permits connection of special devices made expressly for the iX104C5. iX104C5 User’s Handbook... -
Page 22: Led Indicators
The computer is on and is in Sleep mode. Thermal control blue, blinking The computer is on and is in Warm-up mode, with the LCD and backlight off. After the system has warmed to a safe level, the LCD and backlight turn on. iX104C5 User’s Handbook... - Page 23 The computer has encountered a fault and is not operating normally. Contact your computer support personnel, such as your help desk. The computer is off and you have inserted a battery that is at the critical low level and is incapable of running the computer. iX104C5 User’s Handbook...
-
Page 24: Quick-Start Guide
This section is a quick guide to using the main features of your tablet. (See Chapter 2 for detailed information.) Application, Windows, and hot keys Hot key 1 Ctrl-Alt-Delete (Secure Attention Sequence) key Screen Rotation Hot key 2 Function Hot key 3 Fingerprint scanner iX104C5 User’s Handbook... - Page 25 (See “Programming hot keys to start applications, open documents, or go to a website” on page 59.) Enable or disable Airplane mode, which toggles wireless radios on/off. Bluetooth toggle. iX104C5 User’s Handbook...
- Page 26 User’s Handbook...
-
Page 27: Using The Tablet
Status LED is off. Make sure the battery is charged or that the computer is plugged in to an external power source. Press the button. Power On/Off, Backlight On/Off, Sleep/Resume Power On/Off, Backlight On/Off, Sleep/Resume button iX104C5 User’s Handbook... -
Page 28: Turning Off The Computer
“Turning off the you cannot turn off the computer,” press the switch. (Use the stylus or a similar computer by any other Reset means, because you may instrument to press the switch). lose unsaved data. Reset switch iX104C5 User’s Handbook... -
Page 29: Suspending And Resuming Operation
Off)/Sleep/ Resume button options” on page 53. In the default configuration, the P3 key puts the computer in Sleep mode and the Power button shuts down the computer. To change these settings, see “Programming hot keys to perform pre-defined functions” on page 63. iX104C5 User’s Handbook... -
Page 30: Suspending Operation
53. P3 key Method 2 Press the Windows button; then press the right arrow next to Start button. Shutdown Press Sleep When operation is suspended, the Status LED displays a breathing green light. Status LED iX104C5 User’s Handbook... -
Page 31: Resuming Operation
Power On/Off, Backlight On/Off, Suspend/Resume Note: Press the button only once. Power On/Off, Backlight On/Off, Sleep/Resume button Approximately 20 seconds later, the computer resumes normal operation. When the Status LED displays a continuous green light, you can begin using the computer. iX104C5 User’s Handbook... -
Page 32: Using The Pen
Note: During the first use of the tablet, or if the action you are trying to perform does not occur when you use the pen or your finger to touch the screen, calibrate the digitizer as described in “Calibrating the digitizer” on page 73. iX104C5 User’s Handbook... -
Page 33: Using The Digitizer To Perform Mouse Functions
To change the speed, follow the instructions below. Click the Windows button. Start Click the option. Control Panel In the Control Panel window, select Hardware and Sound > Set up your Pen and Tablet. Drag the slider to a faster or slower speed. iX104C5 User’s Handbook... -
Page 34: Positioning The Pen And Pen Tether
Using the pen Positioning the pen and pen tether The pen tether helps prevent the loss of your pen. The following illustrations show how to position the pen and pen tether. Tether anchored at the bottom pen tether iX104C5 User’s Handbook... - Page 35 Chapter 2. Using the Tablet Using the pen Tether anchored on the side tether iX104C5 User’s Handbook...
-
Page 36: Using The Fingerprint Scanner
Protector Suite Control Center and follow the wizard’s instructions. User Enrollment For more information about using the fingerprint scanner, see the Protector Suite 2009 User’s Guide PDF included on your hard disk in the Protector Suite 2009 folder. iX104C5 User’s Handbook... -
Page 37: Changing The Screen Orientation
Chapter 2. Using the Tablet Changing the screen orientation Changing the screen orientation To rotate the screen orientation from portrait (vertical) to landscape (horizontal) mode or from landscape to portrait mode, press the screen rotation key. landscape mode portrait mode iX104C5 User’s Handbook... -
Page 38: Adjusting The Screen Brightness
Brightness brightness. Display brightness slider Method 2 In the Windows tasbar, click the power management icon; then select Adjust screen brightness Move the slider bar (located at the bottom of the window) to change the screen brightness. iX104C5 User’s Handbook... -
Page 39: Enabling Automatic Backlight Control
High Contrast White Click the Back button. Click Display Click to enlarge the icon size; then click Medium - 125% Apply Click . Make sure the screen resolution setting is Adjust Resolution pixels; then click 1024 by 768 iX104C5 User’s Handbook... -
Page 40: Docking The Tablet
Docking the tablet Docking the tablet If you have the optional xStand office dock or xDock vehicle dock, connect it to the tablet at the docking port. (See the iX104 Docking Stations Handbook.) Docking port Guide pin receptacles iX104C5 User’s Handbook... -
Page 41: Connecting Devices
Connect a local area network (LAN) cable’s RJ-45 connector to the internal LAN interface card. (See your network system administrator for more information.) LAN connector Connecting USB-compatible devices Connect any USB-compatible devices to the computer’s USB ports. USB ports iX104C5 User’s Handbook... -
Page 42: Connecting An External Microphone
Press the Windows key; then open the Start Control Panel Select ; then select Hardware and Sound Sound Select the tab. Recording Select ; then select Microphone Properties Select the tab. Levels Adjust the microphone volume or boost. Click iX104C5 User’s Handbook... -
Page 43: Connecting A Headphone Or Speakers
Click the audio icon in the Status area of the Windows taskbar. The volume control area opens. If the button indicates that sound is muted, click the button Mute to turn on the sound. Move the slider bar up or down to increase or decrease the volume. iX104C5 User’s Handbook... -
Page 44: Connecting A Monitor Or Projection Panel (Optional)
To change the video output to the monitor or projection panel: Press the key combination. To change the video output back to the computer: Press the key combination again. iX104C5 User’s Handbook... -
Page 45: Connecting A Device To The Serial Port (Standard)
If your tablet includes the standard serial port, you can connect a terminal or other device that uses the RS-232, RS-422, or RS-485 data transfer standard. 9-pin serial port Connecting an XPL expansion module XPL expansion port Tablet with optional GPS II iX104C5 User’s Handbook... -
Page 46: Using The Battery
Status LED flashes green. (If the battery charge is higher than 95%, the battery will not charge, preventing battery overcharge.) Check the level of charge. (See “Checking battery power status” on page 50.) The charging process continues until the battery charge reaches 100%. iX104C5 User’s Handbook... -
Page 47: If You Have An External Battery Charger
Save your work and close all running programs; then shut down the computer or put the computer in Hibernation mode (see “Suspending operation” on page 30). Note: To avoid losing unsaved data, wait until the computer has completed switching to Hibernation mode before removing the battery. iX104C5 User’s Handbook... - Page 48 Pull the battery away from the computer and remove it. Note: After removing the battery, you must replace the battery or connect the computer to an external power supply within or the computer completely loses power. 3 to 5 minutes iX104C5 User’s Handbook...
-
Page 49: Installing The Battery
Discarding batteries Dispose of batteries in accordance with your local government regulations. Under federal, state, or local law, it may be illegal to put batteries in the trash. Contact your system administrator, municipal waste disposal department/provider for information. iX104C5 User’s Handbook... -
Page 50: Using Power Options
On the Windows taskbar, click the battery icon; then select More . The Power Options window opens. power options Checking battery power status On the Windows taskbar, click the battery icon. The following window opens, displaying the percentage of power remaining in the battery: iX104C5 User’s Handbook... -
Page 51: Selecting A Power Plan
Select one of the following power plans: (select More power in necessary) options – Balance between computer performance and battery Balanced life. – Longer battery life and lower performance. Power Saver – Higher performance and shorter battery life. High performance iX104C5 User’s Handbook... -
Page 52: Selecting Power Options
Using power options Selecting power options On the Windows taskbar, right-click the battery icon. Select Power Options The following window opens. Under the selected power plan, press Change plan settings Select the power options you want to use. iX104C5 User’s Handbook... -
Page 53: Selecting Power (On/Off)/Backlight(On/Off)/Sleep/ Resume
To change what happens when you press the button: On the Windows taskbar, right-click the battery icon. Select Power Options The following window opens. Press Choose what the power buttons do Select the options you want to use. iX104C5 User’s Handbook... -
Page 54: Tips For Conserving Battery Power
Adjust the display brightness to no brighter than necessary for ■ comfortable viewing. The display can consume a large portion of the computer’s power. (See page 38.) Set the LCD Brightness range to “Power Saving” in the BIOS ■ Setup Utility. (See page 77.) iX104C5 User’s Handbook... -
Page 55: Accessing The Solid State Drive (Ssd) Cartridge
Pinch the two center pins with one hand while pushing down on the lever with the other. The drive carrier will pop up (like the battery) and permit removal. Your drive carrier may have two screws installed. If so, Note: remove them before you exchange the drive carrier. iX104C5 User’s Handbook... -
Page 56: Re-Installing The Drive Carrier
Insert the drive with smooth edge into the bay at a slight angle. Press down until the carrier clicks into place, while pinching the two center pins. If your machine had the screws in place, re-attach them. Note: Do not use power tools. iX104C5 User’s Handbook... -
Page 57: Accessing The Microsd And Sim Compartment
47.) Lift up on the D-ring and turn it clockwise ¼ of a rotation. Once the lock is disengaged lift the door to open the compartment. Opening the compartment Installing a MicroSD card Installing a SIM card iX104C5 User’s Handbook... -
Page 58: Programming Hot Keys
Opens the Start menu. Starts Internet Explorer. Puts the computer in Sleep mode. Table 6 Programmable Function mode hot key combinations Key combination Default function Sends video display to a monitor or projection panel. Airplane mode toggle. Bluetooth toggle. iX104C5 User’s Handbook... -
Page 59: Programming Hot Keys To Start Applications, Open Documents
Programming hot keys to start applications, open documents, or go to a website In the Status area of the Windows taskbar, click the iX104C5 icon. Configuration The Launch Button QuickShow dialog box opens. Click the button. Configure The Panel Control Center window opens. iX104C5 User’s Handbook... - Page 60 Chapter 2. Using the Tablet Programming hot keys Click the button next to the key or key combination you Change want to program. The following options appear: Click Launch an Application, Document or Web site The following options appear: iX104C5 User’s Handbook...
- Page 61 Change To open a document: In the Click Open a Document Press to find the document you want the hot key or Browse Function mode hot key combination to open. (For example: spreadsheet.xls airports.doc wiringdiagram.jpg Click Change iX104C5 User’s Handbook...
- Page 62 URL of the Web page you want the Browse hot key or Function mode hot key combination to open. (For example: http://www.xploretech.com Click Change Program more hot keys, or click to close the Panel Control Close Center window. iX104C5 User’s Handbook...
-
Page 63: Programming Hot Keys To Perform Pre-Defined Functions
In the Status area of the Windows taskbar, click the iX104C5 icon. Configuration The Launch Button QuickShow dialog box opens. Click the button. Configure The Panel Control Center window opens. Next to the key or key combination you want to program, click button. Change iX104C5 User’s Handbook... - Page 64 Chapter 2. Using the Tablet Programming hot keys The following options appear: Click Start a pre-defined function In the drop-down list, select an option. Function selection Program more hot keys, or click to close the Panel Control Close Center window. iX104C5 User’s Handbook...
-
Page 65: Programming Hot Keys To Perform Other Key Functions
In the Status area of the Windows taskbar, click the iX104C5 icon. Configuration The Launch Button QuickShow dialog box opens. Click the button. Configure The Panel Control Center window opens. Next to the key or key combination you want to program, click button. Change iX104C5 User’s Handbook... - Page 66 Chapter 2. Using the Tablet Programming hot keys The following options appear: Click Press a key or key combination The following options appear: iX104C5 User’s Handbook...
- Page 67 To cause the hot key to perform the paste function ( Ctrl-V) Check the check box; then click the key. Ctrl Program more hot keys, or click to close the Panel Control Close Center window. iX104C5 User’s Handbook...
- Page 68 User’s Handbook...
-
Page 69: Maintaining The Tablet
Do not disassemble the computer. ■ Keep the computer at least 5 inches (13 centimeters) away from ■ any electrical appliance that generates a strong magnetic field, such as a motor, magnet, TV, refrigerator, or large audio speakers. iX104C5 User’s Handbook... -
Page 70: Preventing The Computer From Overheating
To prevent the computer from overheating, do not obstruct the computer’s air vents. air vent area air vents iX104C5 User’s Handbook... -
Page 71: Storing The Computer
To obtain additional screen protectors, check with your reseller, or go to the Xplore Web site at www.xploretech.com for ordering information. Additional information about installation is included with the screen protectors. iX104C5 User’s Handbook... -
Page 72: When To Replace The Pen
With use, the pen tip may become worn and can scratch the screen. If your pen exhibits one of the following problems, replace the pen: The pen does not move freely across the screen. ■ The pen does not perform as expected. ■ iX104C5 User’s Handbook... -
Page 73: Calibrating The Digitizer
The previous user of the computer writes with the opposite hand or ■ at a different pen angle. The computer has not been used for some time. ■ The computer has been serviced. ■ From the menu, select Start Control Panel The Control Panel opens. iX104C5 User’s Handbook... - Page 74 Hardware and Sound Hardware and Sound In the Tablet PC Settings area, select Calibrate the screen for pen ; then follow the instructions that appear on the or touch input screen.. Calibrate the screen for pen or touch input iX104C5 User’s Handbook...
-
Page 75: Troubleshooting
The Status LED is red, blinking. The computer is powered on, running under battery power, and the charge level in the battery is at a minimum warning level. Plug the computer into an AC/DC power source or install a charged battery. iX104C5 User’s Handbook... - Page 76 • Make sure the volume control in your audio software is set to an audible level. An external device is not working with The device may need to be enabled in the computer’s configuration the computer. program (BIOS Setup). Contact your local help desk or reseller. iX104C5 User’s Handbook...
-
Page 77: Using Bios And Aos Functions
• Press for less than one second for Release Press once to exit Shifted mode. F11 function. (Lock Fn) Function • Press longer to enable Shifted mode. Enter Multi Boot mode. Change a BIOS setup value. Ctrl+Alt+Del Reboot. Enter Enter. iX104C5 User’s Handbook... -
Page 78: Disabling The Auto Power Feature
Follow these steps to enable automatic LCD backlight control: When the computer is booting, press the button to start the BIOS Setup Utility. Select the Main tab. In the drop-down list, select LCD Backlight Control Automatic Click iX104C5 User’s Handbook... -
Page 79: Glossary
Bits Per Second (BPS). In serial transmission, the instantaneous bit speed with which a device or channel transmits a character. Card. Synonym for board; see board. Compact Disk-Read Only Memory (CD-ROM). Stores data on metal-plated plastic discs. iX104C5 User’s Handbook... - Page 80 3. The point of contact between user, the computer, and the program (for example, the pen/stylus or a menu). JBOD. Two drives that appear in Window as two drives, Drive C and Drive D. iX104C5 User’s Handbook...
- Page 81 Program. A set of instructions a computer can execute to tell the system what to do and how to do it. RAID 0. Two drives appear in Windows as one larger drive (two 80GB drives appear as one 160GB drive). iX104C5 User’s Handbook...
- Page 82 Status Indicator (LED). a light above the LCD screen which indicates the current status of a particular device or hardware component. Stylus. A writing instrument. For pen computers, the stylus is used to interface with the LCD and digitizer. iX104C5 User’s Handbook...
- Page 83 A SIM can be moved from one device to another and/or different SIMS can be inserted into any GSM radio. Universal Serial Bus (USB). A serial interface that enables communication between devices and the computer. iX104C5 User’s Handbook...
- Page 84 User’s Handbook...
-
Page 85: Hardware Specifications
2GB, 4 GB, 8GB DDR III (optional) L2 Cache 4MB smart cache BIOS ROM 8Mbit (FWH) Storage 40GB SSD, or 80GB SSD, single or dual for RAID 0/1 and JBOD support * Varies according to your computer’s configuration. iX104C5 User’s Handbook... - Page 86 Appendix D. Hardware Specifications Display Display • Color LCD • Active Digital Sensor and Pen (iX104C5 Resistive Touch Panel (iX104C5 Dual Mode) • 32-bit True color • 10.4” TFT XGA (1024x768), 16M colors • Brightness: 100 levels (min.) • Viewing Angle: - Horizontal: 30 degrees (min.)
- Page 87 • Application buttons with primary and secondary functions • Power On/Off/Suspend/Resume button • Emergency Shutoff/Reset button Audio • Realtec ACC 262 • On-board microphone with noise cancellation • On-board integrated stereo speakers (1W each) Status Indicators Power, Charge/DC-in, Warning iX104C5 User’s Handbook...
- Page 88 • (IP65 only) Bridge Battery • 6-cell Li Ion, 45mAh • Life: (with Suspend-to-RAM on bridge battery only): 3 to 5 minutes from full charge AC Adapter Auto-sensing 100-240V, supplying 19 VDC, with a current of 3.42 A iX104C5 User’s Handbook...
- Page 89 5% saline for 48 hr (12 hr wet, 12 hr dry, 2 cycles) MIL-STD-810G Method 506.5 Contamination by fluids: Detergents, brake fluid, aromatic hydrocarbons MIL-STD-810G Method 506.5 Solar radiation: 1120 W/m2 (355 Btu/ft2/hr) UVB @ 50° C, 7x24 hr cycles MIL-STD-810G Method 506.5 iX104C5 User’s Handbook...
- Page 90 • TUV Bauart, RoHS, 2002/95/EC, WEEE • IEC600950-1 2nd Ed., EN60950-1 2nd Ed., UL60950-1 2nd Ed. • ETL Listed: ANSIISA-12.12.01-2007, C22.2 No. 213 • UL1604 Operating system Operating Systems • Microsoft Windows 7 Professional – English, 32- and 64-bit iX104C5 User’s Handbook...
-
Page 91: Agency Notices
This is because the tablet PC is designed to operate at multiple power levels so as to use only the power required to reach the network. In general, the closer you are to a wireless base station antenna, the lower the power output. iX104C5 User’s Handbook... - Page 92 The guidelines are based on the safety standards previously set by both U.S. and international standards bodies: American National Standards Institute (ANSI) IEEE. C95.1-1992 ■ National Council on Radiation Protection and Measurement (NCRP). ■ Report 86. 1986 iX104C5 User’s Handbook...
- Page 93 The user should be aware that compliance with the certification standards does not prevent service degradation in some situations. Repairs to telecommunication equipment should be made by a Canadian authorized maintenance facility. Any repairs or alterations not expressly iX104C5 User’s Handbook...
- Page 94 In the event of system disposal, observe the following information regarding proper procedures in the State of Vermont. The liquid crystal display (LCD) lamps used in this system contain mercury. In the event of system disposal, be sure to follow local guidelines. iX104C5 User’s Handbook...
- Page 95 Power On/Off/Sleep/Resume headphone volume, adjusting location headphone, connecting programming hot keys Hibernation mode to perform other key functions description to perform pre-defined functions hot keys, programming iX104C5 User’s Handbook...
- Page 96 User’s Handbook...
- Page 97 USB port, location USB-compatible device, connecting video output changing from monitor to computer changing to monitor volume adjusting headphone adjusting microphone adjusting speaker Windows Task Manager, launching XPL expansion module, connecting XPL port Xplore Technologies, contacting iX104C5 User’s Handbook...
- Page 98 User’s Handbook...
- Page 100 95-01097 Rev A...
Need help?
Do you have a question about the iX104C5 and is the answer not in the manual?
Questions and answers