Table of Contents
Advertisement
Quick Links
INSTALLATION, COMMISSIONING AND SERVICING INSTRUCTIONS
WALL HUNG RSF GAS FIRED CONDENSING SYSTEM BOILER
Greenstar i System Compact
FOR SEALED CENTRAL HEATING SYSTEMS AND INDIRECT MAINS FED DOMESTIC HOT WATER
ErP
These appliances are for use with:
Natural Gas or L.P.G.
(Cat. II 2H 3P type C13, C33 & C53)
Model
Natural Gas
27i System Compact
30i System Compact
L.P.G.
27i System Compact
30i System Compact
If you smell gas:
▶ Well away from the building: call the National Gas Emergency
Service on 0800 111 999.
▶ L.P.G. boilers: Call the supplier's number on the side of the gas tank.
UK/IE
GC Number
ErP
41-406-58
ErP
41-406-60
ErP
41-406-59
ErP
41-406-61
Advertisement
Table of Contents

Related Manuals for Benchmark 27i System Compact


Summary of Contents for Benchmark 27i System Compact
- Page 1 FOR SEALED CENTRAL HEATING SYSTEMS AND INDIRECT MAINS FED DOMESTIC HOT WATER These appliances are for use with: Natural Gas or L.P.G. (Cat. II 2H 3P type C13, C33 & C53) Model GC Number Natural Gas 27i System Compact 41-406-58 30i System Compact 41-406-60 L.P.G. 27i System Compact 41-406-59...
-
Page 2: Table Of Contents
CONTENTS CONTENTS 6.4.1 Boiler start up screens ......36 Key to symbols and safety instructions ....4 Commissioning . - Page 3 CONTENTS Fault finding and Diagnosis ......60 Internal wiring diagram ......60 Heating function .
-
Page 4: Key To Symbols And Safety Instructions
Examples of additional symbols used Distance learning and training courses are available from Worcester. The BENCHMARK CHECKLIST can be found in the back of this A numbered step in an action sequence Installation manual. A sequence of numbered steps or actions carried out in a specific order to complete a task. -
Page 5: Safety Precautions
Regulations and should be provided to the customer for future reference. Installers are required to carry out installation, commissioning and servicing work in accordance with the Benchmark Code of Practice which is available from the Heating and Hotwater Industry Council who manage and promote the scheme. -
Page 6: Regulations
REGULATIONS Regulations Installation regulations Current Gas Safety (Installation & Use) Regulations: All gas appliances must be installed by a competent person in accordance with the above regulations. Failure to install appliances correctly could lead to prosecution. The appliance must be installed in accordance with, and comply to, the current: Gas Safety Regulations, IET Regulations, Building Regulations, Building Standards (Scotland) (Consolidation), Building Regulations (Northern Ireland), local water by-laws, Health &... -
Page 7: Appliance Information
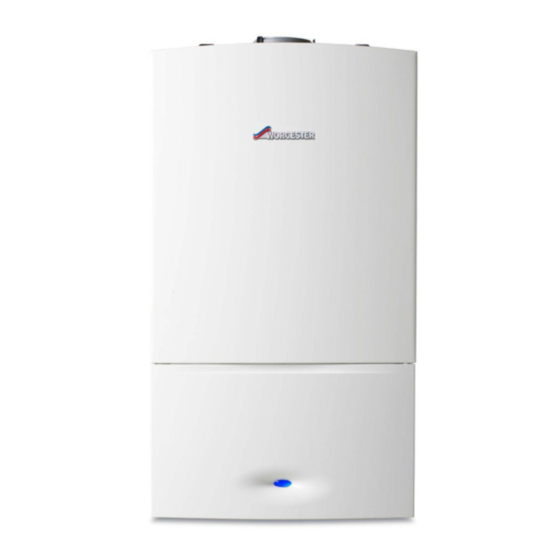
APPLIANCE INFORMATION APPLIANCE INFORMATION Appliance Depth to wall 280mm (When fitted to wall frame) 680mm* * 690mm to top of case front 390mm 6720813280-02.1Wo STANDARD PACKAGE 1. Wall hung gas-fired condensing system boiler for central heating and domestic hot water 2. -
Page 8: Technical Data
APPLIANCE INFORMATION TECHNICAL DATA Natural Gas L.P.G. DESCRIPTION i System Compact UNIT 27kW 30kW 27kW 30kW Gas flow rate - Max. 10 minutes from lighting Natural Gas G20 m³/h 2.92 3.24 L.P.G. kg/h 2.33 Heating Minimum heat input 7.15 7.15 7.15 7.15 Maximum rated heat input (net) -
Page 9: Energy Efficiency
APPLIANCE INFORMATION ENERGY EFFICIENCY The following product data satisfy the requirements of the EU Regulations No. 811/2013 and No. 812/2013 supplementing Directive 2010/30/EU. Product data Symbol Unit 7733600060 7733600062 7733600061 7733600063 Product type – – 27i System 30i System 27i System 30i System Compact Compact... -
Page 10: Layout
APPLIANCE INFORMATION LAYOUT 6720813280-03.1Wo 41 40 Fig. 1 Main boiler components Greenstar i System Compact - 6 720 813 280 (2015/07) -
Page 11: Pre-Installation
PRE-INSTALLATION Wall mounting frame Boiler display Expansion vessel CH return isolator Flow temperature sensor (NTC) Gas inlet isolator Electrode assembly CH flow isolator Maximum safety sensor NTC Condensate connection Auto air vent Flue connector Aluminium Silicon Heat exchanger Case retaining clips Flueway Flue overheat thermostat Sump assembly... -
Page 12: Mains Supply
PRE-INSTALLATION BEFORE CLEANING THE SYSTEM: MAINS SUPPLY ▶ Ensure that the system and pipework is in good working order. 4.2.1 ELECTRICAL SUPPLY ▶ Where possible keep the existing boiler/circulating pump in place when flushing the system. • Supply: 230V - 50 Hz FOLLOW THE GUIDANCE OF BS7593: •... -
Page 13: S And Y Plan Systems
PRE-INSTALLATION SEALED PRIMARY SYSTEM: NOTICE: Automatic bypass ▶ An automatic bypass valve is required when fitting an NOTICE: Artificially softened water must not be used to S-plan type system with two-port valves. fill the central heating system. NOTICE: Drain cock •... -
Page 14: Condensate Pipework
PRE-INSTALLATION AVAILABLE PUMP HEAD 4.4.1 INTERNAL CONNECTIONS In order to minimise risk of freezing during prolonged cold spells, the In order to save as much energy as possible and the following methods of installing condensate drainage pipe should be minimise the possibility of water circulation noise, a low adopted, in order of priority. -
Page 15: External Connections
PRE-INSTALLATION CONDENSATE PUMP ▶ The pipe should be run internally as far as possible before going externally and the pipe diameter should be increased to 32mm before Where “gravity discharge” to an internal termination is not physically it passes through the wall to the exterior. The pipe should be insulated possible, or where very long internal runs would be required to reach a using suitable waterproof and weather resistant insulation, if not suitable discharge point, condensate should be removed using a... -
Page 16: Pressure Relief Pipework
PRE-INSTALLATION PRESSURE RELIEF PIPEWORK NOTICE: ▶ The pressure relief valve is a safety device for the boiler and if activated may discharge boiling water or steam through the relief valve drain pipe. ▶ Care should be taken when siting the outlet pipe so 25mm min. -
Page 17: Boiler Location And Clearances
PRE-INSTALLATION BOILER LOCATION AND CLEARANCES 4.6.1 Installation 4.6.4 BATHROOMS This appliance is only suitable for installing internally within a property at Please check the IP rating of any control to be used on this appliance. a suitable location onto a fixed, rigid surface at least the same size as the Only certain controls can be fitted when the appliance is inside of the appliance and capable of supporting the appliance weight. - Page 18 PRE-INSTALLATION Fig. 15 Plumbing manifold From left Diameter of Function case edge pipe Condensate 33mm 22mm CH Flow 65mm 22mm 195mm 22mm Pressure Relief Valve 291mm 15mm CH Return 325mm 22mm Table 8 Key to figures 14 & 15 Heating System 22mm compression fittings 22mm compression fittings Condensate...
-
Page 19: Flue Terminal Positions
PRE-INSTALLATION FLUE TERMINAL POSITIONS All measurements in millimetres 52mm 104mm 1,500 1,500 300 300 300 300 1,200 Boundary Line Fig. 16 Flue terminal positions NOTICE: ▶ All measurements are the minimum clearances required. ▶ Terminals must be positioned so to avoid combustion products entering the building. ▶... -
Page 20: Flue Options
PRE-INSTALLATION FLUE OPTIONS TELESCOPIC HORIZONTAL FLUE ASSEMBLY WARNING: Flue systems 60/100 mm ▶ Only use Worcester, Bosch approved flue systems, no 350 mm - 570 mm other manufacturer’s flue systems have been approved for use with Worcester appliances. CAUTION: Non accessible flue systems: 130 mm Min ▶... - Page 21 PRE-INSTALLATION High level horizontal flue Vertical balanced flue assembly A = 300 mm B = 500 mm Maximum flue length Maximum flue length (mm) (mm) 60/100 80/125 60/100 80/125 Vertical balanced flue assembly 6,000 15,000 High level horizontal flue 6,000 15,000 Table 18 Table 15...
-
Page 22: Plume Management Terminal Positions
PRE-INSTALLATION 4.10 PLUME MANAGEMENT TERMINAL POSITIONS All measurements in millimetres Flue terminal guard 7 716 191 176 ±45° Plume re-direction: 180° Flue Exhaust Outlet 1,500 Air Intake ±80° 1,200 Boundary Line Fig. 17 Plume terminal positions Maximum and minimum plume management lengths: ▶... -
Page 23: Determine The Plume Management System Length
PRE-INSTALLATION 4.10.1 DETERMINE THE PLUME MANAGEMENT SYSTEM LENGTH FLUE LENGTH VERSUS PLUME MANAGEMENT LENGTH Effective straight flue length with plume management Minimum plume length (M) Maximum plume length (M) 500mm 4,500mm Max flue length (L) 5,000mm Max flue length (L) 2,200mm Note: Measurement M plume length ▶... -
Page 24: Installation
INSTALLATION Additional requirements for roof space installation: INSTALLATION • The boiler should be first unpacked before ascending a ladder to the loft space. WARNING: All the previous “Pre-Installation” sections • Two sets of steps should be used. must be read and the requirements met before starting •... -
Page 25: Unpacking The Appliance
INSTALLATION 6. Remove the inner packing (2) from the back of the boiler. 7. Lie the boiler on the floor ensuring that the V shaped cardboard insert (8) is in place. Fig. 24 Finish unpacking REMOVING THE OUTER CASE ▶ Before the case can be removed, the control panel must be moved into the service position, i.e. -
Page 26: Pre-Plumbing Boiler Connections
INSTALLATION Refer to Figure 26. The connector (1) in the wiring harness is for use on other appliances and does not provide a function on this Greenstar iSystem Compact 25mm Fig. 28 Condensate connection PRV PRE-PLUMBING CONNECTION Fig. 26 Unused connector 1. -
Page 27: Hanging The Boiler
INSTALLATION HANGING THE BOILER CAUTION: Lifting the boiler ▶ There are two handling holes incorporated into the inner casing left and right in the lower section of the appliance. ▶ Do not lift the boiler using the control panel as a hand hold. -
Page 28: Flue Turret/Adaptor Installation
INSTALLATION CONNECTING THE EXPANSION VESSEL CONNECTING THE SIPHON OUTLET To connect the expansion vessel to the hydraulic pump manifold 1. Push the black rubber siphon discharge hose onto the wall frame situated to the left of the pump: connector until fully engaged. 1. -
Page 29: Electrical
INSTALLATION ▶ Check the appliance flue seal [2] is correctly seated and apply silicone grease. 52mm 104mm 6720644842-10.1Wo Fig. 38 Slope for condensate disposal ELECTRICAL CAUTION: Isolate the mains electrical supply before starting any work and observe all relevant safety precautions. -
Page 30: Mounting Optional Plug-In Controls - When Optional Integral Diverter Valve Is Fitted
INSTALLATION Mains voltage connections 230V 230V FR FS LR LR Fig. 41 Mains voltage connectors Mains voltage terminal strip External frost thermostat 230 V A.C. switched live inputs • CH - External controls switch live connection point. • DHW - Inactive unless optional integral diverter valve fitted. 230 V A.C. - Page 31 INSTALLATION REMOVING THE BLANKING PLATE 3. Push the Programmer/Timer in to engage with the slots in the control panel. The control panel must be released and swung forward slightly to gain 4. Pull the Programmer/Timer down to secure with the clips. access to the top cover panel, refer to section 7.4 for access to the 5.
- Page 32 INSTALLATION NEW COMPLETE SYSTEM INSTALLATIONS If a new complete heating system is installed in a new build property or it is a first time installation in an existing property, the heating systems must conform to current building regulations Part L1a. The exception to this are single storey, open plan dwellings where the living area is more than 70% of the total usable floor area.
- Page 33 INSTALLATION EXTERNAL 230V PROGRAMMER AND TWO HEAT ZONES WITH UNVENTED CYLINDER (S-PLAN PLUS) SYSTEM BOILER CONNECTIONS 230V 230V FR FS LR LR 230V Mains Voltage Double Pole Fused Spur Room T/Stat Zone 1 Dual Thermostat Heating Zone 1 Valve Cylinder Zone Valve Programmer Heating...
-
Page 34: Commissioning
Rectify any leaks. ▶ Record the date when the inhibitor was added to the system on the ▶ Check that the condensate pipe has been connected and correctly Benchmark checklist. fitted to the siphon. Greenstar i System Compact - 6 720 813 280 (2015/07) -
Page 35: Starting The Appliance
COMMISSIONING NOTICE: ▶ The concentration of inhibitor in the system should be checked every 12 months or sooner if system content is lost. ▶ The addition of sealing agents to the system water is not recommended as this can cause problems with deposits left in the heat exchanger. -
Page 36: Boiler Start Up Screens
COMMISSIONING 6.4.1 BOILER START UP SCREENS SCREEN DISPLAY DESCRIPTION On initial start up, the following screens are displayed: All possible screen symbols This screen is displayed briefly 1. All the symbols are displayed for approximately two seconds. during boiler start up and shows 2. -
Page 37: Commissioning
COMMISSIONING COMMISSIONING ▶ Press the button to return to normal operation. ▶ The boiler will run for 15 minutes in service mode and return to normal If the optional integral diverter valve is fitted (not if no other inputs are made. supplied) and the Service mode and maximum output are After the tests are completed: selected the boiler will operate both the Central Heating... -
Page 38: Checking The Gas Rate
COMMISSIONING 6.5.2 CHECKING THE GAS RATE 6.5.4 CHECKING FOR LEAKS DURING OPERATION ▶ The gas rate should be measured at the gas meter after the boiler has ▶ Use an approved leak detector to check all connections for possible been operating for a minimum of 10 minutes at maximum output. leaks. -
Page 39: Co And Combustion Checks
The following combustion and flue integrity checks are mandatory from ▶ Refer to section 6.5.1 and 6.5.2 to verify gas type, April 2014 and these values must be recorded on the Benchmark check gas inlet pressure, and gas rate. list, at the back of this manual. -
Page 40: Finishing Commissioning
COMMISSIONING FINISHING COMMISSIONING 6.8.1 REPLACING THE BOILER CASE 6.8.3 FITTING THE FASCIA FLAP 1. Ensure that bottom edge of the case is engaged onto the rail of the 1. Rotate the hinge to be in-line with the flap and present the flap superstructure. -
Page 41: Handover
▶ Show the customer the fault finding information in the User guide. ▶ Show the customer where the serial number/boiler information is when they call in with a problem (Benchmark checklist at the rear of CAUTION: Mains supplies the manual). -
Page 42: Checking The Gas Inlet Pressure
SERVICE AND SPARES CHECKING THE GAS INLET PRESSURE CHECKING FLUE INTEGRITY The integrity of the flue system and performance of the boiler can be NOTICE: checked via the flue turret sample points. ▶ Do not continue with the other checks if the correct gas pressure can not be achieved. -
Page 43: Component Access
SERVICE AND SPARES COMPONENT ACCESS FAN PRESSURE TEST To gain access to the components, remove the outer case: This test is to determine if the heat cell requires cleaning 1. Remove the two screws securing the control panel. or attention. 2. -
Page 44: Fan Pressure
SERVICE AND SPARES 7.5.2 FAN PRESSURE FLUE GAS ANALYSIS NOTICE: Combustion testing ▶ Combustion testing must be carried out by a competent person. Testing must not be attempted unless the person carrying out the combustion check is equipped with a Combustion Analyser conforming to BS 7927 and is competent in its use. -
Page 45: Cleaning The Heat Exchanger
SERVICE AND SPARES ▶ Check the CO/CO readings against the information in table 28 & 29. ▶ Disconnect electrical wires to the fan, ignition transformer, spark electrodes, flue overheat thermostat, main heat exchanger ▶ Check that the CO is less than 200ppm. temperature sensor and flow pipe temperature sensor. -
Page 46: Cleaning The Primary Heat Exchanger
SERVICE AND SPARES Fig. 71 Fitting siphon 7.7.2 CLEANING THE PRIMARY HEAT EXCHANGER 6720803800-03.1Wo SINGLE BLADED TOOL AND BRUSH Fig. 73 Heat exchanger cleaning tool Use a suitable blade to clean the heat exchanger channels. To clean the front channel of the heat exchanger There is an optional tool available to clean the heat exchanger, part 3. -
Page 47: Replacement Of Parts
SERVICE AND SPARES REPLACEMENT OF PARTS CAUTION: Mains supplies: ▶ Turn off the gas supply and isolate the mains supplies before starting any work on the boiler and observe all relevant safety precautions. CAUTION: Component replacement: ▶ Replace the burner housing gasket and the Flueway sump seal when re-assembling the heat exchanger. -
Page 48: Siphon Removal
SERVICE AND SPARES 7.8.5 MAXIMUM SAFETY SENSOR ▶ Disconnect the lead to the maximum safety sensor. 1. Remove the screw securing the sensor. 2. Remove the sensor from the heat exchanger. ¼ ▶ When replacing the sensor, ensure that the assembly is properly located on the orientation pin. -
Page 49: Air Pressure Switch
SERVICE AND SPARES 7.8.7 AIR PRESSURE SWITCH 7.8.8 AUTO AIR VENT Ensure that the boiler has been fully drained. NOTICE: Air Pressure Switch 1. Remove the spring clip completely. ▶ Ensure that the tube is reconnected to the Air Pressure Switch 2. -
Page 50: Fan Assembly
SERVICE AND SPARES 7.8.10 FAN ASSEMBLY REMOVE THE USED SEAL 4. Discard the “tubular” seal [2] or the “moulded” seal [3], depending on CAUTION: Component replacement: which type is fitted and replace with the seal that is provided. ▶ After replacement of a gas related component, where a gasket or seal has been disturbed or replaced, check for gas tightness using a gas sniffer/analyser. -
Page 51: Air/Gas Flap Valve Assembly
SERVICE AND SPARES COMBUSTION AIR INLET AND GAS PIPE DISCONNECTION When refitting the rubber gas pipe, ensure that the pipe 1. Rotate the combustion air inlet pipe anti-clockwise to release from the is correctly oriented by aligning the notch in the pipe fan assembly and pull away from the fan. -
Page 52: Ignition Transformer
SERVICE AND SPARES 7.8.12 IGNITION TRANSFORMER 7.8.14 BURNER HOUSING, BURNER/ GASKET To remove the ignition transformer The front two bolts retaining the burner housing are NOT ▶ Remove the combustion air inlet pipe. captive and will drop out when the nuts are removed. ▶... -
Page 53: Heat Exchanger
SERVICE AND SPARES TIGHTENING DOWN THE BURNER HOUSING 7.8.15 HEAT EXCHANGER 1. Tighten the burner housing castellated nuts [1] down gradually and Before removal: evenly and in a rotating sequence. ▶ Isolate the electrical power to the boiler. 2. Tighten the castellated nuts down until they “bottom out” on the heat ▶... -
Page 54: Diverter Valve Motor And Diverter Valve Removal
SERVICE AND SPARES 7.8.17 PUMP HEAD Before removal: ▶ Isolate the electrical power to the boiler. ▶ Drain the system. ▶ There may be water inside the pump. Protect any electrical items from water ingress. 1. Disconnect the main electrical connector from the bottom of the pump. -
Page 55: Boiler Return Sensor (Ntc)
SERVICE AND SPARES 7.8.19 BOILER RETURN SENSOR (NTC) 7.8.21 CH PRESSURE RELIEF VALVE ▶ Isolate the boiler and ensure that the system is fully drained. ▶ Isolate the boiler and ensure that the boiler is fully drained. 1. Withdraw the spring clip to release the sensor. 1. -
Page 56: Bypass Valve
SERVICE AND SPARES 7.8.23 BYPASS VALVE PCB FUSE Remove the hydraulic block from the boiler, refer to section 7.8.22. The fuse is located next to the high voltage connectors and the spare fuse (1) is located on the back of the access cover. 1. -
Page 57: Expansion Vessel
SERVICE AND SPARES With the control unit in the service position: 1. Remove the access cover retaining screw. 2. Release the catches and remove the access cover. ▶ Disconnect and remove all cables and connectors from the control unit. ▶ Remove the pressure gauge, refer to section 7.8.18. Fig. - Page 58 SERVICE AND SPARES EXPANSION VESSEL REPLACEMENT (BOILER IN PLACE) EXPANSION VESSEL REPLACEMENT (REMOVE BOILER) ▶ Isolate the power from the boiler. ▶ Isolate the power from the boiler. ▶ Lower the control panel into the service position. ▶ Isolate the systems and gas connection using the service valves. ▶...
-
Page 59: Short Parts List
SERVICE AND SPARES SHORT PARTS LIST Fan 8 716 117 417 Burner Gas Valve 8 718 600 23B 0 8 718 600 04A 0 Control panel Flue overheat thermostat Electrodes 8 737 909 (grommet type) (including gasket) 49A 0 8 717 206 213 0 8 718 600 28A 0 Spark generator Pump assembly... -
Page 60: Fault Finding And Diagnosis
FAULT FINDING AND DIAGNOSIS FAULT FINDING AND DIAGNOSIS INTERNAL WIRING DIAGRAM AIR PRESSURE Fan wiring: PRE WIRED LINK SWITCH Live = Brown FLUE Neutral = Blue STAT SPARK ELECTRODES FLAME SENSE ELECTRODE FLOW MAX SAFETY NTC FLAME SENSE GROUND VALVE SAFETY SOLENOID Blue... -
Page 61: Heating Function
FAULT FINDING AND DIAGNOSIS HEATING FUNCTION Fig. 116 Heating function Greenstar i System Compact - 6 720 813 280 (2015/07) -
Page 62: Protection Functions
FAULT FINDING AND DIAGNOSIS PROTECTION FUNCTIONS Fig. 117 Protection function Greenstar i System Compact - 6 720 813 280 (2015/07) -
Page 63: Information And Service Menus
FAULT FINDING AND DIAGNOSIS INFORMATION AND SERVICE MENUS STATUS CODES Status Fault During normal boiler operation various Status codes can be displayed by codes codes pressing the button. First Safety timing error The first screen of the Information menu displays the current Status 262 &... -
Page 64: Selecting The Information Menu
FAULT FINDING AND DIAGNOSIS 8.4.1 SELECTING THE INFORMATION MENU Status Fault codes codes The Information Menu is a "read only" menu. Information about the boiler is displayed here, some of the values are updated in real time to give the No pressure variation detected after switching pump current status of the boiler. -
Page 65: Selecting Service Menus
FAULT FINDING AND DIAGNOSIS 8.4.2 SELECTING SERVICE MENUS Current status Every operation and mode of the 1. Press and hold buttons together for one second, the boiler has a related boiler status code. display will show Menu 1. The boiler status code is displayed on the screen as a three figure number. -
Page 66: Menu 1 - System Parameters
FAULT FINDING AND DIAGNOSIS 8.4.3 MENU 1 - SYSTEM PARAMETERS 2.1d Pump speed setting This function is only available when Initially Menu 1 will be displayed, but will contain no options. parameter 2.1C is set to 0. 1 = Min. and Max. speed can be Menu 1 options will appear on the display when the Intelligent Solar changed manually Module ISM1 is installed on the Greenstar i System Compact... -
Page 67: Reset To Factory Settings
FAULT FINDING AND DIAGNOSIS 8.4.5 RESET TO FACTORY SETTINGS To reset any or all changes made in menu 2 back to the factory defaults setting: °C reset °F Menu 1 NOTICE: Menu 3 ▶ Any changes made in Menu 3 are not reset via these actions. -
Page 68: Using The Test Menu
FAULT FINDING AND DIAGNOSIS 8.4.7 USING THE TEST MENU TESTING THE COMPONENT This menu enables the testing of the functionality of components in an ▶ Select a component to test. ON/OFF mode.The duration of each test is limited to 30 seconds. ▶... - Page 69 FAULT FINDING AND DIAGNOSIS RESETTING THE TEST COMPONENT After completing the test: Test ▶ Press the button, the value 1 will flash. Igniter test. The igniter will spark for a maximum ▶ Press the arrow button, the value will change to a flashing 0. Checking the igniter of 30 seconds.
-
Page 70: Fault Codes
FAULT FINDING AND DIAGNOSIS FAULT CODES Should a fault develop with this boiler (or the system), the boiler will enter a locking or blocking condition, and fault code information will be generated as described in this section. Locking error The boiler display will flash a warning triangle and fault code. At the same time a (static) cause code will also be displayed. Manual intervention is required following clearance of the fault: ▶... - Page 71 FAULT FINDING AND DIAGNOSIS Cause Fault codes codes Description Reset type Possible cause 237 - 239 242 - 256 Internal error Call Worcester, Bosch Group Technical helpline 0330 123 3366 Sensor test failed Reset button On power up all safety sensors are checked. Check has failed.
- Page 72 NOTES Greenstar i System Compact - 6 720 813 280 (2015/07)
- Page 73 NOTES Greenstar i System Compact - 6 720 813 280 (2015/07)
- Page 76 WORCESTER, BOSCH GROUP: TECHNICAL SUPPORT: 0330 123 3366 APPOINTMENTS: 0330 123 9339 SPARES: 0330 123 9779 LITERATURE: 0330 123 9119 TRAINING: 0330 123 0166 SALES: 0330 123 9669 Worcester, Bosch Group Cotswold Way, Warndon, Worcester WR4 9SW. Tel. 0330 123 9559 Worcester, Bosch Group is a brand name of Bosch Thermotechnology Ltd.
Need help?
Do you have a question about the 27i System Compact and is the answer not in the manual?
Questions and answers