Table of Contents
Advertisement
Quick Links
Advertisement
Table of Contents

Subscribe to Our Youtube Channel
Related Manuals for VESTEL BMA-407 I


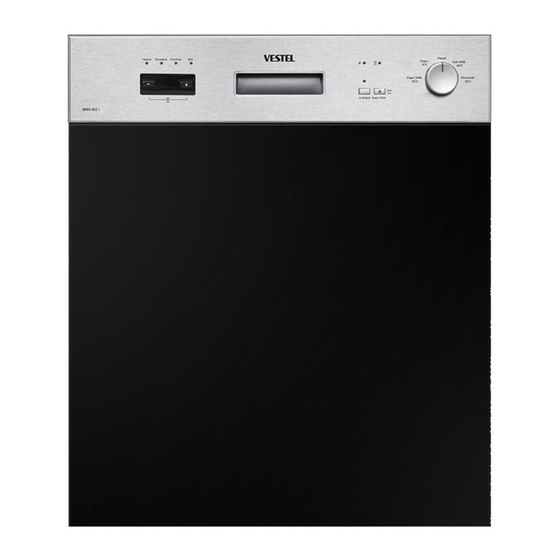
Summary of Contents for VESTEL BMA-407 I
- Page 1 BMA-407 I...
- Page 3 Your device will serve you for long years as long as you display the necessary care and maintenance. We hope you enjoy using your device. This product was manufactured in environmentally friendly VESTEL BEYAZ EŞYA A.Ş. facilities with no harm to the nature.
-
Page 4: Table Of Contents
Contents Safety Warnings ...................1 Safety Information to be Followed While Using the Appliance ..1 Safety Information to be Followed During Installation ....5 Water Connections ................6 Water Inlet Hose ...................6 Water Discharging Hose ...............6 Technical Specifications ...............11 General Appearance ................12 BeforeFirst Use ...................13 Preparing The Machine For Use ............13 Importance of water softening system .......... - Page 5 Filters ....................27 Spray Arms ..................28 Hose Filter ................... 28 Troubleshooting ...................29 Things To Be Done In Case Of Simple Failures ......33...
-
Page 6: Safety Warnings
Safety Information • Connect the appliance to AC current and grounded soc- Safety Information ket. Manufacturer shall not be To Be Followed While responsible for damages that Using the Appliance may result from usage without • Please keep this operation grounding. - Page 7 cable is damaged, • Using accessories and repla- cement parts not recommen- -If the appliance is dropped, it has ded by the manufacturer may signs of visible damage or it does cause appliance damage and not work properly, injuries -If the appliance and electrical •...
- Page 8 before. Break the lock of your • Check if your appliance or its old appliances, cut the power packaging has damages. Ne- cable and remove the plug ver operate an appliance with from the cable to prevent such any kind of damages. Consult situations.
- Page 9 your appliance as there is a risk • Place dishes such as bowls, for explosion. glasses and pots in the dish- washer with their openings • Before washing plastic objects facing down. in your appliance, check if they are suitable for washing in •...
-
Page 10: Safety Information To Be Followed During Installation
programme. In order not to da- spot for the installation. mage automatic door opening • Make sure appliance installa- mechanism, do not attempt to tion and electricity-water con- close the door for a couple of nections are performed in line minutes. -
Page 11: Water Connections
screw supplied with the app- liance must be performed by a qualified electrician using a 10 mm grounding cable to be purchased by the customer. • The location of the screw whe- re grounding cable need to be connected is shown with a yel- low grounding label behind the appliance. - Page 12 transformer on the line. The changed after con-nections are appliance must not be plug- made. ged during installation. • Do not hold the door or cont- • Always use the covered plug rol panel to move the appli- supplied with the appliance. ance.
- Page 13 • Turn off the inlet tap after each washing programme for the safety of your appliance. NOTE:Secure hoses are used in some models. Secure hoses inc- lude dangerous voltage. Do not cut secure hoses. Do not bend or twist them. WARNING:Do not use a disc-harge hose longer than 4m.
- Page 14 Safety Information to be Fol- are not covered by the war- lowed During Cleaning or ranty. Maintenance • If you need to carry the pro- • Clean your appliance regularly duct, keep it in upright position as explained in "Cleaning and and hold the back side.
- Page 15 Limitation of Liability • Some types of sensitive glass, porcelain with decora- All technical information, ope- tive prints, crystals, non-heat- rating instructions, operation resistant adhesive forks and and maintenance of the device knives, lead crystal glasses, in this manual contain the latest kitchen boards, objects manu- information about your applian- factured with synthetic fibre .
-
Page 16: Technical Specifications
Technical Specifications Model BMA-407 I Capacity 12 place settings Height 820 mm - 870 mm Width 598 mm Depth 570 mm Net Weight 41 kg Electricity input 220-240 V, 50 Hz Total Power 1900 W Heating Power 1800 W Pump Power... -
Page 17: General Appearance
General Appearance 1. Upper basket with racks 2. Upper spray arm 3. Lower basket 4. Lower spray arm 5. Filters 6. Rating plate 7. Control Panel 8. Detergent and rinse-aid dispenser 9. Cutlery basket 10. Salt dispenser 11. Upper basket track latch 12. -
Page 18: Beforefirst Use
Before First Use Remove the salt container cap by turning it counter-clockwise ( Picture1 and 2 ) . • Check if electricity and supply water pro- perties are in compliance with values spe- cified in the installation instructions. • Remove all packaging material in the appliance. -
Page 19: Adjustment Of Water Hardness
Test Strip Washing efficiency of the appliance depends on the softness of washing water. There- fore, your appliance has a system to decrease the hardness of the mains water. Washing efficiency will increase if the system is set correctly. Find out the hardness of mains water by using the test strip (if available) to set the system. -
Page 20: Detergent Use
Detergent Use In accordance with the level determined on the test strip, perform the water hard- Use detergents produced just for dishwas- ness adjustment of your appliance as hers. specified below. Powder, liquid and tablet detergents are available in the market produced specially for your dishwasher. - Page 21 Open the detergent container of your dishwasher to fill detergent. Use powder detergent for slightly dirty dishes and in programmes without pre-wash (slightly dirty glasses 19, dirty glasses 29). Start your appliance by adding 5 cm3 powder detergent in the container marked with a on the container shown in the figure.
-
Page 22: Filling And Adjusting Rinse Aid
WARNING: If you experience a problem due to the use of such detergents that you have not experienced before, contact the detergent manufacturer. You can find con- tact details on packaging. When you give up using combined detergents; • Fill in salt and rinse aid containers. •... -
Page 23: Placing Dishes Into Dishwasher
Placing Dishes into Dishwas- Unloading Washed Dishes It is recommended to unload the bottom basket first in order to prevent water drop- Placing dishes correctly will allow you to lets to fall on dishes on the bottom basket get the best of your appliance in terms of while unloading the dishwasher. -
Page 24: Top Basket
Top basket height adjustment while Top Basket it is full Rack with height adjustment These racks are designed to increase the capacity of top basket. You can place your cups and glasses on these racks. Thanks to adjustable feature of the racks, you can place glasses of different sizes under the racks. -
Page 25: Lower Basket
Lower Basket Folding Racks Folding racks consist of four parts in order to let you place big items more easily such as pots, pans, etc. If desired, each part can be folded separately in order to obtain larger space. -
Page 26: Alternative Basket Placement
Alternative Basket Placement Top Basket Important Note for Test Laboratories For detailed information about perfor- mance tests, you can contact us via the e-mail below; Faulty loads dishwasher@standardtest.info Please include the model name and serial number (20 digits) of the appliance to be tested in your request e-mail. -
Page 27: Programme Definition
Programme Definition Programme No Reference Programme names Quick 30 min. Express 50’ min. Intensive and temperatures 40°C 65° C 65° C Type of food coffee, milk, coffee, milk, soups, sauces, soups, sauces, waste tea, cold tea, cold pasta, eggs, pasta, eggs, meats, meats, pilaf, potato and... -
Page 28: Programme Selection And Operating The Machine
PROGRAMME SELECTION AND OPERATING THE MACHINE Operating the Machine of the programmes that you have select- 1. Remaining Time Indicator ed and reduce the energy and water con- Remaining Time Indicator shows the dura- sumption by using half load electricity and tion of the programmes and the remaining water (see programme listing p 24) time during the programme flow. - Page 29 5. On/Off Programme Selection But- It cuts off the energy of the machine when in off position In other positions, the ma- chine is energised and programme selec- tion can be performed. 6 Salt Missing Warning Indicator Check the salt missing warning indicator light on the display to have an idea wheth- er the softening salt in your machine is enough.
-
Page 30: Operating The Machine
Operating the Machine When the programme is started the light on the Start/Pause goes off and Washing light is lit. By rotating the programme selection button, energise the machine and select the After rotating the programme suitable programme. selection button and energising Start the programme by the machine, the light on pressing the Start/Pause key. -
Page 31: Cancelling The Program
Cancelling the Programme If you would like cancel a programme while a washing programme is running on: Press and hold the Start/ Pause key for 3 seconds. After 3 seconds, programme cancellation step starts and the water inside the machine is discharged for 30 seconds. -
Page 32: Filters
Cleaning and Maintenance a. Micro Filter b. Coarse Filter When the appliance is regularly cleaned, c. Metal/Plastic Filter its service life will increase and the possi- bility of frequently experienced problems Turn the filter assembly counter-clockwise will be minimized. to remove and clean. (picture 1 ) Pull and remove metal/plastic filter. -
Page 33: Spray Arms
Hose Filter Never use the dishwasher without filters. • Failure to install filters correctly will redu- The filter on water inlet hose will prevent ce the effectiveness of washing. contamination (sand, clay, etc.) that may • Filter cleaning is very important in terms come from city network or your plumbing. -
Page 34: Troubleshooting
When you notice an abnormal situation in your appliance, you may attempt to troub- leshoot according to the following descriptions. If your appliance does not still operate properly, contact to Vestel Call Center. You may access the authorized services list from the web site. - Page 35 PROBLEM CAUSE SOLUTION Dishes are not placed correctly. Place dishes correctly. Vibration and impact Spray arm hits dishes. sounds during washing. Spray arms may not be Install spray arms. installed. Sprayed water does not Place dishes properly for reach these areas. them not to block each Dishes are leaning against other.
- Page 36 PROBLEM CAUSE SOLUTION Power cut. Wait for the power to come. Start the program by Program may be in Appliance stops during cancelling the standby standby mode. washing. mode. Check if water hose is Problem in water inlet. clogged, clean the clogging. Use required amount of Too little detergent.
- Page 37 PROBLEM CAUSE SOLUTION Mains grounding is not Have an electrician check proper. your mains grounding. Make sure kitchenware Dishes have low stainless used in the dishwasher have steel quality. sufficient stainless steel quality. Washing water salt level Dishes have rust marks. Lower value of salt setting.
-
Page 38: Things To Be Done In Case Of Simple Failures
Things To Be Done In Case Of Simple Failures Your appliance will report the cause of the error as an error code if it is in failure mode. Error codes will be displayed on the screen of your appliance. Following chart shows these error codes, their definitions and points to be checked. - Page 39 Product Information Slip Manufacturer's name or trademark VESTEL BMA-407 I Product Model Capacity Energy efficiency class Annual energy consumption (AEC) (kWh/year) * Standard cleaning cycle energy consumption (Et) 0,90 Off mode power consumption (W) 0,50 On mode power consumption (W) 1.00...
- Page 40 Disposal of the Appliance in an 1.To terminate the contract by stating that Environmental Friendly Manner he is ready to return the sold good, 2.To request a discount on the sale price This symbol on the appliance or on the packaging of the appliance proportional to the defect and keep the indicates that the appliance shall defective good, against the Seller;...
- Page 41 52221982 R24-1...
Need help?
Do you have a question about the BMA-407 I and is the answer not in the manual?
Questions and answers