
Related Manuals for Alienware AW3418DW


Summary of Contents for Alienware AW3418DW
- Page 1 Alienware AW3418DW/AW3418HW Monitor User’s Guide Model: AW3418DW/AW3418HW Regulatory model: AW3418DWb/AW3418HWb...
- Page 2 Notes, cautions, and warnings NOTE: A NOTE indicates important information that helps you make better use of your computer. CAUTION: A CAUTION indicates potential damage to hardware or loss of data if instructions are not followed. WARNING: A WARNING indicates a potential for property damage, personal injury, or death.
-
Page 3: Table Of Contents
Contents About your monitor ......5 Package contents ........5 Product features . - Page 4 Connecting the computer ......28 Removing the monitor stand ......29 VESA wall mounting (optional) .
-
Page 5: About Your Monitor
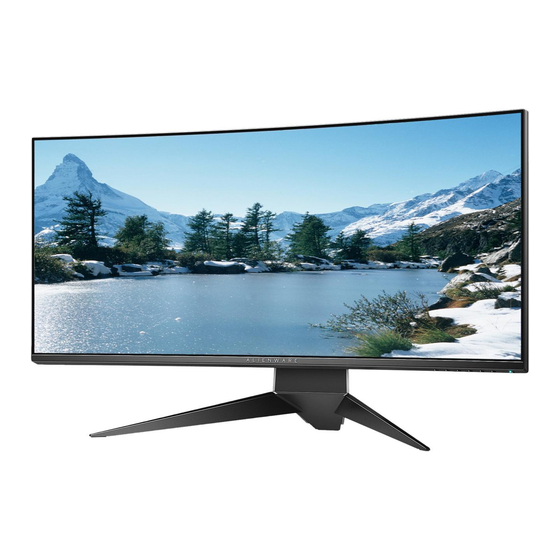
About your monitor Package contents Your monitor ships with the components shown below. If any component is missing, contact Dell technical support. For more information see Contact Dell. NOTE: Some items may be optional and may not ship with your monitor. Some features or media may not be available in certain countries. - Page 6 Power cable (varies by country) DisplayPort cable Mini-DisplayPort to DisplayPort cable USB 3.0 upstream cable (Enables the USB ports on the monitor) • Drivers and Utilities media • Quick Setup Guide • Safety, Environmental, and Regulatory Information About your monitor...
-
Page 7: Product Features
• On-Screen Display (OSD) adjustments for ease of set-up and screen optimization. • AW3418DW and AW3418HW offer six preset modes including FPS (First- Person Shooter), RTS (Real-Time Strategy), RPG (Role-Playing Game) and three customizable game modes for user's own preference. -
Page 8: Identifying Parts And Controls
Identifying parts and controls Front view Label Description Cable-management slot (on the front side of the stand) Function buttons (For more information, see Operating the monitor) Power On/Off button (with LED indicator) About your monitor... -
Page 9: Back View
Back view Back view with monitor stand Label Description VESA mounting holes (100 mm Wall mount monitor using VESA- x 100 mm - behind attached compatible wall mount kit (100 mm x VESA Cover) 100 mm). Lighting dock When the stand riser is attached to the monitor, the dock supplies power to the light on the stand. -
Page 10: Rear And Bottom View
Rear and bottom view Rear and bottom view without monitor stand Label Description Power connector Connect the power cable (shipped with your monitor). Line-out port Connect your speakers. NOTE: This port does not support headphones. DisplayPort Connect your computer with DisplayPort- DisplayPort or Mini-DisplayPort-DisplayPort cable (shipped with your monitor). -
Page 11: Monitor Specifications
NOTE: The factory setting is on. To change the default settings, see AlienFX Lighting Monitor specifications Flat panel specifications Model AW3418DW AW3418HW Screen type Active matrix - TFT LCD Panel technology In-Plane Switching Type Aspect ratio... - Page 12 Viewing angle 178° (vertical) typical 178° (horizontal) typical Luminance output 300 cd/m² (typical) Contrast ratio 1000 to 1 (typical) Faceplate coating Anti-Glare with 3H hardness Backlight LED edgelight system Response time 4 ms gray-to-gray Curvature 1900R (typical) 3800R (typical) Color depth 16.77 million colors Color gamut sRGB 99%, CIE1931 (73%)
-
Page 13: Resolution Specifications
(with overclock) (with overclock) Supported video modes Model AW3418DW/AW3418HW Video display capabilities 480p, 576p, 720p, 1080p, FHD (HDMI & DP playback) Preset display modes HDMI display modes (AW3418DW) Display mode Horizontal Vertical Pixel clock Sync polarity frequency frequency (MHz) (Horizontal/... - Page 14 74.25 HDTV, 1920 x 56.25 148.5 1080p HDTV, 1920 x 67.5 148.5 1080p 2560 x 1080 @ 66.64 181.25 60Hz DP Display Modes (AW3418DW) Display mode Horizontal Vertical Pixel clock Sync polarity frequency frequency (MHz) (Horizontal/ (kHz) (Hz) Vertical) VESA, 640 x 480 31.5...
- Page 15 3440 x 531.52 1440@100Hz 3440 x 559.57 1440@105Hz 3440 x 166.9 587.38 1440@110Hz 3440 x 172.5 607.2 1440@115Hz 3440 x 633.6 1440@120Hz DP display modes (AW3418HW) Display mode Horizontal Vertical Pixel clock Sync polarity frequency frequency (MHz) (Horizontal/ (kHz) (Hz) Vertical) VESA, 640 x 480 31.5...
-
Page 16: Electrical Specifications
Electrical specifications Model AW3418DW AW3418HW Video input signals • HDMI 1.4, 600 mV for each differential line, 100 ohm input impedance per differential pair • DisplayPort 1.2, 600 mV for each differential line, 100 ohm input impedance per differential pair... -
Page 17: Environmental Characteristics
4.59 kg (10.12 lb) 4.52 kg (9.96 lb) Front frame gloss Black Frame - 20 gloss unit (max.) Environmental characteristics Model AW3418DW AW3418HW Compliant standards • Arsenic-free glass and Mercury-free for the panel only Temperature Operating 0 °C to 40 °C (32 °F to 104 °F) Non-operating •... -
Page 18: Power Management Modes
This is referred to as Power save mode*. If the computer detects input from the keyboard, mouse, or other input devices, the monitor automatically resumes to function. The following table shows the power consumption and signaling of this automatic power saving feature. AW3418DW VESA Horizontal Vertical... -
Page 19: Pin Assignments
Pin assignments DisplayPort connector Pin number 20-pin side of the connected signal cable ML0(p) ML0(n) ML1(p) ML1(n) ML2(p) ML2(n) ML3(p) ML3(n) AUX(p) AUX(n) Re-PWR +3.3 V DP_PWR About your monitor | 19... -
Page 20: Plug And Play Capability
HDMI connector Pin number 19-pin side of the connected signal cable TMDS DATA 2+ TMDS DATA 2 SHIELD TMDS DATA 2- TMDS DATA 1+ TMDS DATA 1 SHIELD TMDS DATA 1- TMDS DATA 0+ TMDS DATA 0 SHIELD TMDS DATA 0- TMDS CLOCK+ TMDS CLOCK SHIELD TMDS CLOCK-... -
Page 21: Universal Serial Bus (Usb) Interface
Universal Serial Bus (USB) interface This section gives you information about the USB ports that are available on the monitor. NOTE: This monitor is Super-Speed USB 3.0 compatible. Transfer speed Data rate Power consumption* Super-speed 5 Gbps 4.5 W (Max, each port) High speed 480 Mbps 4.5 W (Max, each port) -
Page 22: Usb Downstream Connector
USB downstream connector Pin number 9-pin side of the connector SSRX- SSRX+ SSTX- SSTX+ USB ports • One upstream - rear • Two downstream - rear • Two downstream - bottom • Power charging port - the port with battery icon; supports fast current charging capability if the device is BC1.2 compatible. -
Page 23: Lcd Monitor Quality And Pixel Policy
LCD monitor quality and pixel policy During the LCD Monitor manufacturing process, it is not uncommon for one or more pixels to become fixed in an unchanging state which are hard to see and do not affect the display quality or usability. For more information on Dell Monitor Quality and Pixel Policy, see www.dell.com/support/monitors. -
Page 24: Setting Up The Monitor
Setting up the monitor Attaching the stand NOTE: The stand is not installed at the factory when shipped. NOTE: The following instructions are applicable only for attaching the stand that was shipped with your monitor. If you are attaching a stand that you purchased from any other source, follow the set up instructions that were included with the stand. - Page 25 3. Gently lift up the monitor by holding it firmly on both sides. 4. Place the monitor on the foam and lift the cover from the monitor. Setting up the monitor | 25...
- Page 26 5. Place the monitor on the foam with the screen facing down. 6. Attach the stand riser till it snaps into place. 26 | Setting up the monitor...
- Page 27 7. Connect the necessary cables to the monitor, as shown in the illustration, and route the cables through the cable-management slot on the stand riser. a. Power cable b. DisplayPort cable or Mini-DisplayPort to DisplayPort cable c. HDMI cable (optional, cable not included) d.
-
Page 28: Connecting The Computer
Connecting the computer WARNING: Before you begin any of the procedures in this section, follow the Safety instructions. NOTE: Do not connect all cables to the computer at the same time. To connect your monitor to the computer: 1. Connect the other end of the connected DisplayPort (or Mini-DisplayPort to DisplayPort), or HDMI cable to your computer. -
Page 29: Removing The Monitor Stand
Removing the monitor stand NOTE: To prevent scratches on the LCD when removing the stand, ensure that the monitor is placed on a soft, clean surface. NOTE: The following instructions are applicable only for attaching the stand that was shipped with your monitor. If you are attaching a stand that you purchased from any other source, follow the set up instructions that were included with the stand. - Page 30 6. Press and hold the stand release button. 7. Lift the stand riser up and away from the monitor. 30 | Setting up the monitor...
-
Page 31: Vesa Wall Mounting (Optional)
5. Mount the monitor on the wall. For more information, see the documentation that shipped with the wall mounting kit. NOTE: For use only with UL-listed wall mount bracket with minimum weight or load bearing capacity of 29.1 kg (AW3418DW)/27.6 kg (AW3418HW). Setting up the monitor... -
Page 32: Operating The Monitor
Operating the monitor Power on the monitor Press the Power button to turn on the monitor. Using the front-panel controls Use the control buttons on the front of the monitor to adjust settings. The following table describes the front-panel buttons: Front-panel button Description Use this button to choose from a list of preset... -
Page 33: Front-Panel Button
Use this button to directly access the Brightness/Contrast menu. Shortcut key/ Brightness/ Contrast Use the MENU button to launch the On-Screen Display (OSD). See Accessing the menu system. Menu Use this button to exit the OSD main menu. Exit Front-panel button Use the buttons on the front of the monitor to adjust the image settings. -
Page 34: Using The On-Screen Display (Osd) Menu
Using the On-Screen Display (OSD) menu Accessing the menu system NOTE: If you change the settings and then either proceed to another menu or exit the OSD menu, the monitor automatically saves those changes. The changes are also saved if you change the settings and then wait for the OSD menu to disappear. - Page 35 Icon Menu and Description submenus Game Use this menu to personalize your visual gameplay experience. Preset Modes Allows you to choose from a list of preset color modes. • Standard: Loads the monitor's default color settings. This is the default preset mode. •...
- Page 36 Preset Modes • ComfortView: Decreases the level of blue light emitted from the screen to make viewing more comfortable for your eyes. WARNING: The possible long-term effects of blue light emission from the monitor may cause personal injury such as digital eye strain, eye fatigue and damage to the eyes.
- Page 37 Game Enhance The feature offers three available functions to enhance your Mode gameplay experience. • Off Select to disable the functions under Game Enhance Mode. • Timer Allows you to disable or enable the timer at the upper left corner of the display. The timer shows the time elapsed since the game starts.
- Page 38 The function increases your displays refresh rate. Refresh Rate to adjust the frequency in 5 Hz increments, from 105 to 120 Hz (for AW3418DW) or 150 to 160 Hz (for AW3418HW). After you specify the refresh rate, the following message...
- Page 39 Brightness/ Use this menu to activate Brightness/Contrast adjustment. Contrast Brightness Brightness adjusts the luminance of the backlight. Press the button to increase the brightness and press the button to decrease the brightness (min. 0 / max. 100). Contrast Adjust the Brightness first, and then adjust the Contrast only if further adjustment is necessary.
- Page 40 Input Source Use the Input Source menu to select between the different video signals that may be connected to your monitor. HDMI Select the HDMI input when you are using the HDMI connector. Select the DP input when you are using the DisplayPort (DP) connector.
- Page 41 AlienFX Use this menu to adjust the Alienware logo lighting, Triad Lighting lights on the back and stand of the monitor, downlights on the bottom of the monitor, and the power button. Before making any adjustments, select any or all of these 4 zones from the submenus.
- Page 42 All Zones To specify an LED lighting color for the selected area, select On and press the button to highlight the Custom Color Zone 1: Back option. Zone 2: Stand Zone 3: Downlights Zone 4: Power Button Then make a selection from the list of 20 available colors by using the buttons.
- Page 43 The following table depicts the color number and the RGB codes used for the 20 LED colors. To turn off the AlienFX lights, select Off. NOTE: These functions are only available when Spectrum is disabled. Operating the monitor | 43...
- Page 44 Spectrum When you select On, the AlienFX lights of 4 zones glow and change colors in sequence of spectrum: red, orange, yellow, green, blue, indigo, and violet. NOTE: When the function is On, the functions above are deactivated. Reset AlienFX Select this option to restore default lighting settings.
- Page 45 Menu Select this option to adjust the settings of the OSD, such as, the languages of the OSD, the amount of time the menu remains on screen, and so on. Language Set the OSD display to one of the eight languages (English, Spanish, French, German, Brazilian Portuguese, Russian, Simplified Chinese, or Japanese).
- Page 46 Personalize Shortcut Key 1 Allows you to choose a feature from Preset Modes, Overclock Refresh Rate, Dark Stabilizer, Brightness/ Shortcut Key 2 Contrast, Game Enhance Mode, Input Source, or Volume Shortcut Key 3 and set it as a shortcut key. Shortcut Key 4 Reset Restores shortcut keys to factory defaults.
-
Page 47: Osd Warning Message
2. Right-click on the desktop and click Screen Resolution. 3. Click the Dropdown list of the Screen Resolution and select 3440 x 1440 (for AW3418DW) or 2560 x 1080 (for AW3418HW). 4. Click OK. In Windows 10: 1. Right-click on the desktop and click Display settings. -
Page 48: Using The Tilt, Swivel, And Vertical Extension
If you are using a non-Dell computer (laptop or desktop): • Go to the support site for your computer and download the latest graphic drivers. • Go to your graphics card website and download the latest graphic drivers. Using the tilt, swivel, and vertical extension NOTE: The following instructions are applicable only for attaching the stand that was shipped with your monitor. -
Page 49: Vertical Extension
Vertical extension NOTE: The stand extends vertically up to 130 mm. The figure below illustrates how to extend the stand vertically. Operating the monitor | 49... -
Page 50: Troubleshooting
Troubleshooting WARNING: Before you begin any of the procedures in this section, follow the Safety instructions. Self-test Your monitor provides a self-test feature that allows you to check whether your monitor is functioning properly. If your monitor and computer are properly connected but the monitor screen remains dark, run the monitor self-test by performing the following steps: 1. -
Page 51: Built-In Diagnostics
Built-in diagnostics Your monitor has a built-in diagnostic tool that helps you determine if the screen abnormality you are experiencing is an inherent problem with your monitor, or with your computer and video card. NOTE: You can run the built-in diagnostics only when the video cable is unplugged and the monitor is in self-test mode. -
Page 52: Common Problems
Common problems The following table contains general information about common monitor problems you might encounter and the possible solutions: Common What you Possible solutions symptoms experience No Video/ No picture • Ensure that the video cable connecting the Power LED off monitor and the computer is properly connected and secure. - Page 53 Brightness Picture too dim • Reset the monitor to factory settings. Problems or too bright • Adjust brightness & contrast controls via OSD. Geometric Screen not • Reset the monitor to factory settings. Distortion centered correctly Horizontal/ Screen has one •...
-
Page 54: Product Specific Problems
Wrong Color Picture color not • Change the settings of the Preset Modes in the good Game menu OSD depending on the application. • Adjust R/G/B value under Custom Color in Game menu OSD. • Run the built-in diagnostics. Image retention Faint shadow •... -
Page 55: Universal Serial Bus (Usb) Specific Problems
Universal Serial Bus (USB) specific problems Specific What you Possible solutions symptoms experience USB interface is USB peripherals • Check that your monitor is turned On. not working are not working • Reconnect the upstream cable to your computer. • Reconnect the USB peripherals (downstream connector). -
Page 56: Appendix
Appendix WARNING: Safety instructions WARNING: Use of controls, adjustments, or procedures other than those specified in this documentation may result in exposure to shock, electrical hazards, and/or mechanical hazards. For information on safety instructions, see the Safety, Environmental, and Regulatory Information (SERI). FCC notices (U.S.
Need help?
Do you have a question about the AW3418DW and is the answer not in the manual?
Questions and answers