Table of Contents
Advertisement
AGA OIL-FIRED COOKER MODELS
(OC, (2 Oven) 2=OE, (4 Oven) =4=)
User Guide &
Installation Instructions
CAUTION: THIS UNIT IS HEAVY, PROPER EQUIPMENT AND ADEQUATE MANPOWER MUST BE USED IN MOVING THE
RANGE TO AVOID DAMAGE TO THE UNIT OR THE FLOOR.
REMEMBER, when replacing a part on this appliance, use only spare parts that you can be assured conform to the safety and
performance specification that we require.
DO NOT use reconditioned or copy parts that have not been clearly authorised by AGA.
PLEASE READ THESE INSTRUCTIONS BEFORE USING THIS APPLIANCE
AND KEEP IN A SAFE PLACE FOR FUTURE REFERENCE.
For use in GB-IE
05/17 EINS 510949
Advertisement
Table of Contents

Subscribe to Our Youtube Channel
Related Manuals for AGA OC


Summary of Contents for AGA OC
-
Page 1: User Guide
REMEMBER, when replacing a part on this appliance, use only spare parts that you can be assured conform to the safety and performance specification that we require. DO NOT use reconditioned or copy parts that have not been clearly authorised by AGA. PLEASE READ THESE INSTRUCTIONS BEFORE USING THIS APPLIANCE AND KEEP IN A SAFE PLACE FOR FUTURE REFERENCE. -
Page 3: Table Of Contents
Manual control The correct oil To extinguish the burner To light the burner Fire valve resetting Operating your AGA After your AGA has been erected Beginning to cook on your AGA Roasting oven Baking oven Simmering oven Cooking guide Cooking table Oven shelves Cleaning &... -
Page 5: Health And Safety 1 10. Installation Instructions
Health and safety Consumer Protection Deep Fat Frying As a responsible manufacturer, we take care to make sure • Use a deep pan, large enough to completely cover the that our products are designed and constructed to meet the appropriate heating area. required safety standards when properly installed and used. -
Page 6: Introduction 2 11. Installation Introduction
IMPORTANT NOTICE: PLEASE READ THE ACCOMPANYING WARRANTY. Any alteration that is not approved by AGA could invalidate the approval of the appliance, operation of the warranty and could affect your statutory rights. -
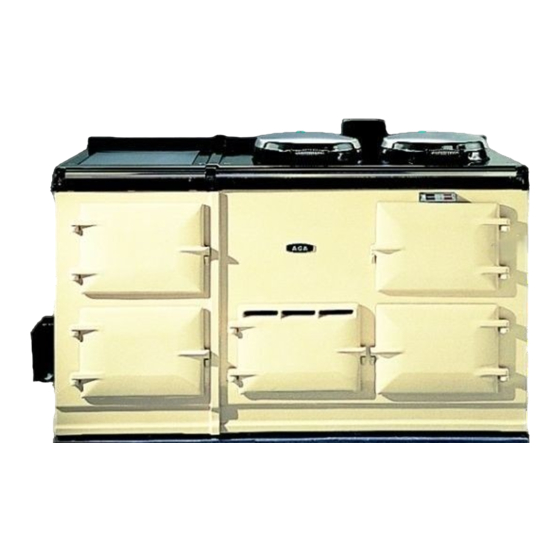
Page 7: Overview
Overview WARMING PLATE BOILING PLATE SIMMERING PLATE (4 OVEN MODEL) SIMMERING OVEN (4 ROASTING OVEN OVEN MODEL) HEAT INDICATOR SIMMERING OVEN PLATE WARMING OVEN (BAKING OVEN ON 4 OVEN MODEL) (4 OVEN MODEL) Fig. 3.1 DESN 510978... -
Page 8: Heat Indicator Fig
Fig. 4.1 Fig. 4.1 • The heat indicator above the Roasting oven door is a guide to the stored heat within the AGA, and does not directly relate to the Roasting oven centre oven temperature. • It has 3 sections black, silver and red. -
Page 9: The Correct Oil
The correct oil Oil Control Box and Transformer Fig. 4.3 OTHER GRADES OF OIL MUST NOT BE USED IN ANY CONTROL KNOB CIRCUMSTANCES. MANUAL Turn control knob fully clockwise to ‘O’ . This will cut off the oil LEVER supply to the burner which will gradually die out. LEADS TO To extinguish the burner CONTROL BOX... -
Page 10: Fire Valve Resetting
Do not worry, this is simply due to protective oil burning off the hotplates. If you can wipe the inside of the hotplate lids whilst the AGA is heating up it will avoid a film of this oil being deposited on the inside of the lids. -
Page 11: Beginning To Cook On Your Aga
Beginning to cook on your AGA Baking oven The first ‘“Golden Rule” of the AGA is to cook as much as This baking oven is a moderate heat, so is ideal for cakes, possible in the ovens - without changing your menus. This... -
Page 12: Cooking Guide
Cooking guide Cooking hints • The cooking charts are a general guide but times and temperatures may vary according to individual recipes. • Larger items may benefit from being turned. • The meat sections should be used as a general guide •... -
Page 13: Cooking Table
Simmering oven LOW MODERATE Casseroles For casseroles, stock, milk puddings and similar dishes bring to heat elsewhere on the AGA then transfer to the simmering oven (one exception is meringues). Rich fruit cakes can be Stock cooked here for a, long time on the base of the oven. -
Page 14: Oven Shelves
Oven shelves Fitting the shelves Fig. 5.1 Fig. 5.2 DESN 512403 DESN 512404 Removing the shelves Fig. 5.3 Fig. 5.4 DESN 512405 DESN 512406... -
Page 15: Cleaning & Caring For Your Cooker
- the AGA E-cloths are excellent Baked on food is more difficult to clean but can for this purpose as they are lint-free and eco-friendly. AGA... -
Page 16: Servicing
Aga engineer. Approved Aga engineers have been factory trained and always use genuine Aga spares • In the event of requiring maintenance, please call AGA Service or your authorised distributor. • Your cooker must only be serviced by a qualified engineer from AGA tor an authorised distributor. - Page 17 REMEMBER, when replacing a part on this appliance, use only spare parts that you can be assured conform to the safety and performance specification that we require. DO NOT use reconditioned or copy parts that have not been clearly authorised by AGA. PLEASE READ THESE INSTRUCTIONS BEFORE USING THIS APPLIANCE...
-
Page 18: Control Overview 4 Delivery Requirements
In particular, please ensure the control box mounted to the BS 4543: Specification for chimney for oil fired appliances. side of the AGA, fire valves, isolation valves and their line Part 1 - 3. fittings are always accessible to ensure they can be accessed J1/4/5: Provision for protection against fire and heat. -
Page 19: 12. Location
Authorised AGA Distributor who will connect up to the burner. If the control valve is fitted away from the cooker, the oil line between the valve and cooker must not exceed 1m in length. -
Page 20: Flue System
The minimum effective area of the permanent air A 127mm minimum diameter factory-made insulated vent in the outside wall must be 24.2cm2 (3.7in2) for OC, and chimney, complying to BS 4543:Part 1 - 3 may be fitted and OE models. -
Page 21: Specifications
Specifications Models OC and OCB Fig. 12.3 1330 1125 Models OCB 90 OCB 135 mm DESN 510375... - Page 22 Models OE Fig. 12.4 1478 1330 1125 DESN 510374 A...
- Page 23 Fig. 12.5 connected directly to the mains supply. Wiring diagram of low voltage electric top ALWAYS use an AGA Transformer. Tiling Where the cooker is to stand in a recess or against a wall which is to be tiled in no circumstances should the tiles overlap the cooker top plate.
- Page 24 If the oil control valve is not fitted against the cooker side panels, then the width across a recess which does not protrude beyond the front of the cooker may be reduced. • OC 1000mm • OE 1500mm A 3mm gap is required each side between the cooker top plate and adjoining work surfaces that maybe fitted.
- Page 25 Commissioning and lighting the burner NOTE: BURNER BASE ENSURE THAT: THE BASE IS LEVEL. IT CONTAINS A 6MM DEPTH OF OIL. THE BURNER SHELLS ARE SEATED PROPERLY Lighting the Burner See Fig. 12.6 Wiring diagram of low voltage electric top and Fig.
- Page 26 AGA Distributor. When the cooking loading commences, a fall in oven temperature will cause the electrical activation of the oil valve top and subsequent increase in oil flow to a high fire condition, until recovery to its idling temperature is allowed.
-
Page 27: Technical Data
13. Technical data Maximum Operating Pressure 1.8 Bar IDLING OIL cc per minute RATE - LOW FIRE Heat Input (Btu/h) 7,690 9,145 COOKING OIL cc per minute RATE - HIGH FIRE Heat Input (Btu/h) 14,550 14,550 Approximate Weekly Litres 40.0 50.9 Oil Consumption Gallons 11.2... - Page 28 Notes...
- Page 29 Notes...
- Page 30 Notes...
- Page 31 Notes...
- Page 32 For further advice or information contact your local AGA Specialist. With AGA Rangemaster’s policy of continuous product improvement, the Company reserves the right to change specifications and make modifications to the appliances described and illustrated at any time. Manufactured By...
Need help?
Do you have a question about the OC and is the answer not in the manual?
Questions and answers