
Related Manuals for dallmeier DMS 80


Summary of Contents for dallmeier DMS 80
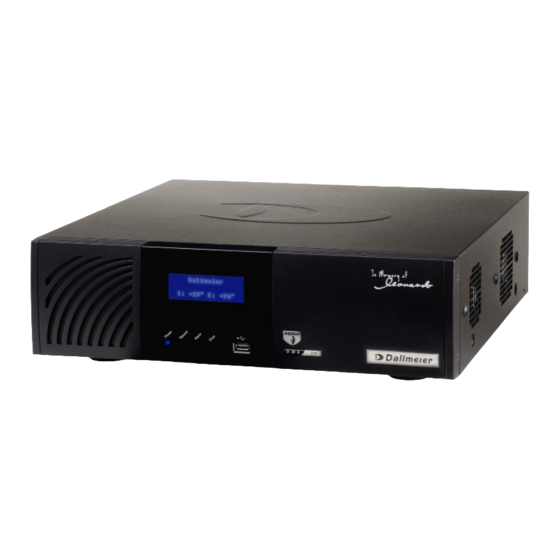
- Page 1 Configuration and Data English Hybrid audio and video recorder DMS 80 DMS 160 DMS 240 DMS 240 HSR Rev. 5.0.1 / 2010-06-22...
- Page 2 Third-party trademarks are named for information purposes only. Dallmeier electronic respects the intellectual property of third parties and always attempts to ensure the complete identification of third-party trademarks and indication of the respective holder of rights. In case that protected rights are not indicated separately, this circumstance is no reason to assume that the respective trademark is unprotected.
-
Page 3: Table Of Contents
DMS 80 / DMS 160 / DMS 240 / DMS 240 HSR Table of contens This document ....................8 Validity ......................8 Documents ......................8 Conventions ....................8 Safety instructions..................10 General instructions ...................12 Scope of delivery ..................12 Transportation and packaging ..............12 Warranty ......................12 Start and Login....................13 Basic settings....................15... - Page 4 DMS 80 / DMS 160 / DMS 240 / DMS 240 HSR 6.1.2.2 Modifications ....................34 6.1.2.3 Track types ....................34 6.1.2.4 Recording modes ..................34 6.1.3 Automatic ......................34 6.1.3.1 Recording......................35 6.1.3.2 Modifications ....................35 6.1.3.3 Track types ....................35 6.1.3.4 Recording modes ..................35 6.1.4 Change ......................36...
- Page 5 DMS 80 / DMS 160 / DMS 240 / DMS 240 HSR 6.7.1.1 Longplay tracks .....................64 6.7.1.2 Secure tracks ....................65 6.7.1.3 Fixed recording duration ................66 6.7.2 Manual ......................66 6.7.3 Automatic ......................67 Other functions....................67 6.8.1 Audio ......................67 6.8.2 Dual Streaming .....................67 6.8.3...
- Page 6 DMS 80 / DMS 160 / DMS 240 / DMS 240 HSR Relay OUT ....................101 11.1 Setting ......................101 11.2 Functions ....................101 Optional periphery ..................105 12.1 Printers......................105 12.1.1 Create printer ....................105 12.1.2 Set printer ....................107 12.2 DIS control ....................107 12.3 Storage .......................108 12.4...
- Page 7 DMS 80 / DMS 160 / DMS 240 / DMS 240 HSR Service .......................136 16.1 Activation ....................136 16.2 Update ......................136 System parameter ..................138 17.1 Default system parameters .................138 17.2 Parameter export ..................138 17.3 Parameter import ..................139 HDD replacement ..................140 18.1 Conditions ....................140...
-
Page 8: This Document
This document Validity This document applies to the hybrid audio and video recorder DMS 80 / 160 / 240 / 240 HSR. It has been produced on the basis of version 7.0.0 (software). The descriptions in this document apply to all above-mentioned models. For simplification reasons, the term “DMS”... - Page 9 DMS 80 / DMS 160 / DMS 240 / DMS 240 HSR CAUTION CAUTION indicates a hazardous situation which, if not avoided, could result in minor or moderate injury. NOTICE NOTICE indicates practices for preventing property damage, incorrect con- figurations or faulty operations.
-
Page 10: Safety Instructions
DMS 80 / DMS 160 / DMS 240 / DMS 240 HSR Safety instructions Only use this unit if it is technically in proper working order, to the intended purpose and while keeping safety and potential dangers in mind. Qualified personnel Installation, mounting, connection, commissioning and configuration of the unit may only be carried out by qualified personnel. - Page 11 DMS 80 / DMS 160 / DMS 240 / DMS 240 HSR Burnt smell If you notice burnt smell or formation of smoke from the unit, immediately disconnect it from the power supply (pull out the power plug). Contact the sales partner responsible for your area.
-
Page 12: General Instructions
Transportation and packaging Store the original packaging for transportation at a later date. Dallmeier electronic is not responsible for damage resulting from unprofessional/improper transportation. The goods should only be shipped in their original packaging. -
Page 13: Start And Login
DMS 80 / DMS 160 / DMS 240 / DMS 240 HSR Start and Login Observe the documentation Commissioning. It contains detailed instructions on moun- ting, connection assignment and commissioning of the device. ¾ Connect the recorder and relevant peripherals to the voltage supply. - Page 14 DMS 80 / DMS 160 / DMS 240 / DMS 240 HSR The graphical operation and configuration interface will be displayed. Fig. 4-3 www.dallmeier.com...
-
Page 15: Basic Settings
DMS 80 / DMS 160 / DMS 240 / DMS 240 HSR Basic settings Language The graphical user interface can be displayed in various languages. ¾ Open the Language dialog using Setup > System > Language. Fig. 5-1 : Language dialog ¾... -
Page 16: Setting
DMS 80 / DMS 160 / DMS 240 / DMS 240 HSR ¾ Set the Datum format. ¾ Set the Time zone. ¾ Configure the system time as described on the following pages. 5.2.1 Setting The system time is provided by the internal RTC (Real Time Clock), if no external time emitter is activated. -
Page 17: System Security
For system security reasons, the number of open ports should be kept to a minimum. Ports definitely not required for Dallmeier systems are closed ex factory and can not be opened. Relevant ports are open to ensure full compatibility. Relevant ports that are not required can be closed in the System Security dialog. -
Page 18: Alarm Duration
DMS 80 / DMS 160 / DMS 240 / DMS 240 HSR 5.4.1 Alarm duration The recorder can be configured in such a way that it is set to alarm status by a Contact IN function. In this case various actions are carried out automatically. -
Page 19: Compare
DMS 80 / DMS 160 / DMS 240 / DMS 240 HSR 5.4.2.1 Compare The Compare test mode shows the results of the picture comparison (motion detection) function in four different views. The output alternates between all the analog cameras that are configured for Picture com- parison recording mode. -
Page 20: Performance
DMS 80 / DMS 160 / DMS 240 / DMS 240 HSR 5.4.2.2 Performance The Performance test mode displays the recording performance of the recorder in table form. All the tracks earmarked for recording from analog cameras will be shown on the first line (track 1 = a, track 2 = b, etc.). -
Page 21: Keyboard Mode
DMS 80 / DMS 160 / DMS 240 / DMS 240 HSR 5.4.3 Keyboard mode If an external keyboard (TA-24 MS) is used for track saving and camera switching, the TAC-18 / TA-24 / TA-24 MS entry in the Keyboard Mode field must be selected. -
Page 22: Playback Monitor
DMS 80 / DMS 160 / DMS 240 / DMS 240 HSR Fig. 5-13 : Single split reply with scaling to 4 CIF Please note that the Options dialog can be opened even during playback using the context menu on the blank area of the control panel. -
Page 23: System Messages
DMS 80 / DMS 160 / DMS 240 / DMS 240 HSR 5.4.6 System messages The automatic storage of the system messages cannot be deactivated. The evaluation of these status messages is made in the Setup > System > System Messages dialog. -
Page 24: Assistant Mode
DMS 80 / DMS 160 / DMS 240 / DMS 240 HSR 5.4.7 Assistant mode Assistant mode provides a user with the setup dialogs defined for his user group in a defi- ned order. Assistant mode can be switched on in playback/live mode by clicking on Setup if it has been activated for the relevant user group. -
Page 25: Max. Recording Pause
DMS 80 / DMS 160 / DMS 240 / DMS 240 HSR 5.4.8.1 Max. recording pause The Max. recording pause function is relevant for the recording modes Motion and Contact. The function assumes an error (e. g. unsuitable configuration of motion detection or faulty contact sensor) if no recording had been triggered in a defined period. -
Page 26: Osd Texts
DMS 80 / DMS 160 / DMS 240 / DMS 240 HSR ¾ Select the Min. Storage period function (Tab). Fig. 5-18 : Recording monitoring dialog / Min. storage period tab ¾ Set the minimum storage period for the relevant cameras / tracks. - Page 27 DMS 80 / DMS 160 / DMS 240 / DMS 240 HSR Please note..the text may be 40 characters in length and be extended by inserted variables (see below)..no line breaks or special characters are possible.
-
Page 28: Logging
DMS 80 / DMS 160 / DMS 240 / DMS 240 HSR Adjust display ¾ Click in section C to adjust the display of the text box. The context menu will be displayed. Fig. 5-22 : Context menu to adjust the display ¾... -
Page 29: Recording Monitor
DMS 80 / DMS 160 / DMS 240 / DMS 240 HSR 5.4.11 Recording monitor If the Recording monitor option is activated an information field will be displayed in the live mode(see Operation documentation, part Sequencer / Live mode).This info field dis- plays recording activity, recording duration and the occupancy of the video memory (track or HDD). -
Page 30: Audio Deactivation
DMS 80 / DMS 160 / DMS 240 / DMS 240 HSR ¾ Activate the Track filter for simple export option, if required. ¾ Activate the Eject after export option, if required. ¾ Finally confirm with OK. Track filter for simple export If this option is activated the Cameras dialogue will be displayed before the execution of the export. -
Page 31: Recording Setting
DMS 80 / DMS 160 / DMS 240 / DMS 240 HSR Recording setting ¾ The complete configuration for the recording and the setting of the track mode is made in the Recoding Settings dialog. ¾ Open the dialog via Setup > Recording > Cameras. -
Page 32: Standard
DMS 80 / DMS 160 / DMS 240 / DMS 240 HSR 6.1.1 Standard In the Standard track mode every camera / track is assigned a particular part of the entire video memory manually (track size). Thereby static tracks will be defined. When the size of one track is modified the recordings in all tracks have to be deleted. -
Page 33: Recording Modes
DMS 80 / DMS 160 / DMS 240 / DMS 240 HSR Reference track Only individual camera images are saved in the reference track. These can be used to compare the current camera settings and positions with the original situation. Reference tracks are therefore not used for recording purposes and neither can they be played back (see documentation Operation). -
Page 34: Modifications
DMS 80 / DMS 160 / DMS 240 / DMS 240 HSR 6.1.2.2 Modifications The size of the tracks can be increased by adding memory units anytime. The recordings do not have to be deleted. The size of the tracks can be decreased by removing memory units anytime. -
Page 35: Recording
DMS 80 / DMS 160 / DMS 240 / DMS 240 HSR Fig. 6-4 : Track mode automatic 6.1.3.1 Recording The recordings will be saved into a memory unit of the corresponding track continuously. When the memory unit is filled the track will be assigned the next empty memory unit. It will then be used for the current recording. -
Page 36: Change
DMS 80 / DMS 160 / DMS 240 / DMS 240 HSR Dallmeier IP and HD cameras • Permanent • Motion • Contact • Switching through timer Other IP cameras • Permanent • Contact 6.1.4 Change The track mode should be set before the recording configuration. In principle it can be changed anytime, whereat all recordings have to be deleted. -
Page 37: Connection
DMS 80 / DMS 160 / DMS 240 / DMS 240 HSR The default settings will be adopted for all connected cameras. The memory will be assi- gned in equal parts to every camera. Recording (permanent) will be activated for all con- nected cameras. -
Page 38: Other Ip Cameras
DMS 80 / DMS 160 / DMS 240 / DMS 240 HSR Fig. 6-8 : Dallmeier IP camera ¾ Select the Login tab. ¾ Enter the IP-Address. ¾ Enter the Password. ¾ Enter the User name, if required. ¾ Confirm with OK. -
Page 39: Basic Configuration
DMS 80 / DMS 160 / DMS 240 / DMS 240 HSR ¾ Enter the User name if required. ¾ Enter the Password. Before saving the settings have to be checked by transferring a test image. ¾ Click test. When the transmission is successful, the test image will be displayed in a separate dialog. -
Page 40: Camera Timer
DMS 80 / DMS 160 / DMS 240 / DMS 240 HSR ¾ Check the image. ¾ Confirm with OK. Camera name The camera name may consist of 2 x 8 alphanumeric characters (connected with a minus sign). ¾ Left-click on a camera button. - Page 41 DMS 80 / DMS 160 / DMS 240 / DMS 240 HSR ¾ Select setting of active or inactive periods (A). Fig. 6-12 : Inactive times ¾ Mark one period (15 minutes) with a left-click. ¾ Mark several periods by drawing a rectangle (B).
-
Page 42: Tracks Timer
DMS 80 / DMS 160 / DMS 240 / DMS 240 HSR The Exception will replace, not complement, the Standard setting of the relevant day. 6.3.3 Tracks timer The Tracks Timer also allows the time-based recording. Unlike the camera timer the Tracks Timer is always referring to a track or track type. -
Page 43: Private Zones
DMS 80 / DMS 160 / DMS 240 / DMS 240 HSR Fig. 6-15 : Areas dialog / Active Areas ¾ Select the relevant camera in the Cameras section. ¾ Ensure that the Active Areas option is selected. ¾ Select the setting of Inactive areas. - Page 44 DMS 80 / DMS 160 / DMS 240 / DMS 240 HSR Fig. 6-17 : Areas dialog / Private Zones ¾ Ensure that the Private Zones option is selected. ¾ Mark one or more private zones by drawing a rectangle.
-
Page 45: Recording Mode
DMS 80 / DMS 160 / DMS 240 / DMS 240 HSR Recording mode Recording configuration is done separately for every camera / track. Note that the Standard track mode differs basically from the modes manual and automa- tic in regard to the storage concept. That is why not all recordings modes are available in the Standard track mode. -
Page 46: Permanent
DMS 80 / DMS 160 / DMS 240 / DMS 240 HSR Note that one recording mode may offer different recording options depending on the ca- mera type. 6.4.1.1 Permanent In the Permanent recording mode every image sent by the camera will be recorded. -
Page 47: Motion
DMS 80 / DMS 160 / DMS 240 / DMS 240 HSR 6.4.1.2 Motion The Motion recording mode analyzes every image send by the camera. If a change of a certain proportion of the picture content is detected between two consecutive images, an image comparison event (event) has taken place. -
Page 48: Contact
DMS 80 / DMS 160 / DMS 240 / DMS 240 HSR Motion Estimate This value specifies the estimated percentage of images with motion. It affects only the estimated recording duration (Estimate) in the track. 6.4.1.3 Contact In the Contact recording mode the recording is triggered by the recorder’s contact IN func- tions. -
Page 49: Switching By Motion
DMS 80 / DMS 160 / DMS 240 / DMS 240 HSR Timer The recording is started by the contact switching. Recording is stopped After the Contact Recording Duration expired. Toggle The recording is triggered by the contact switching. It is stopped again by the same contact switching again. -
Page 50: Switching By Contact
DMS 80 / DMS 160 / DMS 240 / DMS 240 HSR Switching Duration The Switching Duration sets the minimal duration of recording with high quality. If a new motion event is detected in this period, the expiration of the Switching Duration will be re- started. - Page 51 DMS 80 / DMS 160 / DMS 240 / DMS 240 HSR ¾ In default configuration recording will always be done with the Permanent recording mode and normal video quality. ¾ Ensure that the Expert Mode option is activated. ¾ Set the Switching by timer recording mode.
-
Page 52: Standard Mode
DMS 80 / DMS 160 / DMS 240 / DMS 240 HSR ¾ Mark the relevant periods by drawing a rectangle (B). ¾ Proceed analogous for all relevant periods / recording modes. ¾ Configure Exceptions if required. ¾ Confirm with OK. -
Page 53: Motion
DMS 80 / DMS 160 / DMS 240 / DMS 240 HSR ¾ Configure Private Zones if required (see section Basic configuration). ¾ Activate / configure the Timer if required (see section Basic configuration). ¾ Activate the Use Database option if required. -
Page 54: Contact
DMS 80 / DMS 160 / DMS 240 / DMS 240 HSR Fig. 6-28 : Motion recording mode ¾ Configure the Active Areas if required (see section Basic configuration). ¾ Set the Sensitivity of the motion detection. ¾ Set the Motion Estimation for the memory calculation. - Page 55 DMS 80 / DMS 160 / DMS 240 / DMS 240 HSR Fig. 6-29 : Contact recording mode ¾ Set the Pre-Event time (see above). ¾ Configure Private Zones if required (see section Basic configuration). ¾ Activate / configure the Timer if required (see section Basic configuration).
-
Page 56: Sensor
DMS 80 / DMS 160 / DMS 240 / DMS 240 HSR 6.4.2.4 Sensor The Sensor recording mode is only relevant for devices equipped with a sensor board (e.g. DVS 600). Observe the separate documentations. Video quality The options of the video quality configuration depend on the used camera type and track mode. -
Page 57: Dallmeier Ip And Hd Cameras
DMS 80 / DMS 160 / DMS 240 / DMS 240 HSR Fig. 6-31 : Analogue cameras ¾ Set the Resolution. ¾ Set the Frame Rate. ¾ Set the Bit Rate. ¾ Activate Deinterlace if required. ¾ Confirm with OK. - Page 58 DMS 80 / DMS 160 / DMS 240 / DMS 240 HSR Fig. 6-32 : Dallmeier IP cameras ¾ Set the Resolution. ¾ Set the Frame Rate. ¾ Set the Bit Rate. ¾ Set the Bit Rate Mode. ¾ Activate Deinterlace if required.
-
Page 59: Other Ip Cameras
DMS 80 / DMS 160 / DMS 240 / DMS 240 HSR This function is not integrated in the current version. Deinterlace (see above) Encoding Mode This setting defines the standard of the audio and video compression. The current version only supports MPEG-4. -
Page 60: Standard Mode
DMS 80 / DMS 160 / DMS 240 / DMS 240 HSR Frame Rate The frame rate defines the number of individual pictures that are requested and saved eve- ry second. This value plays a major role in determining the fluidity of the playback. For an IP camera from another manufacturer, the frame rate is limited by the number of individual JPEG pictures that can be requested by the camera (see manufacturer’s documentation). -
Page 61: Other Ip Cameras
DMS 80 / DMS 160 / DMS 240 / DMS 240 HSR Fig. 6-35 : Dallmeier IP cameras ¾ Set the Resolution. ¾ Set the Frame Rate. ¾ Set the Bit Rate. ¾ Set the Bit Rate Mode. ¾ Activate Deinterlace if required. -
Page 62: Optional Configuration
DMS 80 / DMS 160 / DMS 240 / DMS 240 HSR 6.5.3 Optional configuration 6.5.3.1 Direct configuration The essential video quality settings (resolution, bit rate, frame rate) can be done directly in the Recording Settings dialog. ¾ Left-click into the relevant field. -
Page 63: B-Frames
6.5.3.3 B-Frames The option B-Fr. (B frames) is available for all Dallmeier IP cameras in the Recording Settings dialog. If the camera supports this function (Dallmeier IP cameras V. 2.3.0 or higher) it can be set to encode the images with or without B frames. -
Page 64: Video Memory
DMS 80 / DMS 160 / DMS 240 / DMS 240 HSR No recording Permanent Motion Contact Switching by motion Switching by Contact Switching by timer Fig. 6-40 : Recording buttons ¾ Proceed analogous for all relevant cameras. ¾ Finally confirm the Recording Settings dialog with OK. -
Page 65: Secure Tracks
DMS 80 / DMS 160 / DMS 240 / DMS 240 HSR ¾ Click into the field HDD% or Estimate of the camera / track. ¾ Set the size of the video memory for the track. ¾ Proceed analogous for all relevant tracks. -
Page 66: Fixed Recording Duration
DMS 80 / DMS 160 / DMS 240 / DMS 240 HSR 6.7.1.3 Fixed recording duration The Fixed recording duration option is relevant for the recording in all LP-Tracks and in all S-Tracks. A track/recording can be defined to cover a certain period normally. Various events can cause a situation when more memory capacity per image is required, e.g. -
Page 67: Automatic
DMS 80 / DMS 160 / DMS 240 / DMS 240 HSR 6.7.3 Automatic In the automatic track mode the entire video memory will be segmented into memory units automatically. When required, every camera / track is assigned one or more memory units automatically (dynamic track size). -
Page 68: Sedor
DMS 80 / DMS 160 / DMS 240 / DMS 240 HSR Fig. 6-47 : Dual Streaming activation ¾ Activate the Dual Streaming function with the appropriate checkbox. ¾ Confirm with OK. 6.8.3 SEDOR The SEDOR function analyses the images of a camera and generates reference data. - Page 69 DMS 80 / DMS 160 / DMS 240 / DMS 240 HSR If required the current reference data can be discard with Forget. The image analysis starts automatically and generates new reference data. SEDOR Sabotage ® The SEDOR Sabotage module detects the manipulation of a camera by e. g defocusing, ®...
- Page 70 DMS 80 / DMS 160 / DMS 240 / DMS 240 HSR Referent values 20% = sensitive / many messages 70% = average value 90% = insensitive / few messages Learning phase The Minimum learning phase determines the duration of the basic image analysis. The longer it is the more untypical deviances can be identified as not relevant for the currently generated reference data.
-
Page 71: Smartfinder
DMS 80 / DMS 160 / DMS 240 / DMS 240 HSR ¾ Set the Minimum object size. ¾ Set the Time to message. ¾ Finally confirm with Close. Object size The minimum size of a relevant object can be set between 2% to 30% of the image reso- lution. -
Page 72: Camera Control
DMS 80 / DMS 160 / DMS 240 / DMS 240 HSR The Settings for SmartFinder dialog will be displayed. Fig. 6-53 : SmartFinder configuration ¾ Observe the explanations given below. ¾ Set the Sensitivity. ¾ Set the Decay time. - Page 73 DMS 80 / DMS 160 / DMS 240 / DMS 240 HSR The Control function will be activated with default settings for the corresponding camera. The determination of the connection type is done in the Recording Settings (sub) dialog. Fig. 6-54 : Camera control activation ¾...
-
Page 74: Display Settings
DMS 80 / DMS 160 / DMS 240 / DMS 240 HSR Display settings A description text can be stored for the recorder and every camera besides the camera name. These texts can be displayed during playback as additional information. -
Page 75: Splitter
DMS 80 / DMS 160 / DMS 240 / DMS 240 HSR Splitter The Splitter function allows pictures from several cameras to be displayed on a single monitor. Each camera is displayed in a so-called split. This function is only available for anaogue cameras. -
Page 76: Automatic Assignment
DMS 80 / DMS 160 / DMS 240 / DMS 240 HSR 7.1.1 Automatic assignment Fig. 7-4 :Automatic assignment Click on Auto to assign the connected cameras to the splits of the current split type in order. Auto all results in the automatic assignment for all split types of the currently selected combination of Monitor and split type (live or playback split). -
Page 77: Sequencer
DMS 80 / DMS 160 / DMS 240 / DMS 240 HSR Sequencer This function is only available for analogue cameras. The Sequencer function allows the pictures from various cameras to be displayed in a de- fined order. Various display sequences can be defined for each video output (VGA, CVBS 1 and CVBS 2). - Page 78 DMS 80 / DMS 160 / DMS 240 / DMS 240 HSR Disable cameras ¾ To disable a camera right-click on the appropriate camera button (in this case camera 3) in the Cameras box. Fig. 7-7 : Disabled camera The camera will be removed from the display sequence of all the monitors. In addition the camera can no longer be selected in sequencer/live mode and in playback/live mode to display the live picture.
-
Page 79: Cvbs Display Sequence
DMS 80 / DMS 160 / DMS 240 / DMS 240 HSR 7.2.2 CVBS display sequence The display sequence and event switching is defined for CVBS monitors in exactly the same way as for VGA monitors. However, it is also possible to use the settings from the VGA monitor for the CVBS moni- tors. -
Page 80: Osd Display
DMS 80 / DMS 160 / DMS 240 / DMS 240 HSR The frame rate automatically will be adjusted when an external application (e. g. PView) establishes a PRemote connection to the recorder.: VGA Monitor 6 fps CVBS Monitor 1... -
Page 81: Network And Pas
DMS 80 / DMS 160 / DMS 240 / DMS 240 HSR Network and PAS Ethernet The network settings of the device can be configured manually or automatically assigned by a DHCP (Dynamic Host Configuration Protocol) server. Note that..incorrect network settings (e.g. the allocation of an already used IP address) die may result in malfunctions. -
Page 82: Manual Configuration
DMS 80 / DMS 160 / DMS 240 / DMS 240 HSR IP-Finder configuration When this option is activated the IP address can be set via network with the Dallmeier IP-Finder software. This option should be deactivated because of security reasons, if the remote configuration is not necessary. -
Page 83: Pstn/Terminal-Adapter
DMS 80 / DMS 160 / DMS 240 / DMS 240 HSR PSTN/Terminal-Adapter The functions for data transmission (PAS) via modem (PSTN) or Terminal Adapter (ISDN) are not integrated in the current version of the recorder software. Alarm hosts An alarm host is an addressee of messages and alarms that can send by a recorder. The individual configuration (connection type, message type and activation period) of up to 8 addressees is made in the Alarm-Hosts dialog. -
Page 84: Connection
DMS 80 / DMS 160 / DMS 240 / DMS 240 HSR Fig. 8-3 The name of the alarm host can be changed if necessary. ¾ Select an alarm host with a left click in the alarm host list. ¾ Open the virtual keyboard Change name. -
Page 85: Alternative Alarm Host
DMS 80 / DMS 160 / DMS 240 / DMS 240 HSR ¾ Enter the alarm host’s IP-Address. ¾ Set the maximum duration of a connection attempt as Ping Timeout (seconds). The connection attempt will be canceled when Ping Timeout is expired. After a break the connection attempt will be started again and repeatedly (Interval). -
Page 86: Connection Check
DMS 80 / DMS 160 / DMS 240 / DMS 240 HSR ¾ Select an alarm host with a left click in the alarm host list. ¾ Set the alternative alarm host with the Alternative drop down box. The alternative alarm host will be displayed in the select list’s Alt. column. -
Page 87: Messages
DMS 80 / DMS 160 / DMS 240 / DMS 240 HSR 8.3.5 Messages Which messages will be sent can be defines separately for every alarm host. Thereby take into account that the single messages are combined to message categories. The message displayed by the alarm host and the additional displayed information depend on the alarm host’s configuration. - Page 88 DMS 80 / DMS 160 / DMS 240 / DMS 240 HSR Events of the category “error“ are: • The I/O board could not be put into operation. • The I/O board is ready for operation. • The display could not be put into operation.
- Page 89 DMS 80 / DMS 160 / DMS 240 / DMS 240 HSR Housekeeping-Systemmotoring This message will be send if the system monitoring (housekeeping) detects an event of the category “info“. Events of the category “info“ are: • The internal temperature is in the upper/lower/normal range.
-
Page 90: Timer
DMS 80 / DMS 160 / DMS 240 / DMS 240 HSR System This message will be send in case of certain errors in the complete system or if status mes- sages of a system component arrive at the recorder. -
Page 91: Activation
DMS 80 / DMS 160 / DMS 240 / DMS 240 HSR 8.3.7 Activation After its configuration the alarm host must be activated. ¾ Select an alarm host with a left click in the alarm host list. ¾ Activate the corresponding checkbox in the Active column. -
Page 92: Parameter Backup
DMS 80 / DMS 160 / DMS 240 / DMS 240 HSR The Settings for EBueS connection dialog will be displayed: Fig. 8-13 ¾ Enter the EBueS server IP Adress. ¾ Enter the FTP user name. ¾ Enter the FTP password. -
Page 93: Import
DMS 80 / DMS 160 / DMS 240 / DMS 240 HSR ¾ Open the Export network files dialog via Setup > Network > Import/Export > Export. Fig. 8-14 ¾ Select the relevant medium as Target. ¾ Confirm with OK. -
Page 94: Serial Interface
DMS 80 / DMS 160 / DMS 240 / DMS 240 HSR Serial Interface The serial interface allows the connection and the communication with external devices. Setting ¾ Open the Serial Interfaces dialog via Setup > Interfaces > Serial. Fig. 9-1 : Serial Interfaces dialog ¾... - Page 95 DNI (external system) This setting allows an external system to be connected for example an automatic teller ma- chine (ATM), access control system or a Huth cash desk via a Dallmeier Network Interface (DNI-1). This function allows communication with an uninterruptible power supply unit (UPS). This means that messages can be sent from the UPS (for example charge status of the battery) to the recorder where they can be output or processed.
-
Page 96: 10 Contact In
DMS 80 / DMS 160 / DMS 240 / DMS 240 HSR 10 Contact IN The contact inputs allow the control of the recorder with external devices. ¾ Open the Contact In dialog via Setup > Interfaces > Contact IN. -
Page 97: Setting
DMS 80 / DMS 160 / DMS 240 / DMS 240 HSR Fig. 10-2 : show function n.c. The function of a camera contact (break or make contact) can be set in Interfaces > Camera Contacts. 10.3 Setting Every contact input can be assigned four functions for the Function n.o. and the Function n.c.. -
Page 98: Functions
DMS 80 / DMS 160 / DMS 240 / DMS 240 HSR 10.4 Functions The available functions of the interface depend on various software and hardware options. The scope of functions depends on the ordered version, not on the content of the documentation. - Page 99 DMS 80 / DMS 160 / DMS 240 / DMS 240 HSR Quit pause of all alarm-hosts This contact function allows to activate all configured alarm hosts. This contact function is no counterpart to the Pause all active alarm-hosts contact function. It does not matter if the alarm host was deactivated by Pause all active alarm-hosts or before.
-
Page 100: Configuration Of Camera-Related Contacts
DMS 80 / DMS 160 / DMS 240 / DMS 240 HSR Day/Night Mode (analogue camera, UTC) This function allows the control of day / night mode switching of a camera (analogue, UTC capable). It is irrelevant thereby if the camera is defined as an UTC camera in the Recording Settings dialog. -
Page 101: 11 Relay Out
DMS 80 / DMS 160 / DMS 240 / DMS 240 HSR 11 Relay OUT The relay allow the event based control of external devices. 11.1 Setting ¾ Open the Relay dialog via Setup > Interfaces > Relay OUT to configure the relay outputs. - Page 102 DMS 80 / DMS 160 / DMS 240 / DMS 240 HSR System error The relay is switched in case of certain errors in the complete system or if status messages of a system component arrive at the recorder. • camera failure •...
- Page 103 DMS 80 / DMS 160 / DMS 240 / DMS 240 HSR Writing/reading onto HDD This relay function allows to represent the HDD access. The relay is switched and held directly before the HDD access (read/write). The relay is reset after the HDD access.
- Page 104 DMS 80 / DMS 160 / DMS 240 / DMS 240 HSR The relay is held until the system monitoring defines the status as "normal". The time for which the relay is held can also be set via the Timer.
-
Page 105: 12 Optional Periphery
DMS 80 / DMS 160 / DMS 240 / DMS 240 HSR 12 Optional periphery 12.1 Printers The recorder allows up to 4 printers to be configured. They can be connected via the LPT interface or a USB port. A network printer may also be used. - Page 106 DMS 80 / DMS 160 / DMS 240 / DMS 240 HSR • No pure GDI printer • Paper format 210 x 297 mm (DIN A4/Letter) • Postscrip printer preferred It is possible to print the image with any printer when a PC/ PView is used to evaluate the recordings.
-
Page 107: Set Printer
DMS 80 / DMS 160 / DMS 240 / DMS 240 HSR 12.1.2 Set printer ¾ Click on Properties… in the Printer dialog to change the settings for the marked printer. The Printer Properties dialog will be displayed. Fig. 12-4 : Printer Properties dialog ¾... -
Page 108: Storage
DMS 80 / DMS 160 / DMS 240 / DMS 240 HSR 12.3 Storage The Dallmeier DAS-303 or DAS-4 Eco external storage systems can be connected to the recorder in order to increase the storage capacity. Note that..the recorder must be equipped with the corresponding hardware (SATA2 / FibreChannel interface). -
Page 109: Dni
DMS 80 / DMS 160 / DMS 240 / DMS 240 HSR 12.5 The DNI-1 Dallmeier network interface is a wide-ranging data interface that is connected to the recorder’s serial interface. It allows the receipt of data from an external system or the camera control (dome, PTZ) via the recorder’s user interface. -
Page 110: Dni - Camera Control
DMS 80 / DMS 160 / DMS 240 / DMS 240 HSR Protocol The next step is to configure the DNI itself. Open the Dallmeier Network Interface dialog via Setup > Interfaces > DNI Setup. Fig. 12-8 : Dallmeier Network Interface dialog ¾... - Page 111 DMS 80 / DMS 160 / DMS 240 / DMS 240 HSR Fig. 12-9 : Serial Interfaces dialog ¾ Select the COM port to which the DNI is connected as the Interface. ¾ Set DNI (camera control) as the function.
-
Page 112: Ups
DMS 80 / DMS 160 / DMS 240 / DMS 240 HSR Identification In the third step the appropriate camera must be identified as controllable. Open the Re- cording Settings dialog via Setup > Recording > Cameras/Tracks. Fig. 12-11 : Recording Settings dialog ¾... -
Page 113: Card Reader
12.8 A Dallmeier VSC-1 (Video System controller) control station for dome / PTZ cameras can be connected to the recorder. Selection and control of the camera is done on the control station, displaying of the images on a recorder’s monitor. -
Page 114: Serial Ptz Cameras
DMS 80 / DMS 160 / DMS 240 / DMS 240 HSR Fig. 12-13 ¾ Set the relevant Monitor. ¾ Set the Split type. ¾ Set the Permission for the Sequencer / Live mode. ¾ Confirm with OK. The permission Other Permissions / Camera control of the relevant user group has to be activated separately in the User Management. - Page 115 DMS 80 / DMS 160 / DMS 240 / DMS 240 HSR At first the serial interface must be configured. ¾ Open the Serial Interfaces dialogue via Setup > Interfaces > Serial. Fig. 12-14 ¾ Select RS485 as Interface. ¾ Set the required parameter.
-
Page 116: Utc Camera
DMS 80 / DMS 160 / DMS 240 / DMS 240 HSR The Recording Settings (sub) dialogue is displayed. Fig. 12-17 ¾ Select Serial… . The Direct camera control dialogue is displayed. Fig. 12-18 ¾ Set the Camera ID corresponding to the configuration of the camera. - Page 117 DMS 80 / DMS 160 / DMS 240 / DMS 240 HSR ¾ Click in the Control column on the line containing the relevant camera. If you have already configured a COM port to control a camera using DNI, the symbol for a dome camera will first be displayed in the Control column.
-
Page 118: Conrol Panel
DMS 80 / DMS 160 / DMS 240 / DMS 240 HSR 12.10.2 Conrol panel ¾ Select the live picture from a UTC-capable camera. ¾ Click on Camera control. Fig. 12-22 Functions 1 Zoom In 5 Position query 2 Zoom Out... -
Page 119: 12.10.3.1 Save Zoom Factor And Position
DMS 80 / DMS 160 / DMS 240 / DMS 240 HSR 12.10.3.1 Save zoom factor and position A selected zoom factor and the position of the picture section can be saved and opened using one of the eight buttons (next to the preview picture). - Page 120 DMS 80 / DMS 160 / DMS 240 / DMS 240 HSR Fig. 12-26 The camera menu is display in the picture and the relevant control elements are activated in the control panel. Fig. 12-27 Please see the precise description of the camera configuration in the documentation for the appropriate camera.
-
Page 121: 12.10.4.1 Functions
DMS 80 / DMS 160 / DMS 240 / DMS 240 HSR 12.10.4.1 Functions Select menu points Select settings Select/save settings Back to preview menu Reset settings to default Direct selection of individual settings www.dallmeier.com... -
Page 122: 12.10.4.2 Close Menu And Save Configuration
DMS 80 / DMS 160 / DMS 240 / DMS 240 HSR 12.10.4.2 Close menu and save configuration ¾ If you have changed the settings on the camera, click again on Open/Close menu. Fig. 12-28 ¾ If you select No, the settings will be saved but will no longer apply after the camera has been restarted. -
Page 123: Reset Camera Settings
DMS 80 / DMS 160 / DMS 240 / DMS 240 HSR Change tool tip entry If you move the mouse pointer to one of the buttons, the tool tip will be displayed with the appropriate designation. Fig. 12-31 You can allocate a unique designation for your saved configuration. -
Page 124: 13 Optional Functions
DMS 80 / DMS 160 / DMS 240 / DMS 240 HSR 13 Optional functions 13.1 Signal loop through The video inputs on the recorder can be terminated by software with a resistance of 75 ohm. This is necessary to prevent falsifications of the video signal (signal level, color, brightness, etc.). - Page 125 DMS 80 / DMS 160 / DMS 240 / DMS 240 HSR ¾ Open the PRemote Settings dialog via Setup > Interfaces > PRemote. Fig. 13-2 : PRemote settings dialog ¾ Define the source of the Audio signal if necessary.
-
Page 126: 14 Hdd Management
DMS 80 / DMS 160 / DMS 240 / DMS 240 HSR 14 HDD management The Hard disk management shows all the hard disks and drives fitted in the recorder or connected externally. Individual HDDs can be enabled and disabled for the recording process. - Page 127 DMS 80 / DMS 160 / DMS 240 / DMS 240 HSR ¾ To change the configuration, select one of the options offered. ¾ Confirm with OK. NOTE If any changes are made to the RAID settings, all recordings must be de- leted.
-
Page 128: 15 User Management
DMS 80 / DMS 160 / DMS 240 / DMS 240 HSR 15 User management Login as group is activated as default on the DMS. With this version the rights are defined for a group and the login takes place using the group name and group password. -
Page 129: Issuing Permissions
DMS 80 / DMS 160 / DMS 240 / DMS 240 HSR 15.1.1 Issuing permissions Note that..the administrator group has all the rights ... may not be limited rights of the administrator group Fig. 15-2 ¾ Select a group. -
Page 130: Define Or Change Passwords
DMS 80 / DMS 160 / DMS 240 / DMS 240 HSR 15.1.3 Define or change passwords Fig. 15-4 ¾ Select a group. ¾ Click on Edit group. ¾ Enter a New password. ¾ Enter the password a second time for confirmation. -
Page 131: Access Restriction
DMS 80 / DMS 160 / DMS 240 / DMS 240 HSR ¾ Confirm 2nd password. ¾ Click OK. If you wish to deactivate the Dual-control login: ¾ Click on the checked Dual-control login checkbox. ¾ Enter and Confirm the 1st password. -
Page 132: Create Users
DMS 80 / DMS 160 / DMS 240 / DMS 240 HSR 15.2.1 Create users At least two users must be created in the Administrator group for technical reasons. Fig. 15-7 ¾ Click on the group to which a new user is to be assigned. -
Page 133: Change User Password
DMS 80 / DMS 160 / DMS 240 / DMS 240 HSR 15.2.3 Change user password Fig. 15-9 ¾ Select the required user. ¾ Click on Edit User. In the Edit User dialog you can assign the current user a new password. It is not possible to change the User login. -
Page 134: User Options
DMS 80 / DMS 160 / DMS 240 / DMS 240 HSR 15.2.5 User options Using this dialog you can make the conditions for access to your recorder more secure. ¾ Click on System > User management. The settings made in the Options dialog will apply to all groups and their users. - Page 135 DMS 80 / DMS 160 / DMS 240 / DMS 240 HSR Set One user login: ¾ Mark the One user radio button. ¾ Confirm by clicking on OK. Every user can now log into the recorder individually using his User login and the corres- ponding Password.
-
Page 136: 16 Service
DMS 80 / DMS 160 / DMS 240 / DMS 240 HSR 16 Service The Service menu point offers a facility to Update the recorder software and to Activate properties and functions of the recorder. 16.1 Activation Certain properties and functions of the recorder are optional (must be activated). They are only available if they were expressly order when you purchased the system. - Page 137 DMS 80 / DMS 160 / DMS 240 / DMS 240 HSR ¾ Open the Software Update dialog via Setup > System > Service > Software Update. Fig. 16-2 : Load Update file ¾ Select the data Source where the update is located.
-
Page 138: 17 System Parameter
DMS 80 / DMS 160 / DMS 240 / DMS 240 HSR 17 System parameter The settings and the basic parameters for the system can be rest to the factory settings as well as being exported and imported. 17.1 Default system parameters To return the recorder to its factory settings, open the Default System Parameters dialog via Setup >... -
Page 139: Parameter Import
If you export the system parameters to a USB stick, a ZIP file will be saved in addition to the parameter files. This contains various log and protocol files, which permit the Dallmeier Support team to analyze the recorder if necessary. -
Page 140: 18 Hdd Replacement
The recorder must therefore be switched off before an HDD drawer unit can be changed. Tested and approved hard disk drives Use only hard disk drives that have been tested and approved by Dallmeier to replace a defective or failed HDD. -
Page 141: Localization Of The Hdd
DMS 80 / DMS 160 / DMS 240 / DMS 240 HSR Contact the Dallmeier electronic Support Team if you are in any doubt. 18.2 Localization of the HDD In the event of a hard disk drive defect, you can find the hard disk drive that must be repla- ced using the recorder’s GUI. - Page 142 DMS 80 / DMS 160 / DMS 240 / DMS 240 HSR Fig. 18-2 : Unlock the HDD drawer unit ¾ Pull the HDD drawer unit out carefully. Fig. 18-3 : Remove the HDD drawer unit ¾ Undo the 4 screws on the underside of the HDD drawer unit.
- Page 143 DMS 80 / DMS 160 / DMS 240 / DMS 240 HSR Fig. 18-5 : Flush connection ¾ Insert the HDD drawer unit into the guide rail. Fig. 18-6 : Close the HDD drawer unit ¾ Slide the HDD drawer unit carefully into the housing.
-
Page 144: 19 Technical Data
DMS 80 / DMS 160 / DMS 240 / DMS 240 HSR 19 Technical data Following technical data was valid at the time of document compilation. Note • possible updates on www.dallmeier.com. • the description of the connection and pin assignment in the Commissioning documentation. - Page 145 DMS 80 / DMS 160 / DMS 240 / DMS 240 HSR With up to 8 IP channels DMS 80/160/240/240 HSR Up to 4 Mbps With up to 16 IP channels DMS 80/240/240 HSR Up to 3 Mbps Interfaces Camera inputs...
- Page 146 DMS 80 / DMS 160 / DMS 240 / DMS 240 HSR Atmospheric load Dust-free Weight 10 - 12 kg 3x with automatic speed adaptation Voltage OUT 2 pin, 12V DC Operating system Linux Languages German, English, French, Spanish (other on request)
- Page 147 Hybrid audio and video recorder Type: DMS 80 / DMS 160 / DMS 240 / DMS 240 HSR Hereby the equipment is confirmed to comply with the requirements set out in the Council Directive on the Approximation of the Laws of the Member States relating to Electromagnetic Compatibility (2004/108/EG) and the Council Directive relating to Low Voltage (2006/95/EG).
Need help?
Do you have a question about the DMS 80 and is the answer not in the manual?
Questions and answers