SciCan HYDRIM C51w Service Manual
Dental instrument washer
Hide thumbs
Also See for HYDRIM C51w:
- Operator's manual (59 pages) ,
- Quick reference manual (2 pages) ,
- Installation instructions & owner's manual (2 pages)

Subscribe to Our Youtube Channel
Related Manuals for SciCan HYDRIM C51w


Summary of Contents for SciCan HYDRIM C51w
- Page 1 Service Guide HYDR IM C51w Service Guide 96-107505 Rev 2.0. Copyright 2001 SciCan. All rights reserved.
-
Page 2: Table Of Contents
5. Troubleshooting .....18 1.1 HYDRIM C51w Illustration ..... . .3 5.1 First Steps . - Page 3 Further, you may be required to report the above information to the device manufacturer. In the case of SciCan products, whether required or not, it is vital for SciCan to learn of any problem in the field. The information described above will help SciCan solve the problem quickly and improve product reliability in new units.
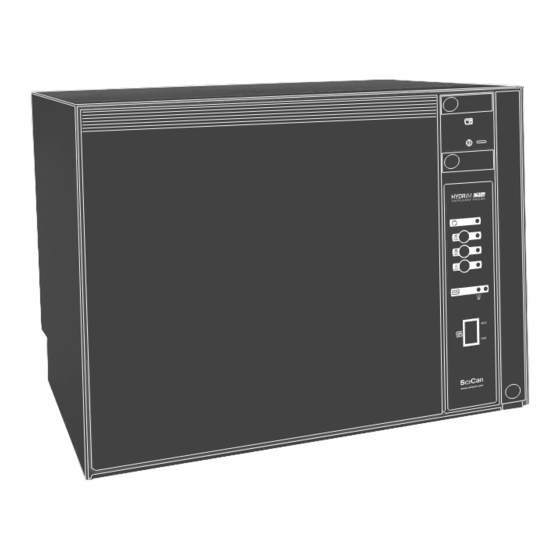
- Page 4 C 5 1 MA X HYDRIM C51w Overview The HYDRIM C51w high speed instrument washer is designed to complement the STATIM family of autoclaves by quickly and hygienically preparing soiled instruments for sterilization. The HYDRIM C51w works like most domestic dishwashers. The operator loads the instruments, closes the door, and selects the wash cycle.
-
Page 5: Specifications
Page 4 HYDRIM C51w Service Guide Confidential 1.2 Specifications Dimensions / mass: Height: 450mm / 17.75" Width: 965mm / 23.5" Depth: 460mm / 18.25" Depth with door open: 780mm / 25.5" Weight: 35kg / 78lbs Running Noise: 60dBA Hot water connection: 70°C max / 160F... -
Page 6: Safety Information
Installation Category 2 device. SciCan shall not be liable for incidental, special or consequential damages caused by any maintenance or services performed on the HYDRIM C51w by a third party or for the use of equipment or parts manufactured by a third party, including lost profits, any commercial loss, economic loss, or loss arising from personal injury. -
Page 7: Required Tools
Further, you may be required to report the above information to the device manufacturer. In the case of SciCan products, whether required or not, it is vital for SciCan to learn of any problem in the field. The information described above will help SciCan solve the problem quickly and improve product reliability in new units. -
Page 8: Shipping Instructions
1.5 Shipping Instructions The unit should be serviced on site. If it is necessary to send the unit back to SciCan, follow these instructions. Before shipping the unit, run the Rinse and Hold cycle to remove most of the water from the system. -
Page 9: Installation
2. Installation 2.1 Suggested Installation Configurations The HYDRIM C51w Instrument Washer should only be installed and serviced by a qualified contractor as it is an Installation Category 2 device. The contractor should be experienced in installing equipment that requires electrical hook-up as well as plumbing. -
Page 10: Drainage
The drain hose should not be further than 1.5m/5ft. from a hard plumbing drain. If this is not possible, then commercial grade plumbing hose must be used to ensure the minimization of possible leaks. If you require additional hose, your SciCan dealer can provide you with ordering details. - Page 11 Page 10 HYDRIM C51w Service Guide Confidential...
- Page 12 HYDRIM C51w Service Guide Page 11 Confidential = 300mm...
- Page 13 Page 12 HYDRIM C51w Service Guide Confidential Hose Headthrough 600 +8...
-
Page 14: Routine Maintenance
HYDRIM C51w Service Guide Page 13 Confidential 3. Routine Maintenance These steps should be performed prior to inspecting the unit. 3.1 Filters Inspect the coarse filter fine filter as follows: 1. Open the unit door and remove the wash rack. -
Page 15: Hoses
Page 14 HYDRIM C51w Service Guide Confidential 6. Inspect both sides of the upper wash arm and the lower wash arm for debris in the nozzles. Remove the debris if discovered. 7. Rinse both wash arms under tap water. 8. Reassemble the wash arms. -
Page 16: Schematics
HYDRIM C51w Service Guide Page 15 Confidential 4. Schematics 4.1 Hydraulic hot water hose circulation pump 1 hot water inlet valve circulation pump 2 cold water hose upper arm fitting cold water inlet valve upper arm tee fitting rinse aid reservoir (in door) -
Page 17: Electrical
Page 16 HYDRIM C51w Service Guide Confidential 4.2 Electrical Recirculation Pump #1 Recirculation Pump #2 Waste pump Dosing pump Chamber full switch Chamber over-flow switch Chemical level switch Heater pressure switch Hot inlet valve Salt regeneration valve Rinse aid thermoactuator... - Page 18 HYDRIM C51w Service Guide Page 17 Confidential 4.2 Electrical Cold water valve 20A, 20B Circulation pump 1 Rinse aid valve Pressure switch Salt valve Chamber heater Hot water valve 23A, 23B Power inlet ground Chamber full Chamber heater ground Circulation pump fuse...
-
Page 19: Troubleshooting
Page 18 HYDRIM C51w Service Guide Confidential 5. Troubleshooting 5.1 First Steps After you have performed checks on the hoses, power source, washer arms and filters (section 3) and the unit still does not function properly, do the following: 1. Power OFF the unit. -
Page 20: Controller Problems
HYDRIM C51w Service Guide Page 19 Confidential 5.3 Controller Problems The controller contains circuitry which is static sensitive. Always wear a static strap when working with or near the controller. Transport the controller in a static protected bag. 1. Power OFF the unit. -
Page 21: Fault Codes
Page 20 HYDRIM C51w Service Guide Confidential 5.4 Fault Codes The unit has built in fault codes. To access this information: 1. Power OFF the unit. 2. Remove the front panel. (See section 6.) 3. Disconnect the blue and yellow wires... -
Page 22: Hydraulic Problems
HYDRIM C51w Service Guide Page 21 Page 21 Confidential Confidential 5.5 Hydraulic Problems When you power on the unit, you immediately hear the drain pump. 1. There is water in the bottom pan or the over flow switch has failed on. - Page 23 Page 22 HYDRIM C51w Service Guide Confidential 5. Tighten the water inlet valves and check the hoses and clamps for leaks. Tighten the clamps once finished. 6. If the problem persists, replace the inlet hoses. 7. If the problem persists, replace the inlet valves.
- Page 24 6. Check the microswitch 7. Check the thermostat 8. If the problem persists, contact SciCan. Water does not recirculate, and instruments are not cleaned. 1. Check the inlet tubes for kinks and blockages. 2. Power OFF the unit.
-
Page 25: Other Problems
Page 24 HYDRIM C51w Service Guide Confidential 12. Pull the pump away from the drain manifold 13. Remove the connector to the drain manifold. 14. Remove the wires that connect to the pump. 15. Replace the second recirculation pump. Water does not drain. ERROR #4 1. - Page 26 HYDRIM C51w Service Guide Page 25 Confidential 4. Check the yellow and blue wires that lead to the terminal block Ensure they are connected. Check the continuity. Try to run the unit with a jumper in place. 5. If all of these are fine, replace the sensor cap No chemical is used.
- Page 27 Page 26 HYDRIM C51w Service Guide Confidential 5. Remove the front door fascia by removing the 4 Torx screws. (See section 6.) 6. Remove the two screws the connectors the thermoactuator. 7. Replace the thermoactuator 8. Disconnect the blue and yellow wires...
-
Page 28: Reassembling The Unit
HYDRIM C51w Service Guide Page 27 Confidential 6. Taking Apart and Reassembling the Unit When the cover is removed: • Hazardous voltages are accessible. Disconnect the power cord before removing the cover. • Sharp metal edges are exposed. Be careful, and wear long sleeves and gloves. -
Page 29: Pulling Back The
Page 28 HYDRIM C51w Service Guide Confidential 6.3 Pulling Back the Back Panel 1. Remove the two Philips machine screws at the top of the back cover. 1.1 Remove the screw at the upper left, holding the side bracket. 2. Remove the Torx pan screw at the lower left. - Page 30 HYDRIM C51w Service Guide Page 29 Confidential 6.6 Removing the Bottom Pan and Kickplate 1. Completely open the front door. 2. Remove the two Torx screws from the kick plate 3. Twist the kick plate and remove it. 4. Drain water from the unit.
- Page 31 Water Heater, J 01-107808S NC Sensor, J 01-107809S Switch Pressure Heater, J 01-107810S Door Spring Kit, J 01-107811S Clip Door, J 01-107812S Inlet Valve Hot Water, J 01-107815S 01-107837S HYDRIM C51w Operator's Manual I, J 01-107838S HYDRIM C51w Operator's Manual II, J...
-
Page 32: Set-Up And Installation Tips
A power outlet of 220V/10A with proper grounding is required for the unit. The power cord of the unit is 1.8m/6ft long. The HYDRIM C51w is heavy (78lbs). Seek assistance when lifting and installing the unit. When connecting the water hoses, the connector with the elbow connects to the back of the unit. - Page 33 HYDR IM C51w Service Guide Confidential Service Report Form Model: Serial Number: Date: Location: Problem: Solution: Routine Maintenance Performed: Filters Washer arms Hoses Note: SciCan may provide you with a more detailed form.
Need help?
Do you have a question about the HYDRIM C51w and is the answer not in the manual?
Questions and answers