Sierra Wireless AirLink RV50 Series Hardware User's Manual
Lte gateway
Hide thumbs
Also See for AirLink RV50 Series:
- User manual (509 pages) ,
- Hardware user's manual (74 pages) ,
- Product manual (47 pages)
Table of Contents
Advertisement
Advertisement
Table of Contents

Related Manuals for Sierra Wireless AirLink RV50 Series


Summary of Contents for Sierra Wireless AirLink RV50 Series
- Page 1 AirLink RV50 Series Hardware User Guide 4117313 Rev 3...
- Page 3 Data may be delayed, corrupted (i.e., have errors) or be totally lost. Although significant delays or losses of data are rare when wireless devices such as the Sierra Wireless modem are used in a normal manner with a well-constructed network, the Sierra Wireless modem should not be used in...
- Page 4 Sierra Wireless product, regardless of the number of events, occurrences, or claims giving rise to liability, be in excess of the price paid by the purchaser for the Sierra Wireless product.
-
Page 5: Contact Information
Preface Contact Information Sales information and technical Web: sierrawireless.com/company/contact-us/ support, including warranty and returns Global toll-free number: 1-877-687-7795 6:00 am to 6:00 pm PST Corporate and product information Web: sierrawireless.com Rev 3 Dec.16... - Page 6 AirLink RV50 Series Hardware User Guide 4117313...
-
Page 7: Table Of Contents
Contents Introduction to the RV50 Series ........11 Key Features . - Page 8 AirLink RV50 Series Hardware User Guide Step 5 — Check the gateway operation ......40 LED Behavior .
- Page 9 Contents AC Power Adapter (Black Connector) ......68 AC Power Adapter Output ........68 AC Power Adapter Environmental Specifications .
- Page 10 AirLink RV50 Series Hardware User Guide 4117313...
-
Page 11: Introduction To The Rv50 Series
1: Introduction to the RV50 Series ® ® This hardware user guide is for the Sierra Wireless AirLink RV50 and the RV50X gateways. Table 1-1 compares the two gateways. Features and specifications described in this user guide apply to both gateways unless otherwise notes. - Page 12 AirLink RV50 Series Hardware User Guide • State of the art LTE coverage: · RV50 — 11 LTE frequency bands · RV50X — 21 LTE frequency bands • Product variants: · RV50: Single product variant for all major North American operators ·...
-
Page 13: Description
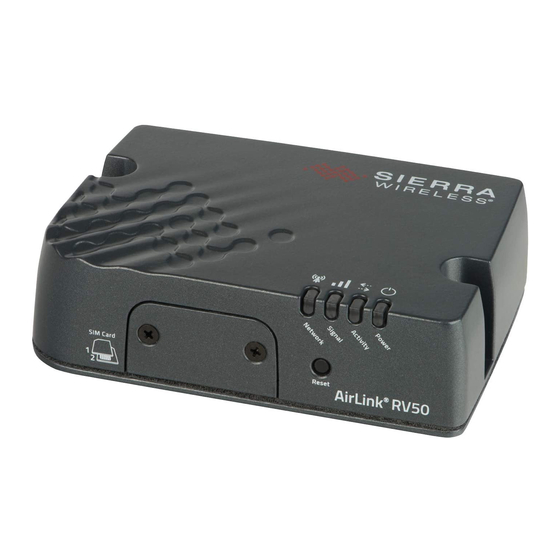
Introduction to the RV50 Series Description Back Panel Cellular Antenna Connector 9-pin RS-232 Serial Port Diversity (See Connect the Antennas page 25.) Antenna Connector (See Serial Port on page 28.) (See Connect the Antennas page 25.) Power Connector RJ-45 Ethernet Port USB 2.0 Micro-AB Port (See Connect the Power... -
Page 14: Gateway Configuration And Management
For a complete list of AT Commands, refer to the ALEOS Software Configura- tion User Guide. Power Modes The AirLink RV50 Series gateway has three power modes: • On — The CPU and the radio are on. The current draw is 900 mW (75 mA @ 12 VDC) when the gateway is idle (i.e. - Page 15 Introduction to the RV50 Series Table 1-2: Power Saving Features Feature Where to configure Notes in ACEmanager Processor Power Services > Power This feature optimizes idle power consumption. Savings Mode Management Recommended for customers who require the best power consumption efficiency, for example in battery or solar powered applications.
-
Page 16: Sample Power Consumption Scenarios
Peak without power saving is similar to Maximum without power saving, but measured as a maximum burst over a limited time. Dual SIM The AirLink RV50 Series gateway has two SIM card slots. You can decide which slot is the Primary SIM card. When the gateway is powered on or reboots, it automatically connects to the network associated with the Primary SIM card. -
Page 17: Network Operator Switching
DC power cable • Mounting screws • Quick Start Guide The following items can be ordered separately from Sierra Wireless: • Universal AC power adapter · Voltage input: 100 – 240 VAC · Current output: 1.5 A · Part number: 2000492 •... - Page 18 AirLink RV50 Series Hardware User Guide 4117313...
-
Page 19: Specifications At A Glance
2: Specifications at a Glance This chapter gives a brief summary of RV50 Series gateway features. For additional information see RV50 Series Specifications page 51. Table 2-1: Specifications at a Glance Certification and Emissions / Immunity CE (Including EMC Test case for vehicle installation EN302489) •... - Page 20 AirLink RV50 Series Hardware User Guide Table 2-1: Specifications at a Glance (Continued) Environmental Vibration (operational) MIL-STD-810G, test method 514.6 • Testing IEC 60068-2-64 • Shock (operational) MIL-STD-810G, test method 516.6 SAE J1455 (Shock and Vibration: Section 4.10.4.2 Cab Mount •...
- Page 21 Specifications at a Glance Table 2-1: Specifications at a Glance (Continued) Reset Manual reset button or using ACEmanager LEDs 4 LEDs: Network • Signal • Activity • Power • Mechanical Specifications 119 mm x 34 mm x 85 mm (94 mm including connectors) •...
- Page 22 AirLink RV50 Series Hardware User Guide Table 2-1: Specifications at a Glance (Continued) Protocols Network: TCP / IP, UDP / IP, DNS • Routing: NAT, Host Port Routing, DHCP, PPPoE, VLAN, VRRP, • Reliable Static Route Applications: SMS, Telnet / SSH, Reverse Telnet, SMTP, SNMP, •...
-
Page 23: Installation And Startup
Cellular antenna • Optional — GPS antenna • Recommended — diversity antenna • AC or DC power cable (available from Sierra Wireless or use your own custom cable) • Optional — a 9-pin connection cable for the RS-232 port •... -
Page 24: Step 1 - Insert The Sim Cards
SIM card in Slot 1 is the Primary SIM card. If you are using only one SIM card, Sierra Wireless recommends that you install it in Slot 1. If the SIM card (or SIM cards) have not already been installed, insert the SIM cards into the gateway before connecting any external equipment or power to the gateway. -
Page 25: Step 2 - Connect The Antennas
Installation and Startup SIM Card Reset SIM card cover Note the orientation of notched corners for proper SIM card alignment. #1 Phillips screws Upper SIM card Lower SIM card (SIM Slot 1) (SIM Slot 2) Figure 3-1: Installing the SIM Card 4. - Page 26 AirLink RV50 Series Hardware User Guide To install the antennas: 1. Connect the cellular antenna to the SMA cellular antenna connector. Note: Take extra care when attaching the Mount the cellular antenna so there is at least 20 cm between the antenna antennas to the SMA and the user or bystander.
-
Page 27: Step 3 - Connect The Data Cables
Installation and Startup Table 3-1: Recommended Antenna Separation Service Frequency Wavelength (λ) Best Antenna Good Antenna (MHz) (mm) Separation (mm) Separation (mm) λ) λ) (1/2 (1/4 WCDMA WCDMA WCDMA 1900 WCDMA 2100 CDMA/EV-DO CDMA/EV-DO 1900 GSM/GPRS/ EDGE GSM/GPRS/ EDGE GSM/GPRS/ 1800 EDGE GSM/GPRS/... -
Page 28: Ethernet Port
AirLink RV50 Series Hardware User Guide A Windows driver must be installed on the PC in order to support USB use. The drivers are available for download on Sierra Wireless’ support web site, http:// www.sierrawireless.com/en/Support/Downloads.aspx. The ALEOS Software Configuration User Guide contains the details of USB mode configuration and driver installation. -
Page 29: Step 4 - Connect The Power
Fusing For DC installations, Sierra Wireless recommends fusing the power input using a 4.0 A fast-acting fuse. DC Voltage Transients Series gateway... -
Page 30: Grounding The Rv50 Series Gateway Chassis
AirLink RV50 Series Hardware User Guide Grounding the RV50 Series Gateway Chassis For DC installations (with a fixed “system” ground reference), Sierra Wireless strongly recommends always grounding the RV50 Series gateway chassis to this system ground reference. To ensure a good grounding reference, use a short wire with a gauge of 18 AWG or larger connected to one of the mounting screws. - Page 31 Note: If you do not connect pin 3 to the ignition, you MUST connect it to the positive terminal of your power supply or battery. If you are using a Sierra Wireless AC adapter, the connection is inside the cable.
-
Page 32: Wiring Diagrams
Grounding the RV50 Series Gateway Chassis on page 30. • Pin 3 (Ignition Sense) — Sierra Wireless recommends always using the Ignition Sense wire (Pin 3) to turn the gateway off. It should not be turned off by disconnecting the power. - Page 33 Installation and Startup 4.0 A Fuse Series gateway RV50 Power Battery Ignition Sense Ground Ignition Figure 3-6: Alternate Vehicle Installation • Pin 1 (Power) — Use the red wire in the DC cable to connect Pin 1 to the power source. Include a 4.0 A fast-acting fuse in the input power line. Sierra Wireless recommends using a continuous (unswitched) DC power source.
-
Page 34: I / O Configuration
AirLink RV50 Series Hardware User Guide Fixed Installation with I/O Input Triggered by Standby Mode If you have a fixed installation where you want to use the I/O to monitor an external device such as a motion detector, remote solar panel, or a remote... -
Page 35: Pulse Counter
Installation and Startup Note: You can configure the GPIO Pin 4 in ACEmanager or ALMS to trigger standby mode, to sink current, or to pull up the voltage. If you are using the I / O line to trigger standby mode, you cannot configure it to sink current or pull up the voltage. Likewise, if you are using the I / O line to either sink current or pull up the voltage, you cannot use it to trigger standby mode. -
Page 36: Digital Input
AirLink RV50 Series Hardware User Guide Digital Input You can use the green wire to connect Pin 4 to a digital input to detect the state of a switch such as a vehicle ignition, or to monitor an external device such as a motion detector, a remote solar panel, or a remote camera. - Page 37 Installation and Startup High Side Pull-up / Dry Contact Switch Input You can use the green wire to connect Pin 4 to a dry contact switch. The dry contact switch is not available in Standby mode. Series gateway RV50 Internal Pull-up Resistor On** = 1.1 mA (Typical)
-
Page 38: Analog Input
AirLink RV50 Series Hardware User Guide Analog Input You can use the green wire to connect Pin 4 to an analog sensor. As an analog input (voltage sensing pin), the gateway monitors voltage changes in small increments. This allows you to monitor equipment that reports status as an analog voltage. - Page 39 Installation and Startup Note: The same method is used to sample the input voltage and the internal board temperature for Events Reporting. The significant changes are 300 m V for the input voltage and 1 degree Celsius for the board temperature. Low Side Current Sink Output You can use Pin 4 as a low side current sink, for example, to drive a relay.
-
Page 40: Step 5 - Check The Gateway Operation
AirLink RV50 Series Hardware User Guide Series gateway RV50 Internal Pull-up Resistor Protection circuitry Pin 4 External pull-up On/Off Figure 3-15: Digital Output / Open Drain Table 3-9: Digital Output / Open Drain Pull-up State Minimum Typical Maximum Units Comments Open Circuit —... -
Page 41: Led Behavior
Solid Amber Fair signal (equivalent to 2 – 3 bars) Flashing Amber Poor signal (equivalent to 1 bar) If possible, Sierra Wireless recommends moving the gateway to a location with a better signal. Flashing Red Inadequate (equivalent to 0 bars) Sierra Wireless recommends moving the gateway to a location with a better signal. -
Page 42: Ethernet Leds
AirLink RV50 Series Hardware User Guide Table 3-10: LED Behavior Color / Pattern Description LED Power Saving Mode Network Solid Green Connected to an LTE network Solid Amber Connected to a 3G or 2G network Flashing Green Connecting to the network... -
Page 43: Configuring With Amm
Installation and Startup Configuring with ACEmanager To access ACEmanager: 1. Connect a laptop to the gateway with an Ethernet cable. 2. Launch your web browser and go to http://192.168.13.31:9191. Note: It takes the gateway 2 – 3 minutes to respond after power up. Figure 3-17: ACEmanager login window 3. -
Page 44: Transitioning From A Raven Gateway
User Guide. Transitioning from a Raven Gateway If you are transitioning from a Raven XT or Raven XE to an AirLink RV50 Series gateway and you want to maintain a similar level of power consumption, Sierra Wireless recommends the settings outlined in Table 3-11. -
Page 45: Step 7 - Mounting The Rv50 Series Gateway
Mounting Brackets The RV50 Series gateway comes with mounting screws. An optional DIN rail mounting bracket (P/N 6000659) is available from Sierra Wireless. Flat Surface Mount If you are mounting the RV50 Series gateway on a flat surface, use the mounting screws that come with the gateway. -
Page 46: Din Rail Mount
Figure 3-18: RV50 Series Gateway Mounting Bracket for Flat Surfaces DIN Rail Mount If you are mounting the RV50 Series gateway on a DIN rail, order DIN rail mounting bracket kit (P/N 6000659) from Sierra Wireless. The kit contains: • L-shaped DIN Rail Mounting Bracket — Qty 1 •... - Page 47 Power Consumption Scenarios on page 16. Note: The DIN rail mounting bracket and clip in the kit Sierra Wireless kit should only be used on horizontally-mounted DIN rail. Rev 3 Dec.16...
-
Page 48: Reboot The Rv50 Series Gateway
AirLink RV50 Series Hardware User Guide Reboot the RV50 Series Gateway To reboot the RV50 Series gateway: • On the gateway, press the Reset button for 1 – 5 seconds. (Release the button when the Power LED flashes green.) •... - Page 49 Installation and Startup To exit Recovery mode, if it has been inadvertently entered, do one of the following: • Press the reset button on the gateway to reboot it. • Click the Reboot button on the Recovery screen. • Wait 10 minutes. If no action is taken within 10 minutes of the device entering Recovery mode (for example, if the Recovery screen has not been loaded by the web browser), it automatically reboots and exits Recovery mode.
- Page 50 AirLink RV50 Series Hardware User Guide 4117313...
-
Page 51: Rv50 Series Specifications
4: RV50 Series Specifications This chapter provides the specifications for the standard RV50 and the RV50X. Radio Frequency Bands Use the following table as a guide to the radio frequencies supported by the RV50 and RV50X radio modules. To determine which radio module your gateway has, refer to the label on the bottom of the gateway, or in ACEmanager, go to Status >... - Page 52 AirLink RV50 Series Hardware User Guide Table 4-1: RV50 MC7354 North America (Continued) Radio Band Frequency Technology EV-DO Tx: 824 – 849 MHz (Cellular 800 MHz) Rx: 869 – 894 MHz Tx: 1850 – 1910 MHz (PCS 1900 MHz) Rx: 1930 – 1990 MHz BC10 Tx: 817 –...
- Page 53 RV50 Series Specifications Table 4-2: RV50 MC7304 International Radio Technology Band Frequency Band 1 (2100 MHz) Tx: 1920 – 1980 MHz Rx: 2110 – 2170 MHz Band 3 (1800 MHz) Tx: 1710 – 1785 MHz Rx: 1805 – 1880 MHz Band 7 (2600 MHz) Tx: 2500 –...
- Page 54 AirLink RV50 Series Hardware User Guide Table 4-3: RV50X Radio Module MC7455 North America and EMEA Radio Band Frequency (Tx) Frequency (Rx) Technology Band 1 1920 – 1980 MHz 2110 – 2170 MHz Band 2 1850 – 1910 MHz 1930 – 1990 MHz Band 3 1710 –...
- Page 55 RV50 Series Specifications Table 4-4: RV50X Radio Module MC7430 Asia Pacific Radio Band Frequency (Tx) Frequency (Rx) Technology Band 1 1920 – 1980 MHz 2110 – 2170 MHz Band 3 1710 – 1785 MHz 1805 – 1880 MHz Band 5 824 –...
-
Page 56: Radio Module Conducted Transmit Power
AirLink RV50 Series Hardware User Guide Radio Module Conducted Transmit Power The following tables provide radio module conducted transmit power specifications. The radio module type is printed on the label on the bottom of the gateway and is available in ACEmanager (Status > About). - Page 57 RV50 Series Specifications Table 4-6: RV50 Radio Module MC7304 Conducted Transmit Power Band Conducted Tx Notes Power (dBm) Band 1 + 23 ± 1 Band 3 Band 8 Band 20 Band 7 + 22 ± 1 UMTS + 23 ± 1 Connectorized (Class 3) Band 1 (IMT 2100 12.2 kbps) Band 2 (UMTS 1900 12.2 kbps)
-
Page 58: Carrier Aggregation Combinations
AirLink RV50 Series Hardware User Guide Table 4-8: RV50X Radio Module MC7430 Conducted Transmit Power Band Conducted Tx Notes Power (dBm) Bands 1, 3, 5, 8, 18, 19, 21, 28, 39 + 23 ± 1 Band 7, 38, 40, 41 + 22 ±... -
Page 59: Gnss Technology
RV50 Series Specifications Table 4-10: RV50X MC7430 Carrier Aggregation Combinations 1 + 8/18/19/21 3 + 5/7/19/28 5 + 3/7 7 + 3/5/7/28 8 + 1 18 + 1 19 + 1/3/21 21 + 1/19 28 + 3/7 38 + 38 39 + 39 40 + 40 41 + 41... -
Page 60: Sim Interface
AirLink RV50 Series Hardware User Guide SIM Interface • The RV50 Series gateway has two 6-pin SIM sockets for mini-SIM (2FF) SIM cards, operated at 1.8 V/3.3 V. • This interface is compliant with the applicable 3GPP standards for USIM. -
Page 61: Mechanical Specifications
RV50 Series Specifications Mechanical Specifications Screws used to attach gateway cover Mounting holes 94 mm 85 mm 3.70 in. 3.35 in. Underside view Cellular (RF) antenna connector Power connector Ethernet Serial (RS-232) Rx Diversity 34 mm 1.34 in. GNSS Back view 119.00 mm 4.69 in. - Page 62 AirLink RV50 Series Hardware User Guide 4112895...
-
Page 63: Regulatory Information
Warning: Changes or modifications to this device not expressly approved by Sierra Wireless could void the user's authority to operate this equipment. RF Exposure In accordance with FCC/IC requirements of human exposure to radio... -
Page 64: Declaration Of Conformity
25, 26 2417C-MC7455 Bands 7, 41 9 dBi Sierra Wireless hereby declares the AirLink RV50 Series devices are in compliance with the essential requirements and other relevant provisions of Directive 1999/5/EC. The RV50 Series devices display the CE mark. Warning: Changes or modifications to this device not expressly approved by Sierra Wireless could void the user's authority to operate this equipment. -
Page 65: Weee Notice
Regulatory Information WEEE Notice If you purchased your AirLink RV50 Series devices in Europe, please return it to your dealer or supplier at the end of its life. WEEE products may be recognized by their wheeled bin label on the product label. - Page 66 AirLink RV50 Series Hardware User Guide 4117313...
-
Page 67: Accessories
A: Accessories DC Power Cable (Black Connector) Table A-1: DC Power Cable DC Power Cable Part Number 2000522 Product Release 2016 Components: 1 UL2464 20 AWG x 4 core cable 4 Molex female crimp terminals /AWG 20-24, 250V, 4A Max, phosphor bronze ... -
Page 68: Ac Power Adapter (Black Connector)
AirLink RV50 Series Hardware User Guide AC Power Adapter (Black Connector) AC Power Adapter Part Number 2000579 Product Release Date 2016 AC Power Adapter Input Table A-2: Input Specifications Minimum Typical Maximum Input Input Voltage 90 VAC 100 – 240 VAC... -
Page 69: Ac Power Adapter Reliability And Quality Control
Table A-4: AC Power Adapter Environmental Specifications Non-operating Storage Temperature C ~ 70°C ° Relative Humidity 10% ~ 90% Vibration and Shock MIL-STD-810D, method 514 AC Power Adapter Reliability and Quality Control AC Power Adapter MTBF When the power supply is operating within the limits of this specification, the MTBF is at least 200,000 hours at 25°C (MIL-HDBK-217F). -
Page 70: Ac Power Adapter Energy Efficiency
AirLink RV50 Series Hardware User Guide AC Power Adapter Energy Efficiency The AC adapter complies with International Efficiency Levels, as shown in Table A-6. Table A-6: AC Adapter Energy Efficiency Supplied No-load power Average active International Input consumption mode efficiency Efficiency Level 115 VAC, 60 Hz. -
Page 71: Acronyms
B: Acronyms Table B-1: Acronyms Acronym or term Definition 3GPP Generation Partnership Project 3GPP unites 6 telecommunications standard development organizations (ARIB, ATIS, CCSA, ETSI, TTA, TTC), and provides their members with a stable environment to produce Reports and Specifications that define 3GPP technologies. Application Programming Interface A protocol intended to be used as an interface by software components to communicate with each other. - Page 72 AirLink RV50 Series Hardware User Guide Table B-1: Acronyms (Continued) Acronym or term Definition Electronics Industry Association EIA was a standards and trade organization composed as an alliance of trade associations for electronics manufacturers in the United States. They developed standards to ensure the equipment of different manufacturers was compatible and interchangeable.
- Page 73 Acronyms Table B-1: Acronyms (Continued) Acronym or term Definition GPRS General Packet Radio Service A packet-oriented mobile data service on 2G and 3G cellular communication systems. GPRS was originally standardized by European Telecommunications Standards Institute (ETSI) in response to the earlier CDPD and i-mode packet-switched cellular technologies.
- Page 74 AirLink RV50 Series Hardware User Guide Table B-1: Acronyms (Continued) Acronym or term Definition Long Term Evolution High performance air interface for cellular mobile communication systems. Point to Point Protocol An alternative communications protocol used between computers, or between computers and routers on the Internet.
-
Page 75: Index
Index Fusing, 29 Accessories, 17 ACEmanager, 14, 43 Acronyms, 71 Glossary, 71 AirLink Management Service, 14, 43 GNSS, 21 ALEOS software, 42 GPS. See GNSS Analog input, 38 Grounding the chassis, 30 Antenna connecting, 25 maximum gain, 64 recommended separation, 26 Host Interfaces, 20 safe... - Page 76 AirLink RV50 Series Hardware User Guide Serial connector pin-out, 28 Serial port, 28 virtual serial port, 27 Open drain, 39 SIM cards, insert, 24 Operating voltage, 21 SIM, dual, 16 Output, digital, 39 Specifications, 19, 51 environmental, 19 environmental testing, 20...
Need help?
Do you have a question about the AirLink RV50 Series and is the answer not in the manual?
Questions and answers