Table of Contents
Advertisement
Available languages
Available languages
BextSpot Pro Spotter
Instructions For Use - Original Instructions / Instrucciones de uso / Mode d' emploi
READ THIS BOOK
LEA ESTE MANUAL
LISEZ CE MANUEL
This book has important information for the use and safe operation of this machine. Failure to read this book prior to oper-
ating or attempting any service or maintenance procedure to your Clarke machine could result in injury to you or to other
personnel; damage to the machine or to other property could occur as well. You must have training in the operation of this
machine before using it. If your operator(s) cannot read this manual, have it explained fully before attempting to operate this
machine.
All directions given in this book are as seen from the operator's position at the rear of the machine.
Form No. 56091115
2/14
Model: CLARKE130SP
English (A2 - A7)
EN
Español (B2 - B7)
ES
Français (C2 - C7)
FR
Advertisement
Table of Contents

Related Manuals for Clarke BextSpot Pro


Summary of Contents for Clarke BextSpot Pro
- Page 1 This book has important information for the use and safe operation of this machine. Failure to read this book prior to oper- ating or attempting any service or maintenance procedure to your Clarke machine could result in injury to you or to other personnel;...
-
Page 2: Table Of Contents
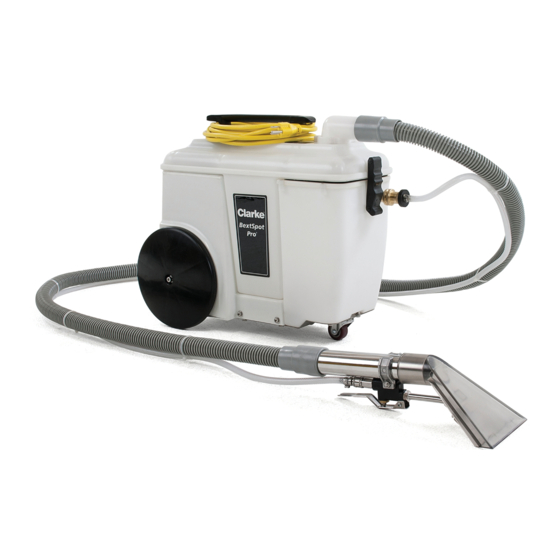
Base Assy ................D-4 – D-5 Wiring Diagram ................. D-5 MACHINE COMPONENTS Solution Tank Recovery Tank Handle Transport Wheels Front Caster Vacuum Intake Solution Coupler Vacuum Hose Solution Hose 10) Hand Tool 11) Clamp A - 2 BextSpot Pro - 56091115 2/14... -
Page 3: Safety Precautions
No adapter should be used with this machine. Adapte Metal Scre Grounded Outlet Grounding Pin Grounded Outlet Box FIGURE 1 2/14 56091115 - BextSpot Pro A - 3... -
Page 4: Machine Operation
!!! DO NOT USE FLAMMABLE LIQUIDS OR OPERATE MACHINE IN OR NEAR FLAMMABLE LIQUIDS OR VAPORS!!! Connect the solution hose and vacuum hose to the machine. Connect the power cable to a grounded wall outlet. (see grounding instructions) A - 4 BextSpot Pro - 56091115 2/14... -
Page 5: Machine Maintenance & Storage
Check brush strip & remove any debris or carpet fi bers. Check pick up head on hand tool and remove any debris or carpet fi bers. Clean machine with a nonabrasive cleaner. Inspect power cable for any damage. Replace if necessary. 2/14 56091115 - BextSpot Pro A - 5... -
Page 6: Technical Specifi Cations
NOTE: If you are storing the machine in an area which can freeze, be sure both tanks and the solution plumbing are empty of all water and dry! A - 6 BextSpot Pro - 56091115 2/14... -
Page 7: Basic Troubleshooting
Contact Distributor Faulty solution pump Contact Distributor Clogged solution tank fi lter Clean or replace fi lter Check for obstructions and kinks and reroute or replace if Pinched or kinked solution hose needed 2/14 56091115 - BextSpot Pro A - 7... - Page 8 COMPONENTES DE LA MÁQUINA Depósito de Solución Depósito de Recuperación Mango Ruedas de Transporte Roldana Delantera Entrada de Aspiración Solución de Acoplamiento Manguera de Aspiración Manguera de Solución 10) Herramienta Manual 11) Pinza B - 2 BextSpot Pro - 56091115 2/14...
- Page 9 Asegúrese de que el equipo esté conectado a un tomacorriente que tenga la misma confi guración que el enchufe. No debe utilizarse ningún adaptador con esta máquina. Adaptad Tornillo de M Receptáculo con Toma a Tierra Caja del Receptáculo con Toma a Tierra Conexión a Tierra FIGURA 1 2/14 56091115 - BextSpot Pro B - 3...
- Page 10 MÁQUINA CERCA DE LÍQUIDOS INFLAMABLES O VAPORES!!! Conecte las mangueras de solución y aspiración a la máquina. Conecte el cable de alimentación a un tomacorriente con conexión a tierra. (Lea las Instrucciones para conexión a tierra) B - 4 BextSpot Pro - 56091115 2/14...
- Page 11 Compruebe el cabezal de recolección en la herramienta manual y retire cualquier residuo o fi bra de la alfombra. Limpie la máquina con un limpiador no abrasivo. Verifi que si el cable eléctrico está deteriorado. Sustituya si es necesario. 2/14 56091115 - BextSpot Pro B - 5...
- Page 12 NOTA: ¡Si va a guardar la máquina en un área que se puede congelar, asegúrese de que ambos, depósitos y tuberías de solución, estén vacíos de toda el agua y secos! B - 6 BextSpot Pro - 56091115 2/14...
- Page 13 Filtro del depósito de solución obstruido Limpie o reemplace el fi ltro Verifi que si hay obstrucción y pliegues, y redirija o reemplace si Manguera de solución trabada o doblada es necesario 2/14 56091115 - BextSpot Pro B - 7...
- Page 14 COMPOSANTS DE L’APPAREIL Réservoir de solution Réservoir de récupération Poignée Roues de transport Roulette avant Orifi ce d’aspiration Raccord pour solution détergente Tuyau d’aspiration Tuyau de solution 10) Embout manuel 11) Collier C - 2 BextSpot Pro - 56091115 2/14...
- Page 15 Vérifi er que l’appareil est bien branché à une prise de courant ayant la même confi guration. Ne pas utiliser d’adaptateur avec cet appareil. Adaptate Vis Metalliq Prise de Terre Socle de Prise de Terre Borne de Terre 2/14 56091115 - BextSpot Pro C - 3...
- Page 16 INFLAMMABLES OU A PROXIMITÉ DE CEUX-CI !!! Brancher le tuyau de solution et le tuyau d’aspiration à la machine. Brancher le câble d’alimentation à une prise reliée à la terre. (Voir les consignes de mise à la terre) C - 4 BextSpot Pro - 56091115 2/14...
- Page 17 fi bres de moquette qui ont pu s’accumuler. Nettoyer la machine à l’aide d’un détergent non abrasif. Vérifi er que le cordon d’alimentation n’est pas endommagé. Le remplacer si nécessaire. 2/14 56091115 - BextSpot Pro C - 5...
- Page 18 à permettre à l’air de circuler. REMARQUE : Si vous stockez la machine dans un endroit exposé au gel, vérifi er que les deux réservoirs et le tuyau de solution sont bien purgés et secs. C - 6 BextSpot Pro - 56091115 2/14...
- Page 19 Nettoyer ou remplacer le fi ltre Vérifi er que le tuyau n’est pas bouché et enlever les débris Le tuyau de solution est coudé ou entortillé qui le bouche puis désentortiller le ou le remplacer si nécessaire 2/14 56091115 - BextSpot Pro C - 7...
- Page 20 PARTS LIST TANK ASSEMBLY 14 15 D - 2 BextSpot Pro - 56091115 2/14...
-
Page 21: Parts List
Float Top VF13516 Washer HOSE ASSEMBLY Item Ref. No. Description VA86860 Hand Tool VV68148 Solution Hose RD20652 Cable Tie RD11177 Clamp, Hose RD80784 Coupler, Male End RD60388 Hose End VV68147 Hose VA80836 Connector 2/14 56091115 - BextSpot Pro D - 3... - Page 22 PARTS LIST VACUUM MOTOR ASSEMBLY 10 11 D - 4 BextSpot Pro - 56091115 2/14...
-
Page 23: Wiring Diagram
VA91346 Switch Assembly VV30183 Power Cord VF99008B Cord Strain Relief VV20509 Screw, Ph, M5 X 10 VV68123 Caster, 1.5” VF99012 Circuit Breaker WIRING DIAGRAM Circuit Breaker 110V-120V 60Hz SINGLE PHASE POWER SUPPLY 2/14 56091115 - BextSpot Pro D - 5... - Page 24 14600 21st Avenue North Plymouth, MN 55447-3408 www.clarkeus.com Phone: 800-253-0367 Fax: 800-825-2753 ©2014 Nilfi sk-Advance, Inc. A Nilfi sk-Advance Brand...
Need help?
Do you have a question about the BextSpot Pro and is the answer not in the manual?
Questions and answers