
Subscribe to Our Youtube Channel
Related Manuals for Danfoss Series 20


Summary of Contents for Danfoss Series 20
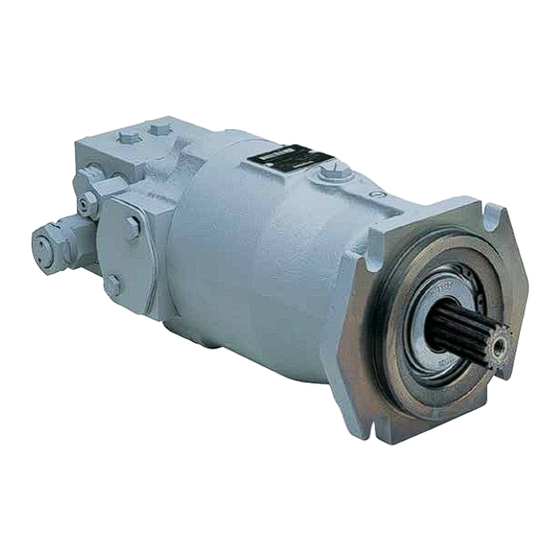
- Page 1 MAKING MODERN LIVING POSSIBLE Service Manual and Repair Instructions Axial Piston Motors Series 20 powersolutions.danfoss.com...
-
Page 2: General Information Introduction
To facilitate easy servicing, the unit has been designed with this in mind. Many of the individual parts and assemblies are interchangeable throughout the entire series 20 family. This includes such items as the servo valve, the charge pumps and the manifold components. -
Page 3: Table Of Contents
Service Manual and Axial Piston Motors Series 20 Repair Instructions Contents General Information Introduction ....................................2 Description ....................................2 Model Code Model Code ....................................4 Recommended Tools and Tools for Minor Repairs and Unit Maintenance ......................5 Installation Additional Tools for Complete Stripping of Units ......................5 Measurement Instruments .............................. -
Page 4: Model Code
Service Manual and Axial Piston Motors Series 20 Repair Instructions Model Code S M F Producer mark Series of product producer specifi- motor fixed cation according association to construction type 20 (at present = A1) Displacement cm Units with working mark 33.3 [2.03]... -
Page 5: Recommended Tools And Installation
Service Manual and Axial Piston Motors Series 20 Repair Instructions Recommended Tools and Installation y Circlip pliers ∅ 2 to 2.5 mm Tools for Minor Repairs and Unit Maintenance y Screw drivers 3, 6 and 9mm y Plastic hammer - small y Pointed pliers (can also be slightly bent) y Torque key to 14.9 Nm [132 lbf•inch]... -
Page 6: Troubleshooting, Gauge Installation And Information
Service Manual and Axial Piston Motors Series 20 Repair Instructions Recommended Tools and Installation Troubleshooting, Gauge Installation and Information Gauge Information Charge Pressure 60 bar [870 psi] - Gauge 7/16 - 20 UNF O-ring Fitting System pressure 600 bar [8700 psi] - Gauge... -
Page 7: Start-Up Procedure Preconditions For Trouble-Free Operation
Clean the air filter whenever too much dirt has accumulated. The max. speed is as specified in the catalogue L1003621 Series 20 Axial Piston Pumps, Technical Information or L1003465 Series 20 Axial Piston Motors, Technical Information. -
Page 8: Preconditions For Trouble-Free Operation (Continued)
Service Manual and Axial Piston Motors Series 20 Repair Instructions Start-up procedure First-time operation The charge pressure measured at the charge pressure gauge connection port of the pump with the adjusting lever in the neutral position should be approx. 15 bar [217.6 psi] at a pump input speed n = 1500 min (rpm). -
Page 9: Plumbing Installa Tion (Variable Displacement Pump - Fixed Displacement Motor)
- or even better by the control linkage - so that in both directions final position of stroke per L1003621 Series 20 Axial Piston Pumps, Technical Information is achieved. 13. Allow the prime mover to turn at 1500 min (rpm). -
Page 10: System Circuit Description
Service Manual and Axial Piston Motors Series 20 Repair Instructions Start-up procedure System Circuit Description HEAT EXCHANGER BYPASS VALVE RESERVOIR CONTROL VACUUM GAUGE HANDLE HEAT EXCHANGER SERVO CONTROL CYLINDER REVERSIBLE VARIABLE DISPLACEMENT PUMP FIXED SERVO PURGE RELIEF VALVE PUMP SWASHPLATE... -
Page 11: System Maintenance Inlet Filter
(suction) connection. Fill the sample into a closable container that is free of residues. Have the oil examined for serviceability by Danfoss, by Oil Manufacturer or by an appropriate institution. Important: Use only recommended oils! (See Information). -
Page 12: Troubleshooting
Service Manual and Axial Piston Motors Series 20 Repair Instructions Troubleshooting Transmission Operates in Insert charge check valves Inspect high pressure Check control one Direction Only (see Series 20 Axial Piston relief valve linkage Pumps, Service Manual (see page 13) -
Page 13: System Operating Hot
Service Manual and Axial Piston Motors Series 20 Repair Instructions Troubleshooting System Operating Hot Check fluid Inspect motor Check system Inspect heat Inspect level in by-pass valve pressure exchanger inlet filter reservoir (if used) (see page 13) to Low Defective... -
Page 14: Inspection Instructions
Service Manual and Axial Piston Motors Series 20 Repair Instructions Troubleshooting Inspection Instructions Checking the high pressure relief valve When the problem occurs in one direc tion only, interchange the relief valve cartridges to see if High pressure relief valve the problem changes to the other direction. -
Page 15: Preparation For Assembly
Service Manual and Axial Piston Motors Series 20 Repair Instructions Troubleshooting Inspection Instructions Checking the shuttle valve The shuttle spool must be easily movable in the (continued) Washer Shuttle spool bore. Any wear, dirt or cracks, indicate that the complete valve block needs to be replaced, the spool and manifold are matched and cannot be replaced separa tely (see page 20). -
Page 16: Disassembly And Assembly Sectional View
Service Manual and Axial Piston Motors Series 20 Repair Instructions Disassembly and Assembly Sectional View Axial piston fixed displacement motor High pressure relief valves Cylinder block (adjustable) assembly Shaft seal Purge relief valve Output shaft Valve block Shuttle valve Swashplate P005 118E L1003443 •... -
Page 17: Exploded View
Service Manual and Axial Piston Motors Series 20 Repair Instructions Disassembly and Assembly Exploded View Description of parts: 1 Hexagonal screw 19 Retainer spring 39 Plug-pipe 2 Washer 20 Spring guide 71 O-ring 3 Kit manifold valve 21 Spring 75 O-ring... -
Page 18: Minor Repairs
Service Manual and Axial Piston Motors Series 20 Repair Instructions Disassembly and Assembly Minor Repairs Changing the shaft seal (disassembly) Utilize the lifting gear and mounting block in accordance with the fitting instructions on page Clamp seal puller on seal-stationary It is recommended that all shaft seal parts be The seal-stationary is removed next. -
Page 19: Changing The Shaft Seal (Assembly)
Service Manual and Axial Piston Motors Series 20 Repair Instructions Disassembly and Assembly Minor Repairs (continued) Changing the shaft seal (assembly) 71 Bronze ring Slide the bronze sealing ring over the shaft and onto the shaft pilot diameter with the O-ring facing the unit. -
Page 20: Changing The Valve Manifold Assembly
Service Manual and Axial Piston Motors Series 20 Repair Instructions Disassembly and Assembly Minor Repairs (continued) Changing the valve manifold assembly Torque spanner The valve manifold assembly can be removed Remove the six (6) hex. cap screws and lift the from the motor and replaced in its entirety. -
Page 21: Repair The Manifold Valve Assembly
Service Manual and Axial Piston Motors Series 20 Repair Instructions Disassembly and Assembly Minor Repairs (continued) Repair the manifold valve assembly High pressure relief valve High pressure relief valve Valve block O-rings + back up rings Washer Washer Hex-plug Shuttle valve... -
Page 22: Installation Torque Values
Installation Torque Values Installation torque values Nm [lbf•in], series 20 Frame size Valve manifold assembly 21.7 [192] - 28.5 [252] 21.7 [192] - 28.5 [252] 21.7 [192] - 28.5 [252]... -
Page 23: Changing The Valve And Bearing Plate (Disassembly)
Service Manual and Axial Piston Motors Series 20 Repair Instructions Disassembly and Assembly Minor Repairs (continued) Changing the valve and bearing plate (disassembly) CCaution! Major repairs may affect the unit warranty, therefore equipment manufacturer should be consulted prior to undertaking such repairs. -
Page 24: Changing The Valve And Bearing Plate (Assembly)
Service Manual and Axial Piston Motors Series 20 Repair Instructions Disassembly and Assembly Minor Repairs (continued) Changing the valve and bearing plate (assembly) Renewing the valve- and bearing plates. Install the pilot ring and the locating pin in the cylinder block. -
Page 25: Changing The Cylinder Block Kit, The Swash Plate And The Motor Shaft (Disassembly)
Service Manual and Axial Piston Motors Series 20 Repair Instructions Disassembly and Assembly Minor Repairs (continued) Torque spanner Place the end cap gasket on the housing, being Install two (2) end cap screws and alter nately certain the locating pins are in place, then install tighten them until the internal spring has the end cap and valve plate. - Page 26 Service Manual and Axial Piston Motors Series 20 Repair Instructions Disassembly and Assembly Minor Repairs (continued) Place the motor in a horizontal position. Slide the cylinder block assembly off the shaft while holding the external end of the shaft. Depending upon the extent of damage, the cylinder block should be replaced complete or certain parts exchanged as the case may be.
-
Page 27: Changing The Cylinder Block Kit, The Swash Plate And The Motor Shaft (Assembly)
Service Manual and Axial Piston Motors Series 20 Repair Instructions Disassembly and Assembly Minor Repairs (continued) Changing the cylinder block kit, the swash plate and the motor shaft (assembly) Cone bearing Lubricate the swash plate, slippers, pistons and bores with clean oil. Hold the shaft on the... - Page 28 Phone: +86 21 3418 5200 Danfoss can accept no responsibility for possible errors in catalogues, brochures and other printed material. Danfoss reserves the right to alter its products without notice. This also applies to products already on order provided that such alterations can be made without changes being necessary in specifications already agreed.
Need help?
Do you have a question about the Series 20 and is the answer not in the manual?
Questions and answers