Table of Contents
Advertisement
Advertisement
Table of Contents

Related Manuals for IFM Electronic O1D102


Summary of Contents for IFM Electronic O1D102
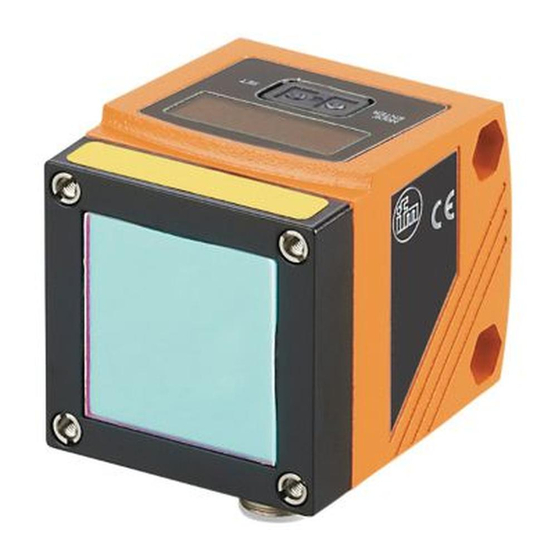
- Page 1 Operating instructions Optical distance sensor O1D102...
-
Page 2: Table Of Contents
Content 1 Preliminary note ���������������������������������������������������������������������������������������������������4 1�1 Symbols used ������������������������������������������������������������������������������������������������4 1�2 Warning signs used ���������������������������������������������������������������������������������������4 2 Safety instructions �����������������������������������������������������������������������������������������������4 3 Functions and features ����������������������������������������������������������������������������������������6 3�1 Applications ���������������������������������������������������������������������������������������������������6 4 Functions �������������������������������������������������������������������������������������������������������������6 4�1 Output function hysteresis �����������������������������������������������������������������������������6 4�2 Output function window ���������������������������������������������������������������������������������6 4�3 Analogue output function �������������������������������������������������������������������������������6 4�4 Switch off the laser ���������������������������������������������������������������������������������������6 5 Installation������������������������������������������������������������������������������������������������������������7 5�1 Installation conditions ������������������������������������������������������������������������������������7... - Page 3 10�2�2 Setting of the display ������������������������������������������������������������������������16 10�2�3 Configuration of OUT1 ����������������������������������������������������������������������16 10�2�4 Hysteresis function ���������������������������������������������������������������������������17 10�2�5 Setting of the switch point for hysteresis function OUT1 ������������������18 10�2�6 Window function �������������������������������������������������������������������������������18 10�2�7 Setting of the switch points for window function OUT1 ��������������������19 10�2�8 Configuration of OUT1 ����������������������������������������������������������������������20 10�2�9 Setting of the switch point for hysteresis function OUT2 ������������������20 10�2�10 Setting of the switch points for window function OUT2 ������������������20...
-
Page 4: Preliminary Note
1 Preliminary note 1.1 Symbols used ► Instruction > Reaction, result […] Designation of pushbuttons, buttons or indications → Cross-reference Important note Non-compliance can result in malfunctions or interference� Information Supplementary note� 1.2 Warning signs used WARNING Warning of serious personal injury� Death or serious irreversible injuries may result�... - Page 5 WARNING Visible laser light; laser protection class 2� Use of controls or adjustments other than those specified herein may result in hazardous radiation exposure� Damage to the retina is possible� ► Do not stare into the laser beam! ► Apply the enclosed labels (laser warning) in the immediate vicinity of the unit� ►...
-
Page 6: Functions And Features
• The measured value is shown in a 10-segment display� • According to the set output functions 2 output signals can be generated� • O1D102: Certification 21 CFR PART 1040 The distance between the sensor and the background must be limited to max�... -
Page 7: Installation
5 Installation 5.1 Installation conditions ► Install the unit so that the object to be detected is within a measuring range of 0�2���3�5 m� The unambiguity range of the sensor is fixed to 4 m� Objects within a range > 3�5…4 m are suppressed� Reflecting objects in the direct beam path of the sensor - also in the range >... -
Page 8: Electrical Connection
► The national and international regulations for the installation of electrical equipment must be adhered to� AN_i_1707_G Original Scale Drawing (MTD) ► Ensure voltage supply according to EN 50178, SELV, PELV� O1D102: cULus, Supply Class 2 ► Disconnect power� ► Connect the unit as follows: O1D102 PNP 2: Out 2... -
Page 9: Operating And Display Elements
7 Operating and display elements 1: 4 x LED green Lighting LED = power and set display unit (mm, m, inch) 2: 4 x LED yellow Indication of the switching status; lights, if the corresponding (two not output is switched� connected) 3: 4-digit Indication of the measured distance, the parameters and... -
Page 10: Menu
8 Menu 8.1 Menu structure = [MODE / ENTER] = [SET]... -
Page 11: 8�2 Explanation Of The Menu
8.2 Explanation of the menu For the factory settings please refer to the end of these instructions (→ 14 Factory setting). Configuration for output 1 4 switching functions can be selected: [Hno], [Hnc], [Fno], [Fnc] → 10.2.3 Configuration of OUT1 Switch point for hysteresis function OUT1 Limit value at which the output with selected hysteresis function changes its switching state (object nearer/farther than distance set)�... - Page 12 Analogue end point Measured value at which 20 mA / 10 V are provided� [AEP] is only active if [OU2] = [I] or [U]� → 10.2.11 Scaling of the measuring range (analogue output) Teach mode Selection "sampling rate" or "repeatability" →...
-
Page 13: Operating Modes
9 Operating modes 9.1 Run mode The run mode is the normal operating mode� After power on the unit is in the Run mode� It carries out its monitoring function and generates output signals according to the set parameters� The display indicates the current distance, the yellow LEDs signal the switching status of the outputs�... -
Page 14: Parameter Setting
10 Parameter setting During parameter setting the unit remains internally in the operating mode� It continues its monitoring function with the existing parameters until the change has been finished� 10.1 Parameter setting in general 10.1.1 Setting of the parameter value Select the display unit [Uni] before you define the values for the parameters�... -
Page 15: 10�1�2 Change From Menu Level 1 To Menu Level 2
10.1.2 Change from menu level 1 to menu level 2 ► Press [MODE/ENTER] several times until [EF] is displayed. MODE ENTER ► Press [SET] briefly� > The first parameter of the sub-menu is displayed (here: [dr1])� MODE ENTER 10.1.3 Electronic lock The unit can be locked electronically to prevent unintentional settings�... -
Page 16: 10�2 Configuration Of The Basic Settings
10.2 Configuration of the basic settings 10.2.1 Selection of the display unit Set [Uni] before the values for the parameters [SPx], [nSPx], [FSPx], [ASP], [AEP] are defined� In case of subsequent changes of the display unit rounding errors during internal conversion to other units may falsify the set values� ►... -
Page 17: 10�2�4 Hysteresis Function
10.2.4 Hysteresis function The hysteresis keeps the switching state of the output stable if the measured value varies about the sensing range� In either case set and reset points are symmetrically arranged around the selected switch point [SPx]� The hysteresis is the distance between set and reset points;... -
Page 18: 10�2�5 Setting Of The Switch Point For Hysteresis Function Out1
Switching status of the outputs Output function Object distance (D) Output status [Hno] D < [SPx] Closed D > [SPx] Open [Hnc] D < [SPx] Open D > [SPx] Closed Example of output function [Hno] Sampling rate 5 Hz, distance to the object 1200 mm, grey value (18 % remission): Hysteresis = ±... -
Page 19: 10�2�7 Setting Of The Switch Points For Window Function Out1
Switches when the object is detected [nSPx] [FSPx] [Fno] [nSPx] = switch point "near"; [FSPx] = switch point "far"; FE = window If the measured value is between the switch point "near" [nSPx] and the switch point "far" [FSPx], the output is closed (when [OUx] = [Fno])� Switching status of the outputs Output function Object distance (D) -
Page 20: 10�2�8 Configuration Of Out1
10.2.8 Configuration of OUT1 ► Select [OU2]� ► Set the switching functions or analogue signals: • [Hno] = hysteresis function / normally open • [Hnc] = hysteresis function / normally closed • [Fno] = window function / normally open • [Fnc] = window function / normally closed •... - Page 21 Current output 4 ... 20 mA Factory setting Measuring range scaled I [mA] I [mA] 0(ASP) 3500(AEP) MEW = final value of the measuring range In the set measuring range the output signal is between 4 and 20 mA� Faults are also displayed: Too much light or object too near: 3�5 mA for a rising edge ([ASP] <...
-
Page 22: 10�3 Teach Mode
10.3 Teach mode 10.3.1 Setting of the sampling rate The sampling rate indicates the time after which a new result of measurement is provided and the outputs are updated� The switching frequency is typ� approx� 1/3 of the sampling rate� ►... -
Page 23: 10�4 Extended Functions
The values apply at: • constant ambient conditions (23°C / 960 hPa) • extraneous light of max�: 100 klx • only after unit powered up for 10 minutes 10.4 Extended functions 10.4.1 Setting of the time delay for switching outputs ►... -
Page 24: Io-Link
11 IO-Link 11.1 General information This unit has an IO-Link communication interface which requires an IO-Link- capable module (IO-Link master) for operation� The IO-Link interface enables direct access to the sensor values and parameters and provides the possibility to set the parameters of the unit during operation� In addition communication is possible via a point-to-point connection with a USB adapter cable�... -
Page 25: 12�1 Fault Indication
Lifetime of a laser diode: 50000 hours 12.1 Fault indication Possible Current output / Switching output cause voltage output [ASP] < [ASP] > [Hno] [Hnc] [Fno] [Fnc] [AEP] [AEP] too much light, 3,5 mA / 20,5 mA / [++] ON OFF OFF ON NoData e�g�... -
Page 26: Maintenance, Repair And Disposal
13 Maintenance, repair and disposal Faulty sensors must only be repaired by the manufacturer� ► Keep the front lens of the sensor free from soiling� ► After use dispose of the unit in an environmentally friendly way in accordance with the applicable national regulations� 14 Scale drawing M12x1 Dimensions in mm... -
Page 27: Factory Setting
15 Factory setting Parameter Setting range Factory setting Own setting mm, m, inch Hno, Hnc, Fno, Fnc 200���3500 1000 nSP1 200���3500 FSP1 200���3500 1200 Hno, Hnc, Fno, Fnc, I, U 200���3500 2000 nSP2 200���3500 1800 FSP2 200���3500 2200 0���3500 0���3500 3500 rATE 1���50...
Need help?
Do you have a question about the O1D102 and is the answer not in the manual?
Questions and answers
on display showing ++