Kongskilde 2800 SERIES Owner's Manual
Hide thumbs
Also See for 2800 SERIES:
- Assembly instructions manual (29 pages) ,
- Assembly instructions manual (64 pages)
Table of Contents

Related Manuals for Kongskilde 2800 SERIES


Summary of Contents for Kongskilde 2800 SERIES
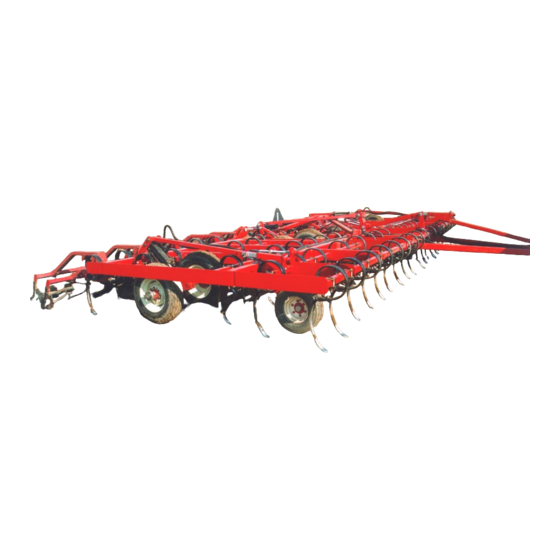
- Page 1 2800 SERIES FIELD CULTIVATORS *Model may not be exactly as shown. Kongskilde reserves the right to make changes to product designs and specifications without notice or obligation to rework. OWNERS MANUAL Warranty Certificate Operating Guide...
-
Page 2: Table Of Contents
TABLE OF CONTENTS INTRODUCTION PRODUCT SAFETY PRECAUTIONS SAFETY DEVICES OPERATING INSTRUCTIONS FIELD LEVELLING PROCEDURE OPERATING ADJUSTMENTS PARKING AND STORAGE MAINTENANCE & LUBRICATION HYDRAULICS AND HOSE DIAGRAMS SECTION TROUBLE SHOOTING CHART... -
Page 3: Introduction
INTRODUCTION This manual has been developed to assist you in the operating and servicing of your new Kongskilde product. Read it carefully: it will provide you with information that will enable you to obtain years of dependable service. If your did not receive a warranty registration form, contact your dealer. He will be able to obtain one for you. - Page 4 If a tool, procedure, work method or operating technique not specifically recommended by Kongskilde is used, you must satisfy yourself that is is safe for you and others. You should ensure that the implement will not be damaged or made unsafe by the operation, maintenance or repair procedures you choose.
-
Page 5: Product Safety Precautions
6. Make sure all wheel bolts are secure and check that the tires are in good condition and inflated properly before attempting to move the implement on public roadways. 7. IMPORTANT NOTE: Some larger models of 2800 Series cultivators may exceed local height regulations for safe transporting on public roadways. The operator is responsible at all times to insure the safe transport of the cultivator along the chosen route.Take care, especially when... - Page 6 8. Make sure that the tractor is shifted into park before getting out to remove transport locks and wing fold lock pins. Never remove wing lock pins or wheel transport locks when the implement is sitting on uneven ground where tipping could occur. 9.
-
Page 7: Safety Devices
SAFTEY DEVICES FOR Folding and Transporting Implements: WHEEL LOCK FOR TRANSPORT CYLINDERS Insert a safety lock over the centre section master cylinder rod and fasten the pins. Slowly ease the cultivator down until the wheel lock is wedged firmly in place. When cultivating the safety lock should be stored in the tractor box or in a place that will not interfere with the safe operation of the equipment. -
Page 8: Operating Instructions
OPERATING INSTRUCTIONS 1. When hooking to the tractor always use an 4. Extend the master wheel lift cylinder and approved draw pin. Secure the draw pin in remove transport lock from the centre wheel place with a safety pin (or other locking cylinder rod. - Page 9 7. Level the cultivator for the tractor draw bar height and set the working depth by following the procedure outlined in later in this manual under Operating Adjustments. 8. Periodically lift the machine completely out of the ground (or when turning at the end of the field).
-
Page 10: Field Levelling Procedure
FIELD LEVELLING PROCEDURE OVERVIEW 1. Set the working depth of the cultivator as described in step 4 of the operating adjustments. 2. Cultivate a short distance and stop. Level the cultivator in the fore aft direction using the procedure in step 3, of the operating adjustments. 3. -
Page 11: Operating Adjustments
OPERATING ADJUSTMENTS 1. Before the machine can be used in the field some basic adjustments need to be made in order to level the machine from side to side and front to back. The first step is to make sure that the centre section is level and that both centre section wheel arm links are set in the same holes. - Page 12 3. Once the cultivator is set level side to side, the machine must be adjusted to run level from front to back. This "fore & aft" leveling is accomplished by adjusting the top link of the hitch in or out by turning the pitch adjuster located near the pivot links. Remove the spring clip pin and adjust the top link as required to bring the front row of tines level with the tines on the back.
- Page 13 5. In order change the working depth of the tines, simply adjust the mechanical stroke control on the master cylinder in or out "shallow up" or deepen the cultivator from the original depth setting. It should not be necessary to readjust the wheel tower sliders, however you will need to reset the gauge wheels.
-
Page 14: Parking And Storage
PARKING THE CULTIVATOR 1. When not in use, park the cultivator on level areas only. Install the wheel locks and wing fold lock pins and release all hydraulic pressure before disconnecting the hydraulic lines from the tractor. If the unit will be parked outside for an extended period of time, remove the wheel locks and lower the cultivator down to rest on the tines. -
Page 15: Maintenance & Lubrication
MAINTENANCE & LUBRICATION Refer to the section on "Safety Precautions" and make sure that all persons working with the implement have been instructed on the safe operation of the unit before performing any maintenance opreations in and around the working areas of the machine. Make sure that the implement has been secured properly using the lock out devices supplied and/or ensure that all reasonable precautions have been taken to ensure that maintenance can be conducted in a safe manner by service personnel. - Page 16 5. Check all nuts and bolts, especiall the tine 7. Occasionally check the condition of the clamp bolts, after the first few hours of pivot pin connections and other moving operation and secure if loose. Inspect the linkages for excessive wear. Replace shares daily and replace worn ones.
- Page 17 10. After making repairs to the hydraulic system 11. The cultivator should never be assembled please follow these additional instructions and placed in the folded position without first in order to remove air from the wheel charging the hydraulic system, but never cylinders and hydraulic lines: assume this has been done! Even on a new machine, leaks can occur from improperly...
- Page 19 Spare part list / 2800 Wheel Lift Hydraulics. Date: 2000, 06. Fig. Part no. Description 600470110 Quick Coupler (Optional-not part of hose kit) 600470233 1/2" Hose 1/2" Pipe x 1/2" JIC - 230" (all models) 600470244 1/2" Hose 1/2" Pipe x 1/2" JIC - 375" (2800-60-20') 600470235 1/2"...
- Page 21 Spare part list / 2800 Wing Fold Hydraulics. Date: 2000, 06. Fig. Part no. Description 600470110 Quick Coupler (Optional-not part of hose kit) 600470232 3/8" Hose 1/2" Pipe x 3/8" JIC - 280" (2800-50-60-70-80) 600470157 3/8" Hose 1/2" Pipe x 3/8" JIC - 215" (2800-90-30') 600470194 3/8"...
- Page 22 HYDRAULIC TROUBLE SHOOTING CHART Problem Cause Remedy Air in System Raise cultivator to highest 1) Cultivator cylinders do not transport position. Hold the work in unison. Cylinders hydraulic lever on the tractor in seem spongy. the “raise” position for approx. 30 seconds.
- Page 23 Cause Remedy Problem 5) Entire cultivator settles. b) External leak. Repair leaking component. c) Wing cylinder and master Install new cylinder seal kits. cylinder leaking internally. The hydraulic system is not Not using the transport lock. 6) Cultivator settles in trans- intended to hold the cultivator port or while parked.
- Page 24 Printed in Canada 601230007 June 2000...
Need help?
Do you have a question about the 2800 SERIES and is the answer not in the manual?
Questions and answers