Linksys WIP300 User Manual
Wireless-g ip phone
Hide thumbs
Also See for WIP300:
- Product data (4 pages) ,
- Quick installation (2 pages) ,
- User manual (76 pages)
Table of Contents
Advertisement
Quick Links
Advertisement
Table of Contents

Subscribe to Our Youtube Channel
Related Manuals for Linksys WIP300


Summary of Contents for Linksys WIP300
- Page 1 Wireless-G IP Phone USER’ s MANUAL 〉 〉 〉 〉 〉 〉 〉 〉 〉 〉 December, 2005...
-
Page 2: Table Of Contents
Contents 1. Getting Started ..................5 1.1 Reading this User’ s Guide..............5 1.2 Charging the Battery................ 5 1.3 Switching the Phone On or Off ............6 1.4 Power Saving Mode................. 6 1.5 Making a Call .................. 6 1.6 Answering a Call................7 1.7 Using the Key Lock Feature ............. - Page 3 5.3 Transferring a Call ................. 20 5.4 Using the Call Mute ............... 21 5.5 Using Call Waiting ................. 21 5.6 Using Call Forwarding..............21 6. Menus....................23 6.1 Main Menu..................23 6.1.1 Phonebook ................23 6.1.2 Call Log................24 6.1.3 E-mail ................. 25 6.1.4 Speed Dial................
-
Page 4: Federal Communication Commission Interference Statement
Federal Communication Commission Interference Statement This equipment has been tested and found to comply with the limits for a Class B digital device, pursuant to Part 15 of the FCC Rules. These limits are designed to provide reasonable protection against harmful interference in a residential installation. This equipment generate, uses and can radiate radio frequency energy and, if not installed and used in accordance with the instructions, may cause harmful interference to radio communications. - Page 5 IC statement Operation is subject to the following two conditions: 1) This device may not cause interference and 2) This device must accept any interference, including interference that may cause undesired operation of the device.
-
Page 6: Getting Started
Getting Started 1.1 Reading this User’ s Guide Thank you for purchasing this Wi-Fi phone. To operate accordingly your new phone, carefully read this user’ s guide first. Screen displays and illustrations in this user’ s guide are designed to help you to operate all the steps directly and precisely. -
Page 7: Switching The Phone On Or Off
1.3 Switching the Phone On or Off Press and hold the Power key to turn ON the phone. Series of animations will be shown on the screen. To turn OFF the phone, press and hold the Power key . Series of animations will be displayed on the screen. -
Page 8: Answering A Call
1.6 Answering a Call When you receive a call, your phone rings and/or vibrates and displays an incoming call message. Press Accept and pick up the phone call. Reject the incoming phone call. 1.7 Using the Key Lock Feature Key lock is used to avoid unintentional pressing of keys. There are two ways to set the key lock function: 1. -
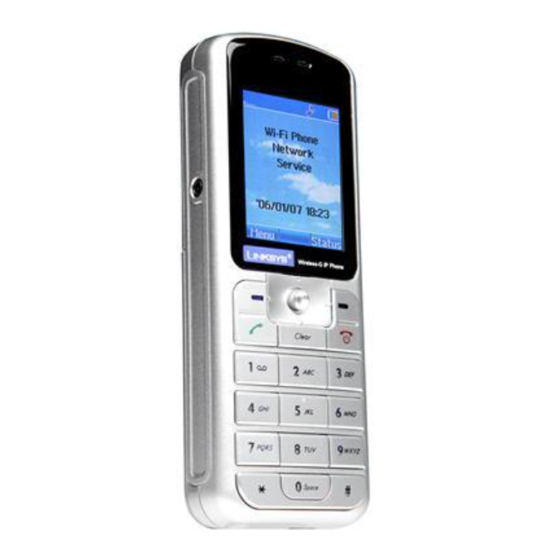
Page 9: Phone Features
Phone Features 2.1 Overall Appearance Earphone Hand strap Screen Battery cap Keypads Earphone slot... -
Page 10: Overall Features
2.2 Overall Features Pixel-based display-Intuitive access to calling features. Nine speed dials configurable in the set. Comfort noise generation (CNG), voice activity detection (VAD) and adaptive jitter buffer RF and battery level indication Local phone book External 2.4GHz antenna USB charger interface ABS+PC plastic housing Simple keypad Remote FW upgrading via Wi-Fi... -
Page 11: Wlan Application
2.4 WLAN Application Place a Call via “SIP Proxy Server” Use your new Wi-Fi phone to make and receive VoIP telephone calls when you are within range of a wireless Internet Telephony Service Provider (ITSP). You do not need to know if the recipient’ s connection type is an IP, cellular or landline based service. -
Page 12: Learning To Use Your Phone
Learning to Use Your Phone 3.1 Using the Icons Icon Description Signal Strength Indicates the received signal strength. The greater the number of bars, the better the signal Message When you have received new messages. In Call / Call Forward When you are on the phone or forward the call. -
Page 13: Using Numeric Mode
For example, you have to press the 5 key twice display the character “K”, the 3 key five times to display the character “e” and the 6 key five times again to display “n”. The cursor moves to the right when you press a different key. When entering the same letter twice or a different letter on the same key, just wait for a few seconds for the cursor to move to the right automatically, and then select the next letter. -
Page 14: While Making A Call
3.2.4 While Making a Call Characters in the Order Displayed 0, + (press and hold) 3.3 Checking the Status You can always check your phone’ s connection status (Wireless and SIP phone) by using this option. Press Status: Phone Status Wireless You can view the following information: BSSID, IP Address and MAC Address. -
Page 15: Setting Up Your Phone
Setting UP Your Phone 4.1 Quick Ways to Set Up Your Wi-Fi Phone First Step: ü It is required to set password for the profile. After the profile’ s password is set, you need to input the configured password to enter the profile menu. 1. - Page 16 OutofBand DTMF The working of out-of-band dual-tone multifrequency. 6. Press OK to confirm your settings. Last Step: 1. In Profile menu, after finishing SIP Account setting, access to Network Profile. 2. Press Option to Edit-Wireless Setting, IP Setting, Account Choice and STUN Setting. Ø...
-
Page 17: Storing Names And Numbers
Rename Preset profile name can be named again. (Either rename in alphabet letters or numbers) Delete To remove the chosen profile. A pops-up message “Delete?” displays on the screen. Press OK to delete the chosen profile. Auto Detect You can either activate On or deactivate Off profiles’ detection. -
Page 18: Setting The Time And Date
your phonebook. 200 entries can be recorded in the Phonebook. 1. Phonebook→ Option→ New. 2. Press Select to input the appropriate Name, Number, E-mail, Ring Tone and set the Speed Dial. Ø Scroll the input method by pressing the left soft key Ø... -
Page 19: Setting A Ring Mode
Scroll up or down to increase or decrease the date Confirm your date setting 4.4 Setting a Ring Mode Your phone rings or vibrates to aware you of an incoming call or other event. This ring or vibration acts as an alert. You can select 1 to 17 different melodies. -
Page 20: Adjusting The Backlight
View the selected wallpaper Set your background image 4.6 Adjusting the Backlight You can adjust the brightness of the display screen to see it better in different lighting conditions. 1. Setting? Display Setting? LCD Brightness. Press Increase or decrease the LCD lighting level Set your display lighting level... -
Page 21: Calling Features
Calling Features 5.1 Viewing Recent Calls Your phone keeps lists of the calls you recently received and dialed, even if the calls did no connect. 1. Call Log→ Dialed Calls/ Received Calls. 2. Press View the name and/or the numbers, if available, display together, with the time and date when the call was received. -
Page 22: Using The Call Mute
While 3 party is connected to execute transfer function. 5.4 Using the Call Mute When you are on a call, you can turn off your microphone so that the peer party will not hear your voice. Press Switch between to hear or to mute caller’ s voice 5.5 Using Call Waiting When you are on a call, an alert tone sounds to indicate that you have... - Page 23 No Answer: will divert the call after 18 seconds when the call is unanswered. Busy: will transfer the call when then line is busy or the call is rejected. 2. Press to select On and then press Set to activate Call Forward function.
-
Page 24: Menus
Menus 6.1 Main Menu 6.1.1 Phonebook This section helps you to use Phonebook’ s features. After storing entries in your Phonebook, you can search for them and view for details. The entries are listed according to alphabetical order. After finding the appropriate name, press View to check the details. -
Page 25: Call Log
Back to cancel the deletion and return to the menu. Phonebook→New Press Select to Preview and input the appropriate Name, Number, E-mail, Ring Tone and set the Speed Dial. 6.1.2 Call Log Feature Description Missed Calls Details refer to chapter 5.2 Returning an Unanswered Call. Call Log→Missed Calls Press Option and you can Save, Delete the Record or... -
Page 26: E-Mail
6.1.3 E-mail Using the Mail-feature, you can receive or send messages instantly. Receiving or Sending e-mails are based on POP3 and SMTP system design. To use this feature you are required to have an e-mail account (a specific username and password) from your e-mail service provider. The maximum storage size is 500 mails for Inbox, Outbox and Draft all together. - Page 27 you’ ve sent are displayed on the screen. Press to the mail you want to read and then press View . Details (From, Date, Recipients and Subject) are indicated. You can also Forward (either Preview the detail, read the Subject, set the Recipients, write the Content, Save To Draft or Send Mail) or Delete the mail or Clear all mails in the Outbox.
-
Page 28: Speed Dial
preference. Ø Reserve Mail: you can store your mails on the server 6.1.4 Speed Dial There are two ways to set Speed Dial, either through Phonebook menu or by Speed Dial menu. Each entry you saved in your phonebook can be assigned as a unique speed dial number (1-9) in phone memory. -
Page 29: Setting
Profile→Roaming Roaming You can use your phone to roam between wireless networks (access points.) There are five major settings listed: Roam Metric: From 0dBm to -99dBm. Default value: -70dBm Roam Delta: From: 0dBm to -99dBm. Default value: 20dBm NProbes: From 1 to 100. Default value: 2 Active Time: From 1ms to 1000ms. - Page 30 Feature Description Language You can set the display language: English, Chinese (Trad.) (optional), Chinese (Simp.) (optional) and Japanese (optional). Setting→Language Press Set to confirm your setting or press Back to menu. Setting→Clock Clock There are six options offered in Clock menu: Time: This option enables you to adjust the current time.
- Page 31 Setting→Clock→DaylightSavings Network Time: You can set Off or On for Network Time. Setting→Clock→Network Time If the network time is set On, then Time Server is listed. Alarm Clock This option enables you to set the alarm to ring at a specific time.
- Page 32 You can either transfer the calls through SIP or DTMF Flash. Default setting: SIP. Regional Tone: You can either select North America or Japan for Regional Tone. Press Set to confirm your setting. Speed Dial There are three options for you to choose: To Disable, to Ask or to Dial the speed dial.
- Page 33 Setting→Display Setting Display Setting Five options included in Display Setting: Wallpaper: Details refer to chapter 4.5 Setting a Wallpaper Image. Setting→Display Setting→Wallpaper Greeting: This option enables you to set welcome words as greeting and to be displayed when the phone is powered on. Setting→Display Setting→Greeting *Text input method refer to chapter 3.2 Entering Text.
-
Page 34: Tools
6.1.7 Tools This section helps you to use Tools’ features. Feature Description Signal Quality This menu displays the status of current wireless connection, including ESSID, BSSID, Channel, Rate, RSSI, Noise and Security. Tools→Signal Quality→ESSID/ BSSID/ Channel/ Rate/ RSSI/ Noise/ Security Site Survey This menu lists all available networks. - Page 35 pops up on the screen. Back to Default: Tools→Advance→Back to Default You can either Clear the original data recorded in Phonebook, E-mail or Others. You can also remove All settings on your phone at once. A message (such as Clear Phonebook & Speed Dial?; Clear E-mail?;...
-
Page 36: Troubleshooting
Troubleshooting 1. Unable To Register With The SIP Server Ø Make sure the Internet and the SIP proxy server are reachable. Ø Make sure the SIP account and the password are correct. 2. Which Codec Should I Choose Ø As which codec choice is depending on what codec is supported on both end of the VoIP host.
Need help?
Do you have a question about the WIP300 and is the answer not in the manual?
Questions and answers