Table of Contents
Advertisement
Quick Links
Advertisement
Table of Contents

Related Manuals for WayteQ N770


Summary of Contents for WayteQ N770
-
Page 1: User Manual
WayteQ N770 GPS Navigator User Manual 1.0 Ver English Version... - Page 2 NOTICE USING YOUR NAVIGATOR at the first time 1. Charge completely 2. Install into your vehicle 3. Initialize software as described in the manual 4. Make sure that the car is outside the garage and it is not covered by anything (treed, bridges, etc) 5.
-
Page 3: Table Of Contents
Contents: Safety and Regulatory Information 1. Getting Started 1.1 Unpacking 1.2 Over View 1.3 Using Your Device in a Vehicle 1.3.1 Using the Car bracket 1.3.2 Connecting the Car Charger 1.3.3 Connecting to AC Power supply and Charging the Battery 1.3.4 Assembly 1.4 Starting up 1.5 Power saving... -
Page 4: Safety And Regulatory Information
Safety and Regulatory Information Important Safety Notices and Warnings Global Positioning System The Global Positioning System (GPS) is a satellite-based system that provides location and timing information around the Globe. GPS is operated and controlled under the sole responsibility of the Government of the United States of America, who are responsible for its availability and accuracy. -
Page 5: Getting Started
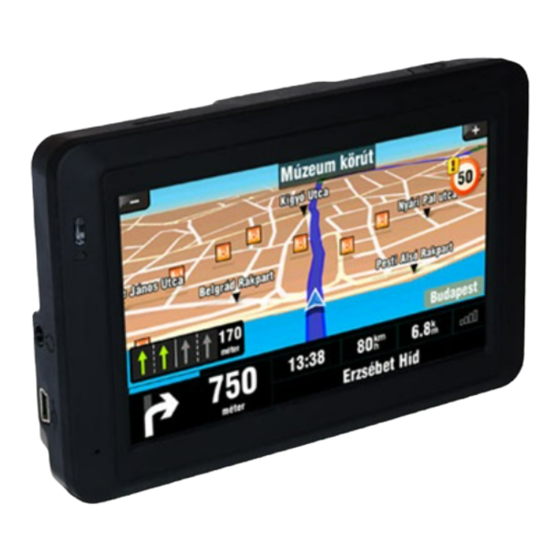
1. Getting Started 1.1 Unpacking Unpack your device box and identify the contents. You should have: (1) Unit. Its main features are a touch-sensitive LCD screen, 1 SD card slot. Details see the photo below. (2) Holder,to hold the device. (3) Bracket, its main features is to fix the device on a car . -
Page 6: Using Your Device In A Vehicle
E. Reset F. SD/SDHC Card Slot Do not expose the device to high temperatures. We recommend that you do not leave the device in direct sunlight for long periods or in an unattended car on sunny days. High temperatures can cause permanent damage. Do not attempt to service the device yourself! Do not open, puncture or disassemble it. -
Page 7: Starting Up
antenna kit. Under normal journey conditions, the suction mount is perfectly sufficient to hold the bracket in position. Note that suction may be lost if left overnight, due to condensation and low temperature. For this reason, and for security, we recommend Removing Both the suction mount bracket and the device when leaving your vehicle overnight. -
Page 8: Main Menu Selection
2. Main Menu Selection 2.1 Navigation Please refer the navigation software user manual for the details. 2.2 Music Tap the icon "Music" on the main menu and enter into following interface. you can read music files in both “ResidentFlash” and “SDMMC” folder , Tap folder icon to enter into following interface like below . -
Page 9: Photo
Circle Auto play Speed bar Pause / Play 2.3 Photo 1) Tap the icon “ Photo” on the main menu, then tap the folder icon to enter into the following interface like below . 2) Tap the file on the screen and enter into the following interface. Previous Zoom out Zoom in... -
Page 10: Ebook
Tap PREVIOUS or NEXT button to view the pictures. If picture is too big or the device does not support the format, it will be dark screen or can not read. 2.4 Ebook 1) Tap the icon “ Ebook” on the main menu, then tap the folder icon to enter into the following interface like below . -
Page 11: System
Page up Page down Return to previous 2) Tap the file and enter into the following interface. Pause / Play Full screen Return to previous Menu Speed bar Tips: When playing in full screen, double press the screen again, it will return to original playing size. - Page 12 Tap the icon "Backlight" and enter into the following display. A. Under Backlight icon, tap "-" to weaken the backlight, and tap "+" to stronger the backlight. B. Under battery icon, tap < or > button to select the duration of auto power off the backlight.
- Page 13 B. Tap the icon "Calibration" and enter the adjustment of touch screen. According to the information on the screen, press the right cross centre. Then take the operation under instruction until the following screen display. 3) Language A. Tap the icon "Language" and enter into the following display. B.
- Page 14 5) Volume A. Tap the icon "Volume" and enter into volume setting display. B. Tap"-" or "+" to adjust volume of speaker. C. You can select "Enable sounds for taps". 6) Date and Time A. Tap the icon "Date Time" and enter into the following display. B.
- Page 15 C. Tap "Time" icon and use "<" or ">" icon to adjust the time. D. Tap "Time Zone" icon and use "<" or ">" icon to adjust the time zone. This document is for guidance only and does not form part of any contract, and may be subject to change without notice.
Need help?
Do you have a question about the N770 and is the answer not in the manual?
Questions and answers