Advertisement
Quick Links
Download this manual
See also:
User Manual
Advertisement

Related Manuals for WayteQ x985BT


Summary of Contents for WayteQ x985BT
- Page 1 WayteQ x985BT GPS navigation User’s manual The user’s manual can be found at: http://wayteq.eu/en/download...
-
Page 2: Internal Memory
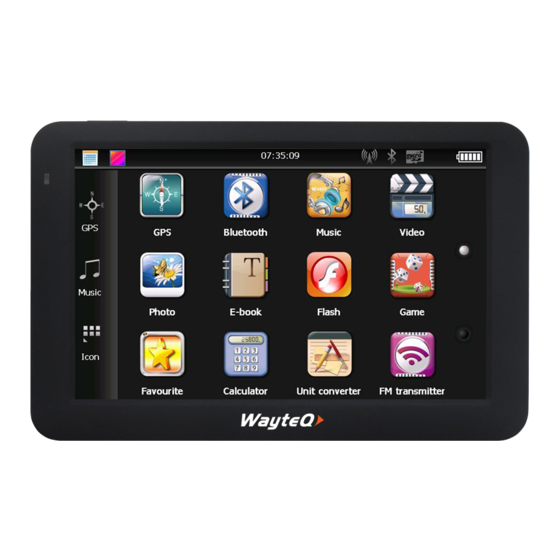
1. TECHNICAL SPECIFICATION Processor MStar MSB2531A Memory (RAM) 256 MB Internal memory 8 GB (storage) LCD display 5” TFT LCD, 800x480 pixel Memory card support microSD card, max. 32 GB MiniUSB connector Speaker Built-in Earphone output 2.5 mm stereo jack Built-in, MStar MSR2112, (66 GPS receiver channels) - Page 3 2. CONTROLS...
- Page 4 1. Notification LED 2. Earphone output 3. MicroSD memory card 4. LCD touchscreen 5. MiniUSB charging and data socket 6. Power ON/OFF switch 7. Speaker 8. RESET button 9. Microphone 3. CHARGING WITH THE AC CHARGER WARNING: During charging, the LED glows in red color. Do not disconnect the device from the charger until charging is complete and the LED glows in blue color.
- Page 5 device to high temperatures or hot environment for a prolonged time. For example do not leave the device exposed to direct sunlight in the car. To avoid damage to the device, keep it away from harsh environment. Please follow the local guidelines and regulations before you dispose the battery.
- Page 6 Touch the icon to display the desktop. 4.2 GPS Touch the GPS icon to start the navigation application. If you purchased the device with a Sygic navigation software, please refer to the software’s documentation that you can find in the internal memory’s „Manual” folder, in PDF format.
- Page 7 4.4 Language Touch the icon, select your preferred language, then touch the „Back” button to apply the changes and return to the application list.
- Page 8 4.5 Navigation application’s path Touch the icon. The „Navigation Path Setting” screen will appear, where you can browse for your preferred navigation software’s executable file. After you have selected the program, touch the „Back” button to apply the changes, then you will be able to start the navigation software by touching the „GPS”...
- Page 9 4.6 GPS information Touch the icon to show some information about the GPS receiver’s current status.
- Page 10 4.7 USB mode In the „USB Setting” screen you can choose the way to connect your device to a PC. MS ACTIVESYNC – synchronize with a PC via Windows Mobile Device Center. MASS STORAGE – transfer files between your device and a PC, like with a flash drive.
- Page 11 4.8 USB connection with a PC After you have successfully connected the USB cable and the device is in „MASS STORAGE” mode, you will see the picture above. This means, the PC that you are connected to can see the device and it is ready to transfer files to/from your device.
- Page 12 Select to open the calibration screen. Take out the stylus and precisely touch the screen with the stylus at the center of the black cross sign, five times.
- Page 13 4.10 Factory defaults Touch the in the main menu to restore the device to its factory defaults. A dialog box will appear and prompt for confirmation. If you are sure to reset the settings, select button. Otherwise select to return to the previous screen.
- Page 14 4.11 Favourite Touch the icon to open the „Program Manager”. With the help of program manager, you can create shortcuts to your preferred applications, so you will not need to browse those applications from the internal memory to start them in the future.
- Page 15 Apply changes and exit Add new application to the list Remove application from the list Start application When you add a new application to the list, the Program Manager will show executable programs with .exe extension from the internal memory or from the external microSD card.
- Page 16 Touch the button to add a new executable application (.exe) to the list. Select that file from its containing folder, then touch „OK”.
- Page 18 If you want to remove an item from the list, select that item, then touch the button. Confirm the action with the „YES” option.
-
Page 19: Declaration Of Comformity (Ex.)
5. DECLARATION OF COMFORMITY (ex.) The importer states, that this product complies with the conditions of use, and in accordance with regulations, there is a product sticker on it, and have a warranty card and a user’s manual in the box. Based on a statement issued by the manufacturer, the product will be placed on the market with CE marking, according to the 79/1997.(XXII.31.) IKIM regulation’s 5.§... -
Page 20: Quality Certification
7. IMPORTER / DISTRIBUTOR: WayteQ Europe Ltd. 6th Gubacsi str. BUDAPEST, 1097 HUNGARY Phone: +36-1 21 73 632 www.wayteq.eu info@wayteq.eu WARNING: WayteQ reserves the right to change the user manual without any notice.The parameters of the product can change without any notice.
Need help?
Do you have a question about the x985BT and is the answer not in the manual?
Questions and answers