Table of Contents
Advertisement
Advertisement
Table of Contents

Related Manuals for WayteQ X950BT


Summary of Contents for WayteQ X950BT
-
Page 1: User Manual
WayteQ GPS Navigation X950BT User Manual English Version 1.0... - Page 2 The manual might contain a few mistakes though it has been checked. If mistakes are found, please contact the WAYTEQ customer service center. Please read carefully the instructions in this manual and use only accessories of WAYTEQ to avoid unpredicted damage. Failure to follow the instructions will invalidate warranty and might endanger personnel safety, for which WAYTEQ assumes no responsibility.
- Page 3 Welcome! Thanks for using the WAYTEQ GPS featured with navigation as the major function as well as other amusement functions like audio play, video play, photo browsing, e-book reading, and games, etc. SiRF Atlas-V, dual-core CPU with high performance and low power consumption ...
-
Page 4: Basic Introduction
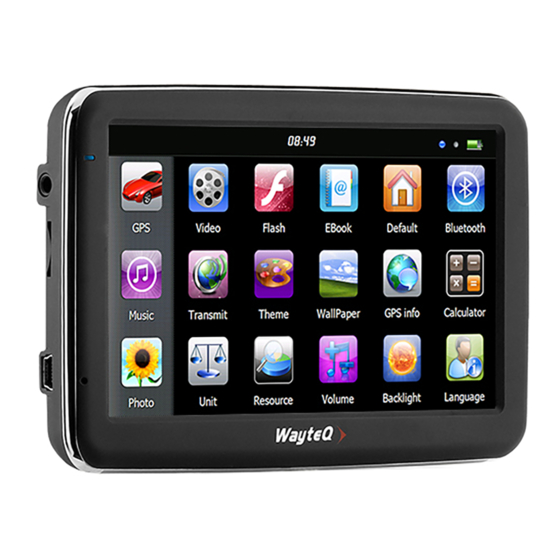
Basic Introduction 1. Overview A. Charging Indication B. Speaker C. Power D. 3.5mm Earphone Socket E. Memory Card Slot F. Mini USB G. Stylus Pen Slot H. Reset I. MIC J. Light Sensor 2. Charging by AC Adapter Caution: The charging indicator light is red during charging. Do not unplug the charge until the battery is fully charged and the indicator light turns green. -
Page 5: Main Functions Introduction
Do not place it without fixing it, or in the place of air bag or the area after the air bag is inflated. While using the mounting kit, follow local regulations. WAYTEQ will have no responsibility for any penalty or damage resulting from traffic violation. -
Page 6: Gps Navigation
Tap the “Turn off” button to turn the unit off. Tap the “Sleep” button to enter a suspend state and the system stops operation. Tap the “Cancel” button to turn back to the screen. 2. GPS Navigation Double tap the “GPS” icon to start navigation program. Caution: Please refer to navigation software instructions for details. - Page 7 Double tap icon “ ” to choose music file . Tap the icon “ “ for single selection , tap the icon “ “ to select all , tap the icon “ for single “ delete , tap the icon “ to delete all.
- Page 8 5. Video Tap the icon " " icon, then tap the “ “ icon to choose video files , and double tap the file and enter into following interface . A. Return to the Main menu B. Volume C. Select video file D.
- Page 9 7. Ebook Tap the " " icon , then tap the " " icon to choose Ebook files , double tap the file and enter into the following interface . A. Return to the Main menu B. Bookmark list C. Bookmark D.
- Page 10 1. Volume Tap the icon “ ” on the menu and enter into the following interface . Choose “ Music “ files to be background sound when unit is power on . Tips : after make any changes of setting , tap " "...
- Page 11 3. Language Tap the " " icon and choose the language . 4. Date and Time Tap the icon " " and enter into the following interface to set date , time and time zone . 5. Calibration Tap the " "...
- Page 12 6. Explorer icon, there will be one prompt as below to ask if go into WINCE mode, choose “OK” to enter and “Cancel” to exit. 7. Sys Info Tap the " " icon and the system information will be shown. 8.
- Page 13 9. Nav Path Tap the " " icon and enter into the following display interface . When you have several Navigation maps in the device, you can set up one of Navigation maps (navigation program files) by choosing the "Navigation" icon and selecting the Auto Run Navigation , next time when tapping the “GPS” icon in the main menu, the device will run the selected Navigation software automatically .
- Page 14 12. Resource Tap “ ” icon to enter System Resource interface as shown below. You may check the capacity of the memory, SD card and flash, or tap to clear the memory . 13. Theme Tap “ ” icon to enter the Theme interface as below to set a style and theme for the system interfaces. To rearrange icons at will, tap on an icon and stay until a four-way arrow appears at the upper left of it, drag the icon to a wanted place.
- Page 15 14. Wallpaper icon to enter into the Wallpaper interface as below. You may choose an pre-installed wallpaper, you may also set an external image as the wallpaper. The pre-installed wallpapers cannot be deleted, while the added images can be deleted. To delete images, select an added image from the “Wallpaper ”...
-
Page 16: Russia Block
12. Jaw Breaker icon to enter into the game interface. Tap “New Game” to start. 13. Russia Block icon to enter into the game interface. Tap “Start” to start. 14. Dui Dui Peng icon to enter into the game interface. Tap “New Game” to start. 15. - Page 17 Tap the “ Paired device list ” icon and enter into the following interface : Tap the “ ” icon to connect to the chosen device , tap the “ “ to disconnect , tap the “ “ to delete pair info . If paired mobile phone is not in the device list, please tap the “...
- Page 18 In case of incoming call , the interface will look as below . Receive the call , and interface will look as below :...
- Page 19 Tap the “ “ icon and enter into Bluetooth settings interface as below. Name : display name of the device in the process of the Bluetooth transmission . Pin: Tap the icon “ “ and enter into the pin code interface . This document is for guidance only and does not form part of any contract, and may be subject to change without notice.
Need help?
Do you have a question about the X950BT and is the answer not in the manual?
Questions and answers