
Related Manuals for WayteQ x920


Summary of Contents for WayteQ x920
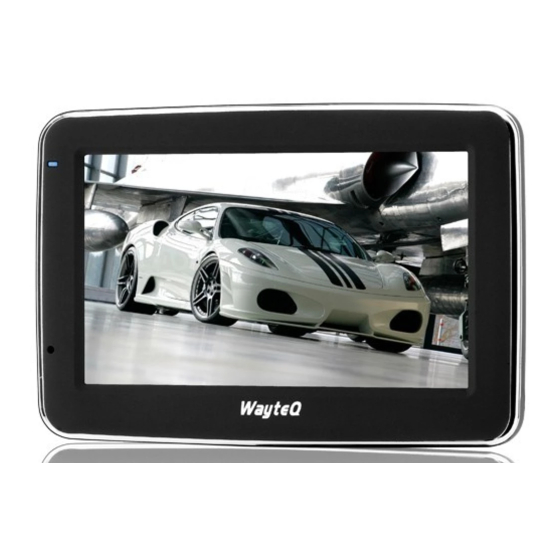
- Page 1 GPS Navigator Használati utasítás Manualul Utilizatorului Ръководство на потребителя Bedienungsanleitung Užívateľská príručka User Manual...
-
Page 2: Használati Utasítás
WayteQ X920 GPS Navigáció Használati utasítás... - Page 3 Hungarian FIGYELEM! Az els használat el tt helyes m ködés érdekében tartsa be az alábbi utasításokat: 1. Töltse fel teljesen az akkumulátort 2. Helyezze az autóba a készüléket 3. A használati utasításban leírt módon indítsa el a navigációs programot. 4. Gy z djön meg róla, hogy autójában a készüléket nem árnyékolja semmi (s r fák, híd, garázs, alagút).
- Page 4 Hungarian Ne tegye ki a készüléket magas h mérsékletnek vagy hosszú ideig tartó direkt napfénynek illetve ne hagyja napon álló autóban. A magas h mérséklet tartós károsodást okozhat. Ne próbálkozzon a készülék sajátkez javításával. Ne próbálja kinyitni, kilyukasztani vagy szétszedni azt. A fenti el írások átlépése miatti meghibásodás esetén a garancia érvényét veszíti.
- Page 5 Hungarian 1.2 Az autós tölt csatlakoztatása A mellékelt autós tölt vel lehet a folyamatos tápellátást és töltést biztosítani autós használat közben. Figyelem: A hirtelen feszültség-ingadozás elkerülése érdekében, csak a gyújtás ráadása után csatlakoztassa a készüléket. 1.3 USB kábel Az USB kábel rendszerfrissítéshez és az akkumulátor töltéséhez szükséges. Számítógépén Microsoft Active Sync® programmal vagy merevlemezes tárolóval egyaránt m ködik.
- Page 6 Hungarian A “Power” gomb újbóli hosszantartó nyomása az alábbi képet eredményezi: Érintse meg a “Power off” feliratot kikapcsoláshoz. Érintse meg a “Cancel” feliratot a visszalépéshez. Nyomja meg a “Sleep” gombot a rendszer hibernálásához. 2. GPS Navigáció Egyszeri érintéssel indíthatja el a navigációs programot. 3.0 Media Érintse meg a "...
- Page 7 Hungarian A. Vissza a Média menüponthoz B. Hanger szabályozás C. A kívánt zeneszám kiválasztása D. Stop E. Következ F. Szünet / Lejátszás G. El z H. Keres sáv I. Lejátszási mód J. Hangszínszabályozás Érintse mega “ ” ikont a zenefájl kiválasztásához. 3.2 Fotó...
- Page 8 Hungarian 3.3 E-book Érintse meg az E-book ikont, majd a " " ikont a kívánt E-book választásához, kett s érintés a fájl megnyitásához. Az alábbi képet látja majd: A. Vissza a Média menüponthoz B. Könyvjelz lista C. Könyvjelz D. Bet méret- és típus E.
- Page 9 Hungarian G. El z H. Keres sáv Javaslat: Teljes képerny s lejátszáskor érintse meg duplán a képerny t és visszalép a normál képerny s lejátszáshoz. 3.5 Flash Érintse meg a “ Flash ” ikont, az alábbi képet fogja látni. A. Hanger B.
-
Page 10: Gps Info
Hungarian 5. Eszközök Érintse meg a Tools ikont, indítsa el a kívánt alkalmazást. 6. GPS Info Érintse meg a GPS Info ikont, így tájékoztatást kap a navigálás aktuális állásáról (helymeghatározás, m holdakkal való kapcsolat, sebesség) 7. Beállítások Érintse meg a Settings ikont. Az alábbi képet látja majd: Javaslat: Beállítások változtatása után érintse meg a "... - Page 11 Hungarian 7.1 Hanger Érintse meg a Volume ikont. Az alábbi képet látja majd: Háttérhang beállításához válasszon zenefájlt. 7.2 Háttérvilágítás Érintse meg a Backlight ikont. Az alábbi képet látja majd: 7.3 Nyelv Érintse meg a Language ikont. Válassza ki a kívánt nyelvet.
- Page 12 Hungarian 7.4 Dátum és id Érintse meg a DateTime ikont. Az alábbi képet látja majd. Itt állíthatja be a kívánt id t, dátumot és id zónát. 7.5 Kalibrálás Érintse meg a Calibration ikont. Az alábbi képet látja majd: Érintse meg az "OK" gombot a képerny kalibrálásához. 7.6 Gyári beállítások visszaállítása Érintse meg a A Factory Reset ikont.
- Page 13 Hungarian 7.7 Rendszer Info Érintse meg a Sys Info ikont. Az alábbi képet látja majd: 7.8 USB Érintse meg az USB ikont, hogy beállíthassa az USB-kapcsolat típusát. 7.9 Navigációs útvonal Érintse meg a Nav Path ikont. Az alábbi képet látja majd: Amennyiben navigációs mappák vannak az eszközre telepítve, a "Navigation"...
-
Page 14: Manualul Utilizatorului
Sistem de Naviga ie GPS WayteQ X920 Manualul Utilizatorului... - Page 15 Romanian Precau ii úi Informare PND este utilizat în mod exclusiv drept mijloc de naviga ie. Nu se va utiliza pentru m surare exact de direc ie, distan , loca ie sau topografie. Utilizatorul va respecta toate semnalele în trafic, precum úi reglement rile locale pe drumuri.
- Page 16 Romanian G. Tij creion Stylus H. Reset I. Senzor de lumin Odat ce cardul este instalat, acesta nu poate fi îndep rtat în timpul oper rii dispozitivului. În cazul în care totuúi este necesar îndep rtarea cardului, în primul rand opri i dispozitivul, împinge i cardul care va ieúi din slot.
- Page 17 Romanian Ap sa i butonul “Power off” pentru a opri dispozitivul. Ap sa i butonul “Sleep” pentru a ini ializa suspendarea func ion rii, iar sistemul va înceta s func ioneze. Ap sa i butonul “Cancel” pentru a se întoarce la afiúarea anterioar . 2.
- Page 18 Romanian C. Selecta i fiúierul de muzic dorit D. Stop E. Next (Înainte) F. Pause / Play (Pauz / Func iune) G. Previous (Înapoi) H. Speed Bar (Modul de vitez ) I. Play mode (Modul de func iune) J. Equalizer Ap sa i de dou ori pe iconul “...
- Page 19 Romanian Ap sa i pe iconul "EBook" în meniul media , urmând s ap sa i iconul " " pentru a selecta fiúiere Ebook, ap sa i de dou ori pe fiúier prin care vizualiza i interfa a de mai jos: A.
- Page 20 Romanian (Modul de vitez ) H. Speed bar Recomand ri: Ap sa i butonul NEXT pentru rularea repetat a filmului. Ap sa i de dou ori pe ecran, care va m ri modul de afiúare integral, ap sa i din nou de dou ori pe ecran, iar acesta va reveni la modul de afiúare anterioar .
- Page 21 Romanian 6. Info GPS Ap sa i iconul "GPS Info" úi unitatea va afiúa în mod detaliat informa iile privind satelitele GPS. 7. Setare Ap sa i pe iconul "Setting" în meniul principal úi va ap rea urm toarea interfa : Recomandare: dup orice modific ri în setare, ap sa i iconul "...
- Page 22 Romanian Selecta i fiúierele “ Music “ drept sunete de fundal când unitatea este pornit . 7.2 Iluminare Ap sa i pe iconul "Backlight" pentru afiúarea interfe ei de mai jos: 7.3 Limb Ap sa i pe iconul "Language" úi selecta i limba dorit . 7.4 Data úi ora Ap sa i pe iconul "Date Time"...
- Page 23 Romanian 7.5 Calibrare Ap sa i pe iconul " Calibration " úi ve i vizualiza interfa a de mai jos: Ap sa i pe iconul "OK" în vederea regl rii touch screen-ului. 7.6 Activare set ri de baz Ap sa i pe iconul " Factory Reset " pentru a vizualiza interfa a de mai jos. Ap sa i pe iconul “ OK “ pentru a reactiva set rile de baz (de fabric ).
- Page 24 Romanian 7.8 USB Ap sa i pe iconul “USB” pentru a seta modul de func ionare USB. 7.9 Cale de navigare Ap sa i pe iconul "Nav Path" úi ve i vizualiza interfa a de mai jos: În cazul în care dispozitivul dispune de mai multe H r i de naviga ie, dac selecta i iconul "Navigation", ave i posibilitatea set rii una dintre H r ile de naviga ie ( fiúiere de program de naviga ie ) úi selecta i func ia Auto Run Navigation (Pornire Automat Naviga ie), iar data urm toare când ap sa i pe iconul “GPS”...
- Page 25 WayteQ GPS Navigation X920...
- Page 26 Bulgarian , GPS 4 GPS PND,...
- Page 27 Bulgarian D. 3.5mm F. Mini USB H. Reset 1.3 USB Microsoft Active Sync® “ - USB” (“Setting-USB”).
- Page 28 Bulgarian “ ” (“Power”), “Power” “Power off”, “Sleep”, “Cancel”, 2. GPS...
- Page 29 Bulgarian “ ” (“Music”) “ ”...
- Page 30 Bulgarian “ “ “ “ “ “ ” "Photo" “ “, "EBook" " ", Ebook,...
- Page 31 Bulgarian EBook "Video" “ “, NEXT 3.5 Flash...
- Page 32 Bulgarian E. Play / Pause « » ("Games") "Toolbox"...
- Page 33 Bulgarian 6. GPS "GPSView" “ ” ("Setting") " ", “Volume” “ Music “ , "Backlight"...
- Page 34 Bulgarian "Language" "Date Time" " Calibration "...
- Page 35 Bulgarian "OK", " Factory Reset " “ OK “, "Sys Info" 7.8 USB “USB” (Nav Path) “ ” ("Nav Path")
- Page 36 Bulgarian ” ”("Navigation"), (Auto Run Navigation), “GPS”...
- Page 37 WayteQ GPS Navigation X920 Bedienungsanleitung...
- Page 38 Austrian Vorsichtsmaßnahmen und Mahnungen PND wird nur als Navigationshilfe benützt. Es ist nicht für die exakte Messung von Richtung, Entfernung, Lage oder Topographie. Der Benützer muss alle Verkehrsschilder am Straßenrand und lokale Gesetze beachten. GPS Satelliten Signale können nicht durch massive Stoffe durchdringen (mit Ausnahme von Glas). Wenn Sie in einem Tunnel oder in einem Gebäude sind, funktioniert die GPS Lokalisierung nicht.
-
Page 39: Ein-Und Ausschalten Des Geräts
Austrian H. Reset I. Lichtfühler Wenn Sie die Karte eingelegt haben, können Sie sis nicht während der Arbeit herausnehmen. Falls Sie die Karte herausnehmen möchten, müssen Sie zuerst das Gerät ausschalten, dann drücken Sie Karte hinein und sie wird herausspringen. 1.2 Aufladung durch ein Auto Ladegerät Achtung: Um ihr Gerät vor einem Stromschlag zu schützen, ist es empfehlenswert das Gerät nach dem Start des Motors anzuschließen. -
Page 40: Gps Navigation
Austrian Berühren Sie den Knopf “Sleep” um in den Schlafmodus zu gelangen-das System sendet nicht mehr. Berühren Sie den Knopf “Cancel” um erneut den Bildschirm einzuschalten. 2. GPS Navigation Berühren Sie zwei mal das Symbol “GPS” um das Navigationsprogramm zu starten. 3. - Page 41 Austrian Berühren Sie das Symbol “ “ für einmalige Auswahl, berühren Sie das Symbol “ “ um alle zu wählen, berühren Sie das Symbol “ für einmaliges löschen, berühren Sie das Symbol “ um alles zu löschen. ” 3.2 Foto Berühren Sie das Symbol "Photo"...
- Page 42 Austrian A. Zurück zu dem Menü Media B. Liste mit Lesezeichen C. Lesezeichen D. Motiv und Schrift E. Hinunter F. Aufwärts G. Auswahl EBook Dateien 3.4 Video Berühren Sie das Symbol "Video" im Menü Media , berühren Sie das Symbol “ “...
- Page 43 Austrian Berühren Sie zwei mal den Bildschirm um in vollem Format zu sehen, berühren Sie noch einmal den Bildschirm zwei mal um wieder in Normalgröße zu gelangen. 3.5 Flash Berühren Sie das Symbol “ Flash ” im Menü Media um in folgendem Interface zu gelangen. A.
- Page 44 Austrian 6. GPS Info Berühren Sie das Symbol "GPS Info" und das Gerät wird Ihnen genaue Information über die GPS Satelliten. 7. Einstellung Berühren Sie das Symbol "Setting" im Hauptmenü um in folgendem Interface zu gelangen . Hinweise : nachdem Sie Änderungen der Einstellungen vornehmen, berühren Sie " "...
-
Page 45: Datum Und Zeit
Austrian Wählen Sie “ Music “ Dateien als Hintergrund beim einschalten des Gerätes. 7.2 Hintergrundbeleuchtung Berühren Sie das Symbol "Backlight" um in folgendem Interface zu gelangen. Berühren Sie den Knopf “Links” oder “Rechts” um die Dauer zur automatischen Abschaltung der Hintergrundbeleuchtung zu wählen. - Page 46 Austrian 7.5 Kalibrieren Berühren Sie das Symbol " Calibration " um in folgendem Interface zu gelangen. Berühren Sie das Symbol "OK" um den Berührungsbildschirm einzustellen. 7.6 Werks Rückstellung Berühren Sie das Symbol " Factory Reset " um in folgendem Interface zu gelangen. Berühren Sie das Symbol “ OK “ um die Fabrikseinstellung zu laden.
- Page 47 Austrian 7.8 USB Berühren Sie das Symbol “USB” um den USB Arbeitsmodus zu wählen. 7.9 Nav Path Berühren Sie das Symbol "Nav Path" um in folgendem Interface zu gelangen. Falls Sie mehrere Navigationskarten im Gerät haben, wenn Sie das Symbol "Navigation" wählen, können Sie eine der Karten einstellen ( navigation program files ) und dann “Auto Run Navigation“...
- Page 48 WayteQ X920 GPS Navigácia Užívate ská príru ka...
- Page 49 Tento systém by mohol by ovplyvnený zmenou dostupnosti a presnosti na presnos prístroja, a preto nenesieme žiadnu zodpovednos , pokia ide o presnos a dostupnos systému. (Podrobný technický popis nájdete v www.wayteq.eu stránky.) Varovania a poznámky Za vlastnú bezpeþnos pri jazde nenastavujte nestláþajte tlaþítka na zariadení. Používajte ho opatrne! Tento navigaþný...
-
Page 50: Základné Informácie
Slovakian Základné informácie 1.1 Preh ad A. kontrolka nabíjania B. reproduktor C. vypínaþ D. konektor na sluchátka E. šachta pre pamä ovú kartu F. mini USB G. dotyková ceruza H. Reset I. Svetelné þidlo Poþas prevádzky neodstra ujte pamä ovú kartu. Pred odstránením pamä ovéj karty reba zariadenie vypnú . 1.2 Auto nabíjaþka Pomocou autonabýjaþky zabezpaþíte trvalé... - Page 51 Slovakian boþného okna. Presvedþ e sa þí nie je na skle špina, mastné, alebo mokré okno po prísavkou, oþistite najlepšie liehhom. Noþné ochladzovania a vyskit rosi môže spôsobi odlepenie prísavky. Aby sme zabránili odliepaniu prísavky doporuþujeme na noc prísavku odmontova . Odstra ovanie držiaka na tri: Stlaþte tlaþidlo na bokoch dvoma prstami ,a môžete ahko stiahnu páky na odstránenie prísavky.
- Page 52 Slovakian 3.1 Hudba (Music) 1) Dotknite sa Music ikony a nasledujúci obraz bude k dispozícií. A. spä do menu B. ovládaþ hlasitosti C. výber hudobného titulu D. Stop E. nasledujúca F. pauza/prehrávanie G. predošlé H. vyhladávaþ I. prehravací mód J. eqalizér Dotknite sa “...
- Page 53 Slovakian 3.2 Fotó Dotknite sa Photo ikony na zobrazenie tohto obrazca a dotknite sa sa “ “ ikony pre výber obrázku A. spä do menu B. výber obrázka C. premietanie D. otáþanie E. zmenšenie zväþenie G. nasledujúci H. predošlí 3.3 E-book E-knihu, ktorú...
- Page 54 Slovakian F. Hore G. E-knihy file 3.4 Videó Dtknite sa ikony videa a potom “ “ ikony pre výber dvoj-dotykom uvidíte tento obrazec: A Spä na menu Médiá B Hlasitos C. Vyberte požadované video D Stop E. Nasledujúci F. Pause / Prehrávanie G.
- Page 55 Slovakian D Stop E. Pauze / Play F. H ada 4.Játékok Dotknite sa ikony Games na spustenie 5. Nástroje Dotykom na ikonu Tools, a potom na požadovanú aplikáciu. 6. GPS Info Dotknite sa GPS Info , získate informácie o súþasnom stave navigácie (lokalizácia, spojenie s družicami rýchlos ) . 7.
- Page 56 Slovakian Návrh: Ak zmenite nastavenia, kliknite na " " ikonu na uloženie zmien. 7.1 Hlasitos Poklepaním na ikonu Hlasitos . Nasleduje obrázok: Na podfarbenie si vyberte hudbu z pamäte. 7.2 Podsvietenie Poklepaním na ikonu Backlight. Nasleduje obrázok: ýas vypnutia je ved a Auto OFF nápisu ,sípkami regulovatelné. Vyberte "Auto podsvietenia" nastavi podsvietenie pomocou svetelného senzora.
- Page 57 Slovakian Poklepaním na ikonu Language. Vyberte požadovaný jazyk. 7.4 ýas a dátum Poklepaním na ikonu DateTime. V nasledujúcom obrázku uvidíte. Tu môžete nastavi požadovaný þas, dátum a þasové pásmo. 7.5 Kalibrácia uknete na záložku kalibrácie. Nasledujúci obrázok: Kliknutím na tlaþidlo "OK" na obrazovku pre kalibráciu. 7.6 Továrenské...
- Page 58 Slovakian 7.7 Informaþný systém Poklepnutím na ikonu Info Sys Nasleduje obrázok: 7.8 USB Dotknite sa USB ikony pre nastavenie typu pripojenia USB. 7.9 Navigaþné cesta Poklepaním na ikonu Nav Path. Nasleduje obrázok:...
- Page 59 Slovakian Ak sú navigaþné mapy nainštalované, s ikonou "Navigation" môžete nastavi ubovo né zložky (tj mapy) v predvolenom nastavení. V tomto prípade sa pri alšom spustení programu sa naþítajú vybraný mapy. Užívate ská príruþka slúži len pre informáciu a nie je súþas ou žiadnej zmluvy. Vyhradzujeme si právo na zmenu!
- Page 60 WayteQ GPS Navigation X920 User Manual English Version...
-
Page 61: Precaution And Notice
English Precaution and Notice The PND is used only as a navigation aid. It is not for precise measurement of direction, distance, location or topography. The user must follow all traffic signs and local regulations along the roads. GPS satellite signals cannot pass through solid materials (except glass). When you are inside a tunnel or building, GPS position is not available. -
Page 62: Main Functions Introduction
English G. Stylus Pen Slot H. Reset I. Light Sensor Once the card is installed, it cannot be removed during the operation of the device. If you need to remove the card, switch the unit off first, push the card in and it will eject from the slot. 1.2 Charging by Car Charger Caution: To protect your device against suddenness, please connect the car charger only after the car engine has been started. - Page 63 English Tap the “Sleep” button to enter a suspend state and the system stops operation. Tap the “Cancel” button to turn back to the screen. 2. GPS Navigation Double tap the “GPS” icon to start navigation program. 3. Media Tap the icon "Media" on the main menu and enter into the below interface : 3.1 Music Tap the icon “Music”...
- Page 64 English Tap the icon “ “ for single selection , tap the icon “ “ to select all , tap the icon “ for single delete , tap the icon “ to delete all . ” 3.2 Photo Tap the "Photo" icon on the media menu and tap the icon “ “...
- Page 65 English A. Return to the Media menu B. Bookmark list C. Bookmark D. Theme and font E. Down F. Up G. Select EBook files 3.4 Video Tap the icon "Video" on the media menu , then tap the “ “ icon to choose video files , and double tap the file and enter into following interface .
- Page 66 English Double tap the screen, it will display in full screen, double tap the screen again, it will return to original playing size. 3.5 Flash Tap the icon “ Flash ” on the media menu and enter into the following interface . A.
- Page 67 English 6. GPS Info Tap the "GPS Info" icon and the unit will show the detail information of GPS satellites. 7. Setting Tap the icon "Setting" on the main menu and enter into the following interface . Tips : after make any changes of setting , tap " "...
-
Page 68: Date And Time
English Choose “ Music “ files to be background sound when unit is power on . 7.2 Backlight Tap the "Backlight" icon and enter into the following interface . 7.3 Language Tap the "Language" icon and choose the language . 7.4 Date and Time Tap the icon "Date Time"... -
Page 69: Factory Reset
English 7.5 Calibration Tap the " Calibration " icon and enter into the following interface . Tap the icon "OK" to adjust the touch screen. 7.6 Factory Reset Tap the " Factory Reset " icon and enter into the following interface . Tap the icon “ OK “ to load factory default setting . 7.7 System Info Tap the "Sys Info"... - Page 70 English 7.8 USB Tap the icon “USB” to set the USB working mode . 7.9 Nav Path Tap the "Nav Path" icon and enter into the following display interface . When you have several Navigation maps in the device, if you choose the "Navigation" icon , you can set up one of Navigation maps ( navigation program files ) , and select the Auto Run Navigation , next time when tapping the “GPS”...
-
Page 71: Technical Specification
English Technical Specification 135 * 85.9 * 14.3 mm (reference) SiRF Atlas IV dual core, ARM11 CPU 500MHz Processor WinCE 6.0 system SDRAM : 128MB ( 64MB Optional ) Flash Memory : 2GB ( 4GB Optional ) External Memory : Micro SD card support up to 8GB SiRF GPS up to 40 channels USB2.0 high speed , support Active Sync. - Page 72 © 2009 WayteQ Technology Co., Ltd. All rights reserved. Print in China...
Need help?
Do you have a question about the x920 and is the answer not in the manual?
Questions and answers