
Related Manuals for Huawei B222s


Summary of Contents for Huawei B222s
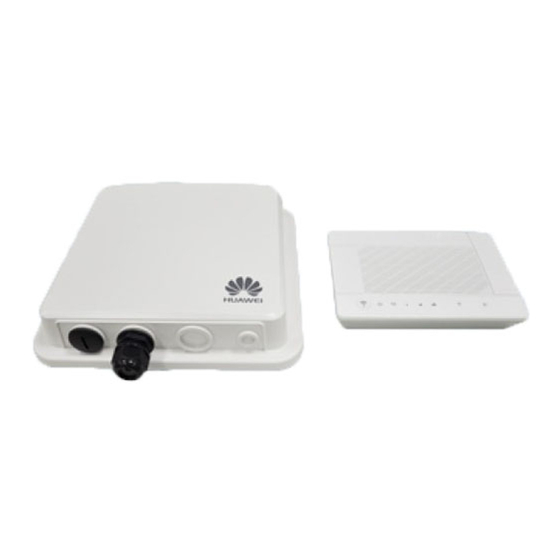
- Page 1 B222s LTE Outdoor CPE Default Login Details http://192.168.1.1 Address User Name admin Password 1234 IMPORTANT! Edition 1, 6/2012 www.zyxel.com www.huawei.com Copyright © 2012 Huawei Technologies Co., LTD.
- Page 2 (See the wizard real time help for information on configuring each screen.) It also contains a connection diagram and package contents list. Note: It is recommended you use the Web Configurator to configure the LTE Device. B222s User’s Guide...
-
Page 3: Table Of Contents
MAC Filter ............................. 115 Parental Control ............................ 117 VoIP ...............................121 Logs ..............................145 Traffic Status ............................149 User Account ............................155 Remote MGMT ............................157 System ..............................159 Time Setting ............................161 Log Setting ............................163 Firmware Upgrade ..........................165 Backup/Restore .............................167 Diagnostic .............................171 Troubleshooting ............................173 B222s User’s Guide... - Page 4 Contents Overview B222s User’s Guide...
-
Page 5: Table Of Contents
2.2.2 Main Window ...........................24 2.2.3 Traffic Status ..........................24 2.2.4 User Account ...........................24 2.2.5 Navigation Panel ........................24 Part II: Technical Reference................27 Chapter 3 Connection Status and System Info ....................29 3.1 Overview ............................29 3.2 The Connection Status Screen ......................29 B222s User’s Guide... - Page 6 5.7.6 WiFi Protected Setup (WPS) ....................62 Chapter 6 Home Networking ..........................69 6.1 Overview ............................69 6.1.1 What You Can Do in this Chapter ....................69 6.1.2 What You Need To Know ......................69 6.2 The LAN Setup Screen ........................71 6.3 The Static DHCP Screen ........................72 B222s User’s Guide...
- Page 7 10.1.2 What You Need To Know .......................95 10.2 The Port Forwarding Screen ......................96 10.2.1 The Port Forwarding Screen ....................97 10.2.2 The Port Forwarding Edit Screen ..................98 10.3 The DMZ Screen ..........................99 10.4 The Sessions Screen ........................99 10.5 Technical Reference ........................100 B222s User’s Guide...
- Page 8 14.2 The Parental Control Screen ......................117 14.2.1 Add/Edit a Parental Control Rule ..................118 Chapter 15 VoIP ..............................121 15.1 Overview ............................121 15.1.1 What You Can Do in this Chapter ..................121 15.1.2 What You Need to Know ......................121 15.1.3 Before You Begin .........................123 B222s User’s Guide...
- Page 9 17.5 The VoIP Status Screen ........................152 Chapter 18 User Account ............................155 18.1 Overview ............................155 18.2 The User Account Screen ......................155 Chapter 19 Remote MGMT...........................157 19.1 Overview ............................157 19.1.1 What You Need to Know ......................157 19.2 The Remote MGMT Screen ......................157 B222s User’s Guide...
- Page 10 26.2 Power, Hardware Connections, and LEDs ..................173 26.3 LTE Device Access and Login ......................174 26.4 Internet Access ..........................175 26.5 Wireless Internet Access .......................176 26.6 Phone Calls and VoIP ........................177 26.7 UPnP .............................178 Appendix A IP Addresses and Subnetting..................179 B222s User’s Guide...
- Page 11 Table of Contents Appendix B Setting Up Your Computer’s IP Address ..............189 Appendix C Pop-up Windows, JavaScript and Java Permissions ...........219 Appendix D Wireless LANs......................229 Appendix E Common Services ......................249 Appendix F Legal Information......................253 Index ..............................255 B222s User’s Guide...
- Page 12 Table of Contents B222s User’s Guide...
-
Page 13: User's Guide
User’s Guide... -
Page 15: Introduction
Here are some example uses for which the LTE Device is well suited. 1.2.1 Internet Access Your LTE Device provides Internet access by connecting to an LTE network wirelessly. Computers can connect to the LTE Device’s ETHERNET ports (or wirelessly). Figure 1 LTE Device’s Internet Access Application B222s User’s Guide... -
Page 16: Voip Features
You can use the WIRELESS On/Off button on top of the device to turn the wireless LAN on or off. You can also use it to activate WPS in order to quickly set up a wireless network with strong security. B222s User’s Guide... - Page 17 LTE Device sets up a WPS connection with the wireless device. Note: You must activate WPS in the LTE Device and in another wireless device within two minutes of each other. See Chapter 5 on page 62 for more information. B222s User’s Guide...
-
Page 18: Ways To Manage The Lte Device
The LTE Device is receiving power and ready for use. Blinking The LTE Device is booting up. The LTE Device detected an error while self-testing, or there is a device malfunction. Blinking The LTE Device is upgrading the firmware. The LTE Device is not receiving power. B222s User’s Guide... - Page 19 The LTE Device is sending or receiving data to/from the LAN at 10/100 Mbps. The LTE Device does not have an Ethernet connection with the LAN. Refer to the Quick Start Guide for information on hardware connections. B222s User’s Guide...
-
Page 20: The Reset Button
To set the device back to the factory default settings, press the RESET button for 5 seconds or until the POWER LED begins to blink and then release it. When the POWER LED begins to blink, the defaults have been restored and the device restarts. B222s User’s Guide... -
Page 21: Introducing The Web Configurator
Login. Figure 6 Password Screen Note: For security reasons, the LTE Device automatically logs you out if you do not use the web configurator for five minutes (default). If this happens, log in again. B222s User’s Guide... - Page 22 Apply; alternatively click Skip to proceed to the main menu if you do not want to change the password now. Figure 7 Change Password Screen The Connection Status screen appears. Figure 8 Connection Status Click System Info to display the System Info screen, where you can view the LTE Device’s interface and system information. B222s User’s Guide...
-
Page 23: The Web Configurator Layout
• A - title bar • B - main window • C - navigation panel 2.2.1 Title Bar The title bar shows the following icon in the upper right corner. Click this icon to log out of the web configurator. B222s User’s Guide... -
Page 24: Main Window
Use the menu items on the navigation panel to open screens to configure LTE Device features. The following table describes each menu item. Table 2 Navigation Panel Summary LINK FUNCTION Connection Status This screen shows the network status of the LTE Device and computers/devices connected to it. Network Setting B222s User’s Guide... - Page 25 Use this screen to allow specific devices to access the LTE Device. Parental Parental Control Use this screen to define time periods and days during which the LTE Control Device performs parental control and/or block web sites with the specific URL. VoIP B222s User’s Guide...
- Page 26 Use this screen to reboot the LTE Device without turning the power off. Diagnostic Ping/TraceRoute Use this screen to test the connections to other devices. Auto Provision Auto Provision Use this screen to configure auto provision which automatically updates the latest firmware and configuration to the LTE Device. B222s User’s Guide...
-
Page 27: Technical Reference
Technical Reference The appendices provide general information. Some details may not apply to your LTE Device. -
Page 29: Connection Status And System Info
Section 2.2.2 on page 24 for more information. 3.2 The Connection Status Screen Use this screen to view the network connection status of the device and its clients. A warning message appears if there is a connection problem. B222s User’s Guide... - Page 30 In Icon View, if you want to view information about a client, click the client’s name and Info. Click the IP address if you want to change it. If you want to change the name or icon of the client, click Change name/icon. In List View, you can also view the client’s information. B222s User’s Guide...
-
Page 31: The System Info Screen
Maintenance > System screen’s Host Name field. Model Name This is the model name of your device. MAC Address This is the MAC (Media Access Control) or Ethernet address unique to your LTE Device. B222s User’s Guide... - Page 32 This displays the International Mobile Subscriber Identity (IMSI) of the SIM card inserted in the outdoor unit. An IMSI is a unique ID used to identify a mobile subscriber in a mobile network. Interface Status Interface This column displays each interface the LTE Device has. B222s User’s Guide...
- Page 33 Register Fail - The last time the LTE Device tried to register the SIP account with the SIP server, the attempt failed. The LTE Device automatically tries to register the SIP account when you turn on the LTE Device or when you activate it. B222s User’s Guide...
- Page 34 This shows Active when the SIP account has been registered and ready for use or In-Active when the SIP account is not yet registered. This field displays the account number and service domain of the SIP account. You can change these in VoIP > SIP > SIP Settings. B222s User’s Guide...
-
Page 35: Broadband
Encapsulation is used to include data from an upper layer protocol into a lower layer protocol. To set up a WAN connection to the Internet, you need to use the same encapsulation method used by your ISP (Internet Service Provider). B222s User’s Guide... - Page 36 Note: The LTE Device can be a standalone AP (default), a CAPWAP managed AP, or a CAPWAP AP controller. CAPWAP Discovery and Management The link between CAPWAP-enabled access points proceeds as follows: An AP in managed AP mode joins a wired network (receives a dynamic IP address). B222s User’s Guide...
- Page 37 • Activate DHCP. Your network’s DHCP server must support option 138 defined in RFC 5415. • Configure DHCP option 138 with the IP address of the CAPWAP AP controller on your network. B222s User’s Guide...
-
Page 38: Before You Begin
The LTE Device must have a WAN interface to allow users to use the LTE connection to access the Internet. Use the Broadband screen to view or modify a WAN interface. You can also configure the LTE Device as part of a Control And Provisioning of Wireless Access Points (CAPWAP) network in this screen. B222s User’s Guide... -
Page 39: Add/Edit Internet Connection
4.2.1 Add/Edit Internet Connection Use this screen to configure a WAN connection. The screen varies depending on the interface type, encapsulation, and WAN service type you select. B222s User’s Guide... - Page 40 Select this if you need to transmit IPv6 packets over the IPv4 network through this WAN Tunneling interface, the IPv6 packets are encapsulated inside IPv4 packets.?? Apply Click Apply to save your changes. Back Click Back to return to the previous screen. B222s User’s Guide...
-
Page 41: Technical Reference
– 1755 MHz 2110 MHz – 2155 MHz 824 MHz – 849 MHz 869 MHz – 894MHz 830 MHz – 840 MHz 875 MHz – 885 MHz 2500 MHz – 2570 MHz 2620 MHz – 2690 MHz B222s User’s Guide... - Page 42 2400 MHz 2496 MHz 2690 MHz 2496 MHz 2690 MHz 3400 MHz – 3600 MHz 3400 MHz – 3600 MHz 3600 MHz – 3800 MHz 3600 MHz – 3800 MHz Note 1: Band 6 is not applicable B222s User’s Guide...
-
Page 43: Wireless
• An “infrastructure” type of network has one or more access points and one or more wireless clients. The wireless clients connect to the access points. • An “ad-hoc” type of network is one in which there is no access point. Wireless clients connect to one another in order to exchange information. B222s User’s Guide... - Page 44 A channel is the radio frequency(ies) used by wireless devices to transmit and receive data. Channels available depend on your geographical area. You may have a choice of channels (for your region) so you should use a channel different from an adjacent AP (access point) to reduce B222s User’s Guide...
-
Page 45: Before You Begin
LAN and you change the LTE Device’s SSID or security settings, you will lose your wireless connection when you press Apply to confirm. You must then change the wireless settings of your computer to match the LTE Device’s new settings. B222s User’s Guide... - Page 46 Select 802.11g Only to allow only IEEE 802.11g compliant WLAN devices to associate with the LTE Device. Select 802.11n only in 2.4G band to allow only IEEE 802.11n compliant WLAN devices with the same frequency range (2.4 GHz) to associate with the LTE Device. B222s User’s Guide...
-
Page 47: No Security
5.2.2 Basic (Static WEP/Shared WEP Encryption) WEP encryption scrambles the data transmitted between the wireless stations and the access points (AP) to keep network communications private. Both the wireless stations and the access points must use the same WEP key. B222s User’s Guide... - Page 48 WEP key for data transmission. If you want to manually set the WEP key, enter any 5 or 13 characters (ASCII string) or 10 or 26 hexadecimal characters ("0-9", "A-F") for a 64-bit or 128-bit WEP key respectively. B222s User’s Guide...
-
Page 49: More Secure (Wpa(2)-Psk)
PSK uses a simple common password, instead of user-specific credentials. Type a pre-shared key from 8 to 63 case-sensitive ASCII characters or 64 hexidecimal digits. more.../hide Click more... to show more fields in this section. Click hide more to hide them. more B222s User’s Guide... -
Page 50: Wpa(2) Authentication
WPA2 and therefore is more compatible with older devices. Click Network Settings > Wireless to display the General screen. Select More Secure as the security level. Then select WPA or WPA2 from the Security Mode list. Figure 24 Wireless > General: More Secure: WPA(2) B222s User’s Guide... -
Page 51: The More Ap Screen
This screen allows you to enable and configure multiple Basic Service Sets (BSSs) on the LTE Device. Click Network Settings > Wireless > More AP. The following screen displays. Figure 25 Network Settings > Wireless > More AP B222s User’s Guide... -
Page 52: Edit More Ap
The following table describes the fields in this screen. Table 13 Wireless > More AP: Edit LABEL DESCRIPTION Wireless Network Setup Wireless Select the Enable Wireless LAN check box to activate the wireless LAN. Wireless Network Settings B222s User’s Guide... -
Page 53: The Wps Screen
Note: The LTE Device applies the security settings of the SSID1 profile (see Section 5.2 on page 45). If you want to use the WPS feature, make sure you have set the security mode of SSID1 to WPA-PSK, WPA2-PSK or No Security. B222s User’s Guide... - Page 54 Note: You must press the other wireless device’s WPS button within two minutes of pressing this button. Method 2 PIN Use this section to set up a WPS wireless network by entering the PIN (Personal Identification Number) of the client into the LTE Device. B222s User’s Guide...
-
Page 55: The Wmm Screen
This is the type of wireless security employed by the network. Apply Click Apply to save your changes. 5.5 The WMM Screen Use this screen to enable or disable Wi-Fi MultiMedia (WMM) wireless networks for multimedia applications. B222s User’s Guide... - Page 56 Automatic Power a longer beacon interval when transmitting traffic that does not require a short Save Deliver packet exchange interval. (APSD) Apply Click Apply to save your changes. Cancel Click Cancel to restore your previously saved settings. B222s User’s Guide...
-
Page 57: Scheduling Screen
Check Mon ~ Fri in the day column, and specify 8:00 ~ 18:00 in the time table. Apply Click Apply to save your changes. Cancel Click Cancel to restore your previously saved settings. 5.7 Technical Reference This section discusses wireless LANs in depth. For more information, see the appendix. B222s User’s Guide... -
Page 58: Additional Wireless Terms
Because of the damage that can be done by a malicious attacker, it’s not just people who have sensitive information on their network who should use security. Everybody who uses any wireless network should ensure that effective security is in place. B222s User’s Guide... - Page 59 Some wireless devices, such as scanners, can detect wireless networks but cannot use wireless networks. These kinds of wireless devices might not have MAC addresses. Hexadecimal characters are 0, 1, 2, 3, 4, 5, 6, 7, 8, 9, A, B, C, D, E, and F. B222s User’s Guide...
-
Page 60: Signal Problems
Problems with absorption occur when physical objects (such as thick walls) are between the two radios, muffling the signal. B222s User’s Guide... -
Page 61: Bss
• You must use different keys for different BSSs. If two wireless devices have different BSSIDs (they are in different BSSs), but have the same keys, they may hear each other’s communications (but not communicate with each other). • MBSSID should not replace but rather be used in conjunction with 802.1x security. B222s User’s Guide... -
Page 62: Wifi Protected Setup (Wps)
PIN method. When you use the PIN method, you must enter the PIN from one device (usually the wireless client) into the second device (usually the Access Point or wireless router). Then, when WPS is activated B222s User’s Guide... - Page 63 On a computer connected to the wireless client, try to connect to the Internet. If you can connect, WPS was successful. If you cannot connect, check the list of associated wireless clients in the AP’s configuration utility. If you see the wireless client in the list, WPS was successful. B222s User’s Guide...
- Page 64 WPA-PSK or WPA2-PSK pre-shared key to the enrollee. Whether WPA-PSK or WPA2-PSK is used depends on the standards supported by the devices. If the registrar is already part of a network, it sends the existing information. If not, it generates the SSID and WPA(2)-PSK randomly. B222s User’s Guide...
- Page 65 This section shows how security settings are distributed in an example WPS setup. The following figure shows an example network. In step 1, both AP1 and Client 1 are unconfigured. When WPS is activated on both, they perform the handshake. In this example, AP1 B222s User’s Guide...
- Page 66 (it already has security information for the network). AP1 supplies the existing security information to Client 2. Figure 34 WPS: Example Network Step 2 REGISTRAR EXISTING CONNECTION CLIENT 1 ENROLLEE CLIENT 2 B222s User’s Guide...
- Page 67 (if the device supports this feature). Then, you can enter the key into the non-WPS device and join the network as normal (the non-WPS device must also support WPA-PSK or WPA2-PSK). B222s User’s Guide...
- Page 68 Check the MAC addresses of your wireless clients (usually printed on a label on the bottom of the device). If there is an unknown MAC address you can remove it or reset the AP. B222s User’s Guide...
-
Page 69: Home Networking
6.1.2.1 About LAN IP Address Similar to the way houses on a street share a common street name, so too do computers on a LAN share one common network number. This is known as an Internet Protocol address. B222s User’s Guide... - Page 70 When a UPnP device joins a network, it announces its presence with a multicast message. For security reasons, the LTE Device allows multicast messages on the LAN only. All UPnP-enabled devices may communicate freely with each other without additional configuration. Disable UPnP if this is not your intention. B222s User’s Guide...
-
Page 71: The Lan Setup Screen
IP Addressing Values IP Pool Starting This field specifies the first of the contiguous addresses in the IP address pool. Address Pool Size This field specifies the size, or count of the IP address pool. DNS Values B222s User’s Guide... -
Page 72: The Static Dhcp Screen
Table 20 Network Setting > Home Networking > Static DHCP LABEL DESCRIPTION Add new static Click this to add a new static DHCP entry. lease This is the index number of the entry. Status This field displays whether the client is connected to the LTE Device. B222s User’s Guide... -
Page 73: The Upnp Screen
IP address, convey its capabilities and learn about other devices on the network. In turn, a device can leave a network smoothly and automatically when it is no longer in use. page 74 for more information on UPnP. B222s User’s Guide... - Page 74 Select Enable to activate UPnP. Be aware that anyone could use a UPnP application to open the web configurator's login screen without entering the LTE Device's IP address (although you must still enter the password to access the web configurator). Apply Click Apply to save your changes. B222s User’s Guide...
-
Page 75: Routing
(R1). You create one static route to connect to services offered by your ISP behind router R2. You create another static route to communicate with a separate network behind a router R3 connected to the LAN. Figure 40 Example of Static Routing Topology B222s User’s Guide... -
Page 76: Configuring Static Route
This indicates which interface handles the traffic forwarded by this route. Modify Click the Edit icon to go to the screen where you can set up a static route on the LTE Device. Click the Delete icon to remove a static route from the LTE Device. B222s User’s Guide... -
Page 77: Add/Edit Static Route
If you want to configure Bound Interface, select the check box and choose an interface through which the traffic is sent. Apply Click Apply to save your changes. Back Click Back to exit this screen without saving. B222s User’s Guide... - Page 78 Chapter 7 Routing B222s User’s Guide...
-
Page 79: Dns Route
Figure 43 Example of DNS Routing Topology DNS:168.92.5.1 atm0.100 (Default) sip.service.com ppp1.123 mail.example.com DNS:10.10.23.7 8.1.1 What You Can Do in this Chapter The DNS Route screens let you view and configure DNS routes on the LTE Device (Section 8.2 on page 80). B222s User’s Guide... -
Page 80: The Dns Route Screen
Click Add new DNS route in the DNS Route screen or the Edit icon next to an existing DNS route. Use this screen to configure the required information for a DNS route. Figure 45 DNS Route: Add/Edit B222s User’s Guide... - Page 81 Select a WAN interface through which the matched DNS query is sent. You must have the WAN interface(s) already configured in the Broadband screen. Apply Click Apply to save your changes. Back Click Back to exit this screen without saving. B222s User’s Guide...
- Page 82 Chapter 8 DNS Route B222s User’s Guide...
-
Page 83: Quality Of Service (Qos)
87). • Use the Monitor screen to view the LTE Device’s QoS-related packet statistics (Section 9.5 on page 92). 9.1.2 What You Need to Know The following terms and concepts may help as you read this chapter. B222s User’s Guide... -
Page 84: The Qos General Screen
Use this screen to enable or disable QoS, set the bandwidth, and select to have the LTE Device automatically assign priority to upstream traffic according to the IEEE 802.1p priority level, IP precedence or packet length. Click Network Setting > QoS to open the General screen. Figure 46 Network Setting > QoS > General B222s User’s Guide... - Page 85 IEEE 802.1p priority level, IP precedence or packet length. Section 9.6.1 on page 93 for more information. Active upstream hardware Queue if available Apply Click Apply to save your changes. Cancel Click Cancel to restore your previously saved settings. B222s User’s Guide...
-
Page 86: The Queue Setup Screen
This shows the maximum transmission rate allowed for traffic on this queue. (kbps) Modify Click the Edit icon to edit the queue. Click the Delete icon to delete an existing queue. Note that subsequent rules move up by one when you take this action. B222s User’s Guide... -
Page 87: Add/Edit A Qos Queue
You can give different priorities to traffic that the LTE Device forwards out through the WAN interface. Give high priority to voice and video to make them run more smoothly. Similarly, give low priority to many large file downloads so that they do not reduce the quality of other applications. B222s User’s Guide... - Page 88 This is the name of the queue in which traffic of this classifier is put. Modify Click the Edit icon to edit the classifier. Click the Delete icon to delete an existing classifier. Note that subsequent rules move up by one when you take this action. B222s User’s Guide...
-
Page 89: Add/Edit Qos Class
Select an existing number for where you want to put this classifier to move the classifier to the number you selected after clicking Apply. Select Last to put this rule in the back of the classifier list. B222s User’s Guide... - Page 90 Enter “0“ for the bit(s) of the matched traffic’s MAC address, which can be of any hexadecimal character(s). For example, if you set the MAC address to 00:13:49:00:00:00 and the mask to ff:ff:ff:00:00:00, a packet with a MAC address of 00:13:49:12:34:56 matches this criteria. B222s User’s Guide...
- Page 91 Select the service classification of the traffic. Exclude Select this option to exclude the packets that match the specified criteria from this classifier. Apply Click Apply to save your changes. Back Click Back to return to the previous screen without saving. B222s User’s Guide...
-
Page 92: The Qos Monitor Screen
This shows how much traffic (bps) assigned to this queue are transmitted successfully. Drop Rate (bps) This shows how much traffic (bps) assigned to this queue are dropped. 9.6 QoS Technical Reference This section provides some technical background information about the topics covered in this chapter. B222s User’s Guide... -
Page 93: Ieee 802.1P
DiffServ defines a new DS (Differentiated Services) field to replace the Type of Service (TOS) field in the IP header. The DS field contains a 2-bit unused field and a 6-bit DSCP field which can define up to 64 service levels. The following figure illustrates the DS field. B222s User’s Guide... - Page 94 The DSCP value determines the forwarding behavior, the PHB (Per-Hop Behavior), that each packet gets across the DiffServ network. Based on the marking rule, different kinds of traffic can be marked for different kinds of forwarding. Resources can then be allocated according to the DSCP values and the configured policies. B222s User’s Guide...
-
Page 95: Network Address Translation (Nat)
(the inside local address) to another (the inside global address) before forwarding the packet to the WAN side. When the response comes back, NAT translates the destination address (the inside global address) back to the inside local address before forwarding it to the original inside host. B222s User’s Guide... -
Page 96: The Port Forwarding Screen
(C in the example). You assign the LAN IP addresses and the ISP assigns the WAN IP address. The NAT network appears as a single host on the Internet. Figure 52 Multiple Servers Behind NAT Example A=10.0.0.33 B=10.0.0.34 10.0.0.1 IP Address assigned by ISP C=10.0.0.35 D=10.0.0.36 B222s User’s Guide... -
Page 97: The Port Forwarding Screen
Click the Delete icon to delete an existing port forwarding rule. Note that subsequent address mapping rules move up by one when you take this action. Apply Click Apply to save your changes. Cancel Click Cancel to restore your previously saved settings. B222s User’s Guide... -
Page 98: The Port Forwarding Edit Screen
Enter the inside IP address of the virtual server here. Address Protocol Type Select the protocol supported by this virtual server. Choices are TCP, UDP, or TCP/UDP. Apply Click Apply to save your changes. Back Click Back to return to the previous screen without saving. B222s User’s Guide... -
Page 99: The Dmz Screen
10.4 The Sessions Screen Use the Sessions screen to limit the number of concurrent NAT sessions each client can use. Click Network Setting > NAT > Sessions to display the following screen. Figure 56 Network Setting > NAT > Sessions B222s User’s Guide... -
Page 100: Technical Reference
This refers to the packet address (source or destination) as the packet travels on the LAN. Global This refers to the packet address (source or destination) as the packet travels on the WAN. NAT never changes the IP address (either local or global) of an outside host. B222s User’s Guide... -
Page 101: What Nat Does
Figure 57 How NAT Works NAT Table Inside Local Inside Global IP Address IP Address 192.168.1.10 IGA 1 192.168.1.13 192.168.1.11 IGA 2 192.168.1.12 IGA 3 192.168.1.13 IGA 4 192.168.1.12 192.168.1.10 IGA1 Inside Local Inside Global Address (ILA) Address (IGA) 192.168.1.11 192.168.1.10 B222s User’s Guide... - Page 102 Chapter 10 Network Address Translation (NAT) B222s User’s Guide...
-
Page 103: Dynamic Dns
IP address as yourhost.dyndns.org. This feature is useful if you want to be able to use, for example, www.yourhost.dyndns.org and still reach your hostname. If you have a private WAN IP address, then you cannot use Dynamic DNS. B222s User’s Guide... -
Page 104: The Dynamic Dns Screen
You can specify up to two host names in the field separated by a comma (","). User Name Type your user name. Password Type the password assigned to you. Apply Click Apply to save your changes. Cancel Click Cancel to restore your previously saved settings. B222s User’s Guide... -
Page 105: Firewall
• Use the Access Control screen to view and configure incoming/outgoing filtering rules (Section 12.4 on page 109). • Use the DoS screen to enable or disable Denial of Service (DoS) protection (Section 12.4 on page 109). B222s User’s Guide... -
Page 106: What You Need To Know
Internet. ICMP uses Internet Protocol (IP) datagrams, but the messages are processed by the TCP/IP software and directly apparent to the application user. Finding Out More Section 12.6 on page 112 for advanced technical information on firewall. B222s User’s Guide... -
Page 107: The General Screen
Select High to have the firewall only allow Telnet, FTP, HTTP, HTTPS, DNS, POP3, and SMTP traffic sent from the LAN to the WAN. Other traffic will be blocked. Apply Click Apply to save your changes. Cancel Click Cancel to restore your previously saved settings. B222s User’s Guide... -
Page 108: The Services Screen
Firewall > Access Control > Add New ACL Rule/Edit screen. To access this screen, click Security > Firewall > Services and then the Add New Serviice Entry button. Figure 62 Security > Firewall > Services > Add New Service Entry B222s User’s Guide... -
Page 109: The Access Control Screen
This displays the destination IP addresses to which this rule applies. Please note that a blank destination address is equivalent to Any. Services This displays the protocol type and a port range that define the service to which this rule applies. B222s User’s Guide... -
Page 110: The Add New Acl Rule/Edit Screen
Destination Select Single or Range depending on whether you want to enter a single or a range of Address Type destination IP address(es) to which the ACL rule applies. Select Any to indicate any destination IP address. B222s User’s Guide... -
Page 111: The Dos Screen
Click Back to exit this screen without saving your changes. 12.5 The DoS Screen Click Security > Firewall > DoS to display the following screen. Use this screen to enable or disable Denial of Service (DoS) protection. Figure 65 Security > Firewall > DoS B222s User’s Guide... -
Page 112: Firewall Technical Reference
Is it possible to modify the rule to be more specific? For example, if IRC is blocked for all users, will a rule that blocks just certain users be more effective? B222s User’s Guide... - Page 113 Internet users may be able to connect to computers with running FTP servers. Does this rule conflict with any existing rules? Once these questions have been answered, adding rules is simply a matter of entering the information into the correct fields in the web configurator screens. B222s User’s Guide...
- Page 114 Chapter 12 Firewall B222s User’s Guide...
-
Page 115: Mac Filter
Use the MAC Filter screen to allow wireless and LAN clients access to the LTE Device. To change your LTE Device’s MAC filter settings, click Security > MAC Filter. The screen appears as shown. Figure 66 Security > MAC Filter B222s User’s Guide... - Page 116 LTE Device in these address fields. Enter the MAC addresses in a valid MAC address format, that is, six hexadecimal character pairs, for example, 12:34:56:78:9a:bc. Apply Click Apply to save your changes. Cancel Click Cancel to restore your previously saved settings. B222s User’s Guide...
-
Page 117: Parental Control
This shows the day(s) and time on which parental control is enabled. Schedule Network Service This shows whether the network service is configured. If not, None will be shown. Website Block This shows whether the website block is configured. If not, None will be shown. B222s User’s Guide... -
Page 118: Add/Edit A Parental Control Rule
The following table describes the fields in this screen. Table 48 Add/Edit Parental Control Rule LABEL DESCRIPTION General Active Select the checkbox to activate this parental control rule. Parental Control Enter a descriptive name for the rule. Profile Name B222s User’s Guide... - Page 119 Keyword LTE Device blocks access. Click Delete to remove it. Apply Click this button to save your settings back to the LTE Device. Back Click this button to return to the previous screen without saving any changes. B222s User’s Guide...
- Page 120 Chapter 14 Parental Control B222s User’s Guide...
-
Page 121: Voip
VoIP stands for Voice over IP. IP is the Internet Protocol, which is the message-carrying standard the Internet runs on. So, Voice over IP is the sending of voice signals (speech) over the Internet (or another network that uses the Internet Protocol). B222s User’s Guide... - Page 122 Detection) settings for each individual phone port on the LTE Device. How to Find Out More Chapter 3 on page 33 for a tutorial showing how to set up these screens in an example scenario. Section on page 135 for advanced technical information on SIP. B222s User’s Guide...
-
Page 123: Before You Begin
15.2 The SIP Service Provider Screen Use this screen to configure the SIP server information, QoS for VoIP calls, the numbers for certain phone functions and dialing plan. Click VoIP > SIP to open the SIP Service Provider screen. B222s User’s Guide... - Page 124 Note: Click more... to see all the fields in the screen. You don’t necessarily need to use all these fields to set up your account. Click hide more to see and configure only the fields needed for this feature. Figure 69 VoIP > SIP > SIP Service Provider B222s User’s Guide...
- Page 125 Chapter 15 VoIP B222s User’s Guide...
- Page 126 IP address by a standard DNS address record lookup. Session Timer Select this to have the LTE Device support RFC 4028. (RFC 4028) This makes sure that SIP sessions do not hang and the SIP line can always be available for use. RTP Port Range B222s User’s Guide...
- Page 127 Session Expires Enter the number of seconds the LTE Device lets a SIP session remain idle (without traffic) before it automatically disconnects the session. B222s User’s Guide...
- Page 128 This code is used to disable call forwarding when the phone is busy. When Busy Disable Do Not Disturb This code is used to turn the Do Not Disturb feature on. This has the LTE Device not Enable forward calls to the phone line. B222s User’s Guide...
-
Page 129: The Sip Account Screen
This shows the name of the SIP service provider. Provider Account No. This shows the SIP number. Modify Click the Edit icon to configure the SIP account. Click the Delete icon to delete this SIP account from the LTE Device. B222s User’s Guide... -
Page 130: Add/Edit Sip Account
You can configure a new SIP account or edit one. To access this screen, click Add new SIP Account in the SIP Account screen or Edit icon next to an existing account. Figure 71 SIP Account: Add/Edit B222s User’s Guide... - Page 131 Minimum is the quietest, and Maximum is the loudest. Active G.168 Select this if you want to eliminate the echo caused by the sound of your voice (Echo reverberating in the telephone receiver while you talk. Cancellation) B222s User’s Guide...
-
Page 132: Multiple Sip Accounts
You can set up two SIP accounts on your LTE Device and your LTE Device is equipped with two phone ports. By default, SIP1 of the LTE Device maps to phone port 1 for incoming and outgoing, and SIP2 maps to phone port 2 for incoming and outgoing. B222s User’s Guide... -
Page 133: Phone Screen
SIP Account Select the SIP account you want to use when making outgoing calls with the analog phone connected to this phone port. SIP Number This shows the SIP account number. SIP Account(s) to Receive Incoming Call B222s User’s Guide... -
Page 134: The Phone Region Screen
Use this screen to add, edit, or remove speed-dial numbers for outgoing calls. Speed dial provides shortcuts for dialing frequently-used (VoIP) phone numbers. You also have to create speed-dial entries if you want to call SIP numbers that contain letters. Once you have configured a speed dial B222s User’s Guide... - Page 135 Click Add when you finish editing to change the configurations. Click the Delete icon to erase this speed-dial entry. Clear Click this to erase all the speed-dial entries. Cancel Click this to set every field in this screen to its last-saved value. B222s User’s Guide...
-
Page 136: Technical Reference
SIP and RTP protocols to communicate with other servers. A SIP user agent has to register with the SIP registrar and must provide information about the users it represents, as well as its current IP address (for the routing of incoming SIP requests). B222s User’s Guide... - Page 137 A SIP proxy server receives requests from clients and forwards them to another server. In the following example, you want to use client device A to call someone who is using client device The client device (A in the figure) sends a call invitation to the SIP proxy server B. B222s User’s Guide...
- Page 138 In the following example, you want to use client device A to call someone who is using client device Client device A sends a call invitation for C to the SIP redirect server B. The SIP redirect server sends the invitation back to A with C’s IP address (or domain name). B222s User’s Guide...
- Page 139 The following figure displays the basic steps in the setup and tear down of a SIP call. A calls B. Table 56 SIP Call Progression 1. INVITE 2. Ringing 3. OK 4. ACK 5.Dialogue (voice traffic) 6. BYE 7. OK B222s User’s Guide...
-
Page 140: Quality Of Service (Qos)
Network traffic can be classified by setting the ToS (Type of Service) values at the data source (for example, at the LTE Device) so a server can decide the best method of delivery, that is the least cost, fastest route and so on. B222s User’s Guide... -
Page 141: Phone Services Overview
Note: To take full advantage of the supplementary phone services available through the LTE Device's phone ports, you may need to subscribe to the services from your VoIP service provider. The LTE Device does not support DiffServ at the time of writing. B222s User’s Guide... - Page 142 Press the flash key and then “1” to disconnect the current call and resume the call on hold. If you hang up the phone but a caller is still on hold, there will be a remind ring. B222s User’s Guide...
- Page 143 Hang up the phone to drop the connection. If you want to separate the activated three-way conference into two individual connections (one is on-line, the other is on hold), press the flash key and press “2”. B222s User’s Guide...
- Page 144 Chapter 15 VoIP B222s User’s Guide...
-
Page 145: Logs
Refer to the documentation of your syslog program for details. The following table describes the syslog severity levels. Table 58 Syslog Severity Levels CODE SEVERITY Emergency (EMERG): The system is unusable. Alert (ALERT): Action must be taken immediately. Critical (CRIT): The system condition is critical. B222s User’s Guide... -
Page 146: The System Log Screen
This field displays the date and time the log was recorded. Level This field displays the severity level of the logs that the device is to send to this syslog server. Message This field states the reason for the log. B222s User’s Guide... -
Page 147: The Phone Log Screen
Click > VoIP Call History to open the VoIP Call History screen. Use this screen to see the details of the calls performed on the LTE Device. Figure 82 System Monitor > Log > VoIP Call History B222s User’s Guide... - Page 148 This field displays the phone number you used to make or receive this call. Peer Number This field displays the phone number you called or from which this call is made. Interface This field displays the type of the call. Duration This field displays how long the call lasted. B222s User’s Guide...
-
Page 149: Traffic Status
This shows the number of bytes received and sent through the WAN interface of the LTE Device. Refresh Interval Select how often you want the LTE Device to update this screen from the drop- down list box. B222s User’s Guide... -
Page 150: The Lan Status Screen
This indicates the number of bytes received on this interface. Interface This shows the LAN or WLAN interface. Sent (Packet) Data This indicates the number of transmitted packets on this interface. Error This indicates the number of frames with errors transmitted on this interface. B222s User’s Guide... -
Page 151: The Nat Status Screen
This shows the name of the client. IP Address This shows the IP address of the client. MAC Address This shows the MAC address of the client. No. of Open This shows the number of NAT sessions used by the client. Session B222s User’s Guide... -
Page 152: The Voip Status Screen
This field displays the last number the SIP account called. The field is blank if the SIP Number account has never dialed a number. Call Status Account This column displays the SIP account in the LTE Device. Duration This field displays how long the current call has lasted. B222s User’s Guide... - Page 153 This field displays the SIP number that you use to receive calls on this phone port. Number Phone State This field shows whether or the phone connected to the subscriber port is on-hook ONHOOK) or off-hook (OFFHOOK). B222s User’s Guide...
- Page 154 Chapter 17 Traffic Status B222s User’s Guide...
-
Page 155: User Account
LTE Device. Retype to Type the new password again for confirmation. Confirm Apply Click Apply to save your changes. Cancel Click Cancel to restore your previously saved settings. B222s User’s Guide... - Page 156 Chapter 18 User Account B222s User’s Guide...
-
Page 157: Remote Mgmt
Select the Enable check box for the corresponding services that you want to allow access to the LTE Device from the WAN. Port You may change the server port number for a service if needed, however you must use the same port number in order to use that service for remote management. B222s User’s Guide... - Page 158 Chapter 19 Remote MGMT Table 67 Maintenance > Remote MGMT (continued) LABEL DESCRIPTION Apply Click Apply to save your changes. Cancel Click Cancel to restore your previously saved settings. B222s User’s Guide...
-
Page 159: System
In Windows XP, click start, My Computer, View system information and then click the Computer Name tab. Note the entry in the Full computer name field and enter it as the LTE Device System Name. Click Maintenance > System to open the following screen. Figure 89 Maintenance > System B222s User’s Guide... - Page 160 A value of "0" means a management session never times out, no matter how long it has been left idle (not recommended). Apply Click this to save your changes back to the LTE Device. Cancel Click this to begin configuring this screen afresh. B222s User’s Guide...
-
Page 161: Time Setting
Check with your ISP/network administrator if you are unsure of this information. Time Zone Choose the time zone of your location. This will set the time difference between your time zone and Greenwich Mean Time (GMT). B222s User’s Guide... - Page 162 October. The time you type in the o'clock field depends on your time zone. In Germany for instance, you would type 2 because Germany's time zone is one hour ahead of GMT or UTC (GMT+1). Apply Click Apply to save your changes. Reset Click Reset to begin configuring this screen afresh. B222s User’s Guide...
-
Page 163: Log Setting
You can configure where the LTE Device sends logs and which logs and/or immediate alerts the LTE Device records in the Log Setting screen. 22.2 The Log Setting Screen To change your LTE Device’s log settings, click Maintenance > Log Setting. The screen appears as shown. Figure 91 Maintenance > Log Setting B222s User’s Guide... - Page 164 Log Level Select the severity level of logs that you want to record. If you want to record all logs, select ALL. Apply Click Apply to save your changes. Cancel Click Cancel to restore your previously saved settings. B222s User’s Guide...
-
Page 165: Firmware Upgrade
23.1 Overview This chapter explains how to upload new firmware to your LTE Device. You can download new firmware releases from your nearest Huawei FTP site (or www.huawei.com) to use to upgrade your device’s performance. Only use firmware for your device’s specific model. Refer to the label on the bottom of your LTE Device. - Page 166 After two minutes, log in again and check your new firmware version in the Status screen. If the upload was not successful, an error screen will appear. Click OK to go back to the Firmware Upgrade screen. Figure 95 Error Message B222s User’s Guide...
-
Page 167: Backup/Restore
The backup configuration file will be useful in case you need to return to your previous settings. Click Backup to save the LTE Device’s current configuration to your computer. B222s User’s Guide... - Page 168 IP address (192.168.1.1). See Appendix B on page 189 for details on how to set up your computer’s IP address. If the upload was not successful, an error screen will appear. Click OK to go back to the Configuration screen. B222s User’s Guide...
-
Page 169: The Reboot Screen
System restart allows you to reboot the LTE Device remotely without turning the power off. You may need to do this if the LTE Device hangs, for example. Click Maintenance > Reboot. Click the Reboot button to have the LTE Device reboot. This does not affect the LTE Device's configuration. B222s User’s Guide... - Page 170 Chapter 24 Backup/Restore B222s User’s Guide...
-
Page 171: Diagnostic
Type the IP address of a computer that you want to ping in order to test a connection. Click Ping and the ping statistics will show in the diagnostic . TraceRoute Click this button to perform the traceroute function. This determines the path a packet takes to the specified host. B222s User’s Guide... - Page 172 Chapter 25 Diagnostic B222s User’s Guide...
-
Page 173: Troubleshooting
Make sure you understand the normal behavior of the LED. See Section 1.6 on page Check the hardware connections. See the Quick Start Guide. Inspect your cables for damage. Contact the vendor to replace any damaged cables. B222s User’s Guide... -
Page 174: Lte Device Access And Login
Check the hardware connections, and make sure the LEDs are behaving as expected. See the Quick Start Guide. Make sure your Internet browser does not block pop-up windows and has JavaScript and Java enabled. See Appendix C on page 219. B222s User’s Guide... -
Page 175: Internet Access
If you are trying to access the Internet wirelessly, make sure you have enabled the wireless LAN by the WPS/WLAN button or the Network Setting > Wireless > General screen. Disconnect all the cables from your device, and follow the directions in the Quick Start Guide again. If the problem continues, contact your ISP. B222s User’s Guide... -
Page 176: Wireless Internet Access
• Electrical devices: microwaves, monitors, electric motors, cordless phones, and other wireless devices. To optimize the speed and quality of your wireless connection, you can: • Move your wireless device closer to the AP if the signal strength is low. B222s User’s Guide... -
Page 177: Phone Calls And Voip
I can access the Internet, but cannot make VoIP calls. The PHONE light should come on. Make sure that your telephone is connected to the PHONE port. You can also check the VoIP status in the System Info screen. B222s User’s Guide... -
Page 178: Upnp
The Local Area Connection icon for UPnP disappears in the screen. Restart your computer. I cannot open special applications such as white board, file transfer and video when I use the MSN messenger. Wait more than three minutes. Restart the applications. B222s User’s Guide... -
Page 179: Appendix A Ip Addresses And Subnetting
192.168.1.1). Each of these four parts is known as an octet. An octet is an eight-digit binary number (for example 11000000, which is 192 in decimal notation). Therefore, each octet has a possible range of 00000000 to 11111111 in binary, or 0 to 255 in decimal. B222s User’s Guide... - Page 180 Host ID 00000010 By convention, subnet masks always consist of a continuous sequence of ones beginning from the leftmost bit of the mask, followed by a continuous sequence of zeros, for a total number of 32 bits. B222s User’s Guide...
- Page 181 This is usually specified by writing a “/” followed by the number of bits in the mask after the address. For example, 192.1.1.0 /25 is equivalent to saying 192.1.1.0 with subnet mask 255.255.255.128. B222s User’s Guide...
- Page 182 You can “borrow” one of the host ID bits to divide the network 192.168.1.0 into two separate sub- networks. The subnet mask is now 25 bits (255.255.255.128 or /25). The “borrowed” host ID bit can have a value of either 0 or 1, allowing two subnets; 192.168.1.0 /25 and 192.168.1.128 /25. B222s User’s Guide...
- Page 183 Table 78 Subnet 1 LAST OCTET BIT IP/SUBNET MASK NETWORK NUMBER VALUE IP Address (Decimal) 192.168.1. IP Address (Binary) 11000000.10101000.00000001. 00000000 Subnet Mask (Binary) 11111111.11111111.11111111. 11000000 B222s User’s Guide...
- Page 184 11111111.11111111.11111111. 11000000 Subnet Address: Lowest Host ID: 192.168.1.193 192.168.1.192 Broadcast Address: Highest Host ID: 192.168.1.254 192.168.1.255 Example: Eight Subnets Similarly, use a 27-bit mask to create eight subnets (000, 001, 010, 011, 100, 101, 110 and 111). B222s User’s Guide...
- Page 185 NO. SUBNETS HOST BITS SUBNET 255.255.128.0 (/17) 32766 255.255.192.0 (/18) 16382 255.255.224.0 (/19) 8190 255.255.240.0 (/20) 4094 255.255.248.0 (/21) 2046 255.255.252.0 (/22) 1022 255.255.254.0 (/23) 255.255.255.0 (/24) 255.255.255.128 (/25) 255.255.255.192 (/26) 1024 255.255.255.224 (/27) 2048 255.255.255.240 (/28) 4096 B222s User’s Guide...
- Page 186 Regardless of your particular situation, do not create an arbitrary IP address; always follow the guidelines above. For more information on address assignment, please refer to RFC 1597, Address Allocation for Private Internets and RFC 1466, Guidelines for Management of IP Address Space. B222s User’s Guide...
- Page 187 WAN addresses must be on different subnets. In the following example, the LAN and WAN are on the same subnet. The LAN computers cannot access the Internet because the router cannot route between networks. Figure 105 Conflicting Computer IP Addresses Example B222s User’s Guide...
- Page 188 LAN port both use 192.168.1.1 as the IP address. The computer cannot access the Internet. This problem can be solved by assigning a different IP address to the computer or the router’s LAN port. Figure 106 Conflicting Computer and Router IP Addresses Example B222s User’s Guide...
-
Page 189: Appendix B Setting Up Your Computer's Ip Address
204 • Linux: Ubuntu 8 (GNOME) page 208 • Linux: openSUSE 10.3 (KDE) page 212 Windows XP/NT/2000 The following example uses the default Windows XP display theme but can also apply to Windows 2000 and Windows NT. B222s User’s Guide... - Page 190 Appendix B Setting Up Your Computer’s IP Address Click Start > Control Panel. Figure 107 Windows XP: Start Menu In the Control Panel, click the Network Connections icon. Figure 108 Windows XP: Control Panel B222s User’s Guide...
- Page 191 Right-click Local Area Connection and then select Properties. Figure 109 Windows XP: Control Panel > Network Connections > Properties On the General tab, select Internet Protocol (TCP/IP) and then click Properties. Figure 110 Windows XP: Local Area Connection Properties B222s User’s Guide...
- Page 192 In the Command Prompt window, type "ipconfig" and then press [ENTER]. You can also go to Start > Control Panel > Network Connections, right-click a network connection, click Status and then click the Support tab to view your IP address and connection information. B222s User’s Guide...
- Page 193 Click Start > Control Panel. Figure 112 Windows Vista: Start Menu In the Control Panel, click the Network and Internet icon. Figure 113 Windows Vista: Control Panel Click the Network and Sharing Center icon. Figure 114 Windows Vista: Network And Internet B222s User’s Guide...
- Page 194 Figure 115 Windows Vista: Network and Sharing Center Right-click Local Area Connection and then select Properties. Figure 116 Windows Vista: Network and Sharing Center Note: During this procedure, click Continue whenever Windows displays a screen saying that it needs your permission to continue. B222s User’s Guide...
- Page 195 Appendix B Setting Up Your Computer’s IP Address Select Internet Protocol Version 4 (TCP/IPv4) and then select Properties. Figure 117 Windows Vista: Local Area Connection Properties B222s User’s Guide...
- Page 196 In the Command Prompt window, type "ipconfig" and then press [ENTER]. You can also go to Start > Control Panel > Network Connections, right-click a network connection, click Status and then click the Support tab to view your IP address and connection information. B222s User’s Guide...
- Page 197 Figure 119 Windows 7: Start Menu In the Control Panel, click View network status and tasks under the Network and Internet category. Figure 120 Windows 7: Control Panel Click Change adapter settings. Figure 121 Windows 7: Network And Sharing Center B222s User’s Guide...
- Page 198 Appendix B Setting Up Your Computer’s IP Address Double click Local Area Connection and then select Properties. Figure 122 Windows 7: Local Area Connection Status Note: During this procedure, click Continue whenever Windows displays a screen saying that it needs your permission to continue. B222s User’s Guide...
- Page 199 Appendix B Setting Up Your Computer’s IP Address Select Internet Protocol Version 4 (TCP/IPv4) and then select Properties. Figure 123 Windows 7: Local Area Connection Properties B222s User’s Guide...
- Page 200 Click OK to close the Internet Protocol (TCP/IP) Properties window. Click OK to close the Local Area Connection Properties window. Verifying Settings Click Start > All Programs > Accessories > Command Prompt. In the Command Prompt window, type "ipconfig" and then press [ENTER]. B222s User’s Guide...
- Page 201 Figure 125 Windows 7: Internet Protocol Version 4 (TCP/IPv4) Properties Mac OS X: 10.3 and 10.4 The screens in this section are from Mac OS X 10.4 but can also apply to 10.3. Click Apple > System Preferences. Figure 126 Mac OS X 10.4: Apple Menu B222s User’s Guide...
- Page 202 In the System Preferences window, click the Network icon. Figure 127 Mac OS X 10.4: System Preferences When the Network preferences pane opens, select Built-in Ethernet from the network connection type list, and then click Configure. Figure 128 Mac OS X 10.4: Network Preferences B222s User’s Guide...
- Page 203 Figure 129 Mac OS X 10.4: Network Preferences > TCP/IP Tab. For statically assigned settings, do the following: • From the Configure IPv4 list, select Manually. • In the IP Address field, type your IP address. • In the Subnet Mask field, type your subnet mask. B222s User’s Guide...
- Page 204 Check your TCP/IP properties by clicking Applications > Utilities > Network Utilities, and then selecting the appropriate Network Interface from the Info tab. Figure 131 Mac OS X 10.4: Network Utility Mac OS X: 10.5 The screens in this section are from Mac OS X 10.5. B222s User’s Guide...
- Page 205 Appendix B Setting Up Your Computer’s IP Address Click Apple > System Preferences. Figure 132 Mac OS X 10.5: Apple Menu In System Preferences, click the Network icon. Figure 133 Mac OS X 10.5: Systems Preferences B222s User’s Guide...
- Page 206 From the Configure list, select Using DHCP for dynamically assigned settings. For statically assigned settings, do the following: • From the Configure list, select Manually. • In the IP Address field, enter your IP address. • In the Subnet Mask field, enter your subnet mask. B222s User’s Guide...
- Page 207 Appendix B Setting Up Your Computer’s IP Address • In the Router field, enter the IP address of your LTE Device. Figure 135 Mac OS X 10.5: Network Preferences > Ethernet Click Apply and close the window. B222s User’s Guide...
- Page 208 Note: Make sure you are logged in as the root administrator. Follow the steps below to configure your computer IP address in GNOME: Click System > Administration > Network. Figure 137 Ubuntu 8: System > Administration Menu B222s User’s Guide...
- Page 209 Figure 138 Ubuntu 8: Network Settings > Connections In the Authenticate window, enter your admin account name and password then click the Authenticate button. Figure 139 Ubuntu 8: Administrator Account Authentication B222s User’s Guide...
- Page 210 • In the Configuration list, select Static IP address if you have a static IP address. Fill in the IP address, Subnet mask, and Gateway address fields. Click OK to save the changes and close the Properties dialog box and return to the Network Settings screen. B222s User’s Guide...
- Page 211 If you know your DNS server IP address(es), click the DNS tab in the Network Settings window and then enter the DNS server information in the fields provided. Figure 142 Ubuntu 8: Network Settings > DNS Click the Close button to apply the changes. B222s User’s Guide...
- Page 212 The following screens use the default openSUSE 10.3 installation. Note: Make sure you are logged in as the root administrator. Follow the steps below to configure your computer IP address in the KDE: B222s User’s Guide...
- Page 213 Click K Menu > Computer > Administrator Settings (YaST). Figure 144 openSUSE 10.3: K Menu > Computer Menu When the Run as Root - KDE su dialog opens, enter the admin password and click OK. Figure 145 openSUSE 10.3: K Menu > Computer Menu B222s User’s Guide...
- Page 214 Figure 146 openSUSE 10.3: YaST Control Center When the Network Settings window opens, click the Overview tab, select the appropriate connection Name from the list, and then click the Configure button. Figure 147 openSUSE 10.3: Network Settings B222s User’s Guide...
- Page 215 Select Dynamic Address (DHCP) if you have a dynamic IP address. Select Statically assigned IP Address if you have a static IP address. Fill in the IP address, Subnet mask, and Hostname fields. Click Next to save the changes and close the Network Card Setup window. B222s User’s Guide...
- Page 216 Click Finish to save your settings and close the window. Verifying Settings Click the KNetwork Manager icon on the Task bar to check your TCP/IP properties. From the Options sub-menu, select Show Connection Information. Figure 150 openSUSE 10.3: KNetwork Manager B222s User’s Guide...
- Page 217 Appendix B Setting Up Your Computer’s IP Address When the Connection Status - KNetwork Manager window opens, click the Statistics tab to see if your connection is working properly. Figure 151 openSUSE: Connection Status - KNetwork Manager B222s User’s Guide...
- Page 218 Appendix B Setting Up Your Computer’s IP Address B222s User’s Guide...
-
Page 219: Appendix C Pop-Up Windows, Javascript And Java Permissions
In Internet Explorer, select Tools, Pop-up Blocker and then select Turn Off Pop-up Blocker. Figure 152 Pop-up Blocker You can also check if pop-up blocking is disabled in the Pop-up Blocker section in the Privacy tab. In Internet Explorer, select Tools, Internet Options, Privacy. B222s User’s Guide... - Page 220 Click Apply to save this setting. Enable Pop-up Blockers with Exceptions Alternatively, if you only want to allow pop-up windows from your device, see the following steps. In Internet Explorer, select Tools, Internet Options and then the Privacy tab. B222s User’s Guide...
- Page 221 Select Settings…to open the Pop-up Blocker Settings screen. Figure 154 Internet Options: Privacy Type the IP address of your device (the web page that you do not want to have blocked) with the prefix “http://”. For example, http://192.168.167.1. B222s User’s Guide...
- Page 222 Figure 155 Pop-up Blocker Settings Click Close to return to the Privacy screen. Click Apply to save this setting. JavaScript If pages of the web configurator do not display properly in Internet Explorer, check that JavaScript are allowed. B222s User’s Guide...
- Page 223 Figure 156 Internet Options: Security Click the Custom Level... button. Scroll down to Scripting. Under Active scripting make sure that Enable is selected (the default). Under Scripting of Java applets make sure that Enable is selected (the default). B222s User’s Guide...
- Page 224 Figure 157 Security Settings - Java Scripting Java Permissions From Internet Explorer, click Tools, Internet Options and then the Security tab. Click the Custom Level... button. Scroll down to Microsoft VM. Under Java permissions make sure that a safety level is selected. B222s User’s Guide...
- Page 225 Click OK to close the window. Figure 158 Security Settings - Java JAVA (Sun) From Internet Explorer, click Tools, Internet Options and then the Advanced tab. Make sure that Use Java 2 for <applet> under Java (Sun) is selected. B222s User’s Guide...
- Page 226 Mozilla Firefox 2.0 screens are used here. Screens for other versions may vary. You can enable Java, JavaScript and pop-ups in one screen. Click Tools, then click Options in the screen that appears. Figure 160 Mozilla Firefox: Tools > Options B222s User’s Guide...
- Page 227 Appendix C Pop-up Windows, JavaScript and Java Permissions Click Content.to show the screen below. Select the check boxes as shown in the following screen. Figure 161 Mozilla Firefox Content Security B222s User’s Guide...
- Page 228 Appendix C Pop-up Windows, JavaScript and Java Permissions B222s User’s Guide...
-
Page 229: Appendix D Wireless Lans
(AP). Intra-BSS traffic is traffic between wireless clients in the BSS. When Intra-BSS is enabled, wireless client A and B can access the wired network and communicate with each other. When Intra-BSS is B222s User’s Guide... - Page 230 APs is called a Distribution System (DS). This type of wireless LAN topology is called an Infrastructure WLAN. The Access Points not only provide communication with the wired network but also mediate wireless network traffic in the immediate neighborhood. B222s User’s Guide...
- Page 231 A hidden node occurs when two stations are within range of the same access point, but are not within range of each other. The following figure illustrates a hidden node. Both stations (STA) are within range of the access point (AP) or wireless gateway, but out-of-range of each other, so they B222s User’s Guide...
- Page 232 AP will fragment the packet into smaller data frames. A large Fragmentation Threshold is recommended for networks not prone to interference while you should set a smaller threshold for busy networks or networks that are prone to interference. B222s User’s Guide...
- Page 233 Wireless security is vital to your network to protect wireless communication between wireless clients, access points and the wired network. Wireless security methods available on the LTE Device are data encryption, wireless client authentication, restricting access by device MAC address and hiding the LTE Device identity. B222s User’s Guide...
- Page 234 • Authentication Determines the identity of the users. • Authorization Determines the network services available to authenticated users once they are connected to the network. • Accounting Keeps track of the client’s network activity. B222s User’s Guide...
- Page 235 For EAP-TLS authentication type, you must first have a wired connection to the network and obtain the certificate(s) from a certificate authority (CA). A certificate (also called digital IDs) can be used to authenticate users and a CA issues certificates and guarantees the identity of each certificate owner. B222s User’s Guide...
- Page 236 The AP maps a unique key that is generated with the RADIUS server. This key expires when the wireless connection times out, disconnects or reauthentication times out. A new WEP key is generated each time reauthentication is performed. B222s User’s Guide...
- Page 237 Standard (AES) in the Counter mode with Cipher block chaining Message authentication code Protocol (CCMP) to offer stronger encryption than TKIP. TKIP uses 128-bit keys that are dynamically generated and distributed by the authentication server. AES (Advanced Encryption Standard) is a block cipher that uses a 256-bit mathematical algorithm B222s User’s Guide...
- Page 238 WPA. At the time of writing, the most widely available supplicant is the WPA patch for Windows XP, Funk Software's Odyssey client. The Windows XP patch is a free download that adds WPA capability to Windows XP's built-in "Zero Configuration" wireless client. However, you must run Windows XP to use it. B222s User’s Guide...
- Page 239 The AP checks each wireless client's password and allows it to join the network only if the password matches. The AP and wireless clients generate a common PMK (Pairwise Master Key). The key itself is not sent over the network, but is derived from the PSK and the SSID. B222s User’s Guide...
-
Page 240: Security Parameters Summary
An antenna couples RF signals onto air. A transmitter within a wireless device sends an RF signal to the antenna, which propagates the signal through the air. The antenna also operates in reverse by capturing RF signals from the air. Positioning the antennas properly increases the range and coverage area of a wireless LAN. B222s User’s Guide... - Page 241 For a single AP application, place omni-directional antennas as close to the center of the coverage area as possible. For directional antennas, point the antenna in the direction of the desired coverage area. B222s User’s Guide...
- Page 242 WPS in the area. However, you need to log into the configuration interfaces of both devices. Take the following steps to set up WPS using the PIN method. B222s User’s Guide...
- Page 243 On a computer connected to the wireless client, try to connect to the Internet. If you can connect, WPS was successful. If you cannot connect, check the list of associated wireless clients in the AP’s configuration utility. If you see the wireless client in the list, WPS was successful. B222s User’s Guide...
- Page 244 WPA-PSK or WPA2-PSK pre-shared key to the enrollee. Whether WPA-PSK or WPA2-PSK is used depends on the standards supported by the devices. If the registrar is already part of a network, it sends the existing information. If not, it generates the SSID and WPA(2)-PSK randomly. B222s User’s Guide...
- Page 245 This section shows how security settings are distributed in an example WPS setup. The following figure shows an example network. In step 1, both AP1 and Client 1 are unconfigured. When WPS is activated on both, they perform the handshake. In this example, AP1 B222s User’s Guide...
- Page 246 (it already has security information for the network). AP1 supplies the existing security information to Client 2. Figure 171 WPS: Example Network Step 2 REGISTRAR EXISTING CONNECTION CLIENT 1 ENROLLEE CLIENT 2 B222s User’s Guide...
- Page 247 (if the device supports this feature). Then, you can enter the key into the non-WPS device and join the network as normal (the non-WPS device must also support WPA-PSK or WPA2-PSK). B222s User’s Guide...
- Page 248 Check the MAC addresses of your wireless clients (usually printed on a label on the bottom of the device). If there is an unknown MAC address you can remove it or reset the AP. B222s User’s Guide...
-
Page 249: Appendix E Common Services
H.323 1720 NetMeeting uses this protocol. HTTP Hyper Text Transfer Protocol - a client/server protocol for the world wide web. HTTPS HTTPS is a secured http session often used in e- commerce. B222s User’s Guide... - Page 250 UNIX systems and network servers. TCP/UDP Secure Shell Remote Login Program. STRM WORKS 1558 Stream Works Protocol. SYSLOG Syslog allows you to send system logs to a UNIX server. B222s User’s Guide...
- Page 251 TFTP Trivial File Transfer Protocol is an Internet file transfer protocol similar to FTP, but uses the UDP (User Datagram Protocol) rather than TCP (Transmission Control Protocol). VDOLIVE 7000 Another videoconferencing solution. B222s User’s Guide...
- Page 252 Appendix E Common Services B222s User’s Guide...
-
Page 253: Appendix F Legal Information
802.11n(40MHz) operation of this product in the U.S.A. is firmware-limited to channels 3 through 9. • IEEE 802.11b or 802.11g operation of this product in the U.S.A. is firmware-limited to channels 1 through 11. 注意 ! 依據 低功率電波輻射性電機管理辦法 第十二條 經型式認證合格之低功率射頻電機,非經許可,公司、商號或使用 者均不得擅自變更頻率、加大功率或變更原設計之特性及功能。 第十四條 低功率射頻電機之使用不得影響飛航安全及干擾合法通信;經發現 有干擾現象時,應立即停用,並改善至無干擾時方得繼續使用。 前項合法通信,指依電信規定作業之無線電信。低功率射頻電機須忍 受合法通信或工業、科學及醫療用電波輻射性電機設備之干擾。 B222s User’s Guide... -
Page 254: Safety Warnings
Your product is marked with this symbol, which is known as the WEEE mark. WEEE stands for Waste Electronics and Electrical Equipment. It means that used electrical and electronic products should not be mixed with general waste. Used electrical and electronic equipment should be treated separately. B222s User’s Guide... -
Page 255: Index
Basic Service Set, see BSS blinking LEDs Broadband 61, 229 data fragment threshold example default LAN IP address BYE request Denials of Service, see DoS DHCP 32, 70, 103 diagnostic differentiated services Differentiated Services, see DiffServ B222s User’s Guide... - Page 256 Extended Service Set IDentification 46, 53 IP address Extended Service Set, see ESS default IP Address Assignment IP pool FCC interference statement ITU-T filters MAC address firewalls configuration security client list firmware MAC address flash key limitations B222s User’s Guide...
- Page 257 Quality of Service, see QoS Quick Start Guide 2, 21 96, 186 definitions how it works what it does RADIUS Network Address Translation, see NAT message types network map messages non-proxy calls shared secret key RADIUS server B222s User’s Guide...
- Page 258 Type of Service, see ToS account call progression client identities INVITE request number Uniform Resource Identifier proxy server Universal Plug and Play, see UPnP redirect server upgrading firmware register server UPnP servers security issues service domain user agent speed dial B222s User’s Guide...
- Page 259 WPA2-PSK 237, 238 example application example channel WPA-PSK encryption 60, 237, 238 application example example fragmentation threshold 62, 64 limitations example MAC address filter limitations MBSSID preamble example RADIUS server push button RTS/CTS threshold scheduling security SSID B222s User’s Guide...
Need help?
Do you have a question about the B222s and is the answer not in the manual?
Questions and answers