Table of Contents
Advertisement
Quick Links
Advertisement
Table of Contents

Related Manuals for TomTom BANDIT


Summary of Contents for TomTom BANDIT
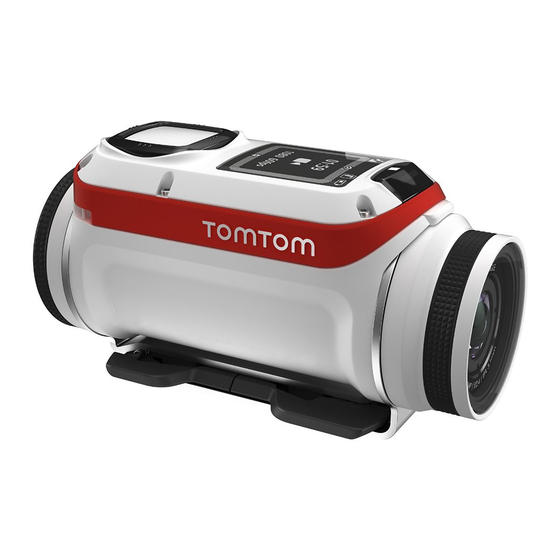
- Page 1 TomTom Bandit Reference Guide...
-
Page 2: Table Of Contents
Contents Welcome CAMERA Camera Quick Start ....................5 What's in the box ....................5 Charging your camera ..................5 Inserting a memory card ..................7 Setting up ....................... 8 Using the universal mount ..................9 Switching on and off ..................11 Recording ...................... -
Page 3: Welcome
Start. This covers all parts of the camera system, including the mobile camera app and the desktop app. To collect, edit and share your videos and photos on the move, download the Bandit Mobile app from tomtom.com/app. To collect, edit and share your videos and photos from your computer, downloadBandit Desktop app from tomtom.com/app. -
Page 4: Camera
CAMERA... -
Page 5: Camera Quick Start
Abide by all local laws when using the TomTom Bandit Action Camera as there may be laws relating to use of such devices in a particular manner, such as use of the camera as an invasion of privacy. - Page 6 Turn the battery stick to remove it from your camera. Insert the battery stick USB connector into your computer's USB socket or a standard USB wall-charger. Tip: While the battery stick is charging, the LEDs show the charge level and one LED flashes. To see the power level of the battery stick, remove the USB connector from the USB charging socket, then press the START button.
-
Page 7: Inserting A Memory Card
Inserting a memory card The photos you take and the videos you record are stored on a micro-SD memory that is located in the battery stick. Inserting a micro-SD memory card into the battery stick Important: If you remove the battery stick be extra careful not to let dirt or water enter the camera or the battery stick. -
Page 8: Setting Up
Language and Units in the Settings menu. When you first switch on your Bandit, you have to answer a few questions to set it up. Answer the questions by pressing the button to move up, down, left or right on the screen. -
Page 9: Using The Universal Mount
Using the universal mount You can mount your camera in many places, for example on your helmet or on the handlebars using the optional bike mount. EMAILED GAVIN FOR BETTER IMAGE The universal mount kit lets you mount your camera on a helmet or other flat or slightly curved surface. - Page 10 2. Attach the universal mount to the adhesive disc by first fully opening the mount. 3. Push the mount onto the disc at any yaw angle until you hear a click. 4. Fold down the camera platform to any angle between 90 degrees to horizontal and fully closed. This locks the mount to the disc.
-
Page 11: Switching On And Off
Note: To remove the mount, reverse the above instructions. Switching on and off Switching on your Bandit Press the START button (button 2) at the back of the camera for 2 seconds to switch your camera on. If no SD card is inserted into the battery stick, you are asked to insert one so that the camera can switch on. -
Page 12: Recording
You can add a tag when something exciting or memorable happens such as reaching a fast speed, or crashing. Or you could tag a beautiful view or the highest peak on a walk. You can easily create videos from your tags by using the TomTom MOBILE APP or the TomTom DESKTOP APP. -
Page 13: Your Camera
Important: Before usng the mobile camera app on your smartphone, you need to link your camera to your MySports account using a computer. This needs to be done only once. You can download the TomTom Mobile Camera app for free from your usual app store or by going to tomtom.com/app. -
Page 14: What's On The Screen
1. Battery stick. 2. Power indicator. 3. USB connector. 4. Control button to move up, down, left or right to other screens on your camera display: Move up or down to select items in a menu. Move right to select an item and open the menu for that item. ... -
Page 15: Charging Your Camera
This symbol shows the battery status. Charging your camera You can charge your Bandit in the following two ways: Charging the battery stick using a USB socket Important: If you remove the battery stick be extra careful not to let dirt or water enter the camera or the battery stick. - Page 16 Turn the battery stick to remove it from your camera. Insert the battery stick USB connector into your computer's USB socket or a standard USB wall-charger. Tip: While the battery stick is charging, the LEDs show the charge level and one LED flashes. To see the power level of the battery stick, remove the USB connector from the USB charging socket, then press the START button.
-
Page 17: Inserting A Memory Card
NOTE TO GERRY: we need to replace this image with a cleaner one :-) Tip: You don't have to remove the battery stick from the camera. Connect the power cable to the battery stick connector and to a USB socket. QUESTION for REVIEWERS: How do you know when the battery is full for this method?? Inserting a memory card The photos you take and the videos you record are stored on a micro-SD memory that is located in... -
Page 18: Camera Modes
Turn the battery stick to remove it from your camera. Insert the micro-SD memory card into the memory card slot in the battery stick. NOTE TO GERRY: we need to replace this image with a cleaner one :-) Insert the battery stick into the camera and turn it until it locks. Note: If you insert a micro-SD card that is too slow to work with your camera, the camera shows you a message and you are asked to use a supported micro-SD card. -
Page 19: Camera Status
Photo mode has the following options: Single - For taking a single photograph. Burst - For taking a series of photos in a very short time. Continuous - For taking a series of photos at a pre-set interval. This is also called photo logging. -
Page 20: Sensors Built In To Your Camera
Storage - the amount of free space available on your camera. If you are running out of space, connect your camera to your computer. TomTom MySports Connect transfers the videos and photos to your computer. QuickGPS - the status of the QuickGPSfix information on your camera. -
Page 21: Switching On And Off
Switching on and off Your Bandit can be on, off, or in standby. You can only switch the camera on and off using the buttons on the camera. Switching on your Bandit Press the START button (button 2) at the back of the camera for 2 seconds to switch your camera on. -
Page 22: Receiving Updates
The camera is restarted more than 500km away from your previous position. QuickGPSfix contains information about satellite positions which helps your Bandit find your position faster. Tip: QuickGPSFix information is stored in a separate folder from your videos and photos. -
Page 23: Using Peripherals
Using peripherals Using the universal mount You can mount your camera in many places, for example on your helmet or on the handlebars using the optional bike mount. EMAILED GAVIN FOR BETTER IMAGE The universal mount kit lets you mount your camera on a helmet or other flat or slightly curved surface. - Page 24 2. Attach the universal mount to the adhesive disc by first fully opening the mount. 3. Push the mount onto the disc at any yaw angle until you hear a click. 4. Fold down the camera platform to any angle between 90 degrees to horizontal and fully closed. This locks the mount to the disc.
-
Page 25: Using The Optional Remote Control
5. Mount the camera on the camera platform. 6. Push down the lever to lock the mount. Note: To remove the mount, reverse the above instructions. Using the optional remote control The remote control can be used to start and stop recording, and to manually tag your video. Use the remote control when you can't easily or safely reach your camera. - Page 26 5. Move up or down to turn it on. Note: When connecting the camera to the remote control for the first time, any button press on the remote control tells the camera that the remote control is out there and ready for connec- tion.
-
Page 27: Using Lens Covers
FOR REVIEWERS: WHY IS THERE A CHARGING CABLE FOR THE REMOTE IF IT USES BATTERIES? Using lens covers The camera is waterproof with the standard IPX7 lens cover (black and white). If you want to use the camera underwater to depths down to 50 m, fit the optional IPX8 lens cover (black). Note: When using the IPX8 lens cover, the microphone and barometer are concealed and hence don't work with this lens cover. -
Page 28: Adding Sensors
2. Attach the strap around your chest, so the monitor sits just above the base of your chest bone. Make sure the monitor is the right way up so that the word 'TomTom' is the right way up for someone standing in front of you. - Page 29 To change the CR2032 battery on the monitor, use a coin to open the back of the monitor. The battery must be recycled or disposed of according to local laws and regulations. Note: The TomTom Heart Rate Monitor is not waterproof.
-
Page 30: Recording Videos
Recording videos About recording videos You can use your Bandit to record videos in the following modes: VIDEO - Use this mode to record normal high-quality videos. SLOW MO - This mode records slow-motion videos at high-quality. ... -
Page 31: Recording A Video
Slow motion A slow motion video is recorded at a multiple of the normal frame rate, for example 2x, 4x, or 6x, but the video is stored with the normal frame rate of 30 fps for playback. Audio, GPS and sensor data are recorded. -
Page 32: Taking Photos
Taking photos About taking photos You can use your Bandit to take photos in the following modes: Single - A single photo is taken. Burst - A series of photos are taken in a very short time. ... - Page 33 The screen shows the number of photos taken. 4. Press STOP to stop taking photos.
-
Page 34: Settings
Settings About settings Important: You can also change a large range of settings using the MOBILE APP on your smartphone. To change settings that you use frequently such as the camera mode, move left from the Camera Status screen. To access other settings that you may need to change less frequently, use the Settings menu. These settings determine the overall behaviour of your camera, and are used to adjust the mode settings for each photo and video mode. - Page 35 Burst settings 16 MP Size 8 MP 5 per sec Burst 10 per sec Auto Scene Preset: Sun, Cloudy, Mountain Metering Continuous settings 16 MP Size 1s, 5s, 10s, 15s, 30s, 60s ...
-
Page 36: General Settings
Slo Mo settings 1080p at 2x speed Size 720p at 4x speed WVGA at 6x speed Wide View Normal Auto Scene Preset: Sun, Cloudy, Mountain Metering Cinematic settings 4k at 15 fps ... - Page 37 Tip: When airplane mode or flight mode is switched on, an airplane icon is shown on the Camera Status screen and all Bluetooth low energy (also known as BLE or Bluetooth® Smart) connectivity is disabled. Options Important: You can also change a large range of settings using the MOBILE APP on your smartphone. From the Camera Status screen on your camera, move down to open the SETTINGS menu.
- Page 38 1. From the Camera Status screen on your camera, move down to open the SETTINGS menu. 2. Select GENERAL then select STORAGE. 3. Select DELETE ALL. This selection deletes all the photos and videos you made with your Bandit from the memory card. Formatting the memory card 1.
-
Page 39: Glossary Of Terms
Glossary of Terms Glossary Term Wi-Fi - 802.11n, Wi-Fi is in Wi-Fi Direct (or as a fallback ad-hoc) mode. Range will be minimum 10 meters and bandwidth will be at minimum 10Mbps. Bluetooth 720p 1080p Burst Camera Frames per second (fps) Photo Video... -
Page 40: Addendum
Addendum How TomTom uses your information Information regarding the use of personal information can be found at tomtom.com/privacy. FCC information for the user THE DEVICE COMPLIES WITH PART 15 OF THE FCC RULES Federal Communications Commission (FCC) Statement This equipment radiates radio frequency energy and if not used properly - that is, in strict accordance with the instructions in this manual - may cause interference to radio communications and television reception. - Page 41 Europe. FCC Country Code Selection The Country Code Selection feature is disabled for TomTom Action Cameras marketed in the US or Canada. Per FCC regulations, all WiFi products marketed in US must be fixed to US operation channels only.
- Page 42 Le présent appareil est conforme aux CNR d'Industrie Canada applicables aux appareils radio exempts de licence. L'exploitation est autorisée aux deux conditions suivantes: l'appareil ne doit pas produire de brouillage, et l'utilisateur de l'appareil doit accepter tout brouillage radioélectrique subi, même si le brouillage est susceptible d'en compromettre le fonctionnement.
- Page 43 R&TTE directive Hereby, TomTom declares that TomTom products and accessories are in compliance with the essential requirements and other relevant provisions of the EU Directive 1999/5/EC. The declaration of conformity can be found here: tomtom.com/legal. Battery operating temperatures Operating temperatures for camera battery: -20°C (-4°F) to 40°C (104°F). Do not expose to temperatures beyond this.
-
Page 44: Copyright Notices
TomTom or its suppliers. The use of this material is subject to the terms of a licence agreement. Any unauthorised copying or disclosure of this material will lead to criminal and civil liabilities.
Need help?
Do you have a question about the BANDIT and is the answer not in the manual?
Questions and answers