Table of Contents
Advertisement
Quick Links
Advertisement
Table of Contents

Related Manuals for TomTom Bandit


Summary of Contents for TomTom Bandit
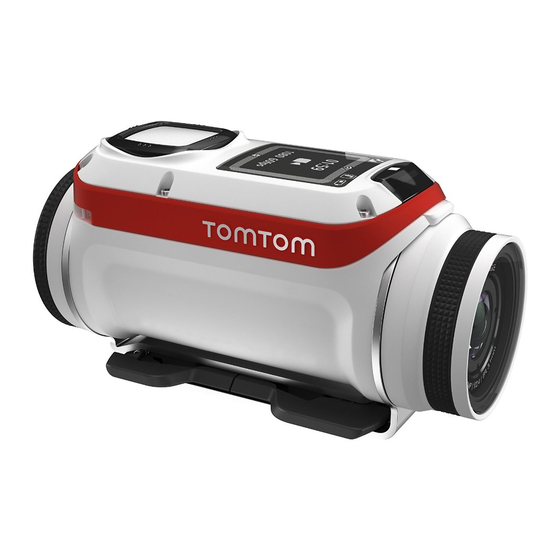
- Page 1 TomTom Bandit Reference Guide...
-
Page 2: Table Of Contents
Inserting a memory card ..................15 Setting up ..................... 16 Installing the basic mount .................. 16 Installing the 360 pitch mount................17 Switching your TomTom Bandit on and off .............. 20 Recording ...................... 21 Video highlights ....................21 Your TomTom Bandit .................... 23 Getting started .................... - Page 3 Inserting a memory card ..................63 Transferring data from the Batt-Stick ............... 64 Bandit Mobile App About the TomTom Bandit Mobile app ............... 66 Connecting to the Mobile app ................. 67 Log in to TomTom MySports ................... 68 Disconnecting from the Mobile app ................69 What's on the screen ....................
- Page 4 Addendum and Copyright Addendum ......................98 Copyright notices ....................103...
-
Page 5: Welcome
Welcome... -
Page 6: Welcome
Bandit Studio Tip: There are also frequently asked questions (FAQs) at tomtom.com/support. Select your product model from the list or enter a search term. We hope you enjoy reading about and, most importantly, having fun with your new TomTom Bandit! -
Page 7: What's New In This Release
What's new in this release Introducing Bandit Studio Bandit Studio is the easy way to view your videos and photos, and to create your video story, on your computer. Bandit Studio in this Guide for full details. Connect an external microphone You can now connect the optional TomTom Bandit external microphone to your TomTom Bandit. -
Page 8: Tomtom Videos
TomTom videos You can find many videos on our YouTube channel to help you learn about your new TomTom Bandit and other TomTom products. Visit the official TomTom Bandit YouTube Channel to learn more about your TomTom Bandit. Visit www.youtube.com/user/TomTomOfficial/videos... -
Page 9: Product Safety Information
Your TomTom Bandit may get hot. Certain parts of your TomTom Bandit could (in rare cases) cause skin irritation. Do not use or store your TomTom Bandit in hot places such as a car, or in dusty, humid or steamy places for extended periods of time. -
Page 10: Tomtom Bandit
TomTom Bandit... -
Page 11: Tomtom Bandit Quick Start
Important: If you remove the Batt-Stick or lens cover be extra careful not to let dirt or water enter the TomTom Bandit or the Batt-Stick. Only remove the Batt-Stick or lens cover in clean and dry conditions. To remove the Batt-Stick, follow these steps: 1. -
Page 12: Installing The Batt-Stick
Inserting the Batt-stick Important: If you remove the Batt-Stick or lens cover be extra careful not to let dirt or water enter the TomTom Bandit or the Batt-Stick. Only remove the Batt-Stick or lens cover in clean and dry conditions. - Page 13 6. Turn the cap clockwise to lock the Batt-Stick into the camera. Unlocking the Batt-Stick To put the Batt-Stick in the unlocked position follow these steps: 1. Hold the Batt-Stick and press the release lever while turning the cap counterclockwise.
-
Page 14: Charging Your Tomtom Bandit
Charging the Batt-Stick using a USB socket Important: If you remove the Batt-Stick or lens cover be extra careful not to let dirt or water enter the TomTom Bandit or the Batt-Stick. Only remove the Batt-Stick or lens cover in clean and dry conditions. -
Page 15: Inserting A Memory Card
Note: If you insert a microSD card that is too slow to work with your TomTom Bandit, the TomTom Bandit shows you a message and you are asked to use a compatible microSD card. -
Page 16: Setting Up
Language in the Camera settings menu. When you first switch on your TomTom Bandit, you have to answer a few questions to set it up. Answer the questions by pressing the button to move up, down, left or right on the screen. -
Page 17: Installing The 360 Pitch Mount
Installing the 360 pitch mount The 360 pitch mount kit lets you mount your TomTom Bandit on a helmet or other flat or slightly curved surface. Flat and curved mount bases are supplied. Once installed, you can easily adjust the direction and angle of your TomTom Bandit. - Page 18 Only attach the mount to a smooth, hard surface. The mount won't securely attach to porous, textured or soft surfaces. To install the TomTom Bandit at different angles and on the left or right side of a helmet, you can turn the TomTom Bandit's base more than 180 degrees around the TomTom Bandit body.
- Page 19 5. Install the 360 pitch mount on the mount base. Push down the TomTom Bandit plate to lock the pitch mount on the base. 6. Install the TomTom Bandit on the 360 pitch mount. Make sure the TomTom Bandit is secure.
-
Page 20: Switching Your Tomtom Bandit On And Off
Switching off your TomTom Bandit Press the STOP button at the front of the TomTom Bandit for 2 seconds to switch it off. The red LEDs flash and you hear the shut-down sound. The TomTom Bandit will automatically shut down if the battery power becomes too low. -
Page 21: Recording
The highlights from built-in and external sensors are added automatically. Tip: You can also add highlights to your video when you view it in the Mobile app or Bandit Studio, and you can adjust the position and duration of a highlight. - Page 22 Speed. G-force. Maximum acceleration. Maximum deceleration. Maximum rotation. Maximum vertical speed. Heart rate from a heart rate monitor. Manual highlight.
-
Page 23: Your Tomtom Bandit
The TomTom Bandit enters standby mode when it has not be used for a short time. After two hours the TomTom Bandit automatically switches off. - Page 24 5. Connector with cap for optional power cable and external audio cable. 6. Attachment for a lanyard. 7. Control button to move up, down, left or right to other screens on the TomTom Bandit display: Move up or down to select items in a menu.
-
Page 25: What's On The Screen
What's on the screen The TomTom Bandit screen lets you select the type of video or photo you want to record and lets you change the settings for each video and photo mode. You move to other screens using the control button by doing the following: Move up or down to select items in a menu. -
Page 26: Charging Your Tomtom Bandit
Charging the Batt-Stick using a USB socket Important: If you remove the Batt-Stick or lens cover be extra careful not to let dirt or water enter the TomTom Bandit or the Batt-Stick. Only remove the Batt-Stick or lens cover in clean and dry conditions. -
Page 27: Inserting A Memory Card
Note: If you insert a microSD card that is too slow to work with your TomTom Bandit, the TomTom Bandit shows you a message and you are asked to use a compatible microSD card. - Page 28 Photo Video settings Each video mode has its own settings. You can change settings directly on the TomTom Bandit or by using the Mobile App. From the Camera Status screen, move down to the SETTINGS menu and select the mode settings for your current video mode, for example VIDEO or SLOW MO.
-
Page 29: Tomtom Bandit Status
Photo settings Use the photo settings to select a photo mode. Once a mode has been chosen, you can then select settings for that photo mode. You can change settings directly on the TomTom Bandit or by using Mobile App. -
Page 30: Switching Your Tomtom Bandit On And Off
Switching your TomTom Bandit on and off Your TomTom Bandit can be on, off, or in standby. You can only switch the TomTom Bandit on and off using the buttons on the TomTom Bandit. Switching on your TomTom Bandit Press the START button at the back of the TomTom Bandit for 2 seconds to switch your TomTom Bandit on. -
Page 31: Connecting To The Mobile App
Switching off your TomTom Bandit Press the STOP button at the front of the TomTom Bandit for 2 seconds to switch it off. The red LEDs flash and you hear the shut-down sound. The TomTom Bandit will automatically shut down if the battery power becomes too low. -
Page 32: Caring For Your Tomtom Bandit
1. Connect your smartphone to your TomTom Bandit using Wi-Fi. 2. Open the Bandit Mobile app. If an update is available it is transferred to your TomTom Bandit in the background. When the update is ready to install you see a message on the app. -
Page 33: Deleting Videos And Photos, And Formatting The Memory Card
alcohol, or insect repellents. Chemicals can damage the camera's seals, case, and finish. After using your camera in water, rinse your TomTom Bandit with clean water and dry it with a soft cloth. On the Batt-Stick, open the external contact cap and dry both the contacts and the cap. - Page 34 Heart rate - maximum heart rate shown at the top of the screen, current heart rate at the bottom of the screen using the optional heart rate monitor. Note: Your TomTom Bandit also has built-in sensors that record metrics that are stored with the video file. You cannot view these metrics on your TomTom Bandit.
-
Page 35: Using Peripherals
Using peripherals Installing the basic mount The basic mount kit lets you mount your TomTom Bandit on a helmet or other flat or slightly curved surface. Flat and curved basic mounts are supplied. Tip: Additional mounts are available as accessories. -
Page 36: Installing The 360 Pitch Mount
Installing the 360 pitch mount The 360 pitch mount kit lets you mount your TomTom Bandit on a helmet or other flat or slightly curved surface. Flat and curved mount bases are supplied. Once installed, you can easily adjust the direction and angle of your TomTom Bandit. - Page 37 The mount base won't attach securely if you install it in damp and cold conditions. 4. Wait 24 hours for the adhesive to cure. 5. Install the 360 pitch mount on the mount base. Push down the TomTom Bandit plate to lock the pitch mount on the base.
-
Page 38: Using The Bike Mount
TomTom Bandit if the mount fails. Using the bike mount The optional bike mount kit lets you mount your TomTom Bandit on the handlebars of a bike or other tube-shaped component of a similar size. -
Page 39: Using The Optional Remote Control
You can hold the remote control in your hand, or you can attach it to a place you can easily reach. Note: The remote uses Bluetooth Smart to connect to your TomTom Bandit and can only be used with one TomTom Bandit at a time. -
Page 40: Using Lens Covers
Using lens covers The standard white lens cover is splash-proof (IPX7). If you want to use the TomTom Bandit in water or underwater to depths down to 40 m (5 ATM), or for activities on the water surface, for example surfing, install the optional Dive (IPX8) black lens cover. - Page 41 To install a lens cover, put the lens cover on the TomTom Bandit lens and turn it clockwise until it locks. Important: Store the lens cover in its storage bag when you are not using it. Important: To prevent damage to the TomTom Bandit lens, never use the TomTom Bandit without a lens cover.
-
Page 42: Adding Sensors
Adding sensors About sensors Sensors are used by your TomTom Bandit to record data simultaneously with your video files. This makes it easier for you to find the highlights in the video when reviewing it. Note: Your TomTom Bandit stores all sensor data in the video file. - Page 43 2. Attach the strap around your chest, so the monitor sits just above the base of your breastbone. Make sure the monitor is the right way up so that the word "TomTom" is the right way up for someone standing in front of you.
- Page 44 To change the CR2032 battery in the monitor, use a coin to open the back of the monitor. The battery must be recycled or disposed of according to local laws and regulations. Note: The TomTom Heart Rate Monitor is not waterproof.
-
Page 45: Recording Videos
3. When videoing, press the START button on the TomTom Bandit or the highlight button in the app to manually add highlights to your video. 4. Press the STOP button on the TomTom Bandit or the record button in the Mobile app to stop the recording. -
Page 46: Video Highlights
The highlights from built-in and external sensors are added automatically. Tip: You can also add highlights to your video when you view it in the Mobile app or Bandit Studio, and you can adjust the position and duration of a highlight. - Page 47 To manually add a highlight while recording a video, press the START button on the TomTom Bandit or the remote control, or the highlight button on the Mobile app. If you are using the TomTom Bandit without the Mobile app, when you have manually added a...
-
Page 48: Taking Photos
To take single photos, select NORMAL mode, either directly on the TomTom Bandit or from the Mobile app. Note: If your TomTom Bandit is connected to the Mobile app, you can only use the app to change TomTom Bandit settings. -
Page 49: Taking Burst Photos
To take burst photos, select BURST mode, either directly on the TomTom Bandit or from the Mobile app. Note: If your TomTom Bandit is connected to the Mobile app, you can only use the app to change TomTom Bandit settings. -
Page 50: Settings
Mobile App on your smartphone. To change settings that you use frequently, such as the TomTom Bandit mode, move left from the Camera Status screen. To access other settings that you may need to change less frequently, use the Settings menu. These settings determine the overall behavior of your TomTom Bandit, and are used to adjust the mode settings for each photo and video mode. -
Page 51: About Quickgpsfix
Mobile App on your smartphone. From the Camera Status screen on your TomTom Bandit, move right, then move down to open the SETTINGS menu. Select GENERAL, then select CONNECT. Use these settings to connect your TomTom Bandit to your smartphone, a remote control or an external sensor. - Page 52 You can hold the remote control in your hand, or you can attach it to a place you can easily reach. Note: The remote uses Bluetooth Smart to connect to your TomTom Bandit and can only be used with one TomTom Bandit at a time.
- Page 53 Select BEEP to switch the buzzer sound on the TomTom Bandit ON or OFF. When the TomTom Bandit is out of your sight, for example when mounted on your helmet, the buzzer tells you when the TomTom Bandit has started and stopped recording or when the power is switched on or off, and it also alerts you to notifications.
- Page 54 This selection deletes only the last file that was recorded and stored on the microSD card since the TomTom Bandit was switched on. If no file was stored since the TomTom Bandit was last switched on, then no file is deleted.
- Page 55 About The About screen contains standards and legal information that is applicable to the TomTom Bandit.
-
Page 56: Batt-Stick
Batt-Stick... -
Page 57: About The Batt-Stick
Important: If you remove the Batt-Stick or lens cover be extra careful not to let dirt or water enter the TomTom Bandit or the Batt-Stick. Only remove the Batt-Stick or lens cover in clean and dry conditions. -
Page 58: Removing The Batt-Stick
Important: If you remove the Batt-Stick or lens cover be extra careful not to let dirt or water enter the TomTom Bandit or the Batt-Stick. Only remove the Batt-Stick or lens cover in clean and dry conditions. To remove the Batt-Stick, follow these steps: 1. - Page 59 3. Pull the Batt-Stick out.
-
Page 60: Installing The Batt-Stick
Inserting the Batt-stick Important: If you remove the Batt-Stick or lens cover be extra careful not to let dirt or water enter the TomTom Bandit or the Batt-Stick. Only remove the Batt-Stick or lens cover in clean and dry conditions. - Page 61 3. Turn the cap clockwise to lock the Batt-Stick into the camera. Unlocking the Batt-Stick To put the Batt-Stick in the unlocked position follow these steps: 1. Hold the Batt-Stick and press the release lever while turning the cap counterclockwise. 2.
-
Page 62: Charging Your Tomtom Bandit
Charging the Batt-Stick using a USB socket Important: If you remove the Batt-Stick or lens cover be extra careful not to let dirt or water enter the TomTom Bandit or the Batt-Stick. Only remove the Batt-Stick or lens cover in clean and dry conditions. -
Page 63: Inserting A Memory Card
Note: If you insert a microSD card that is too slow to work with your TomTom Bandit, the TomTom Bandit shows you a message and you are asked to use a compatible microSD card. -
Page 64: Transferring Data From The Batt-Stick
2. Insert the Batt-Stick USB connector into a USB port on your computer. 3. On your computer, open a file manager program. Your TomTom Bandit appears in your computer's file system as a Removable Disk. 4. Open the DCIM folder to find your videos and photos. -
Page 65: Bandit Mobile App
Bandit Mobile App... -
Page 66: About The Tomtom Bandit Mobile App
About the TomTom Bandit Mobile app The TomTom Bandit Mobile app is the easy way to view your videos and photos and to create your video story within minutes of the action. You can also use the Mobile app to change video and photo modes on your TomTom Bandit, to start and stop recording, and to take photos. -
Page 67: Connecting To The Mobile App
Connecting to the Mobile app The Mobile app will not start until you have connected your smartphone to your TomTom Bandit using Wi-Fi. Tip: For iOS only. If your smartphone is Bluetooth Smart (BLE) capable, Wi-Fi is switched on and... -
Page 68: Log In To Tomtom Mysports
Log in to TomTom MySports and register your TomTom Bandit to get software updates and QuickGPSFix updates from TomTom. You can log into TomTom MySports with an existing account, or you can create a new account. 1. Select Preferences in the menu. -
Page 69: Disconnecting From The Mobile App
On your Mobile, close the Mobile app. The TomTom Bandit Wi-Fi connection is switched off. Your smartphone will revert to a Wi-Fi connection available in your area. Note: You cannot use the Mobile app when there is no Wi-Fi connection to your TomTom Bandit. -
Page 70: What's On The Screen
2. Live Viewfinder. The live viewfinder shows the live image from the TomTom Bandit. Use the image to help you frame your video or photo when your TomTom Bandit is mounted out of sight or in a position that's difficult to reach. -
Page 71: Video Settings
Video settings Each video mode has its own settings. You can change settings directly on the TomTom Bandit or by using the Mobile App. From the Camera Status screen, move down to the SETTINGS menu and select the mode settings for your current video mode, for example VIDEO or SLOW MO. -
Page 72: Photo Settings
Photo settings Use the photo settings to select a photo mode. Once a mode has been chosen, you can then select settings for that photo mode. You can change settings directly on the TomTom Bandit or by using Mobile App. -
Page 73: Video Highlights
The highlights from built-in and external sensors are added automatically. Tip: You can also add highlights to your video when you view it in the Mobile app or Bandit Studio, and you can adjust the position and duration of a highlight. -
Page 74: My Library
My Library My Library shows the videos, photos and highlights that are on your TomTom Bandit. You can view your complete videos or just see your video highlights. Tip: The videos and photos remain on your TomTom Bandit until you delete them. -
Page 75: Viewing A Video Or Photo In My Library
Delete a video, photo or highlight button. Swipe left on a video, photo or highlight to show the delete button. Select the button to delete the video or photo from your TomTom Bandit. Viewing a video or photo in My Library 1. -
Page 76: Uploading Your Photos
1. Select Videos, Photos or Highlights from the menu. 2. Swipe left on the video, photo or highlight that you want to delete. 3. Select the delete button. 4. Select Yes to delete your video, photo or highlight from your TomTom Bandit. -
Page 77: Creating A Story Using The Mobile App
Creating a story using the mobile app You can create a video story from highlights in your TomTom Bandit videos. The highlights were added automatically and manually when the video was recorded, but you can also add highlights to a video using the Mobile app. - Page 78 1. Select Create a story from the menu. 2. Shake your phone to create a video story. The Mobile app creates a video story from your video highlights. The video plays in the video player.
-
Page 79: Manually Selecting Your Video Highlights
Tip: Turn your phone to landscape to view the video in full-screen mode. You can now edit and share your video story. Manually selecting your video highlights Note: You must have highlights in your videos to be able to create a video story. 1. -
Page 80: Editing Your Video Story
3. If you want to use the highlight in your video story, select the select video button. 4. Select more highlights to add to your video story. 5. Select Create a story from the menu. Tip: You can also select the confirmation bar that appears when you select a highlight. The Mobile app creates a video from your video highlights. -
Page 81: Uploading Your Video Story
6. Select Add a soundtrack to add a music track to your video story. 7. Select the Share button. Your video story is created and saved in your phone's video gallery. From the gallery you can upload your video story to your chosen website. Uploading your video story When you have created your video story, select the Share button. -
Page 82: Camera Status
Camera status This screen shows information about your TomTom Bandit. You may be asked to go to this screen during a call to TomTom Customer Support. -
Page 83: Preferences
Important: Using mobile data to download updates will use your data connection and may cost you money. Help us improve We will continually improve the TomTom Bandit mobile app and introduce new features. To help us, you can share anonymous information about your app and how you use it. About This is an information screen rather than a setting and shows you information about the TomTom Bandit and the Mobile app. -
Page 84: Bandit Studio
Bandit Studio... -
Page 85: About Bandit Studio
About Bandit Studio Bandit Studio is the easy way to view your videos and photos, and to create your video story, on your computer. You can import videos and photos directly from your Batt-Stick, or from a location on your computer. -
Page 86: Log In To Tomtom Mysports
Log in to TomTom MySports and register your TomTom Bandit to get software updates and QuickGPSFix updates from TomTom. You can log in to TomTom MySports with an existing account, or you can create a new account. 1. Select the settings button. -
Page 87: What's On The Screen
What's on the screen When you start Bandit Studio, you see your new files on your Batt-Stick, and your already imported files. Bandit Studio has the following four screens: Originals Original files are the video and photo files that you have already imported from your memory card. -
Page 88: Working With The Memory Card
The memory card screen shows the video and photo files on your memory card. The memory card can either be in a Batt-Stick or in a card reader. When Studio detects a TomTom Bandit memory card, the memory card screen is shown automatically. -
Page 89: Importing Videos And Photos From Your Computer
2. Select File then Import. 3. Find your TomTom Bandit .MP4 video files in your computer's file system. Note: You can only import video files that have been created on a TomTom Bandit. 4. Select the video or photo file you want to import. -
Page 90: Working With Originals
Working with Originals Original files are the video and photo files that you have already imported from your memory card or from your computer. These files are stored in your personal videos folder on your computer. Double-click on a file to play it or view it in a larger screen. Select the full-screen button in the lower right corner of the viewer to view the video or photo in full-screen mode. -
Page 91: Working With Highlights
The highlights from built-in and external sensors are added automatically. Tip: You can also add highlights to your video when you view it in the Mobile app or Bandit Studio, and you can adjust the position and duration of a highlight. -
Page 92: Using Or Deleting A Highlight
Manual highlight. Using or deleting a highlight Click on a highlight to select it, then choose one of the following actions: Tip: You can also right-click on a highlight to show these actions. Add the highlight to your video story. Export the highlight as an MP4 file. -
Page 93: Creating Your Video Story
You can select highlights yourself using the Highlights screen. You can use the I Feel Lucky button on the My Story screen to let Bandit Studio select your highlights. When your highlights are selected and added, your video is shown in the editing mode so you can edit your video. -
Page 94: Editing Your Video Story
Editing your video story Your video story is created from your video highlights. You can edit your video story before you share it. 1. To edit the order of the highlights used to create your video story, click and drag a highlight along the highlight bar to the place you want in your video story. -
Page 95: Updating Bandit Studio
Updating Bandit Studio 1. Select the settings button. If a Bandit Studio update is available the screen displays Update next to the Studio version number. 2. Select Update. The Bandit Studio update is downloaded to computer. 3. Follow the instructions on the screen to install the update. -
Page 96: Studio Settings
Studio and how you use it. Auto Start Bandit Studio starts when you either insert the Batt-Stick USB connector into a USB port on your computer, or you insert the memory card from a Batt-Stick into a card-reader on your computer. - Page 97 Addendum and Copyright...
- Page 98 Your Bandit Action Camera may get hot. The parts of your Bandit Action Camera could (in rare cases) cause skin irritation. Do not use or store your Bandit Action Camera in hot place such as an automobile, or in a dusty, humid, or steamy place for an extended period of time.
- Page 99 Russia, which is solely responsible for its availability and accuracy. Changes in GPS or GLONASS availability and accuracy, or in environmental conditions may impact the operation of this device. TomTom disclaims any liability for the availability and accuracy of GPS or GLONASS. How TomTom uses your information Information regarding the use of personal information can be found at tomtom.com/privacy.
- Page 100 A minimum separation distance of 1.2 cm must be maintained between the user’s body and the device, including the antenna during body-worn operation to comply with the RF exposure requirements in Europe. Responsible party in North America TomTom, Inc., 24 New England Executive Park, Suite 410, Burlington, MA 01803 Tel: 866 486-6866 option 1 (1-866-4-TomTom)
- Page 101 Emissions information for Canada Operation is subject to the following two conditions: This device may not cause interference. This device must accept any interference, including interference that may cause undesired operation of the device. Operation is subject to the condition that this device does not cause harmful interference. This Class B digital apparatus complies with Canadian ICES-003.
- Page 102 The information in this document is subject to change without notice. TomTom shall not be liable for technical or editorial errors or omissions contained herein, nor for incidental or consequential damages resulting from the performance or use of this document. This document contains information protected by copyright.
- Page 103 TomTom or its suppliers. The use of this material is subject to the terms of a license agreement. Any unauthorized copying or disclosure of this material will lead to criminal and civil liabilities.
Need help?
Do you have a question about the Bandit and is the answer not in the manual?
Questions and answers