
Related Manuals for Merck Spectroquant Prove 100


Summary of Contents for Merck Spectroquant Prove 100
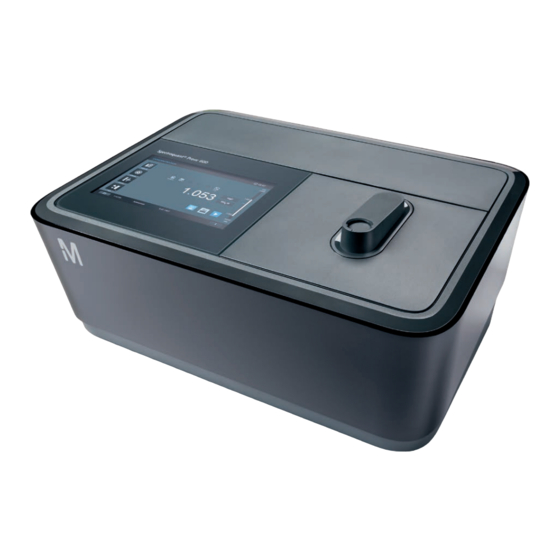
- Page 1 Quick Guide Spectroquant Prove ® | 600 Spectroquant® Prove Spectrophotometer...
-
Page 2: Table Of Contents
Contents 1 Safety ........................3 Intended use .............................................3 2 Overview ......................4 Scope of delivery .............................................4 Overview of the instrument .......................................4 Display and user interface ........................................5 3 Getting started ....................10 General notes on handling ......................................10 Initial setup ............................................10 3.2.1 Connecting the power supply .................................. -
Page 3: Safety
1 Safety 1.1 Intended use This quick guide contains basic instructions that you must follow during the commissioning, operation and maintenance of the spectrophotometer. Consequently, all responsible personnel must The intended use of the spectrophotometer consists exclusively read this operating manual carefully before working with the of the carrying out of photometric measurements according to meter. -
Page 4: Overview
2 Overview 2.1 Scope of delivery Packaging The spectrophotometer is shipped in protective transport • Spectrophotometer packaging. • Power adapter CAUTION • Power connectors (3 pieces) • Dust cover Retain the original packaging including the inner packaging to • Zero cell protect the instrument against hard knocks if it has to be transport- •... -
Page 5: Display And User Interface
2 Overview – 2.3 Display and user interface 2.3 Display and user interface NOTE The entire display is touch-sensitive. Make selections using a fingertip or special touch pen. Do not touch the display with sharp objects (e.g. the tip of a ballpoint pen). •... - Page 6 2 Overview – 2.3 Display and user interface Main menu navigation The main menu is always visible on the left: It consist of two “Methods” and “Results” are the most often used modes and pages with four smart icons each. To switch between the two they are at the top of the main menu navigation.
- Page 7 2 Overview – 2.3 Display and user interface The main menu “Methods" comprises two main overview panels arranged as shown below: the Concentration Measurement Overview and the Method List Overview. Screen layout concentration measurement overview Alerts Menu title Timestamp Measurement range Main menu Results...
- Page 8 2 Overview – 2.2 Display and user interface Overview of main buttons Buttons Description Method list List of all methods, irrespective of mode Settings This button is used to activate method-specific settings (e.g. sample dilution, turbidity correction, zero adjustment, sample blank, reagent blank) Ad hoc For performing measurements (absorbance / transmission, spectrum, kinetics) Allows measurements to be performed without the need to create methods Absorbance / Transmission Mode Ad hoc submenu: perform absorbance or transmission measurements...
- Page 9 2 Overview – 2.2 Display and user interface Overview of action & selection buttons Action & selection buttons Description Start button Start an action (e.g. measurement) Start zero Start zero adjustment for a method Apply Save Stop Close Logout User logout Search method Search / results list Search function, search criterion: method name, method number or item number...
-
Page 10: Getting Started
3 Getting started 3.1 General notes on handling 3.2.1 Connecting the power supply The Spectroquant® Prove spectrophotometer is an optical preci- Power is supplied through the power adapter provided. The power sion instrument. It should always be handled with care, especially adapter supplies the spectrophotometer with the required voltage when in mobile use. -
Page 11: First Power-On
3 Getting started – 3.2 Initial setup 3.2.2 First power-on 3.2.3 Language setup After switching on the spectrophotometer for the first time you The software supports several languages. When you switch are automatically guided through the language, date and time on the spectrophotometer for the first time, a list of language setup procedures (see below). options is automatically displayed after the boot procedure. 1. -
Page 12: Self-Test
3 Getting started – 3.2 Initial setup 3.2.5 Self-test Following language, date and time setup the spectrophotometer 2. The calendar view pops up . You can now enter the date. performs a self-test. 3. Tap on OK to confirm. 1. Remove all cells and close the cell compartment cover. 4. -
Page 13: Operation
4 Operation 4.1 Switching the spectrophotometer on or off Switching on Starting the self-test 3. Remove all cells and close the cell compartment cover. 1. Press the ON / OFF button . The spectrophotometer gives 4. Start the self-test with the Start button an audible signal (beep) and starts booting for approximately 5. - Page 14 4 Operation – 4.1 Switching the spectrophotometer on or off Energy-saving mode – display Switching off Press the ON / OFF button to switch the spectrophotometer off. NOTE The instrument has an Auto-Power-Off function, which switches it automatically off after a user-defined time. This function is not active out of the box, but you can turn it on in “System (Instru- The spectrophotometer automatically switches off the backlight ment settings)".
-
Page 15: System Setup
4 Operation – 4.2 System setup 4.2 System setup General instrument setup is carried out in the “System" menu. Buttons Description Information This submenu displays the following information about the device: Software / method versions, device class, lamp counter and serial number Interface (Setup 1) This submenu displays the following settings options and standard settings: Audible signals –... -
Page 16: Zero Adjustment For Preprogrammed Methods
4 Operation – 4.3 Zero adjustment for preprogrammed methods 4.3 Zero adjustment for preprogrammed methods NOTE A zero adjustment must be performed for each cell type. The zero adjustment is stored within the spectrophotometer separately for The instrument provides a Quick Zero function. With this the zero each cell type. -
Page 17: When To Repeat The Zero Adjustment
4 Operation – 4.4 Measurements 4.3.2 When to repeat the zero adjustment? We recommend that you repeat the zero adjustment in the following cases: • If the spectrophotometer was subject to mechanical stress such as strong shock or transport • If the ambient temperature has changed by more than 5 °C since the last zero adjustment •... -
Page 18: Performing A Measurement
4 Operation – 4.4 Measurements 4.4.1 Performing a measurement Measurements can be performed using rectangular cells of various path lengths (10, 20, 50 mm / 100 mm Prove 600) and Spectroquant® round cells. Insert cells as follows to start the measurement: Measuring with a round cell with closed lid Measuring with rectangular cells with open lid –... - Page 19 4 Operation – 4.4 Measurements Insert rectangular cells (10, 20, 50 mm): Insert 100 mm rectangular cells (Prove 600): 4. Remove the top of the round cell compartment including the AutoSelector 5. Insert the 100 mm rectangular cell vertically into the cell holder .
-
Page 20: Appendix
5 Appendix 5.1 Certificates Merck KGaA Frankfurter Straße 250 64293 Darmstadt Deutschland, Germany, Allemagne EMD Millipore 290 Concord Road Billerica, MA 01821 EG - KONFORMITÄTSERKLÄRUNG EC - DECLARATION OF CONFORMITY CE - DÉCLARATION DE CONFORMITÉ Wir erklären in alleiniger We declare under our sole Nous déclarons sous notre seule... -
Page 21: Warranty
5 Glossary – 5.2 Warranty 5.2 Warranty In addition to any other rights provided by local law which shall not be limited herewith, the manufacturer provides an additional limited worldwide warranty for a period of 12 months from the date of shipment, that the spectrophotometer is free from any defects that are due to faulty material or workmanship unless otherwise noted in the product manual. - Page 22 Manufactured by Merck KGaA, 64271 Darmstadt, Germany, Tel. +49(0)6151 72-2440 www.analytical-test-kits.com Distributed by EMD Millipore Corporation, 290 Concord Road, Billerica, MA 01821, USA, Tel. +1-978-715-4321 © 2015 Merck KGaA, Darmstadt, Germany. All rights reserved.
Need help?
Do you have a question about the Spectroquant Prove 100 and is the answer not in the manual?
Questions and answers