Table of Contents
Advertisement
Quick Links
Advertisement
Table of Contents

Subscribe to Our Youtube Channel
Related Manuals for Mio mivue drive 60 series


Summary of Contents for Mio mivue drive 60 series
- Page 1 Hardware User Manual ₅₀ ₆₀ MiVue Drive...
-
Page 2: Important Safety Information
It is your sole responsibility to place, secure and use your Mio in a manner that will not cause accidents, personal injury or property damage. Always observe safe driving practices. Do not mount your Mio in a way that may interfere with the safe operation of the vehicle, the deployment of air bags or other safety equipment. -
Page 3: Home Charger-Specific Safety Information
Home charger-specific safety information To charge your Mio from the mains power, use the home charger (Input: 100-240V AC 50-60Hz; Output: 5V DC 2A Max) supplied by Mio as an accessory (may be sold separately). Using other home chargers with your Mio could result in serious injury or property damage. -
Page 4: Compliance
For regulatory identification purposes: Mio MiVue Drive 50/60 Series is assigned a model number of N538-5000/N538-6000. Marking labels located on the exterior of your Mio indicate the regulations that your model complies with. Please check the marking labels on your Mio and refer to the corresponding statements in this chapter. Some notices apply to specific models only. -
Page 5: Table Of Contents
Mounting your Mio in a vehicle ........................7 Enabling Traffic (TMC) Reception ......................7 Getting to know your Mio ..........................8 How do I turn on my Mio? ..........................9 Using the power button ..........................9 Resetting the device ............................ 9 How do I charge the battery? ........................ -
Page 6: Welcome
Welcome Thank you for purchasing this Mio. Please read this manual carefully before using your Mio for the first time. Keep this manual in a safe place and use as your first point of reference. Important information for using the manual It is important to understand the terms and typographical conventions used in this manual. -
Page 7: Mounting Your Mio In A Vehicle
Enabling Traffic (TMC) Reception Traffic information is available in selected models and countries only. If your Mio has a built-in TMC receiver, you can receive live traffic information via the in-car charger which is used as an antenna. For information on using traffic information on your Mio, see the Software User Manual. -
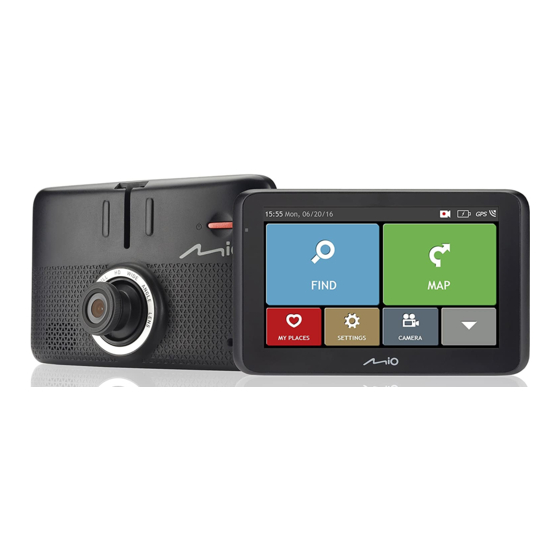
Page 8: Getting To Know Your Mio
Getting to know your Mio Power button ❶ Reset button ❷ Speaker ❸ Microphone ❹ Touch screen ❺ Battery indicator ❻ Connector for in-car charger, USB cable* and home charger* ❼ *may be sold separately Slot for MicroSD memory card ❽... -
Page 9: How Do I Turn On My Mio
To turn ON your device, press the Power button. For normal operation, turn off the device by briefly pressing the power button. Your Mio will enter a suspended state. When you next briefly press the power button, your Mio will return to the Main Menu. -
Page 10: How Do I Charge The Battery
Mio. CAUTION: When your Mio is turned on and connected to a computer, it is recognized as an external mass-storage device. Do NOT delete any files that are pre-installed on your Mio. Deleting the files can cause your Mio to crash. -
Page 11: How Do I Use A Memory Card
How do I use a memory card? CAUTION: Do not apply pressure to the centre of the memory card. Do not insert or remove the memory card when the device is turned on. Hold the card (MicroSD) by the edges and gently insert it into the slot as shown in the illustration. To remove a card, gently push the top edge of the card inwards to release it, and pull it out of the slot. -
Page 12: Reference
LCD panels may be used to help protect the screen from minor scratches. Never clean your Mio when it is turned on. Use a soft, lint-free cloth to wipe the screen and the exterior of your Mio. ... -
Page 13: Troubleshooting
Charge the battery using the in-car charger, home charger (may be sold separately) or USB cable (may be sold separately), then try again. Screen responds slowly. The remaining battery power may be too low to operate your Mio. If the problem still persists, reset your Mio. Screen freezes. - Page 18 ...
- Page 19 ❶ ❷ ❸ ❹ ❺ ❻ ❼ ❽ ❾ ❿ ⓫ ⓬ ⓭ ⓮...
- Page 20 ...
- Page 21 ...
- Page 23 ...
- Page 24 ...
- Page 25 ...
- Page 27 ❶...
- Page 28 ❷ ❸ ❹ ❺ ❻ ...
- Page 29 ...
- Page 32 ...
- Page 33 ...
- Page 34 ...
- Page 38 ...
- Page 39 ...
- Page 40 ...
- Page 41 ...
- Page 42 ❶ ❷ ❸ ❹ ❺ ❻...
- Page 43 ...
- Page 44 ...
- Page 45 ...
- Page 46 ...
- Page 47 ❶ ❷ ❸ ❹ ❺ ...
- Page 51 ❶ ❷ ❸ ❹ ❺ ❶ ❷...
- Page 52 ❸ ❹ ❶ ❷ ❸ ❹ ❺...
- Page 55 ...
- Page 56 ...
- Page 58 ...
- Page 59 ...
- Page 60 ...
- Page 61 ...
- Page 63 ...
- Page 65 ...
- Page 66 ...
- Page 67 ...
- Page 68 ❶ ❷ ❸ ...
- Page 69 ...
- Page 70 ...
- Page 71 ...
- Page 72 ❶ ❷ ❸ ❹ ❺ ❻...
- Page 73 ❶ ❷ ❸ ❹ ❺ ❻ ❼ ❽ ❾...
- Page 75 ...
- Page 76 ...
- Page 77 ...
- Page 78 ...
- Page 79 ...
- Page 80 ❶ ❷...
- Page 81 ...
- Page 82 ❶ ❷ ❸ ❹...
- Page 83 ...
- Page 84 ...
-
Page 90: Mivue Manager
User Manual MiVue Manager ™... - Page 91 MiVue Manager MiVue Manager™ is a tool for you to view the videos recorded on a MiVue recorder. Your computer needs MOV and AVI codecs to play the recording files. Please visit www.mio.com/support to install the required codecs. Not all features are available for every model.
- Page 92 4. Double-click the desired file on the file list to start playback. The playback controls are described as follows: ❶ ❷ ❸ ❹ ❺ ❻ ❼ Skips to the previous / next file on the list. ❶ Starts or resumes the playback. ❷...
- Page 93 Selects the folder that stores the recording files. ❶ Previews and prints the current video image. ❷ Saves the selected files to the specified location on your computer. ❸ Captures and saves the current video image to the specified ❹ location on your computer.
- Page 94 Revision: R00 (10/2016) Trademarks All brand and product names are trademarks or registered trademarks of their respective companies. Disclaimer Specifications and documents are subject to change without notice. MiTAC does not warrant this document is error-free. MiTAC assumes no liability for damage incurred directly or indirectly from errors, omissions, or discrepancies between the device and the documents.
Need help?
Do you have a question about the mivue drive 60 series and is the answer not in the manual?
Questions and answers