Table of Contents
Advertisement
Advertisement
Table of Contents

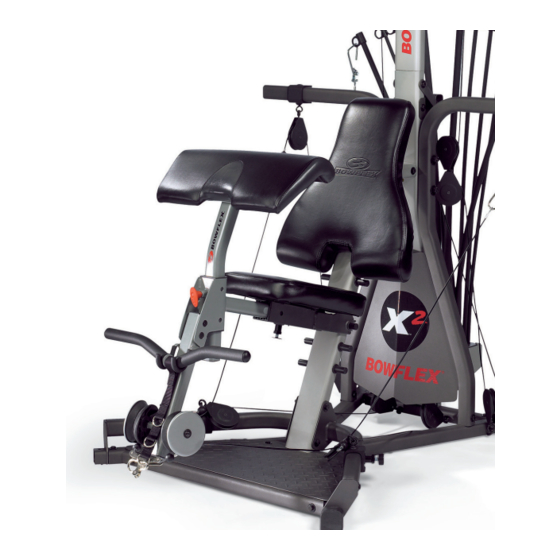
Summary of Contents for Bowflex Preacher Curl Attachment
- Page 1 Preacher Curl Attachment Owner’s / Assembly Manual P/N: 001-7015.061512.B...
-
Page 2: Table Of Contents
Maintenance ........13 How to Use Your Preacher Curl Attachment ..15 Exercise . -
Page 3: Important Safety Precautions
Safety Warning Labels There are no warning labels on the Preacher Curl attachment itself. Once the Preacher Curl attachment is installed, pay attention to the warning labels located on the Bowflex home gym. Please read all safety ®... -
Page 4: Before You Assemble
3. When attaching two pieces, gently lift and look through the bolt holes to help guide the bolt through the holes. 4. As a general rule, and for all bolts and nuts on your Bowflex ® Preacher Curl attachment, turn bolts or nuts toward the right (clockwise) to tighten and left (counterclockwise) to loosen. -
Page 5: Parts Guide
Parts Guide Item #: Qty: Description: Item #: Qty: Description: FRONT ASSEMBLY Allen Bolt 3/8” X 5-3/4” BACKBONE ASSEMBLY Flathead Bolt 3/8” X 1” V-PULLEY ASSEMBLY Allen Bolt 3/8” X 2-3/4” CABLE ASSEMBLY Allen Bolt 5/16” X 1” PREACHER CURL BAR Flat Washer 3/8”... -
Page 6: Assembly Instructions
Allen Bolt (10), Washers (14) and Nut (16). • 1/2” Hex Wrench (for seat bolts on older See Figure 1a and 1b. Reattach the Seat Pad to the Seat Bowflex Xtreme 2 model) ® Backbone with the 4 seat bolts and washers. - Page 7 Assembly Instructions STEP 2: Preacher Curl Sub-assembly Figure 2 Parts: Assembly Steps: • (1) Front Assembly - Item 1 • (1) Backbone Assembly - Item 2 2-1 Attach the Front Assembly (1) to the Backbone Assembly (2) using the hardware shown. See Figure 2.
- Page 8 Figure 3b - view from below seat Parts: Assembly Steps: • Preacher Curl Sub-assembly from Step 2 • (1) Locking Knob - Item 17 (for the Bowflex 3-1 Slide the Backbone Assembly (2) into the Leg Xtreme home gym without Leg Extension) ®...
- Page 9 Assembly Instructions STEP 4: Install V-Pulley Assembly Cable plate Pulley Cable route Figure 4 - V-pulley assembly (squat pulleys not shown) Parts: Assembly Steps: • Preacher Curl Sub-assembly from Step 3 • (2) V-Pulley Assembly - Item 3 4-1 Mount one V-Pulley (3) on the Front Assembly (1) •...
- Page 10 Connect the Cable to the cable in the chest bar pulley. Note: To route the Cables for the Bowflex Xtreme 2 unit, ® thread each Cable between the squat pulley cable and the pulley groove in the squat pulley.
- Page 11 Assembly Instructions STEP 6: Bicep Curl Pad Assembly Figure 6 Parts: Assembly Steps: • (1) Seat Post - Item 6 • (1) Pad - Item 7 6-1 Attach the Pad (7) to the Seat Post (6) using the hardware shown. See Figure 6. Hardware: •...
- Page 12 Assembly Instructions STEP 7: Mount Bicep Curl Pad on Lower Sub-assembly Pop pin Figure 7 - (only one squat pulley shown) Parts: Assembly Steps: • Bicep Curl Pad Assembly from Step 6 • Preacher Curl Sub-assembly from Step 5 7-1 Insert the Bicep Curl Pad Assembly in the mount on the Preacher Curl Sub-assembly, as shown in Figure 7.
-
Page 13: Maintenance
Wipe the unit down completely and be sure to touch up any scratches with touch up paint to prevent rusting. Monthly Check the frame of the unit for any sign of cracking or permanent bending. If you find this situation, do not use the accessory and contact Bowflex Service immediately. - Page 14 How to Use Your Preacher Curl Pulley Position and Cable Routing When using the Preacher Curl attachment, attach the cables to the squat pulley cables. The squat pullleys are placed in the #1 position (closest to the Power Rod unit).
-
Page 15: How To Use Your Preacher Curl Attachment
Contact your doctor before you use the machine again. Use the values calculated or measured by the machine’s computer for reference purposes only. Check out the E-Z Curl Bar and a wide selection of other great products available at www.bowflex.com... -
Page 16: Exercise
Exercises Preacher Curl – Elbow Flexion (in supination) Muscles worked: Biceps; Brachialis; Brachioradialis Position: Seated – facing outward Accessory: Preacher Curl Attachment, E-Z Curl Bar (optional - shown in exer- cise photos) Pulleys: Squat station START ACTION Key Points: • Slowly curl the handles in an arc •... -
Page 17: Muscle Chart
Muscle Chart Sternocleidomastoid Trapezius Pectoralis Major Anterior Deltoid Posterior Deltoid Serratus Anterior Medial Deltoid Infraspinatus Biceps Rectus Abdominus Teres Major Brachialis Flexor Digitorum Triceps Superficialis External Obliques Latissimus Dorsi Brachioradialis Pronator Teres Flexor Carpi Gluteus Radialis Medius Tensor Gluteus Fasciae Maximus Latae Adductor... -
Page 19: Limited Warranty
Limited Warranty Who Is Covered This warranty is valid only to the original purchaser and is not transferable or applicable to any other person(s). What Is Covered Nautilus, Inc. warrants that this product is free from defects in materials and workmanship, when used for the purpose intended, under normal conditions, and provided it receives proper care and maintenance as described in the Product’s Assembly and Owner’s manual. -
Page 20: Contacts
Nautilus, Inc., (800) NAUTILUS / (800) 628-8458, www.NautilusInc.com - Customer Service: North America (800) 605-3369, customerservice@bowflex.com | outside U.S. +01-360-859-5180, technics-APLA@nautilus.com | Printed in China | © 2007 Nautilus, Inc.


Need help?
Do you have a question about the Preacher Curl Attachment and is the answer not in the manual?
Questions and answers