
Related Manuals for Venmar HRV600i


Summary of Contents for Venmar HRV600i
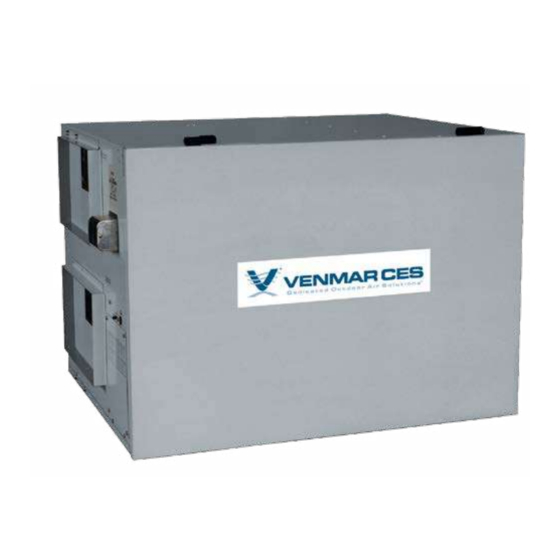
- Page 1 Heat Recovery Ventilators Installation, Operation and Maintenance Instructions Manual Capacity: 300 to 1,260 cfm Model: HRV600i, HRV700i, HRV1200i ©2001 Venmar CES...
-
Page 2: Table Of Contents
Maintenance..................................14 Bi-monthly.Maintenance.............................14 Annual.Maintenance..............................15 Appendix.A:.Equipment.Data............................17 Appendix.B:.Dimensional.Drawings..........................18 Appendix.C:.Flow.Measuring.Station.and.Balancing.Damper.Positions................23 Appendix.D:.Drain.Connections............................24 Appendix.E:.Mounting.Diagrams............................25 Appendix.F:.Terminal.Control.Diagrams..........................26 Appendix.G:.HRV600i,.HRV700i.and.HRV1200i.Start-up.Form.and.Checklist..............29 Appendix.H:.Electrical.Control.Box.and.Wire.Connections.....................33 Appendix.I:.Components..............................34 Appendix.J:.Troubleshooting............................37 Appendix.K:.Make-up.Heat.Requirements........................38 Manufacturer reserves the right to discontinue or change specifications or designs without notice or obligation. VCES-HRV-IOM-1C – HRV600i, HRV700i, HRV1200i... -
Page 3: Nomenclature
©Venmar CES 2001. All rights reserved throughout the world. Illustrations cover the general appearance of Venmar CES products at the time of publication and Venmar CES reserves the right to make changes in design and construction at any time without notice. -
Page 4: Safety.considerations
This manual has been designed for general purpose • The electrical schematic is attached to the inside of and describes options offered by Venmar CES that could the control panel. be included in the unit. Consult the manual from the •... -
Page 5: Inspection.on.arrival
Fine dust, larger particulate matter, solvents, varnishes and WARNING other chemicals may cause filter clogging and elevated Venmar CES equipment is not designed to be used for cabinet pressures, higher power consumption and possible temporary heating, cooling and/or ventilation during irreparable damage to the flat plate heat recovery module, construction. -
Page 6: Internal.packaging
(minimum ¼”per foot [6 mm per 305 mm]). If this is not possible, a pump should be used. Appendix D for specific trap height and connection requirements. VCES-HRV-IOM-1C – HRV600i, HRV700i, HRV1200i... -
Page 7: Exhaust.dampers.for.indoor.units
For port locations see Appendix the unit to the building (see Appendix VCES-HRV-IOM-1C – HRV600i, HRV700i, HRV1200i... -
Page 8: Drains
Mount the damper in the exhaust air to outside duct as the system possible. shown in Appendix C Ductwork for fan outlet duct considerations. A proper selection of style and size of grilles and diffusers is required to minimize pressure drop. The velocity of the VCES-HRV-IOM-1C – HRV600i, HRV700i, HRV1200i... -
Page 9: Electrical.connections
See Forced Air System. voltage terminal strips. See Appendix B for location. VCES-HRV-IOM-1C – HRV600i, HRV700i, HRV1200i... -
Page 10: Start-Up
(right side). Check if temporary dry contacts or a changed to determine if the natural frequency is causing jumper wire are used. the vibration. VCES-HRV-IOM-1C – HRV600i, HRV700i, HRV1200i... - Page 11 When plate FLA. controlling units with remote controls, use extreme cau- 10. On the HRV600i and HRV1200i there are three tion around moving mechanical components such as speed settings available with the controls, only two fans, belts and motors as they can lead to severe personal of which can be functional.
-
Page 12: Frost.control
• Power connected, low speed call – Both fans on low • Power connected, FF control contacts close during speed, internal frost control damper (if equipped) unit ventilation or frost control cycle. opens fresh air from outside. If equipped with recir- culation module, the internal frost control damper closes recirculation opening. VCES-HRV-IOM-1C – HRV600i, HRV700i, HRV1200i... -
Page 13: Remote.wall.control
This procedure should be repeated to ensure that tions of ducting where airflow has stabilized across the the unit is balanced properly. area of the duct. This position will provide the most accu- rate measurements. VCES-HRV-IOM-1C – HRV600i, HRV700i, HRV1200i... -
Page 14: Balancing.procedure
Ensure that the dirt, then wash with warm water. drain fittings are free from dirt and draining freely. VCES-HRV-IOM-1C – HRV600i, HRV700i, HRV1200i... -
Page 15: Annual.maintenance
Blue + White Medium speed System Operation Check Black + White High speed Verification of all control modes should be checked to en- sure proper operation. Refer to Sequence of Operation. VCES-HRV-IOM-1C – HRV600i, HRV700i, HRV1200i... - Page 16 Install the repaired motor assembly by following these instructions in reverse. Figure 1: Blower assembly removal – HRV600i and HRV1200i Locking plate Remove these two screws Capacitor VCES-HRV-IOM-1C –...
-
Page 17: Appendix.a:.equipment.data
26” x 54” x 46” 38” x 44” x 32” (L x W x H) [1,016 x 813 x 813 mm] [660 x 1,372 x 1,168 mm] [965 x 1,117 x 813 mm] Note: 1 – Available as accessory on supply only, in addition to washable foam filter VCES-HRV-IOM-1C – HRV600i, HRV700i, HRV1200i... -
Page 18: Appendix.b:.dimensional.drawings
Appendix B: Dimensional Drawings Figure B1: HRV600i unit dimensional drawing (with exhaust only defrost) VCES-HRV-IOM-1C – HRV600i, HRV700i, HRV1200i... - Page 19 Figure B2: HRV600i unit dimensional drawing (with recirculation defrost) VCES-HRV-IOM-1C – HRV600i, HRV700i, HRV1200i...
- Page 20 Figure B3: HRV700i unit dimensional drawing VCES-HRV-IOM-1C – HRV600i, HRV700i, HRV1200i...
- Page 21 Figure B4: HRV1200i unit dimensional drawing (with exhaust only defrost) VCES-HRV-IOM-1C – HRV600i, HRV700i, HRV1200i...
- Page 22 Figure B5: HRV1200i unit dimensional drawing (with recirculation defrost) VCES-HRV-IOM-1C – HRV600i, HRV700i, HRV1200i...
-
Page 23: Appendix.c:.flow.measuring.station.and.balancing.damper.positions
Appendix C: Flow Measuring Station and Balancing Damper Positions Figure C1: HRV600i and HRV1200i flow measuring station and balancing damper positions Reverse door option Balancing damper Flow measuring station (FMS) Exhaust air to outside Min. 8” [203 mm] (see Notes below) -
Page 24: Appendix.d:.drain.connections
Appendix D: Drain Connections Figure D1: HRV600i and HRV1200i drain connections Plastic drain fitting Min. 3” Min. 3” [76 mm] [76 mm] ¾” NPT coupler To drain Min. 4” Min. 1” [102 mm] Min. 4” [25 mm] Min. 1” [102 mm]... -
Page 25: Appendix.e:.mounting.diagrams
Appendix E: Mounting Diagrams Figure E1: HRV600i and HRV1200i mounting Reinforced rubber strap Note: Diagrams show standard unit configuration. For units with the reversed door option, the door Recirculation will be located here. module 3/8” [10 mm] threaded rod (supplied by others) -
Page 26: Appendix.f:.terminal.control.diagrams
CONTACT CLASS 2 VOLTAGE NOTE: Connections are all dry contacts except wall control and 24 VAC power supply. Use of 24 VAC circuit requires isolating contacts (ex. thermostat) to prevent interconnection of Class 2 outputs. VCES-HRV-IOM-1C – HRV600i, HRV700i, HRV1200i... - Page 27 LEVELS EXCEED SETPOINT – HIGH SPEED NOTE: Connections are all dry contacts except wall control and 24 VAC power supply. Use of 24 VAC circuit requires isolating contacts (ex. thermostat) to prevent interconnection of Class 2 outputs. VCES-HRV-IOM-1C – HRV600i, HRV700i, HRV1200i...
- Page 28 CONTACT CLASS 2 VOLTAGE NOTE: Connections are all dry contacts except wall control and 24 VAC power supply. Use of 24 VAC circuit requires isolating contacts (ex. thermostat) to prevent interconnection of Class 2 outputs. VCES-HRV-IOM-1C – HRV600i, HRV700i, HRV1200i...
-
Page 29: Appendix.g:.hrv600I,.Hrv700I.and.hrv1200I.start-Up.form.and.checklist
Start-up Form and Checklist IMPORTANT • Complete this form for each unit and email, fax or mail to Venmar CES immediately after start-up to validate warranty and to provide valuable information for personnel performing future maintenance or for factory assistance to address below. - Page 30 FLA. On the HRV600i and HRV1200i, there are three speed settings available with the controls, only two of which can be functional. The units are factory set to use the low and high speed taps on the blower motors. If additional airflow is required, the medium speed tap can be used instead of the low speed tap.
- Page 31 After 24 hours of satisfactory operation, shut down the Company Name: ___________________________________ unit and check all foundation bolts, fan set screws and ter- Telephone: ________________________________________ minals. Tighten where required. Email to Tech Support (venmarservice@venmarces.com) or Additional Comments: fax to 306-244-4221. _________________________________________________ _________________________________________________ VCES-HRV-IOM-1C – HRV600i, HRV700i, HRV1200i...
- Page 32 This page intentionally left blank. VCES-HRV-IOM-1C – HRV600i, HRV700i, HRV1200i...
-
Page 33: Appendix.h:.electrical.control.box.and.wire.connections
Appendix H: Electrical Control Box and Wire Connections Figure H1: HRV600i and HRV1200i electrical control box and wiring connections Power line input junction box Low voltage terminal strips Microprocessor control board access plate Microprocessor controller terminal Control box HRV cabinet... -
Page 34: Appendix.i:.components
Appendix I: Components Figure I1: HRV600i exhaust only defrost components Item Description Part Number Exhaust fan assembly – require 1 per unit 1808144 Exhaust fan wheel – require 1 per unit 201586 Exhaust fan motor – require 1 per unit 1808149 Hinge kit (male/female) –... - Page 35 Supply fan assembly powder coated – require 2 per unit 1808148P Supply fan wheel – require 2 per unit 201586 Supply fan motor – require 2 per unit 1808150 Control box Terminal strips Some unit components listed above are optional. Consult the unit nomenclature for standard and optional components. VCES-HRV-IOM-1C – HRV600i, HRV700i, HRV1200i...
- Page 36 Supply fan assembly powder coated – require 2 per unit 1808148P Supply fan wheel – require 2 per unit 201586 Supply fan motor – require 2 per unit 1808150 Control box Terminal strips Some unit components listed above are optional. Consult the unit nomenclature for standard and optional components. VCES-HRV-IOM-1C – HRV600i, HRV700i, HRV1200i...
-
Page 37: Appendix.j:.troubleshooting
Appendix J: Troubleshooting Table J1: HRV600i, 700i and 1200i Troubleshooting Symptoms Possible Causes Solutions Over ventilation – speed setting too high. Adjust speed setting. Inside air is too dry. Set dehumidistat control in a higher position (if Dehumidistat setting too low. -
Page 38: Appendix.k:.make-Up.heat.requirements
This will temper the air before it is distributed throughout the building. The table below gives the heating requirements in kilowatts at dif- ferent temperatures and airflows. Table K1: Make-up Heat Requirements (kW) – HRV600i and HRV700i Outdoor Air Outdoor Air Outdoor Air... - Page 39 Venmar CES has a policy of continuous improvement and reserves the ©2001 Venmar CES right to change design and specifications without notice. VCES-HRV-IOM-1C (PN 206815) September 2014...
Need help?
Do you have a question about the HRV600i and is the answer not in the manual?
Questions and answers