Table of Contents
Advertisement
Quick Links
Advertisement
Table of Contents

Related Manuals for Key Digital KD-MLV4x2Pro


Summary of Contents for Key Digital KD-MLV4x2Pro
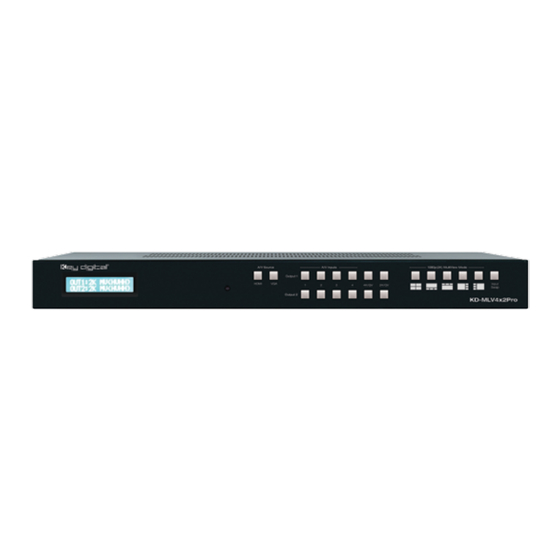
- Page 1 KD-MLV4x2Pro 4 Inputs to 2 Outputs POH/HDBaseT/HDMI/VGA Multi-View Seamless Presentation Matrix Switcher. Includes 1 Power over HDBaseT/HDMI Rx Extender. Operating Instructions Screen Modes The Experts in Digital Video Technology and Solutions ™...
-
Page 2: Table Of Contents
KD-X222PO Rx HDBaseT extender receiver is included and powered from the matrix. KD-MLV4x2Pro is designed to fit a wide variety of professional video installation and live- event needs. It is ideal for digital signage, video wall, conference & board room, huddle spaces, home theater, and bar/restaurant applications. - Page 3 Input: 2 HDMI, 2 HDMI or Analog video, all with external audio » Output: 1 HDMI and 1 HDBaseT output. Rx unit included. » HDBaseT Built-In: Included KD-X222PORx unit is powered by at KD-MLV4x2Pro › Signal Extension: › Up to 200 feet @ 1080p/60, 1080p/24, 1080i, 720p with third-party CAT5e/6 »...
-
Page 4: Quick Setup Guide
2. Connect Video and Audio Sources to the desired KD-MLV4x2Pro input ports 3. Connect HDMI output ports to a display/sync device using Key Digital HDMI cables and audio devices to the audio outputs 4. Connect the Rx unit’s HDMI output a display/sync device, and use a CAT5e/6 cable to interconnect the Rx and KD-MLV4x2Pro’s HDBaseT ports. -
Page 5: Rack Mounting
When using an IR Emitter / IR Extender (sold separately), the IR Emitter must be mounted over the IR Sensor on the front of the KD-MLV4x2Pro. One end of the cable is connected to the IR Receiver/ Master Controller / IR Extender / IR Connecting Block, while the other end is mounted over the IR Sensor of the KD-MLV4x2Pro. -
Page 6: Connections, Buttons And Leds
Connections, Buttons and LEDs Rear Panel Connections: All connections to the KD-MLV4x2Pro are found on the rear panel of the unit. Refer to the illustrations below for port assignments while making connections: HDMI Input Analog L/R Input VGA / DB15 Input... - Page 7 Analog L/R Balanced/ HDBaseT HDMI Coaxial PCM Digital Unbalanced Output Output Output Audio Output Video Outputs HDMI Output (1 total) › Supports either 1080p@60 fps or 4096x2160 30Hz [4:4:4] 8bit » 4096x2160 resolution supported in 4K Quadrant mode only » Does not support CEC, 3D, ARC, Ethernet over HDMI »...
- Page 8 Pass-through Control and Power Ports Serial IR Power RS-232 TCP/IP KD-MLV4x2Pro Control Ports › Serial IR and RS-232 on a 6-Pin Terminal Block » Advanced control possible via RS-232 and TCP/IP. Basic control via IR » Pin out of Serial IR / RS-232 Main Unit Control »...
- Page 9 A Network Setup Tutorial video is available at: https://youtu.be/AMC7KvPPJsg » The default TCP-IP address of the KD-MLV4x2Pro unit is 192.168.1.239 » The default port number is 23. » HDBaseT IR/RS-232 IR/RS232 Switch pass-through port HDBaseT IR/RS-232 pass-through port › Supports bi-directional control with KD-X222PO Rx »...
-
Page 10: Front Panel Operation
HDMI/VGA Input Select Mode Select Input Swap The front-panel of KD-MLV4x2Pro features 3 sets of buttons: HDMI / VGA input-type select (2 buttons) Enables selection of the HDMI digital video input or VGA analog video input for the specified ›... - Page 11 If desired, the layouts can be over-written via the Web Control Interface, RS-232, or TCP-IP, by › saving to the KD-MLV4x2Pro’s preset bank Resetting the KD-MLV4x2Pro to factory default will restore these 5 layouts in the preset bank as › layouts 1-5, respectively.
-
Page 12: Ir Remote Control
» EDID Control via IR KD-MLV4x2Pro has a built-in library of 5 EDID settings and the ability to copy EDID data from any output specified via IR, RS-232, and TCP-IP. EDID Control setup via RS-232 and TCP-IP can be found in the RS-232 Commands and Protocol TCP-IP Setup and Control sections. - Page 13 » Addressing via IR To apply a two-digit address to your KD-MLV4x2Pro unit, press the following buttons on the remote control: R3, R1, R2, X1, X2. X1 and X2 are chosen using the Device Select number pad. 00 is the default unit address »...
-
Page 14: Web Control Interface
The default port number is 23. » You can connect to the KD-MLV4x2Pro unit on a 192.168.1.1 type router, or using a network cable directly from your computer. The TCP-IP address and port number of the KD-MLV4x2Pro unit can be adjusted to accommodate your LAN’s setting. - Page 15 Basic Video The Basic Video setup page enables selection of the following: A. Entering Quad and Multi-View modes and choosing desired layout from default presets. › Enter Multi-View mode affects both outputs and loses independence of each output. » The default Multi-View presets are unit presets 1-5 which can be written over manually in the »...
- Page 16 Basic Audio The Basic Audio setup page enables selection of the following: A. Input type (HDMI or external 3.5mm Stereo analog) of each audio source › B. Selection of desired audio source for Output 1 or Output 2, independently. › Advanced Video...
- Page 17 › Use the drop down menu to choose the desired 1080p (2K) Multi-View Custom preset » Press the Apply button if you wish to set the KD-MLV4x2Pro unit’s outputs to the selected » screen layout Press the Save button if you wish to write the entered values of the Advanced Video section »...
- Page 18 After connecting to KD-MLV4x2Pro by using a 192.168.1.xxx type network or using a crossover cable, you can adjust and view the unit’s TCP-IP settings using the Web Control Interface. A. Host IP Address is the IP address that you’d like to apply to the connected KD-MLV4x2Pro ›...
-
Page 19: Custom Layout Examples
Custom Layout Examples To help gain comfort and familiarity with the Advanced Video setup tool, please review and practice the follow examples. Example 1: Full-sized background image with 3-small layered and fanned windows Screen: Setup:... - Page 20 Example 2: Image layering with proportionate size decrease Screen: Setup:...
- Page 21 Example 3: Full-sized background window with small, right-stacked windows and transparency applied Note: Currently, transparency settings are only able to be applied via RS-232 or TCP-IP terminal. See the RS-232 Commands and Protocol and Window Transparency and Border settings section for more information.
-
Page 22: Rs-232 And Tcp-Ip Commands And Protocol
RS-232 and TCP-IP Commands and Protocol RS-232 Protocol: The KD-MLV4x2Pro provides access to all functions when used with an RS-232 control system. Baud Rate = 57600 bits per second › RS-232 cable pin out Data Bits = 8 › Stop Bits = 1 ›... - Page 23 -- SPO xx ON/OFF : Set Output xx ON or Set Output xx OFF -- SPOA ON/OFF : Set All Outputs ON or Set All Outputs OFF -- SPO xx DBG ON/OFF: Set Outputs xx Debug Mode ON/OFF -- SPOA DBG ON/OFF : Set Outputs xx Debug Mode ON/OFF -- SPO MV z : Set Outputs by z [1=Normal, 2=Mutliview Mode]...
- Page 24 : Set System Address to xx Response from Help command – Current settings and/or status of unit: KD-MLVX4x2Pro>sta ------------------------------------------------------------------------- Key Digital Systems STATUS ------------------------------------------------------------------------- KD-MLVX4x2Pro System Address = 00 F/W Version : 1.05 -- RS232 : Baud Rate=57600bps, Data=8bit, Parity=None, Stop=1bit...
-
Page 25: Window Transparency And Border Settings
› Window Border KD-MLV4x2Pro enables a border-line / bezel to be applied and customized if desired. The border- line width and color of the border-line can be specified The RS-232 / TCP-IP command to apply border-line width is as follows: ›... -
Page 26: Specifications
Color rrr value ggg value bbb value Teal Blue Brown Maroon Silver Green Specifications Technical: Inputs: 4 HDMI connectors, Type A, 19 pin female; 2 HD analog video 15-pin female, » 4 analog audio connector, 3.5mm stereo female Outputs: 1 HDMI connector, Type A, 19 pin female; 1 HDBaseT RJ45 female; 2 digital »... -
Page 27: Important Product Warnings & Safety Instructions
Damage to the power supply or power plug » Exposure to rain or moisture » Power Supply Use: You MUST use the Power Supply provided with your unit or you VOID the Key Digital Warranty and risk damage to your unit and associated equipment. ®... -
Page 28: How To Contact Key Digital
Please email any comments/questions about the manual to: E-mail: customersupport@keydigital.com › Warranty Information All Key Digital products are built to high manufacturing standards and should provide years of ® trouble-free operation. They are backed by a Key Digital Limited 3 Year Product Warranty Policy. http://www.keydigital.com/warranty.htm... - Page 29 , led by digital video pioneer Mike Tsinberg, ® develops and manufactures high quality, cutting-edge technology solutions for virtually all applications where high-end video and control are important. Key Digital ® is at the forefront of the video industry for Home Theater Retailers, Custom Installers, System Integrators, Broadcasters, Manufacturers, and Consumers.
Need help?
Do you have a question about the KD-MLV4x2Pro and is the answer not in the manual?
Questions and answers