Table of Contents
Advertisement
Quick Links
DENSITÉ series
XVP-3901
3G/HD/SD Up, Down & Cross Converter
with Audio Processor
Guide to Installation and Operation
M886-9900-240
22 Feb 2010
Miranda
Technologies Inc.
3499 Douglas-B.-Floreani
St-Laurent, Québec, Canada H4S 1Y6
Tel. 514-333-1772
Fax. 514-333-9828
www.miranda.com
© 2010 Miranda Technologies Inc.
Advertisement
Table of Contents

Related Manuals for Miranda XVP-3901 DENSITE series


Summary of Contents for Miranda XVP-3901 DENSITE series
- Page 1 DENSITÉ series XVP-3901 3G/HD/SD Up, Down & Cross Converter with Audio Processor Guide to Installation and Operation M886-9900-240 22 Feb 2010 Miranda Technologies Inc. 3499 Douglas-B.-Floreani St-Laurent, Québec, Canada H4S 1Y6 Tel. 514-333-1772 Fax. 514-333-9828 www.miranda.com © 2010 Miranda Technologies Inc.
-
Page 2: Electromagnetic Compatibility
• EN 61000-4-5 Surge immunity • EN 61000-4-11 Voltage dips, short interruptions and voltage variations immunity How to contact us: For technical assistance, please contact the Miranda Technical support centre nearest you: Americas Asia Europe, Middle East, Africa, UK Telephone:... -
Page 3: Table Of Contents
GUIDE TO INSTALLATION AND OPERATION Table of Contents XVP-3901 3G/HD/SD Up, Down & Cross Converter with Audio Processor ......1 Introduction ............................1 Features .............................. 1 XVP-3901 Models ..........................2 1.3.1 XVP-3901 (full model)......................3 1.3.2 XVP-3901-FS ......................... 4 1.3.3 XVP-3901-DC ........................ - Page 4 GUIDE TO INSTALLATION AND OPERATION 5.5.3 Advanced tab........................42 5.5.4 Meta tab..........................43 5.5.5 AFD tab ..........................46 5.5.6 De-interlacer tab ........................47 Audio Processing panel........................48 5.6.1 Audio Processing Tab ......................48 5.6.2 Downmix tab.........................50 5.6.3 AES Inputs tab........................52 5.6.4 Status tab ..........................52 Dynamic Proc. panel .........................53 Audio Outputs panel ..........................56 5.8.1 CH 1-2, CH 3-4, …...
- Page 5 GUIDE TO INSTALLATION AND OPERATION 5.17.1 Audio option ........................108 5.17.2 Key/Fill option: ........................109 5.17.3 Dynamic Processing option: ....................109 5.17.4 Loudness Measurement option: ..................110 5.17.5 ALC option ......................... 110 5.17.6 XVP Full Upgrade option (XVP-3901-UG-xx2XVP):............111 5.18 Alarm Config panel ......................... 111 5.19 Info panel ............................
- Page 6 GUIDE TO INSTALLATION AND OPERATION XVP-3901...
-
Page 7: Xvp-3901 3G/Hd/Sd Up, Down & Cross Converter With Audio Processor
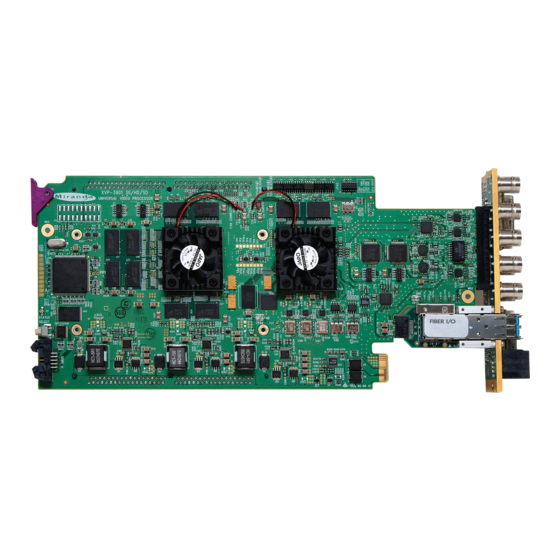
GUIDE TO INSTALLATION AND OPERATION 1 XVP-3901 3G/HD/SD Up, Down & Cross Converter with Audio Processor 1.1 Introduction The XVP-3901 is a highly integrated module designed to synchronize, convert and process 3Gbps, HD and SD signals into 3G/HD/SD hybrid plants. The card offers a dual multi-rate 3G/HD/SD input and provides simultaneous 3G/HD and SD outputs. -
Page 8: Xvp-3901 Models
Audio metadata insertion, extraction and processing • Perfect audio/video synchronization plus additional audio fixed delay of up to 2 seconds • Compatible with Miranda audio processing cards like UAP and DAP • Optional Dolby-E/Digital (AC-3) encoder/decoder modules • Optional Linear Acoustic upMAX™... -
Page 9: Xvp-3901 (Full Model)
GUIDE TO INSTALLATION AND OPERATION 1.3.1 XVP-3901 (full model) This block diagram shows the functionality of the XVP-3901 full model. Figure 1.1 Functional block diagram XVP-3901 This chart shows the video formats supported by the XVP-3901 at its inputs and outputs XVP-3901 Output Input... -
Page 10: Xvp-3901-Fs
GUIDE TO INSTALLATION AND OPERATION 1.3.2 XVP-3901-FS The XVP-3901-FS is a highly integrated 3G/HD/SD frame synchronizer, aspect ratio converter and video/audio signal processor. It is similar to the full XVP-3901 except that it does not have up/down/cross conversion capabilities. Figure 1.2 Functional block diagram XVP-3901-FS This chart shows the video formats supported by the XVP-3901-FS at its inputs and outputs XVP-3901-FS Output... -
Page 11: Xvp-3901-Dc
GUIDE TO INSTALLATION AND OPERATION 1.3.3 XVP-3901-DC The XVP-3901-DC is a highly integrated 3G/HD/SD downconverter and video/audio signal processor. It is similar to the full XVP-3901 except that it does not have up and cross conversion capabilities. Figure 1.3 Functional block diagram XVP-3901-DC This chart shows the video formats supported by the XVP-3901-DC at its inputs and outputs XVP-3901-DC Output... -
Page 12: Xvp-3901-Uc
GUIDE TO INSTALLATION AND OPERATION 1.3.4 XVP-3901-UC The XVP-3901-UC is a highly integrated 3G/HD/SD upconverter and video/audio signal processor. It is similar to the full XVP-3901 except that it does not have cross and down conversion capabilities. Figure 1.4 Functional block diagram XVP-3901-UC This chart shows the video formats supported by the XVP-3901-UC at its inputs and outputs XVP-3901-UC Output... -
Page 13: Xvp-3901-Xc
GUIDE TO INSTALLATION AND OPERATION 1.3.5 XVP-3901-XC The XVP-3901-XC is a highly integrated 3G/HD cross converter and video/audio signal processor. It is similar to the full XVP-3901 except that it does not have up and down conversion capabilities. Figure 1.5 Functional block diagram XVP-3901-XC This chart shows the video formats supported by the XVP-3901-XC at its inputs and outputs XVP-3901-XC Output... -
Page 14: Front Card-Edge Interface
GUIDE TO INSTALLATION AND OPERATION 1.4 Front Card-edge Interface The front card-edge of the XVP-3901 incorporates three elements: SDA-1101 - SD DIGITAL VIDEO DISTRIBUTION AMPLIFIER • Status LED (see section 3.2) • Select Button (see section 4) • ABUS connector (see section 2.5) Select Status XVP-3901... -
Page 15: Installation
2.5 ABUS Connection to Companion Audio Cards When the XVP-3901 is used in conjunction with one or two companion audio cards (Miranda’s AAP, DAP or UAP series), the ABUS flat cable must be installed between the ABUS connector of the XVP-3901 and the connectors on the audio cards. -
Page 16: Rear Panels And Connectors
GUIDE TO INSTALLATION AND OPERATION 2.6 Rear Panels and Connectors XVP-3901-75-3DRP-F XVP-3901-110-3DRP-F XVP-3901-110-3TRP-F XVP-3901-75-3TRP XVP-3901-75-3TRP-F XVP-3901-110-3TRP Figure 2.2 XVP-3901 Rear Panels 10 | XVP-3901... - Page 17 GUIDE TO INSTALLATION AND OPERATION REF IN – Studio reference input For external synchronization, connect a black studio reference signal to the BNC labeled REF IN. • The loop must be terminated if not used. The reference input must conform to SMPTE 170M/SMPTE 318M/ITU 624-4/BUT 470-6 for standard definition signals and SMPTE 274M / SMPTE 296M for high definition signals and is used to phase the HD/SD SDI outputs to the studio.
- Page 18 GUIDE TO INSTALLATION AND OPERATION The pinout of the D-SUB connector for both XVP-3901-110-3DRP-F XVP-3901-75-3DRP-F Pin # 110Ω and 75Ω rear panels is shown in this chart. 110 Ohm rear 75 Ohm rear AES IN 1 (Hi) AES IN 1 AES IN 1 (Lo) AES IN 2 (Hi) AES IN 2...
- Page 19 GUIDE TO INSTALLATION AND OPERATION GPI / RS-422 B – GPI I/O and Metadata I/O The rear panel connector on a 26-pin D-SUB Function Pin # provides: GPI 1 (USER1) • 6 GPI: 4 to recall user-configurable presets and 2 for input selection. GPI 2 (USER2) •...
-
Page 20: User Interface
The local control panel and its push-buttons can be used to move through a menu of parameters and to adjust parameter values (see section 4). • Miranda’s iControl system can be used to access the card’s operating parameters from a remote computer, using a convenient graphical user interface (GUI) (see section 5). •... - Page 21 GUIDE TO INSTALLATION AND OPERATION LED Status Flashing Green Yellow Error Condition Reference mismatch Card System error Manual Freeze Test Mode AES 1 presence error AES 2 presence error AES 3 presence error AES 4 presence error Silence detected Channel 1 Silence detected Channel 2 Silence detected Channel 3 Silence detected Channel 4...
-
Page 22: Local Control Using The Densité Frame Control Panel
GUIDE TO INSTALLATION AND OPERATION 4 Local control using the Densité frame control panel 4.1 Overview Push the SELECT button on the XVP-3901 card edge (see Section 1.4) to assign the local control panel to operate the XVP- 3901. Use the control panel buttons to navigate through the menu, as described below. -
Page 23: Remote Control Using Icontrol
GUIDE TO INSTALLATION AND OPERATION 5 Remote control using iControl The operation of the XVP-3901 may be controlled using Miranda’s iControl system. • This manual describes the control panels associated with the XVP-3901 and their use. • Please consult the iControl User’s Guide for information about setting up and operating iControl. - Page 24 GUIDE TO INSTALLATION AND OPERATION Move the mouse over an icon and a status message appears below the icon providing additional information. If there is an error, the error status message appears in the message area without mouse-over. • If there are multiple errors, the error messages cycle so all can be seen •...
- Page 25 GUIDE TO INSTALLATION AND OPERATION Icon #4 – Audio Status Audio OK (green) Yellow alarm condition detected on 1 or more channels (yellow) Red alarm condition detected on 1 or more channels (red) All audio disabled (gray) Card System Mismatch – the audio cards detected on the ABUS do not match the configuration selected in the ABUS panel (red) Icon #5 –...
-
Page 26: Video Input/Output Panel
(green) Hardware Health Monitoring (Fan1, Fan2, Hardware fault detected) If this icon appears red, return the card to Miranda and specify the error code. (red) Section 2. The left portion of the window contains all the parameter groups, which become highlighted when they are selected;... -
Page 27: Input/Output Config Tab
GUIDE TO INSTALLATION AND OPERATION 5.2.1 Input/Output Config Tab Input Config: use the pulldowns to select the rear panel input that will be used when the inputs are selected: • BNC IN – use one of the electrical inputs • Fiber IN –... -
Page 28: Deglitcher Tab
GUIDE TO INSTALLATION AND OPERATION • If input 2 and Failover mode are both selected, an error is reported by iControl and the card edge LED turns red. The second input is always required in this mode. • Both input signals must be present – the system cannot switch to input 2 if there is no signal there – and the absence of either of the signals will be flagged as an error (icon #2 and card-edge LED red) •... - Page 29 GUIDE TO INSTALLATION AND OPERATION To perform a glitch-free switch between two sources, they must be in the same clean switch region. A clean switch region is contained within ± ½ line about an H=0 point in the reference signal, as shown by the dotted lines in the figure.
-
Page 30: Freeze Tab
GUIDE TO INSTALLATION AND OPERATION Practical examples: Example 1: we have two SD (525) sources, one that indicates an offset of -25 μs with respect to the reference (A) and the other an offset of -35 μs (B). We know that a clean switch region limit is present at -½ line, which corresponds to -31.76 μs. -
Page 31: Video Processing Panel
GUIDE TO INSTALLATION AND OPERATION Freeze Option Auto Freeze Mode Manual Mode • Freeze to last valid FIELD 1 Field 1 Freeze to last valid FIELD • Freeze to last valid FIELD 2 Field 2 • Freeze to last valid FRAME Frame •... -
Page 32: Advanced Tab
GUIDE TO INSTALLATION AND OPERATION • For gain control, a nominal value of 0 represents 100% gain, while -800 represents 0% gain, and +800 represents 200% gain. Y Cb Cr mode RGB mode Slider name Range Slider name Range All gain -800 to +800 All Gain -800 to +800... - Page 33 GUIDE TO INSTALLATION AND OPERATION The upper portion of the panel is occupied by two video screen images, labelled Input and Output. These screens do not show the actual video being processed by the XVP- 3901, but rather show graphic images that represent the geometric aspects of the input signal and the output that results after it is exposed to the current ARC processing functions.
-
Page 34: Arc Tab
GUIDE TO INSTALLATION AND OPERATION functions implemented. If no AFD flag is detected at the input, the card uses the Default AFD flag specified in the AFD tab Note 2 – Forced mode: Forced mode is useful when the input AFD flag is unreliable, missing or if the user wants a simple way to force the aspect ratio conversion. - Page 35 GUIDE TO INSTALLATION AND OPERATION 5.4.1.1 Input sub-section Input: Crop – Horizontal and Vertical The crop controls allow selection of a portion of the original image – the amount of horizontal and vertical cropping is expressed as a percentage of the size of the original image. The user can manually adjust the level of horizontal and vertical cropping.
- Page 36 GUIDE TO INSTALLATION AND OPERATION 5.4.1.3 Presets sub-section For convenience in manual operation, several of the most common conversion situations are pre-programmed into the XVP-3901, and can be quickly accessed. The available Presets change according to the AFD mode and Output Format selections made using the pulldowns on the input and output screens.
-
Page 37: Timing Tab
GUIDE TO INSTALLATION AND OPERATION format, and is measured starting from the edges of the displayed image, as shown in the following table. Masks can cover a minimum of 25% of the active area. Note: all masks are adjusted in steps of 2 pixels or 2 lines. Available Presets for various AFD Mode selections (16:9 output) 5.4.2 Timing tab... -
Page 38: Meta Tab
GUIDE TO INSTALLATION AND OPERATION When the MPEG preprocessor is deactivated (OFF), the adaptive detail enhancer will increase the details and the sharpness of edges without causing ringing on the HD output. In this mode (‘OFF’), high frequency content is added to the HD video output to improve graphic contents and characters. - Page 39 GUIDE TO INSTALLATION AND OPERATION and the V-chip information from line 21 field 2 of the incoming 525-line signal may be inserted as ancillary packets required for FCC compliance. NTSC and DTV closed captions will be embedded, in the 3G/HD outputs, within EIA-708-B packets as per SMPTE 334M.
-
Page 40: Afd Tab
GUIDE TO INSTALLATION AND OPERATION The XVP-3901 detects the presence of Namedropper data in the program arriving at its input, and flags it using the status icon in this panel, which turns green when Namedropper data is detected. 5.4.4.3 Meta / Timecode sub-tab SD inputs: In the case of an SD input, the DVITC in the VBI interval is transcoded into ATC time code packets for the 3G/HD output. -
Page 41: De-Interlacer Tab
GUIDE TO INSTALLATION AND OPERATION When AFD is present at the input, the card can perform an automatic adjustment of the aspect ratio. See the appendix for more details. 5.4.5.1 Default settings section Default/Forced: this text box is labeled according to the mode selected in the Input Screen pulldown in the Video Output Group –... -
Page 42: Video Outputs Panel - Sd Output Tab
GUIDE TO INSTALLATION AND OPERATION Film mode: When The Film Mode selection is set to ON, the XVP-3901 monitors the input for film-based sequences and applies the proper algorithm. Film detection is provided for 3:2, 2:2 (59Hz and 50 Hz sources) and 5:5 sequences. Video Over Film: When the film mode is enabled, turn ON the Video-Over-Film (VOF) function to detect and bypass field-merging on certain video regions such as scrolling video characters over an entire film frame, thereby preventing any unwanted combing effects. -
Page 43: Arc Tab
GUIDE TO INSTALLATION AND OPERATION Figure 5.22 Screens for SD output You can configure the AFD mode differently for an SD input than for a 3G/HD input. The card will remember the different parameters and will load them automatically without user intervention based on whether the video input is SD or 3G/HD. - Page 44 GUIDE TO INSTALLATION AND OPERATION When using manual aspect ratio mode (AFD mode is 4:3 or 16:9), the card will remember automatically all the parameters for the different combinations of input/output aspect ratio conversions (see the combinations below). This means you can configure the card once for each type of conversion and then the card will restore the configuration automatically when the proper input format and input/output aspect ratio is encountered.
- Page 45 GUIDE TO INSTALLATION AND OPERATION moved to the top, to the center or to the bottom of the frame. This control is not available in Auto AFD mode or Forced AFD mode. The picture will be centered by default when an ARC Preset is selected. Output: Anamorphism This control box allows the output image to be resized asymmetrically.
- Page 46 GUIDE TO INSTALLATION AND OPERATION Output Format 16:9 (when selected on the SD Video Output panel) Input Format (selected by AFD Mode pulldown) 16:9 Presets Output after ARC processing Figure 5.24b Available Presets for various AFD Mode selections (16:9 output) The advantage of using Presets is to provide a unique conversion without having to specify the H&V scaling factor or the percentage of cropping/side panels and anamorphism.
-
Page 47: Timing Tab
GUIDE TO INSTALLATION AND OPERATION Masks should be adjusted by viewing the output on a video monitor and positioning the masks to cover edge effects with a minimum loss of clean picture content. Usually masks are the final adjustment to be made. The masking is shown on the top right Output screen by graying out the masked portion. -
Page 48: Advanced Tab
GUIDE TO INSTALLATION AND OPERATION 5.5.3 Advanced tab The Advanced tab provides controls over the type and level of detail enhancement that will be performed, and the color of the mask. 5.5.3.1 Image Processing section Separate controls are provided for Horizontal and Vertical detail enhancement: Horz. -
Page 49: Meta Tab
GUIDE TO INSTALLATION AND OPERATION 5.5.4 Meta tab The Meta tab provides resources to deal with Metadata incorporated into the incoming signal. It has three associated sub-tabs, described below. 5.5.4.1 Warning messages Warning messages may appear at the bottom of the Meta and AFD panels when conflicts arise because of the settings. - Page 50 GUIDE TO INSTALLATION AND OPERATION 5.5.4.2 Meta / Meta sub-tab Closed Caption section Presence: this icon turns green in the presence of incoming EIA-708-B or EIA-608-B closed captioning data when an 3G/HD source is installed or when line 21 closed captions are detected when an SD source is installed.
- Page 51 GUIDE TO INSTALLATION AND OPERATION Blanking section Insertion of the Vertical Blanking Interval may be set to OFF or AUTO, using the pull-down box. Insertion is disabled if no VBI data is present. • For SD outputs, VBI insertion may only be enabled when the detected input is SD. •...
-
Page 52: Afd Tab
GUIDE TO INSTALLATION AND OPERATION Duplicate: forces a second copy of the time code to be inserted on the 2 line following the selected line. For example, selecting line 14 for time code insertion, and turning timecode duplication ON, will result in time code being inserted into both lines 14 and 16. -
Page 53: De-Interlacer Tab
GUIDE TO INSTALLATION AND OPERATION Source: Selects the source of AFD information – options are AFD (SMPTE 2016), VLI or WSS (for 625 sources only). Insertion Line: The Insertion line is used to select on which line in the VANC the AFD packet (SMPTE 2016) will be inserted. -
Page 54: Audio Processing Panel
GUIDE TO INSTALLATION AND OPERATION 5.6 Audio Processing panel The Audio Processing panel provides full audio processing and delay parameters for up to 32 channels. The first 16 channels come from the embedded input channels and/or the discrete AES inputs. The second set of 16 channels comes from the output channels of the following modules: •... - Page 55 GUIDE TO INSTALLATION AND OPERATION 96 to 12 dB in 0.5 dB steps. For non-PCM audio, the level value is overridden to 0 dB. Mute (speaker button): Mutes the selected audio channel Phase Invert: When checked, inverts the selected audio channel phase. Lock: “Locks”...
-
Page 56: Downmix Tab
GUIDE TO INSTALLATION AND OPERATION 5.6.2 Downmix tab This tab provides resources to control the downmix of a “5.1 channel” surround-sound audio signal into an LtRt or LoRo stereo pair. The 5.1 terminology refers to six discrete audio channels, with the low frequency effect (LFE) channel of limited bandwidth designated as the “.1”... - Page 57 GUIDE TO INSTALLATION AND OPERATION Manual Downmix Config / Default Metadata Config The heading of this area of the panel changes depending on the selection in the Operating Mode pulldown above, but the available controls are the same in both cases. •...
-
Page 58: Aes Inputs Tab
GUIDE TO INSTALLATION AND OPERATION Follow Metadata Config: This section reports on Metadata presence in the selected path if the Follow Metadata Path 1 or 2 Operating Mode is selected. The four data boxes below the Metadata status icon indicate the current mode, plus the values in use for Dialnorm, Center Mix Level and Surround Mix Level. -
Page 59: Dynamic Proc. Panel
GUIDE TO INSTALLATION AND OPERATION Auto Align button to automatically adjust the audio timing delay to ensure a perfect alignment with the video. This is equivalent to changing manually the audio delay in the audio processor. If you change the output timing of the card or the video output format, you may have to re-align the Dolby-E. - Page 60 GUIDE TO INSTALLATION AND OPERATION Dynamic Gain Sets the audio dynamic gain from 0 to 24 dB (in 1 dB steps) applied to Dynamic Gain the selected channel. The dynamic gain is applied at the end of the dynamics processing chain. 0 dB 24 dB Limiter Threshold...
- Page 61 GUIDE TO INSTALLATION AND OPERATION Use the Threshold slider to set the compression threshold (i.e. break point in the transfer curve). The compression threshold specifies the level above which the compressor will process the signal. • Range -60 dB to 0 dB Expander Audio expansion means to expand the dynamic range of a signal.
-
Page 62: Audio Outputs Panel
GUIDE TO INSTALLATION AND OPERATION 5.8 Audio Outputs panel This panel provides additional audio processing for the 16 audio channels embedded in the 3G/HD and SD output, and for the four AES outputs: • audio channel shuffling • level adjustment •... -
Page 63: Ch 1-2, Ch 3-4
GUIDE TO INSTALLATION AND OPERATION 5.8.1 CH 1-2, CH 3-4, … CH 15-16 tabs, and AES1, … AES4 tabs Each of these tabs provides all necessary controls for the output mixers. The example shown is for 3G/HD Output, CH 1-2, but all panels have the same controls. Operation Mode (Off, A, SUM(A+B), Mix): This menu allows the source(s) of each output channel to be selected –... -
Page 64: Config Tab
GUIDE TO INSTALLATION AND OPERATION 5.8.2 Config tab A Config tab is available in the 3G/HD tab and the SD tab, but not in the AES tab, In each case, the tab contains only an Output – Audio Insert pulldown. Use the pulldown in this tab to enable (AUTO) or disable (OFF) audio embedding in the output. -
Page 65: Dolby E And Dolby Digital (Ac-3) Decoder
GUIDE TO INSTALLATION AND OPERATION The output channels of the above modules are always fixed and depend only on the module socket number in which it is inserted. The outputs for module 1 will always be in the range 17 to 24. The output for module 2 will always be in the range 25 to 32. - Page 66 GUIDE TO INSTALLATION AND OPERATION The Input Selection determines the Dolby decoder input channel pair. See Audio Processing/AES Inputs for the input selection from the audio card. The Decoder Status section indicates the bitstream format detected at the decoder input. The possible values are: Dolby-E (16, 20 or 24 bits), Dolby Digital (16 or 32 bits, Channel 1, 2 or both), PCM.
- Page 67 GUIDE TO INSTALLATION AND OPERATION associated with each Dolby-E program: Coding Mode, Bitstream Mode, Dialnorm (dialog normalization) value, RF Overmodulation Protection, Line Mode Profile, RF Mode Profile, Dolby Surround Mode, Dolby Surround EX Mode and Preferred Stereo Downmix Mode. The number of programs depends on the Program Configuration. 5.9.1.3 Dolby Digital tab The Decoder to Proc Channel Assignment section indicates the output channel assignment.
-
Page 68: Linear Acoustic Upmax
GUIDE TO INSTALLATION AND OPERATION 5.9.2 Linear Acoustic upMAX • Identified as MOD-LA-DUP-701 on the module tab. This optional module integrates the upMAX upmixer function licensed by Linear Acoustic. This processing creates a 5.1 channel surround field (Left, Right, Center, LFE, Left-Surround, Right-Surround) from a 2.0 channel stereo input (Left, Right) The Operating Mode pull-down box offers four different... -
Page 69: Dolby Digital (Ac-3) Encoder
GUIDE TO INSTALLATION AND OPERATION If the Coding Mode parameter is other than 3/2 (i.e. 5.1 channels) or 2/0 (i.e. stereo channels) or if the selected metadata path does not carry metadata, the Operating mode will follow the Reversion Mode pull-down. Coding Mode (Metadata): Operating Mode: PASS... - Page 70 GUIDE TO INSTALLATION AND OPERATION Test signals at -18, -20 dBFS and silence are available for each mode. • Encode test modes will generate a test bit-stream containing a 1 kHz sine wave for full bandwidth channels and 100 Hz for the LFE channel of a 5.1 program. •...
-
Page 71: Dolby-E Encoder
GUIDE TO INSTALLATION AND OPERATION 5.9.4 Dolby-E encoder • Identified as MOD-DOLBY-ENC-E on the Module tab 5.9.4.1 Shuffler Inputs An input shuffler allows any combination of the available channels to be used as inputs. Default is CH1 to CH8. • Pulldowns: Available input channels 1 to 32 The graphic shows the output channels in use. -
Page 72: Mod-La-Alc-X-Yyy (Alc) Module
The MOD-LA-ALC Automatic Loudness Control (ALC) module is the Miranda/Linear Acoustic solution to this need. It uses Linear Acoustic’s AeroMAX multiband loudness control algorithm. • Identified as MOD-LA-ALC-X-YYY on the module tab where X can be 2, 6 or 8 input channels and –YYY is the optional –DUP UpMAX... - Page 73 GUIDE TO INSTALLATION AND OPERATION are assigned to silence channels. The second program (PGM 2) can only be configured as a 2.0 stereo program, but you can use it as a single mono program. The figure below shows some of the most popular operating modes for the 5.1 ALC.
- Page 74 GUIDE TO INSTALLATION AND OPERATION AutoMAX-II Mode In this mode, the module will automatically detect the presence of 5.1 or 2.0 channels at the input. When 2.0 is detected, the incoming stereo will be upmixed. When 5.1 is detected, the incoming 5.1 channels will automatically be passed through untouched.
- Page 75 GUIDE TO INSTALLATION AND OPERATION • ITU LOUDness LMT - Utilizes a specially tuned Input AGC plus Multiband Limiters and the Final Limiter to slowly adjust the average program loudness to a given value and the multiband and final limiters will act until the AGC catches up.
- Page 76 GUIDE TO INSTALLATION AND OPERATION For reference, the crossover frequencies are: • • Band 1 (Low Bass): 20 Hz - 60 Hz Band 4 (High Mid): 950 Hz - 6.1 kHz • • Band 2 (Mid Bass): 30 Hz - 200 Hz Band 5 (Brilliance): 5.2 kHz - 24 kHz •...
- Page 77 GUIDE TO INSTALLATION AND OPERATION Parametric Equalization (PEQ) Three bands of parametric equalization are provided for fine tuning if necessary. None of the factory-supplied presets use the parametric equalizers, but they are provided to create notch filters or other effects if necessary. Each filter has a gain control with a +/-12dB range, a center frequency control that varies from 20 Hz to 22.050 kHz, and a bandwidth or “Q”...
- Page 78 GUIDE TO INSTALLATION AND OPERATION Threshold /Inf > Thr • B1 - B5 AGC Thresh(old): -12.00dB - +12.00dB (default: 0.00dB all). The reference point for the attack and release parameters to act on the audio signal present in that band. •...
- Page 79 GUIDE TO INSTALLATION AND OPERATION Multiband Limiters Performs multiband limiting of the signals coming from the multiband compressor. • B1 - B5 Lim(it) Thresh(old): +12.00dB - 0.00dB (default: B1:+4.25dB, B2:+4.25dB, B3:+6.50dB, B4:+9.00dB, B5:+9.00dB). The point above which limiting action takes place at an Infinity:1 ratio. •...
- Page 80 GUIDE TO INSTALLATION AND OPERATION Final Stage This final section of the processor is where the final look- ahead peak limiter and bass soft clipper are adjusted. The look-ahead limiters are wideband, limited to 6dB of gain reduction, are extremely fast, and due to their look-ahead nature are virtually transparent even at full gain reduction.
-
Page 81: Mod-Ja-Alc-X-Yyy (Alc) Module
GUIDE TO INSTALLATION AND OPERATION 5.10 MOD-JA-ALC-X-YYY (ALC) module Minimizing loudness differences between segments in a playout channel is an important issue in a world where multiple programs originating in different formats from different sources must be integrated seamlessly. The MOD-JA- ALC Automatic Loudness Control (ALC) module is the Jünger Audio solution to this need. - Page 82 GUIDE TO INSTALLATION AND OPERATION Changing the Program Configuration may affect the selected preset for the other programs. This is especially true if the number of programs increases or decreases. The following pop-up may appear: Note that it may take up to 10 seconds for the new configuration to be established and for the panel to update. 5.10.2.1 MOD-JA-ALC-2 (and –DUP) The table below shows the possible configurations for a 2-channel ALC module.
- Page 83 GUIDE TO INSTALLATION AND OPERATION MOD-JA-ALC-8 The table below shows the possible configurations for an 8-channel ALC module. The first column indicates the configurations without upmix (or when upmix is disabled). The other 2 columns indicate the possible configurations when the upmix is enabled and in the specified mode. Valid Config with Upmix (Pass, Auto, Valid Config with Upmix (forced Valid Config for JA-ALC-8...
-
Page 84: Pgm 1 Link Mode
GUIDE TO INSTALLATION AND OPERATION 5.10.2.3 ALC Filter The ALC filter parameter sets the type of filtering applied on the audio content by the ALC to measure the audio loudness • The ITU-R BS.1770 mode (factory) is the most common way to measure loudness, given in LKFS units. •... -
Page 85: Loudness Monitoring
GUIDE TO INSTALLATION AND OPERATION L and R are linked, Ls and Rs are Movie Not supported linked separately, C and LFE are processed separately Quad L/R/Ls/Rs are linked, C and LFE are Not supported processed separately All (LFE Linked) 5.1 (6 surround channels + LFE 1x5.1 (6 surround channels + LFE link) link) L/R/C/Ls/Rs and LFE are linked... - Page 86 GUIDE TO INSTALLATION AND OPERATION View the Audio Modules / PGM X / Advanced tab to access the available controls. 5.10.5.1 Input Gain An input gain stage is available in front of the ALC to compensate for programs having an input loudness out of the ALC tracking range (very low or very high input loudness).
- Page 87 GUIDE TO INSTALLATION AND OPERATION target but less than (Target Loudness + Zero Zone Above) will be left untouched by the leveler. Only signals with a loudness above the Zero Zone Above will be attenuated. Zero Zone Below The Zero Zone Below parameter makes it possible to keep some long-term dynamics below the target, normally reduced or eliminated by the leveler, in the processed signals.
-
Page 88: Upmix Configurations
GUIDE TO INSTALLATION AND OPERATION 5.10.5.5 Presets Factory TV Factory Factory Factory Preset name Units Sport Show Movie Input Gain Operating Level dBFS Loudness Target LKFS Zero Zone Above Zero Zone Below Leveler Max Gain Freeze level dBFS Silent level dBFS Time sec/min... - Page 89 GUIDE TO INSTALLATION AND OPERATION 5.10.6.2 Operating Mode The following operating modes are supported: Upmix (factory) The first 2 input channels (L & R) are upmixed to generate a 5.1 output regardless if the input is 2.0 or 5.1. All other input channels are ignored.
-
Page 90: Notes
GUIDE TO INSTALLATION AND OPERATION The upmix operating modes will differ depending on the ALC model and the program configuration. See the table below for the list of upmix operating modes versus the ALC PGM1 program config. PGM 1 Config. Upmix Operating Mode Pass, Upmix (refer to the figures below). -
Page 91: Dolby Metadata Panel
GUIDE TO INSTALLATION AND OPERATION 5.11 Dolby Metadata panel This panel provides resources for managing the flow of Dolby metadata through the XVP-3901. The Dolby metadata panel is part of the audio processing option (XVP-3901-OPT- AUD). • Note that unlike the audio processing configuration, only one (1) Dolby metadata configuration is saved by the card, regardless of the input format (3G/HD or SD). - Page 92 GUIDE TO INSTALLATION AND OPERATION Note: When decoding PCM audio, the Dolby decoder does not generate any metadata. If a decoder is selected as a source for a specified metadata path, the generator on the same path will be automatically turned ON when the decoder is decoding PCM audio.
- Page 93 GUIDE TO INSTALLATION AND OPERATION 5.11.1.1 [Path #1] → [Delay] Through Coarse and Fine adjustments, a fixed delay can be applied to the Metadata bitstream. It is useful when processing, like watermarking, is applied to the audio signal outside the XVP-3901. The delayed Metadata bitstream will stay properly timed with its associated audio signal.
- Page 94 GUIDE TO INSTALLATION AND OPERATION [Path #1] → [Probe 1] → [Dynamic Range] This panel reports the status of Dynamic Range processing: • Line Mode Profile • RF Mode Profile • RF Overmod. Protection → → Figure 5.72 [Path #1] [Probe 1] [Dynamic Range] [Path #1] →...
- Page 95 GUIDE TO INSTALLATION AND OPERATION [Path #1] → [Probe 1] → [Extended BSI] • Preferred Stereo Downmix • Lt/Rt Center Mix Level • Lt/Rt Surround Mix Level • LoRo Center Mix Level • LoRo Surround Mix Level • Surround EX mode •...
- Page 96 GUIDE TO INSTALLATION AND OPERATION [Path #1] → [Generator 1] → [Dynamic Range] This panel allow configuration of the Dynamic Range processing parameters: • Line Mode Profile [None, Film Standard, Film light, Music standard, Music light, Speech] • RF Mode Profile [None, Film Standard, Film light, Music standard, Music light, Speech] •...
- Page 97 GUIDE TO INSTALLATION AND OPERATION [Path #1] → [Generator 1] → [Extended BSI] • Preferred Stereo Downmix • Lt/Rt Center Mix Level • Lt/Rt Surround Mix Level • LoRo Center Mix Level • LoRo surround Mix Level • Surround EX mode •...
- Page 98 GUIDE TO INSTALLATION AND OPERATION The Metadata Profiles… button gives access to a panel that allows the user to copy the card settings from this XVP- 3901 to other XVP-3901 cards accessible via iControl. These profiles are also compatible with the DAP-1781 metadata profiles.
-
Page 99: Input/Output Tab
GUIDE TO INSTALLATION AND OPERATION 5.11.2 Input/Output tab This tab provides resources to configure the input and output selections and processing of metadata for the XVP-3901 card. VANC Metadata Extractor The card can extract 2 Dolby metadata streams from the VANC interval according to the specified SDID (range = 01 to 09). -
Page 100: Loudness Tab
GUIDE TO INSTALLATION AND OPERATION A-BUS (To Audio Cards) A-BUS In: Use this pulldown to select the source of metadata that will be sent to the external audio cards (if present) on the input A-BUS. • OFF: No metadata is sent on the input A-BUS •... - Page 101 GUIDE TO INSTALLATION AND OPERATION 5.11.3.1 [Loudness] → [Dialnorm] The Probing data box displays the Dialnorm value extracted from the Metadata bitstream, below is the measured Dialnorm value, extracted from the internal processing. The Dialnorm value active path appears in green; this path can be modified with a click on the relevant >> button. A click on the Accept button will transfer the selected value to the Generator.
-
Page 102: Alc Panel
The Automatic Loudness Control (ALC) option is the solution to this need. It uses Miranda’s proprietary wideband ALC algorithm. • Identified as XVP-3901-OPT-ALC-X, where X can be 2, 6, 8 or 16 input channels. The table shows the ALC models available : Output Channel Config. -
Page 103: Pgm1-4 Tabs
GUIDE TO INSTALLATION AND OPERATION ALC filter This pull-down selects which type of filtering is applied to the audio content for all programs : None, or RLB filtering as per recommendation ITU-R BS.1770. Enable Loudness Monitoring turns ON the ALC input and output loudness monitoring for all programs. - Page 104 GUIDE TO INSTALLATION AND OPERATION ALC Bypass Checking this box bypasses the ALC program processing, and the input channels pass-through the output unaltered. Target Loudness Sets the target output loudness. This value sets the average output loudness, which means that due to the program dynamics, the output loudness will move around the selected target.
- Page 105 GUIDE TO INSTALLATION AND OPERATION Response Time Outside of the Fast and Transient modes ranges, the ALC performs loudness correction slowly, following the Response Time. Response time values are : 5 sec, 10 sec, 15 sec, 20 sec, 30 sec, 45 sec, 1 min, 5 min, 10 min, 15 min, 20 min.
-
Page 106: Reference Panel
GUIDE TO INSTALLATION AND OPERATION Reference panel This group of parameters allows the selection of the reference to be used by the XVP-3901. Use the radio buttons in the Reference Source area to select from the following options: • Auto – this mode selects the first source detected in this order of priority: o External Reference input o URS... -
Page 107: Monitoring Panel
GUIDE TO INSTALLATION AND OPERATION 5.14 Monitoring panel 5.14.1 Thumbnails tab The thumbnail area displays thumbnail images for the inputs and outputs selected in the Player area. Player – Click the checkbox to display the thumbnail Control – Click the checkboxes to apply the Mode, Format, Quality and Refresh Rate settings to the these thumbnails. - Page 108 GUIDE TO INSTALLATION AND OPERATION 5.14.2.1 RALM Connections tab Use the radio buttons to turn the meter display ON (RALM) or OFF for the indicated channels. The meter appears directly above the controls. Reset Counter: click this button to reset the overload counter on the ALM display to zero. See the next section for instructions on setting up the overload counter.
-
Page 109: Test Panel
GUIDE TO INSTALLATION AND OPERATION 5.15 Test panel This panel contains a single checkbox that sends a 75% color bar test pattern (100% white), along with audio test tones (a continuous tone on right channel with pulsed tone on left channel in every pair) to the XVP-3901 output. 5.16 Factory/Presets panel Figure 5.928 Test panel 5.16.1 Factory section... - Page 110 GUIDE TO INSTALLATION AND OPERATION Click Save to store the current parameter settings and values from the XVP-3901 into the selected User Preset. The existing contents of the preset will be overwritten. Note: if you see a pop-up warning box like this when you click Save, you will need to decide how to deal with the Metadata Generator presets.
-
Page 111: Lock Input Selection Section
GUIDE TO INSTALLATION AND OPERATION 5.16.3 Lock Input Selection section When User Presets are saved, the input selection is saved as well. This means that changing User Preset may change input selection, depending on which one is associated with the User Preset. This is the normal behavior when ”Update Input Select with User Preset”... -
Page 112: Edit Presets Label
GUIDE TO INSTALLATION AND OPERATION 5.16.5 Edit Presets Label… Click this button to open a window where you can define the name assigned to each user preset. This is the name that will appear on the pulldown in the User Presets section. The labels will also be copied from card to card when a copy profile is performed. - Page 113 GUIDE TO INSTALLATION AND OPERATION • Click the save button once the name and location have been identified in the Save box • If the file is saved correctly, the Transfer Status box on the right of the Copy profile from line will indicate Succeeded against a green background •...
-
Page 114: Options Panel
XVP-3901 Full Upgrade option (XVP-3901-OPT-UG-xx2XVP) To activate each of these options, you must • Obtain a licence key from Miranda Technologies Inc. • Type the licence key in the box • Click on ENABLE OPTION to enable the option’s features. -
Page 115: Key/Fill Option
GUIDE TO INSTALLATION AND OPERATION 5.17.2 Key/Fill option: This option is used to enable the background key/fill functionality for the side panels and letterbox. Figure 5.100 Key/Fill option 5.17.3 Dynamic Processing option: This option enables the audio dynamics processing functionality of the XVP-3901. •... -
Page 116: Loudness Measurement Option
GUIDE TO INSTALLATION AND OPERATION 5.17.4 Loudness Measurement option: This option enables the Loudness Measurement functionality of the XVP-3901. • Note: The Audio option must be enabled before enabling the Loudness Measurement option Figure 5.102 Loudness Measurement option 5.17.5 ALC option This option enables the Automatic Loudness Control feature of the XVP-3901. -
Page 117: Xvp Full Upgrade Option (Xvp-3901-Ug-Xx2Xvp)
GUIDE TO INSTALLATION AND OPERATION 5.17.6 XVP Full Upgrade option (XVP-3901-UG-xx2XVP): This option can be used to upgrade an XVP-3901-UC, -FS, -DC, or -XC model to a full XVP-3901. • The option name varies depending on which model you have – xx in the upgrade option name is the current model designation. - Page 118 GUIDE TO INSTALLATION AND OPERATION Figure 5.1040 Alarm Configuration panel Card LED This column allows configuration of the contribution of selected individual alarms to the status LED located on the front card edge. The Card LED status is shown at the bottom of the alarm tree in the Status/Name column. 112 | XVP-3901...
- Page 119 GUIDE TO INSTALLATION AND OPERATION Overall Alarm This column allows configuration of the contribution of each individual alarm to the Overall Alarm associated with this card. The Overall Alarm is shown in the upper left corner of the iControl panel, and also appears at the bottom of the Status/Name column.
- Page 120 GUIDE TO INSTALLATION AND OPERATION Copy to other cards Click this button to open a panel that allows the alarm configuration set for this card to be copied into another XVP- 3901 card. • Select one or more destination cards from the list in the window by clicking in the checkboxes, or all of them by clicking in the All checkbox •...
-
Page 121: Info Panel
• Details…: Reports the Firmware version, service version, and panel version for this card Figure 5.109 Details window • Advanced…: Shows the Miranda LongID for this card. The Miranda LongID is the address of this XVP-3901 in the iControl network. Figure 5.110 Advanced window XVP-3901 | 115... - Page 122 GUIDE TO INSTALLATION AND OPERATION • Remote System Administration – opens the Joining Locators window, which lists remote lookup services to which this XVP-3901 is registered. Add: Force the iControl service for this XVP-3901 to register itself on a user-specified Jini lookup service, using the following syntax in the data box: jini://<ip_address>...
-
Page 123: Automation Using Rs-422
GUIDE TO INSTALLATION AND OPERATION 6 Automation Using RS-422 Some card behaviors can be controlled using the RS-422 port. This is especially useful for automation systems. For detailed information about the protocol including the handshaking, please refer to the Oxtel Series Automation Protocol manual. - Page 124 GUIDE TO INSTALLATION AND OPERATION Example: To convert a 4:3 input to 16:9 with 25% side panels at the output, the " R010-1-SIDE25" command string should be encapsulated and sent by the automation to the card. In this case, the final string would be: <STX0>R010-1-SIDE25:<CRC low><CRC high>...
-
Page 125: Specifications
GUIDE TO INSTALLATION AND OPERATION 7 Specifications VIDEO INPUT SIGNAL SMPTE 259M-C (270Mbps) and SMPTE 292M (1.485, 1.485/1.001 Gbps) SMPTE 424M (2.970, 2.970/1.001 Gbps) SUPPORTED FORMATS SD: 480i59.94, 576i50 HD: SMPTE 274M: 1080i59.94, 1080i50, 1080p23, 1080p23sF, 1080p25, 1080p29 HD: SMPTE 296M: 720p59.94, 720p50 HD: SMPTE 425 Level A (mapping 1), Level B: 1080p59.94, 1080p50 EMBEDDED AUDIO SMPTE 299M (HD), SMPTE 272 (SD) - Page 126 GUIDE TO INSTALLATION AND OPERATION VIDEO PROCESSING PERFORMANCE SIGNAL PATH 10 bits minimum PROCESSING DELAY 1 frame in all processing mode. Up to 15 additional frames of delay can be added. REFERENCE INPUT SIGNAL (1) SMPTE 170M/SMPTE 318M/ITU 624-4 black burst SMPTE 274M / SMPTE 296M Tri-Level Sync RETURN LOSS >35 dB up to 5.75 MHz...
- Page 127 GUIDE TO INSTALLATION AND OPERATION A-BUS CONNECTOR As per A-BUS Standard, Miranda Technologies Inc. AUDIO PROCESSING PERFORMANCE QUANTIZATION 24 bits SAMPLING 48 KHz, synchronous NUMBER OF CHANNELS 32 channels, 4 embedded groups, 4 AES inputs/outputs FREQUENCY RESPONSE ±0.02 dB (20 Hz to 20 KHz)
-
Page 128: Annex 1 - Xvp-3901 Local User Interface
GUIDE TO INSTALLATION AND OPERATION 122 | XVP-3901... - Page 129 GUIDE TO INSTALLATION AND OPERATION XVP-3901 | 123...
- Page 130 GUIDE TO INSTALLATION AND OPERATION 124 | XVP-3901...
- Page 131 GUIDE TO INSTALLATION AND OPERATION XVP-3901 | 125...
- Page 132 GUIDE TO INSTALLATION AND OPERATION 126 | XVP-3901...
-
Page 133: Annex 2 - Afd Functions
GUIDE TO INSTALLATION AND OPERATION ANNEX 2 – AFD FUNCTIONS The charts below show the conversions that will be performed by the XVP-3901 when the Active Format Descriptor (AFD) processing is activated by selecting AUTO in the AFD Mode pulldown on the input screen of the HD Video Output or SD Video Output panels. - Page 134 GUIDE TO INSTALLATION AND OPERATION Input signal Output signal 16:9 4:3 Full frame image in a 4:3 frame 4:3 Full frame image in a 4:3 frame 4:3 Pillar-box image in 16:9 frame (16:9_9) (4:3_8) (4:3_8) 4:3 Full frame image in a 4:3 frame 4:3 Full frame image in a 4:3 frame 4:3 Pillar-box image in 16:9 frame (use preferred 4:3_8 code instead)
- Page 135 GUIDE TO INSTALLATION AND OPERATION Input signal Output signal 16:9 16:9 Full frame image in a 16:9 frame 16:9 Letterbox image in 4:3 frame 16:9 Full frame image in a 16:9 frame (use preferred 16:9_8 flag instead) (4:3_10) (16:9_2) (16:9_2) 14:9 Pillar-box image in a 16:9 frame 14:9 Letterbox image in a 4:3 frame 14:9 Pillar-box image in a 16:9 frame...
- Page 136 GUIDE TO INSTALLATION AND OPERATION Input signal Output signal 16:9 4:3 Pillar-box image Shoot and protect 4:3 Image shoot and protect 14:9 in a 14:9 Pillar-box image in a 16:9 frame 14:9 in a 16:9 frame 4:3 frame (4:3_13) (16:9_13) (16:9_11) 16:9 Image shoot and protect 14:9 in a 14:9 Letterbox image in a 4:3 frame...
-
Page 137: Annex 3 - Installing The Optical Interface
GUIDE TO INSTALLATION AND OPERATION ANNEX 3 – Installing the Optical Interface Installing and removing the Fiber I/O interface cartridge requires special care. This annex describes the process. Some rear panels used with the XVP-3901 incorporate a fiber optic interface. The interface consists of two parts: •... - Page 138 GUIDE TO INSTALLATION AND OPERATION 3. Slide the module straight into the socket, and push gently until it clicks into position. Connecting the fiber optic cables 1. Remove the dust plug from the SFP module if present 2. Verify that the exposed end of the optical fiber in the LC connector is clean •...
-
Page 139: Annex 4 - Installing The Audio Modules
GUIDE TO INSTALLATION AND OPERATION ANNEX 4 – Installing the Audio Modules To install an audio module: 1. Remove the card from the frame 2. The two available sockets are located near the top and bottom of the card, and are labeled MODULE #1 and MODULE #2 3. - Page 140 GUIDE TO INSTALLATION AND OPERATION 4. Hold the audio module tilted at about a 30 degree angle and insert its connector into one of the available sockets, as shown in the photo below. 5. Push down on the module until it is parallel to the surface of the card. It will click into place 6.
- Page 141 GUIDE TO INSTALLATION AND OPERATION To remove an audio module: 1. Remove the card from the frame 2. Remove the two screws that secure the module to the card 3. Push outward on the two metal clips that hold the module in the horizontal position, one located at each corner of the socket.
-
Page 142: Annex 5 - Dolby Digital Main Channel Output Functions
GUIDE TO INSTALLATION AND OPERATION ANNEX 5 – Dolby Digital Main Channel Output Functions Coding Pro Logic Listening Main Channel Output Function Mode Mode Mode Disable All 3/2 channels + EX decode of back surround Full All 3/2 channels 3 Stereo 3 Stereo downmix of 3/2 channels Phantom Phantom downmix of 3/2 channels... - Page 143 GUIDE TO INSTALLATION AND OPERATION Coding Pro Logic Listening Main Channel Output Function Mode Mode Mode Disable Default to 3 Stereo mode Full Default to 3 Stereo mode 3 Stereo All 3/0 channels Phantom C mixed into L and R with cmix coefficient Stereo Lo/Ro downmix Mono...
Need help?
Do you have a question about the XVP-3901 DENSITE series and is the answer not in the manual?
Questions and answers