
Subscribe to Our Youtube Channel
Related Manuals for SonicWALL SMA 200


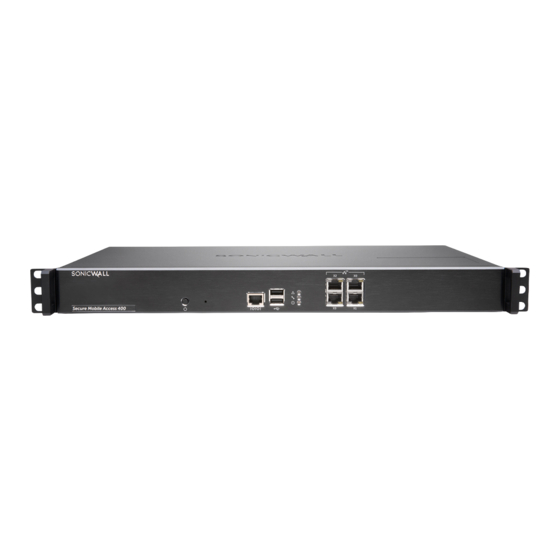
Summary of Contents for SonicWALL SMA 200
- Page 1 SonicWall™ Secure Mobile Access 200/400 Getting Started Guide SMA 200 Regulatory Model Number: 1RK33‐0BB SMA 400 Regulatory Model Number: 1RK33‐0BC...
- Page 2 Copyright © 2017 SonicWall Inc. All rights reserved. SonicWall is a trademark or registered trademark of SonicWall Inc. and/or its affiliates in the U.S.A. and/or other countries. All other trademarks and registered trademarks are property of their respective owners The information in this document is provided in connection with SonicWall Inc. and/or its affiliates’ products. No license, express or implied, by estoppel or otherwise, to any intellectual property right is granted by this document or in connection with the sale of SonicWall products. EXCEPT AS SET FORTH IN THE TERMS AND CONDITIONS AS SPECIFIED IN THE LICENSE AGREEMENT FOR THIS PRODUCT, SONICWALL AND/OR ITS AFFILIATES ASSUME NO LIABILITY WHATSOEVER AND DISCLAIMS ANY EXPRESS, IMPLIED OR STATUTORY WARRANTY RELATING TO ITS PRODUCTS INCLUDING, BUT NOT LIMITED TO, THE IMPLIED WARRANTY OF MERCHANTABILITY, FITNESS FOR A PARTICULAR PURPOSE, OR NON‐ INFRINGEMENT. IN NO EVENT SHALL SONICWALL AND/OR ITS AFFILIATES BE LIABLE FOR ANY DIRECT, INDIRECT, CONSEQUENTIAL, PUNITIVE, SPECIAL OR INCIDENTAL DAMAGES (INCLUDING, WITHOUT LIMITATION, DAMAGES FOR LOSS OF PROFITS, BUSINESS INTERRUPTION OR LOSS OF INFORMATION) ARISING OUT OF THE USE OR INABILITY TO USE THIS DOCUMENT, EVEN IF SONICWALL AND/OR ITS AFFILIATES HAVE BEEN ADVISED OF THE POSSIBILITY OF SUCH DAMAGES. SonicWall and/or its affiliates make no representations or warranties with respect to the accuracy or completeness of the contents of this document and reserves the right to make changes to specifications and product descriptions at any time without notice. SonicWall Inc. and/or its affiliates do not make any commitment to update the information contained in this document. For more information, visit https://www.sonicwall.com/legal/.
- Page 3 Legend WARNING: A WARNING icon indicates a potential for property damage, personal injury, or death. CAUTION: A CAUTION icon indicates potential damage to hardware or loss of data if instructions are not followed. IMPORTANT, NOTE, TIP, MOBILE, or VIDEO: An information icon indicates supporting information. SMA 200/400 Getting Started Guide Updated ‐ March 2017 232‐003789‐50 RevA...
-
Page 4: In This Guide
In this Guide This Getting Started Guide provides instructions for basic installation and configuration of the SonicWall™ Secure Mobile Access 200/400 appliances. Chapters and sections Chapter 1 Sections include: In this Guide on page 3 Chapters and sections on page 3 SonicWall Secure Mobile Access 200/400 Getting Started Guide... - Page 5 Chapter 2 Sections include: Appliance Overview on page 7 SMA 200 Front and Rear Panels on page 8 SMA 200 Package Contents on page 10 SMA 400 Front and Rear Panels on page 11 SMA 400 Package Contents on page 13 Power Input Rating on page 14 Chapter 3 Sections include: Setting Up the Appliance on page 15 What You Need to Begin on page 16 Powering On the SMA Appliance on page 17 Accessing the Management Interface on page 17 Troubleshooting on page 18 Changing Your Administrator Password on page 18 Adding a Local User on page 19 Setting the Time Zone on page 20 Configuring DNS and WINS on page 21 SonicWall Secure Mobile Access 200/400 Getting Started Guide...
- Page 6 Chapter 4 Sections include: Registering Your Appliance on page 23 Creating a MySonicWall Account on page 24 Registering Your SMA Appliance on page 24 Services and Licensing on page 25 Upgrading Information on page 28 Chapter 5 Sections include: Deploying Your Appliance on page 31 Selecting a Deployment Scenario on page 32 Configuring the X0 IP Address on page 34 Configuring a Default Route on page 35 Adding a NetExtender Client Route on page 35 Setting Your NetExtender Address Range on page 36 Adding a New SMA Custom Zone on page 38 Scenario A: Connecting the SMA on a New DMZ on page 40 Scenario B: Connecting the SMA on an Existing DMZ on page 45 Scenario C: Connecting the SMA on the LAN on page 49 Testing and Troubleshooting Your Remote Connection on page 52 SonicWall Secure Mobile Access 200/400 Getting Started Guide...
- Page 7 Chapter 6 Sections include: Safety and Regulatory Information on page 55 Safety and Regulatory Information on page 56 Warranty Information on page 62 SonicWall Secure Mobile Access 200/400 Getting Started Guide...
-
Page 8: Appliance Overview
Appliance Overview This section provides information about the SonicWall Secure Mobile Access 200/400 appliances. • SMA 200 Front and Rear Panels on page 8 • SMA 200 Package Contents on page 10 • SMA 400 Front and Rear Panels on page 11 • SMA 400 Package Contents on page 13 • Power Input Rating on page 14 SonicWall Secure Mobile Access 200/400 Getting Started Guide... -
Page 9: Front Panel
- Solid Yellow: Appliance is starting Reset Button - Blinking Yellow: SafeMode - Off: Appliance is powered up and operational Press and hold for several seconds to - Alarm LED: Indicates a critical warning or error set the appliance into SafeMode SonicWall Secure Mobile Access 200/400 Getting Started Guide... -
Page 10: Rear Panel
Rear Panel Power Supply Plug Use the supplied power cord to provide Exhaust Fans power to the appliance Provides optimal cooling for the Sonicwall SMA appliance SonicWall Secure Mobile Access 200/400 Getting Started Guide... - Page 11 232 001007 50 Rev A Copyright © 2017 SonicWall Inc. All rights reserved. SonicWall is a trademark or registered trademark of SonicWall Inc. and/or its affiliates in the U.S.A. and/or other countries. All other trademarks are property of their respective owners.
- Page 12 - Solid Yellow: Appliance is starting Reset Button - Blinking Yellow: SafeMode - Off: Appliance is powered up and operational Press and hold for several seconds to - Alarm LED: Indicates a critical warning or error set the appliance into SafeMode SonicWall Secure Mobile Access 200/400 Getting Started Guide...
- Page 13 Rear Panel Power Supply Plug Use the supplied power cord to provide Exhaust Fans power to the appliance Provides optimal cooling for the SonicWall SMA appliance SonicWall Secure Mobile Access 200/400 Getting Started Guide...
- Page 14 No license, express or implied, by estoppel or otherwise, to any intellectual property right is granted by this document. SonicWall Inc. and/or its a liates do not make any commitment to update the informa on contained in this document. For more informa n, visit h ps://www.sonicwall.com/...
- Page 15 Power Input Rating The following table describes the power input rating for the SonicWall Secure Mobile Access 200/400 appliances: 100‐240V~ A 1.5A Max. 50‐60Hz SonicWall Secure Mobile Access 200/400 Getting Started Guide...
- Page 16 Setting Up the Appliance This section provides pre‐configuration information and procedures for setting up your SonicWall Secure Mobile Access 200/400 appliance. • What You Need to Begin on page 16 • Powering On the SMA Appliance on page 17 • Accessing the Management Interface on page 17 • Troubleshooting on page 18 • Changing Your Administrator Password on page 18 • Adding a Local User on page 19 • Setting the Time Zone on page 20 • Configuring DNS and WINS on page 21 SonicWall Secure Mobile Access 200/400 Getting Started Guide...
-
Page 17: What You Need To Begin
What You Need to Begin Use the following configuration information during the setup process and for future reference: Before you install your SMA appliance, ensure the following Serial Number: Record the serial number found on are available: the top panel of your SonicWall appliance. • A Windows, Linux, or MacOS computer to use as a management station for initial configuration of the Authentication Code: Record the authentication code SonicWall Secure Mobile Access 200/400 found on the top panel of your SonicWall appliance. • An Internet connection Admin Password: Select an administrator password. • A Web browser supporting JavaScript and HTTP (default is password) uploads. Supported browsers include the following: Network Configuration Information Supported Browser Browser Version Collect the following about your network configuration: Internet Explorer 9.0 or higher Primary DNS: _________________________________ Mozilla Firefox Latest version Secondary DNS (optional): ______________________ Apple Safari Latest version Google Chrome Latest version DNS Search List (in order): ______________________ WINS server(s) (optional): _______________________... -
Page 18: Accessing The Management Interface
Powering On the SMA Accessing the Management Appliance Interface To power on the SonicWall Secure Mobile Access 200/ To access the Web‐based management interface: 400 appliance: 1 On the computer you use to manage the SonicWall Secure Mobile Access 200/400, set it to have a static IP 1 Plug one end of the power cord into the SonicWall address in the 192.168.200.x/24 subnet, such as Secure Mobile Access 200/400 and the other into an 192.168.200.20. Use a Subnet Mask of 255.255.255.0. A appropriate power outlet. Default Gateway is not required. 2 The appliance automatically turns on when plugged in. Do not use 192.168.200.1, as this address will conflict with the appliance. • The power LED on the front panel illuminates blue when the appliance is turned on. 2 Open a Web browser, and enter https://192.168.200.1 (the default X0 management IP address) in the Location • The test LED illuminates yellow until the or Address field. firmware is booted. When the test LED is no longer lit, the SonicWall Secure Mobile Access NOTE: A security warning may appear. Click the option 200/400 is ready for configuration. to accept the certificate and continue. 3 Connect one end of an Ethernet cable into the X0 port 3 In the Login screen, enter the default credentials and of your SonicWall Secure Mobile Access 200/400. ... -
Page 19: Troubleshooting
4 A Software Transaction Agreement displays. Read the If you are still unable to connect to the SMA appliance, contact agreement, select the I Accept the terms of this SonicWall Support: Software Transaction Agreement check box, and then Web: https://support.sonicwall.com/ click Continue. You are now successfully connected to the SMA management Changing Your Administrator interface. Password Troubleshooting To change your administrator password: If you cannot connect to the SonicWall Secure Mobile Access 200/400, verify the following: 1 In the SMA management interface, navigate to the Users > Local Users page. • Did you plug your management workstation into the X0 interface on the SMA appliance? 2 Click the Configure button corresponding to the admin account. Management can only be performed through X0. • Is the link light illuminated on both the management station and port X0 of the SMA appliance? CAUTION: Changing your password from the factory • Did you correctly enter the SMA appliance default is strongly recommended. If you change your management IP address in your Web browser (default password, be sure to keep it in a safe place. If you lose 192.168.200.1)? your password, you will have to reset the SMA appliance to factory default settings, losing your • Is your computer set to a static IP address in the ... -
Page 20: Adding A Local User
Adding a Local User 3 Enter a password for the admin account in the Password field. Re‐enter the password in the Confirm Password field. For testing and verification, you can create a local user account and in the local appliance authentication repository. To add a local user: 1 Navigate to the Users > Local Users page. 2 Click the Add User button. 3 Enter a User Name. 4 Select LocalDomain from the Domain and Group drop‐ down menus. 5 Enter a password for the user in both the Password and Confirm Password fields. 4 Click Accept to apply changes. SonicWall Secure Mobile Access 200/400 Getting Started Guide... -
Page 21: Setting The Time Zone
Setting the Time Zone 6 Select User from the User Type drop‐down menu. Setting the correct time is essential to operations of the SonicWall SMA 200/400. Be sure to set the time zone correctly. Leaving Automatic synchronization with an NTP server enabled (default setting) is recommended for accuracy. To set the time zone for your appliance: 1 Navigate to the System > Time page. 2 Select the appropriate Time Zone from the drop‐down menu. 7 Click Accept to finish adding a local user. 3 Click Accept to save changes to the time settings. SonicWall Secure Mobile Access 200/400 Getting Started Guide... - Page 22 Configuring DNS and WINS 4 (Optional) Enter a Secondary DNS Server in the Secondary DNS Server field. Refer to the notes you took in the What You Need to Begin on page 16 to complete this procedure. To configure the DNS / WINS Servers: 1 Navigate to the Network > DNS page in the management interface. 2 Enter a unique name for your SMA appliance in the SMA Appliance Hostname field. 3 Enter your Primary DNS Server information. 5 (Optional) Enter domain suffixes in the DNS Search List: a Type each domain suffix and click Add. b Use the directional up and down arrow keys to arrange the DNS suffixes in order of priority. The first suffix in the list is appended to the host name to create a FQDN, which is used to resolve names. If the name is not resolved, the next suffix in the list is used. SonicWall Secure Mobile Access 200/400 Getting Started Guide...
- Page 23 6 (Optional) Enter your WINS servers in the Primary WINS Server and Secondary WINS Server fields. 7 Click Accept. SonicWall Secure Mobile Access 200/400 Getting Started Guide...
-
Page 24: Registering Your Appliance
Registering Your Appliance This section provides instructions for registering your SonicWall Secure Mobile Access 200/400 appliances. • Creating a MySonicWall Account on page 24 • Registering Your SMA Appliance on page 24 • Services and Licensing on page 25 • Upgrading Information on page 28 NOTE: Registration is an important part of the setup process and is necessary to receive the benefits of SonicWall services, user licensing, firmware updates, and technical support. SonicWall Secure Mobile Access 200/400 Getting Started Guide... -
Page 25: Creating A Mysonicwall Account
Creating a MySonicWall 3 Complete the Registration form and click Register. 4 Verify that the information is correct and click Submit. Account 5 In the confirmation screen, click Continue to finish creating your MySonicWall account. A MySonicWall account is required for product registration. If you already have an account, continue to Registering Your SMA Appliance on page 24. Registering Your SMA Appliance To create a MySonicWall account: Before you register your appliance, verify that the time, DNS, 1 In your browser, navigate to www.MySonicWall.com. and default route settings on your SonicWall Secure Mobile Access 200/400 are correct. 2 In the login screen, click the Register Now link. To verify or configure these settings, navigate to the System > Time, Network > DNS, or Network > Routes pages, respectively. Refer to Setting Up the Appliance on page 15 for more information. SonicWall Secure Mobile Access 200/400 Getting Started Guide... - Page 26 Services and Licensing To register your SMA appliance: 1 Log into your MySonicWall account. If you do not have This section contains the following subsections: an account, see Creating a MySonicWall Account on page 24. • Service Management on page 26 2 On the main page, enter the appliance serial number in • Flexible Per‐User Licensing on page 27 the Register A Product field. Click Next. • Activating Services and Software on page 27 NOTE: To determine the serial number and authentication code, refer to What You Need to Begin on • Trying or Purchasing Services on page 28 page 16. 3 On the My Products page, select the Product button. 4 Enter a Friendly Name for the appliance. 5 If applicable, select the Product Group from the drop‐ down list. 6 Enter the Authentication Code. 7 Click Register. 8 Click Continue. SonicWall Secure Mobile Access 200/400 Getting Started Guide...
- Page 27 Service Management The following products and services are available for the SonicWall SMA appliance: The Service Management page in MySonicWall lists services, • Gateway Services: support options, and software, such as Web Application • Node Upgrade Firewall and Analyzer, that you can purchase or try with a free trial. • Spike License If you purchased an appliance that is pre‐licensed, you may be • Desktop and Server Software: required to enter your activation key here unless current • Secure Virtual Assist/Secure Virtual Meeting licenses are already indicated in the Status column with either a license key or an expiration date. • Web Application Firewall • Analyzer • End Point Control • Geo‐IP & Botnet Filter • Support Services: • Dynamic Support 8x5 • Dynamic Support 24x7 • Software and Firmware Updates • Hardware Warranty SonicWall Secure Mobile Access 200/400 Getting Started Guide...
- Page 28 Flexible Per‐User Licensing Activating Services and Software Your SMA appliance comes standard with a set number of user If you purchase a service subscription or upgrade from a sales licenses. However, as the needs of your organization change, representative, you will receive an activation key. This key is SonicWall offers flexible options when it comes to adding emailed to you after online purchases, or is on the front of the additional licenses. The ability to purchase a convenient certificate that was included with your purchase. number of additional licenses allows you to plan sensibly for the future, or provides immediate scalability when you need it To activate existing licenses: most. 1 Navigate to the My Products page and select the registered appliance you want to manage. SMA 200 SMA 400 2 Locate the product on the Service Management page Initial User Licenses and click the Activate icon in that row. Additional Per‐User 1 ‐ 5 ‐ 10 10 ‐ 25 ‐ 100 3 In the Activate Service page, type or paste your key into License Packages the Activation Key(s) field and then click Submit. Maximum Concurrent After the service is activated, you will see an expiration User Sessions Allowed date or a license key string in the Status column on the Service Management page. SonicWall Secure Mobile Access 200/400 Getting Started Guide...
- Page 29 Trying or Purchasing Services Obtaining the Latest SMA Firmware NOTE: If you have already registered your SonicWall To try a free trial of a service, click the Try icon in the Service SMA appliance, and selected Notify me when new Management page. firmware is available on the System > Settings page, To purchase a product or service, click Buy icon in the Service you are automatically notified of any updates available Management page. for your model. When activation is complete, MySonicWall displays an To obtain a new SMA firmware image file: activation screen with service status and expiration information. The service management screen also displays the 1 Log into your MySonicWall account at product you licensed. www.MySonicWall.com. The licensed services also display on the System > Licenses 2 Click Downloads. page of your SonicWall SMA management interface. 3 On the Download Center page, select one of the following from the Software Type drop‐down menu: Upgrading Information • SMA 200 Firmware • SMA 400 Firmware This section includes the following topics for upgrading to the latest firmware image on your SMA appliance: 4 Scroll down to locate the firmware version you want, and then click the link for it and save it to a directory on • Obtaining the Latest SMA Firmware on page 28 your management station. For example, for the •...
- Page 30 Uploading New SMA Firmware After the appliance starts up, the updated firmware version is displayed on the System > Status page. To upload a new SMA firmware image: Accessing the Appliance using 1 Log into your SMA appliance as the administrator and SafeMode navigate to the System > Settings page. 2 Select Upload New Firmware and browse to the If you are unable to connect to the SonicWall SMA location where you saved the SMA image file, select the management interface, you can restart the appliance in file, and click the Upload button. The upload process SafeMode. The SafeMode feature allows you to quickly recover can take up to one minute. from uncertain configuration states with a simplified 3 When the upload is complete, you are ready to reboot management interface that includes the same settings your SonicWall SMA appliance with the new SMA available on the System > Settings page. firmware. Do one of the following: You can upload new firmware and restart the appliance using • To boot the appliance with current configuration the old or new firmware while in SafeMode. settings, click the boot icon for New Firmware You can set the appliance into SafeMode by using a narrow, • To boot the appliance with factory default straight object, like a straightened paper clip, to press and hold settings, click the boot icon for New Firmware the reset button on the SMA appliance for five to ten seconds. and select the check box to Boot with factory When the appliance is in SafeMode, the test LED blinks yellow. default settings After the appliance is in SafeMode, connect your computer to 4 A warning message dialog is displayed: Are you sure you ...
- Page 31 SonicWall Secure Mobile Access 200/400 Getting Started Guide...
- Page 32 Deploying Your Appliance This section provides overviews of deployment scenarios, as well as configuration instructions for connecting your SonicWall SMA appliance to various network devices, including gateway appliances. • Selecting a Deployment Scenario on page 32 • Configuring the X0 IP Address on page 34 • Configuring a Default Route on page 35 • Adding a NetExtender Client Route on page 35 • Setting Your NetExtender Address Range on page 36 • Adding a New SMA Custom Zone on page 38 • Scenario A: Connecting the SMA on a New DMZ on page 40 • Scenario B: Connecting the SMA on an Existing DMZ on page 45 • Scenario C: Connecting the SMA on the LAN on page 49 • Testing and Troubleshooting Your Remote Connection on page 52 TIP: Before performing the procedures in this section, fill out the information in What You Need to Begin on page 16. SonicWall Secure Mobile Access 200/400 Getting Started Guide...
-
Page 33: Selecting A Deployment Scenario
Gateway Appliance The deployment scenarios described in this section are based SonicOS 5.8.1 or SMA on New DMZ • An unused interface higher: • New DMZ configured for NAT on actual customer deployments and are SonicWall‐ • TZ Series or Transparent Mode recommended deployment best practices for SMA appliances. • NSA E-Class SMA on Existing • One dedicated interface in use •... - Page 34 Overview of Scenario A: Overview of Scenario B: SMA on a New DMZ SMA on an Existing DMZ SonicWall Gateway Appliance SonicWall Gateway Appliance 10GE 10GE SDHC SDHC ALARM TEST ALARM SonicWall NSA 3600 CONSOLE MGMT TEST CONSOLE MGMT X2, etc X2, etc Switch Switch Router Switch Router Network Nodes Remote Users Network Nodes...
- Page 35 Management Interface on page 17. 2 Navigate to the Network > Interfaces page. Internet Router 3 In the Interfaces table, click the Configure icon for the Remote Users X0 interface. 4 In the Interface Settings dialog box, set the IP Address | O | O | Secure Mobile Access 400 SMA Appliance to an unused address within your DMZ or LAN subnet. 5 For the Subnet Mask, enter the value that matches your DMZ or LAN subnet mask, such as 255.255.255.0. 6 Click Accept. A warning displays that you are changing the X0 IP Address. Click OK to acknowledge. Configuring the X0 IP Address 7 Reset the management computer to have a static IP address in the range you just set for the X0 interface. When deploying the SMA in any of the scenarios shown in For example, if you set X0 to 10.1.1.10, you could set Selecting a Deployment Scenario on page 32, you need to reset your computer to 10.1.1.20. the IP address of the X0 interface on the SMA to an address SonicWall Secure Mobile Access 200/400 Getting Started Guide...
-
Page 36: Configuring A Default Route
8 Log into the SMA management interface again, using 3 Select X0 as the interface and click Accept. the IP address you just configured for the X0 interface. For example, point your browser to https://10.1.1.10. Configuring a Default Route Refer to the following table to correctly configure your default route for the scenario you selected. Your upstream gateway IP Adding a NetExtender Client If you are using scenario: address will be: Route A ‐ SMA on a New DMZ The IP address of the DMZ interface you create NetExtender allows remote clients to have seamless access to B ‐ SMA on an Existing DMZ The existing DMZ interface IP resources on your local network. address C ‐ SMA on the LAN The LAN interface IP address To configure a default route: 1 Navigate to the Network > Routes page. 2 Enter the upstream gateway device’s IPv4 address in the Default IPv4 Gateway field or the IPv6 address in the Default IPv6 Gateway field. SonicWall Secure Mobile Access 200/400 Getting Started Guide... - Page 37 To configure a NetExtender client route: 5 Enter the subnet mask of the destination network in the Subnet Mask/Prefix field. Continuing the example, 1 Navigate to the NetExtender > Client Routes page. enter 255.255.255.0. 6 Click Accept to finish adding this client route. Setting Your NetExtender 2 To force all SMA client traffic to pass through the NetExtender tunnel, select Enabled from the Tunnel All Address Range Mode drop‐down list. 3 Click Add Client Route. The NetExtender address range defines the IP address pool 4 Enter the network address of the trusted network to from which addresses will be assigned to remote users during which you would like to provide access with NetExtender sessions. The range needs to be large enough to NetExtender in the Destination Network field. For accommodate the maximum number of concurrent example, if you are connecting to an existing DMZ on NetExtender users you wish to support. the 10.1.1.0/24 subnet and you want to provide access The range should fall within the same subnet as the interface to your LAN network on the 192.168.168.0/24 subnet, to which the SMA appliance is connected, and it must not you would enter 192.168.168.0. overlap or collide with any assigned addresses if other hosts are on the same segment as the SMA appliance. SonicWall Secure Mobile Access 200/400 Getting Started Guide...
- Page 38 192.168.200.100 to 192.168.200.200 (default Begin and Client Address Range End fields. range) 3 Click Accept to add the Client Address Range. Scenario B Select a range that falls within your existing DMZ subnet. For example, if your DMZ uses the 10.1.1.0/24 subnet, and you want to Scenario A 192.168.200.100 to 192.168.200.200 support up to 30 concurrent NetExtender (default range) sessions, you could use 10.1.1.220 to Scenario B An unused range within your DMZ subnet. 10.1.1.249. Scenario C An unused range within your LAN subnet. Scenario C Select a range that falls within your existing LAN subnet. For example, if your LAN uses the If you do not have enough available addresses to support your 192.168.168.0/24 subnet, and you want to desired number of concurrent NetExtender users, you may use support up to 10 concurrent NetExtender a new subnet for NetExtender. This condition may occur if your sessions, you could use 192.168.168.240 to existing DMZ or LAN is configured in NAT mode with a small 192.168.168.249. subnet space, such as 255.255.255.224, or more commonly if your DMZ or LAN is configured in Transparent mode and you NOTE: DHCP/DHCPv6 is supported and can manage the have a limited number of public addresses from your ISP. In IPv4 and IPv6 addresses in the LAN and the NetExtender either case, you may assign a new, unallocated IP range to client address ranges. NetExtender (such as 192.168.10.100 to 192.168.10.200) and configure a route to this range on your gateway appliance. SonicWall Secure Mobile Access 200/400 Getting Started Guide...
- Page 39 67.115.118.75 through 67.115.118.80, and you wish to your SMA, such as X2. support 50 concurrent NetExtender clients, configure your 3 Select Create new zone in the Zone field. SMA X0 interface with an available IP address in the Transparent range, such as 67.115.118.80, and configure your NetExtender range as 192.168.10.100 to 192.168.10.200. Then, on your gateway device, configure a static route to 192.168.10.0, using 67.115.118.80. Adding a New SMA Custom The Add Zone window opens. Zone 4 Enter SMA in the Name field. 5 Select Public from the Security Type drop‐down menu. Adding a new SMA custom zone on your gateway appliance is a 6 Clear the Allow Interface Trust check box. necessary step in deploying your SMA appliance using Scenarios A and C. For more information, see the following 7 Select the following check boxes: sections: • Enable Gateway Anti‐Virus Service • Scenario A: Connecting the SMA on a New DMZ on • Enable IPS page 40 • Scenario C: Connecting the SMA on the LAN on page 49 To add a new SMA custom zone on the gateway appliance: 1 Log into your gateway appliance as an administrator and navigate to the Network > Interfaces page. SonicWall Secure Mobile Access 200/400 Getting Started Guide...
- Page 40 • Enable Anti‐Spyware Service For example: Scenario A Use an IP address in the default SMA X0 subnet (default 192.168.200.x) Scenario C Use an IP address in the gateway LAN subnet (default 192.168.168.x) 10 Enter your Subnet Mask. 11 Optionally enter the Default Gateway, which is the WAN address of the gateway appliance. 12 If you want to allow management of the gateway appliance over this interface, select the desired management options. 13 If you want to allow users to log in to the gateway appliance using this interface, select the desired user login options. 14 Click OK to apply changes. 8 Click OK. 9 In the Edit Interface window again, enter the IP address for this interface in the IP Address field. SonicWall Secure Mobile Access 200/400 Getting Started Guide...
- Page 41 Scenario A: Connecting the SMA Allowing a WAN to SMA Connection NOTE: Before continuing, you must add a new SMA on a New DMZ custom zone. Refer to Adding a New SMA Custom Zone on page 38 for more information. The following procedures explain how to configure your gateway appliance based on Scenario A: To allow a WAN to SMA connection: • Connecting the SMA to the Gateway on page 40 1 Click the Wizards icon in the top right corner of the • Allowing a WAN to SMA Connection on page 40 gateway appliance management interface. • Allowing an SMA to LAN Connection on page 42 2 On the Welcome page, select the Public Server Guide, and then click Next. Connecting the SMA to the Gateway To connect the SMA 200/400 using Scenario A: 1 Connect one end of an Ethernet cable to an unused port on your SonicWall gateway appliance. 2 Connect the other end of the Ethernet cable to the X0 port on the front of your SonicWall Secure Mobile Access 200/400. The X0 Port LED lights up indicating an active connection. Configure the SMA X0 IP address. Refer to Configuring the X0 IP Address on page 34. SonicWall Secure Mobile Access 200/400 Getting Started Guide...
- Page 42 5 On the Server Private Network Configuration page, enter the following server and SMA information, and then click Next: Service Type Other Services Create new group Server Name Specify the name for the SMA appliance 4 In the Add Service Group dialog box, create a service Server Private SMA appliance X0 IP address group for HTTP and HTTPS: IP Address • Enter a Name for the service. Server Comment Brief description of the server • Select both HTTP and HTTPS and click the arrow button to move them to the right column. 6 On the Server Public Information page, accept the default IP address, or enter an IP address in your • Click OK. allowed public IP range. Click Next. NOTE: The default IP address is the WAN IP address of your SonicWall security appliance. If you accept this default, all HTTP and HTTPS traffic to this IP address will be routed to your SMA appliance. 7 The Public Server Configuration Summary page displays all the configuration actions that will be performed. Click Apply to create the configuration and allow access from the WAN to the SMA on the DMZ. SonicWall Secure Mobile Access 200/400 Getting Started Guide...
- Page 43 To allow an SMA to LAN connection: 1 Navigate to the Network > Address Objects page on the gateway appliance. 4 Click Add to create the object. Once done, click Close. 2 In the Address Objects tab, click Add. 5 Click Add again to create an address object for the 3 In the Add Address Object dialog box, create an address NetExtender range. object for the X0 interface IP address of your SMA appliance: 6 In the Add Address Object dialog box, create an address object for the NetExtender range: Name Name of the SMA appliance Name Name for NetExtender Zone Assignment Zone Assignment Type Host Type Range IP Address SMA appliance X0 IP address (default 192.168.200.1) Starting IP Address Start of the NetExtender IP address range (default 192.168.200.100) Ending IP Address End of the NetExtender IP address range (default 192.168.200.200) SonicWall Secure Mobile Access 200/400 Getting Started Guide...
- Page 44 • Click OK to create the group when both objects are in the right column. 7 Click Add to create the object. Once added, click Close. 11 Navigate to the Firewall > Access Rules page, and select the Matrix view style. 8 On the Network > Address Objects page, click the Address Groups tab. 9 Click Add Group. 10 In the Add Address Object Group dialog box, create a group for the X0 interface IP address of your SMA appliance and the NetExtender IP range: • Enter a name for the group. • In the left column, select the address objects you created and click the right arrow button. SonicWall Secure Mobile Access 200/400 Getting Started Guide...
- Page 45 12 Click the SMA > LAN icon. Source The address group you just created, such as SMA and NetExtender. Destination Users Allowed Users Excluded None Schedule Always on Select the following • Enable Logging check box(es) • Allow Fragmented Packets 15 Click OK to create the rule. This completes Scenario A. Continue to Testing and Troubleshooting Your Remote Connection on page 52. 13 On the page that displays for SMA to LAN, click Add. NOTE: Some gateway appliances have a default zone 14 In the Add Rule window, create a rule to allow access to named SSLVPN. Do not select this zone when the LAN for the address group you just created: configuring for the SMA appliance. The SSLVPN zone is intended for use with the more limited SSLVPN features that are included in the firewall products. From To Source Port Service SonicWall Secure Mobile Access 200/400 Getting Started Guide...
- Page 46 Scenario B: Connecting the SMA 3 Configure the SMA X0 with an IP address in the DMZ subnet. Refer to Configuring the X0 IP Address on page on an Existing DMZ The following procedures explain how to configure your Allowing WAN to DMZ Connection gateway appliance based on Scenario B: If you are already forwarding HTTP or HTTPS to an internal • Connecting the SMA to the Gateway on page 45 server and you only have a single public IP address, you will • Allowing WAN to DMZ Connection on page 45 need to select different (unique) ports of operation for either the existing servers or for the SMA appliance, because both • Allowing DMZ to LAN Connection on page 47 cannot concurrently use the same IP address and port combinations. Connecting the SMA to the Gateway To allow a WAN to DMZ connection: To connect the SMA using Scenario B: 1 Log into your gateway appliance as an administrator and click the Wizards icon at the top right of the 1 Connect one end of an Ethernet cable to your DMZ, interface. either directly to the corresponding port on your existing SonicWall gateway appliance, to a hub, or to a switch on your DMZ. 2 Connect the other end of the Ethernet cable to the X0 port on your SonicWall Secure Mobile Access 200/400. The X0 Port LED lights up indicating an active connection. SonicWall Secure Mobile Access 200/400 Getting Started Guide...
- Page 47 • Enter a name for the service. • Select both HTTP and HTTPS and click the arrow button to move to the right column. • Click OK. 5 On the Server Private Network Configuration page, enter the following Server information and click Next: Server Name Name for the SMA appliance Server Private IP The X0 IP address of the SMA Address appliance within your DMZ range, such as 10.1.1.10/24. Server Comment Brief description of the server 6 On the Server Public Information page, accept the 3 On the Public Server Guide page of the Wizard, select: default IP address or enter a new IP address in your allowed public IP range. Click Next. Service Type Other NOTE: The default IP address is the WAN IP address of Services Create new group your SonicWall firewall. If you accept this default, all HTTP and HTTPS traffic to this IP address will be routed to your SMA appliance. The Add Service Group dialog box is displayed. 7 The Public Server Configuration Summary page displays all configuration actions that will be performed. Click SonicWall Secure Mobile Access 200/400 Getting Started Guide...
- Page 48 5 Click Add again to create an address object for the NetExtender range. To allow a DMZ to LAN connection: 6 In the Add Object dialog box, create an address object 1 On your gateway appliance, navigate to the Network > for the NetExtender range using the following options, Address Objects page. then click Add: 2 In the Address Objects tab, click Add. Name Name for NetExtender 3 In the Add Object dialog box, create an address object Zone Assignment for the X0 interface IP address of your SMA appliance: Type Range Name Name for the SMA appliance Starting IP address Start of the NetExtender IP Zone Assignment address range within your DMZ Type Host range, such as 10.1.1.220. IP Address X0 IP address of the SMA Ending IP address End of the NetExtender IP appliance within your DMZ address range within your DMZ range, such as 10.1.1.10. range, for example 10.1.1.249. SonicWall Secure Mobile Access 200/400 Getting Started Guide...
- Page 49 • Click OK to create the group when both objects are in the right column. 7 On the Network > Address Objects page, click the Address Groups tab. 8 Click Add Group. 9 In the Add Address Object Group dialog box, create a group for the X0 interface IP address of your SMA appliance and the NetExtender IP range: 10 On the Network > Interfaces page, verify that the • Enter a name for the group. assigned zone is DMZ for the interface connected to your SMA appliance. • In the left column, select the address objects you created and click the right arrow button. 11 Navigate to the Firewall > Access Rules page, and select the Matrix view style. 12 Click the DMZ > LAN icon. 13 On the page that displays for DMZ to LAN, click Add. SonicWall Secure Mobile Access 200/400 Getting Started Guide...
- Page 50 Service Port Service Scenario C: Connecting the SMA Source The address group you just created, such as SMA and on the LAN NetExtender 2. Destination The following procedures explain how to configure your Users Allowed gateway appliance based on Scenario C: Users Excluded None • Connecting the SMA to the Gateway on page 49 Schedule Always on • Configuring SMA to LAN Connectivity on page 50 Select the following • Enable Logging check box(es) • Allow Fragmented Connecting the SMA to the Gateway Packets 15 Click OK to create the rule. To connect the SMA using Scenario C: This completes Scenario B. Continue to Testing and 1 Connect one end of an Ethernet cable to an unused port on your LAN hub or switch. 2 Connect the other end of the Ethernet cable to the X0 port on the front of your SonicWall Secure Mobile SonicWall Secure Mobile Access 200/400 Getting Started Guide...
- Page 51 3 In the Add Object dialog box, create an address object active connection. for the X0 interface IP address of your SMA: Configure the SMA X0 IP address. Refer to Configuring Name Name for the SMA appliance the X0 IP Address on page 34. Zone Assignment Type Host Configuring SMA to LAN Connectivity IP Address SMA appliance X0 IP address (default 192.168.200.1) NOTE: Before continuing, you must add a new SMA custom zone. Refer to Adding a New SMA Custom Zone on page 38 for more information. In order for users to access local resources through the SMA appliance, you must configure your gateway device to allow an outside connection through the SMA into your LAN. To allow an SMA to LAN connection: 4 Click Add to create the object. After adding, click Close. 1 Log into your gateway appliance as an administrator 5 Click Add again to create an address object for the and navigate to the Network > Address Objects page. NetExtender range. 2 In the Address Objects tab, click Add. 6 In the Add Object dialog box, create an address object for the NetExtender range, using the following options: Name Name for NetExtender Zone Assignment Type Range SonicWall Secure Mobile Access 200/400 Getting Started Guide...
- Page 52 • Enter a name for the group. Starting IP Address Start of the NetExtender IP address range • In the left column, select the two address (default 192.168.200.100) objects you created and click the right arrow button. Ending IP Address End of the NetExtender IP address range • Click OK to create the group when both objects (default 192.168.200.200) are in the right column. 7 Click Add to create the object. Once added, click Close. 8 On the Network > Address Objects page, click the Address Group tab. 9 Click Add Group. 11 Navigate to the Firewall > Access Rules page, and select the Matrix view style. 10 In the Add Address Object Group dialog box, create a group for the X0 interface IP address of your SMA and 12 Click the SMA > LAN icon. the NetExtender IP range: 13 On the page that displays for SMA to LAN, click Add. SonicWall Secure Mobile Access 200/400 Getting Started Guide...
- Page 53 Testing and Troubleshooting 14 In the Add Rule window, create a rule to allow access to the LAN for the address group you just created: Your Remote Connection From To You have now configured your SonicWall gateway appliance and SMA appliance for secure remote access. Source Port Service This section provides information on the following topics: Source The address group you just • Verifying a User Connection from the Internet on page created, such as SMA to LAN. Destination • Firewall > Access Rules Matrix View on page 53 Users Allowed Users Excluded None Verifying a User Connection from the Schedule Always on Internet Select the following Enable Logging check box(es) Allow Fragmented Packets You can verify your connection using a remote client on the WAN. 15 Click OK to create the rule. This completes Scenario C. Continue to Testing and To verify a User Connection from the Internet: Troubleshooting Your Remote Connection on page 52. 1 From a WAN connection outside of your corporate ...
- Page 54 2 When prompted, enter the User Name and Password You have now successfully set up your SMA appliance. created in Adding a Local User on page 19 of this guide. TIP: It is easier for remote users to access the SMA appliance using a fully qualified domain name (FQDN) 3 Select LocalDomain from the drop‐down menu and rather than an IP address. It is recommended that you click Login. The SonicWall Virtual Office screen displays create a DNS record to allow for FQDN access to your in your Web browser. SMA appliance. If you do not manage your own public DNS servers, contact your ISP for assistance. Firewall > Access Rules Matrix View If the SMA zone does not appear in the Firewall > Access Rules matrix view, verify that it is selected as the zone for the gateway interface connected to the SMA appliance. To ensure the SMA zone displays in the matrix view: 4 Click NetExtender to start the NetExtender client 1 In the administrative interface of your SonicWall installation. appliance, navigate to the Network > Interfaces page. 5 If prompted, click Install to complete the client installation. 6 Ping a host on your corporate LAN to verify your remote connection. SonicWall Secure Mobile Access 200/400 Getting Started Guide...
- Page 55 2 Click the Configure icon for X2 or the port you assigned 3 Select SMA as the Zone from the drop‐down list. as the SMA zone. 4 Click OK. SonicWall Secure Mobile Access 200/400 Getting Started Guide...
- Page 56 Safety and Regulatory Information This section provides safety, regulatory, trademark, copyright and warranty information. • Safety and Regulatory Information on page 56 • Appliance Mounting Information on page 56 • Lithium Battery Warning on page 57 • Cable Connections on page 57 • Sicherheitsanweisungen on page 57 • Hinweis zur Lithiumbatterie on page 59 • Kabelverbindungen on page 59 安全說明 on page 59 • 鋰電池警告 on page 60 • 纜線連結 on page 60 • 台灣 RoHS / 限用物質含有情況標示資訊 on page 61 • • Warranty Information on page 62 SonicWall Secure Mobile Access 200/400 Getting Started Guide...
-
Page 57: Safety And Regulatory
SMA 200 6 Mount in a location away from direct sunlight and 1RK33‐0BC SMA 400 sources of heat. A maximum ambient temperature of 104º F (40º C) is recommended. 7 If installed in a closed or multi‐rack assembly, the Appliance Mounting operating ambient temperature of the rack environment may be greater than the room ambient. Information Therefore, consideration should be given to installing the equipment in an environment compatible with the The following conditions are required for proper installation of maximum recommended ambient temperature. the SMA appliance: 8 Mount the SonicWall appliance evenly in the rack in 1 The SonicWall appliance is designed to be mounted in a order to prevent a hazardous condition caused by standard 19‐inch rack mount cabinet. uneven mechanical loading. 2 Use the mounting hardware recommended by the rack 9 Four mounting screws, compatible with the rack design, manufacturer and ensure that the rack is adequate for must be used and hand‐tightened to ensure secure the appliance. installation. Choose a mounting location where all four mounting holes line up with those of the mounting bars 3 Ensure that no water or excessive moisture can enter of the 19‐inch rack mount cabinet. the unit. 10 A suitably rated and approved branch circuit breaker ... -
Page 58: Lithium Battery Warning
SonicWall SMA 200/400 appliance must be disposed of, do so 12 Reliable grounding of rack‐mounted equipment must following the battery manufacturer's instructions. be maintained. Particular attention must be given to power supply connections other than direct connections to the branch circuits, such as power strips. Cable Connections 13 The included power cords are approved for use only in specific countries or regions. Before using a power cord, All Ethernet and RS232 (Console) cables are designed for intra‐ verify that it is rated and approved for use in your building connection to other equipment. Do not connect these location. ports directly to communication wiring or other wiring that exits the building where the SonicWall appliance is located. 14 Minimum power cord rating for European Union (CE): Certified power supply cord not lighter than light PVC sheathed flexible cord according to IEC 60227, Sicherheitsanweisungen designation, or H05 VV‐F or H05 VVH2‐F2, and rated for at least 3G 0.75 mm². Für eine ordnungsgemäße Montage sollten die folgenden 15 The following statement applies only to rack‐installed Hinweise beachtet werden: products that are GS‐Marked: This equipment is not intended for use at workplaces with visual display units, 1 Das SonicWall Modell ist für eine Montage in einem in accordance with §2 of the German ordinance for standardmäßigen 19‐Zoll‐Rack konzipiert. workplaces with visual display units. SonicWall Secure Mobile Access 200/400 Getting Started Guide... - Page 59 2 Vergewissern Sie sich, dass das Rack für dieses Gerät 8 Bringen Sie die SonicWall waagerecht im Rack an, um mögliche Gefahren durch ungleiche mechanische geeignet ist und verwenden Sie das vom Rack‐Hersteller empfohlene Montagezubehör. Belastung zu vermeiden. 3 Stellen Sie sicher, dass das Gerät vor Wasser und hoher 9 Verwenden Sie für eine sichere Montage vier passende Luftfeuchtigkeit geschützt ist. Befestigungsschrauben, und ziehen Sie diese mit der hand an. Wählen Sie einen Ort im 19‐Zoll‐Rack, wo alle 4 Stellen Sie sicher, dass die Luft um das Gerät herum vier Befestigungen der Montageschien verwendet zirkulieren kann und die Lüftungsschlitze an der Seite werden. des Gehäuses frei sind. Hier ist ein Belüftungsabstand von mindestens 26 mm einzuhalten. 10 Ein angemessen dimensionierter und geprüfte Sicherung, sollte Bestandteil der Haus‐Installation sein. 5 Achten Sie darauf, das sich die Netzwerkkabel nicht in Bitte folgen die den lokalen Richtlinien beim Einkauf der unmittelbaren Nähe von Stromleitungen, von Material oder Komponenten. Leuchtstoröhren und Störquellen wie Funksendern oder Breitbandverstärkern befinden. 11 Prüfen Sie den Anschluss des Geräts an die Stromversorgung, damit der Überstromschutz sowie 6 Wählen Sie für die Montage einen Ort, der keinem die elektrische Leitung nicht von einer eventuellen direkten Sonnenlicht ausgesetzt ist und sich nicht in der Überlastung der Stromversorgung beeinflusst werden. ...
-
Page 60: Hinweis Zur Lithiumbatterie
Union (CE): Zertifizierte Netzkabel nicht leichter als Alle Ethernet‐ und RS232‐C‐Kabel eignen sich für die leichte PVC‐Schlauchkabel nach IEC 60227, Bezeichnung Verbindung von Geräten in Innenräumen. Schließen Sie an die oder H05 VV‐F oder H05 VVH2‐F2 und bewertet für Anschlüsse der SonicWall keine Kabel an, die aus dem mindestens 3G 0,75 mm². Gebäude in dem sich das Gerät befindet herausgeführt 15 Der folgende Hinweis gilt nur für rackmontierte werden. Produkte mit GS‐Kennzeichen: Dieses Gerät ist nicht zur Verwendung an Arbeitsplätzen mit visuellen Anzeigegeräten gemäß § 2 der deutschen Verordnung 安全說明 für Arbeitsplätze mit visuellen Anzeigegeräten vorgesehen. 需要滿足以下條件以進行正確安裝: 1 SonicWall 設備被設計成安裝在一個標準的 19 吋機 Hinweis zur Lithiumbatterie 架安裝櫃。需要滿足以下條件以進行正確安裝。 2 使用機架製造商推薦的裝載硬體,確認機架足夠裝 Die in der SMA 200/400 Appliance von SonicWall verwendete 置所需。 Lithiumbatterie darf nicht vom Benutzer ausgetauscht werden. Zum Austauschen der Batterie muss die SonicWall in ein von 3 請確認裝置內不會滲入水分或過多的濕氣。 SonicWall autorisiertes Service‐Center gebracht werden. Dort 4 裝置週邊請保持通風,特別是裝置通風口側。建議 wird die Batterie durch denselben oder entsprechenden, vom 裝置與牆壁間至少要有 1 英吋 (25.44 公釐 ) 的淨空。 Hersteller empfohlenen Batterietyp ersetzt. Beachten Sie bei SonicWall Secure Mobile Access 200/400 Getting Started Guide... - Page 61 5 纜線的路徑應遠離電源線、日光燈,以及會產生雜 13 隨附的電源線僅限於特定的國家或地區使用。使用 訊的來源,如無線電、發送器與寬頻放大器。 前,請確認電源線的額定值且已被認可在你的地區 上使用。 6 架設位置需遠離陽光直射與熱源。建議周圍溫度最 高溫不 要超過 104°F (40°C)。 鋰電池警告 7 如果是安裝於封閉式或多組機架配件,機架環境的 周圍操作溫度可能會高過室內周遭。因此,在與上 述建議之最高周圍溫度相容的環境中安裝設備時, 使用者不得自行更換 SonicWall 網際網路安全性裝置中使 應將此列入考量。 用的鋰電池。必須將 SonicWall 裝置 送回 SonicWall 授權的 服務中心,以更換相同的鋰電池或製造商推薦的同類型鋰 8 將 SonicWall 裝置平坦地裝設在機架中,如此才能避 電池。若因任何原因必須丟棄電池或 SonicWall 網際網路 免因不均勻的機械負荷造成危險狀況。 安全性裝置,請嚴格遵守電池製造商的指示。 9 必須使用四顆與機架設計相容的安裝螺釘,並用手 鎖緊螺釘,確定安裝牢固。選擇一個安裝位置,將 四個裝載洞孔對齊 19 吋架設機櫃的安裝桿。 纜線連結 10 應當提供一個合適額定值並且已被認可的分支電路 斷路器作為安裝該裝置的一部分。在購買材料或部 所有乙太網路與 RS232 ( 主控台 ) 線路都是為與其他裝置進 件時,應遵循當地安全代碼。 行內建連接所設計的。請不要將這些連接埠直接連接至通...
- Page 62 限用物質及其化學符號 單元 六價鉻 鉛 汞 鎘 多溴聯苯 多溴二苯醚 (Pb) (Hg) (Cd) (PBB) (PBDE) ‐ 機箱 / 檔板 (Chassis/ Bracket) ‐ 機械部件 ( 風扇、散熱器 等 ) (Mechanical parts (fan, heatsink etc.) ‐ 電路板組件 (PCBA) ‐ 電線 / 連接器 (Cable/ connector) ‐ 電源設備 (power supply) ‐ 配件 (Accessories) 備考 1. “O” 係指該項限用物質之百分比含量未超出百分比含量基準値。 備考 2. “‐‐” 係指該項限用物質為排除項目。 SonicWall Secure Mobile Access 200/400 Getting Started Guide...
-
Page 63: Warranty Information
Declaration of Conformity of the defective product according to the terms of SonicWall's then‐current Support Services policies. A “Declaration of Conformity” in accordance with the directives This warranty does not apply if the product has been subjected and standards has been made and is on file at SonicWall to abnormal electrical stress, damaged by accident, abuse, International Limited, City Gate Park, Mahon, Cork, Ireland. misuse or misapplication, or has been modified without the CE declarations can be found online at: https:// written permission of SonicWall. support.sonicwall.com/. NOTE: Additional regulatory notifications and DISCLAIMER OF WARRANTY. EXCEPT AS SPECIFIED IN THIS information for this product can be found online at: WARRANTY, ALL EXPRESS OR IMPLIED CONDITIONS, https://support.sonicwall.com. REPRESENTATIONS, AND WARRANTIES INCLUDING, WITHOUT LIMITATION, ANY IMPLIED WARRANTY OR CONDITION OF MERCHANTABILITY, FITNESS FOR A PARTICULAR PURPOSE, Warranty Information NONINFRINGEMENT, SATISFACTORY QUALITY OR ARISING FROM A COURSE OF DEALING, LAW, USAGE, OR TRADE SonicWall Inc. warrants that commencing from the delivery PRACTICE, ARE HEREBY EXCLUDED TO THE MAXIMUM EXTENT date to Customer (but in any case commencing not more than ALLOWED BY APPLICABLE LAW. TO THE EXTENT AN IMPLIED ninety (90) days after the original shipment by SonicWall), and WARRANTY CANNOT BE EXCLUDED, SUCH WARRANTY IS continuing for a period of twelve (12) months, that the product LIMITED IN DURATION TO THE WARRANTY PERIOD. BECAUSE will be free from defects in materials and workmanship under SOME STATES OR JURISDICTIONS DO NOT ALLOW LIMITATIONS normal use. This Limited Warranty is not transferable and ON HOW LONG AN IMPLIED WARRANTY LASTS, THE ABOVE applies only to the original end user of the product. SonicWall LIMITATION MAY NOT APPLY TO YOU. THIS WARRANTY GIVES and its suppliers' entire liability and Customer's sole and YOU SPECIFIC LEGAL RIGHTS, AND YOU MAY ALSO HAVE OTHER exclusive remedy under this limited warranty will be shipment ... - Page 64 THE ABOVE LIMITED WARRANTY. IN NO EVENT SHALL SONICWALL OR ITS SUPPLIERS BE LIABLE FOR ANY DAMAGES WHATSOEVER, INCLUDING, WITHOUT LIMITATION, DAMAGES FOR LOSS OF PROFITS, BUSINESS INTERRUPTION, LOSS OF INFORMATION, OR OTHER PECUNIARY LOSS ARISING OUT OF THE USE OR INABILITY TO USE THE PRODUCT, OR FOR SPECIAL, INDIRECT, CONSEQUENTIAL, INCIDENTAL, OR PUNITIVE DAMAGES HOWEVER CAUSED AND REGARDLESS OF THE THEORY OF LIABILITY ARISING OUT OF THE USE OF OR INABILITY TO USE HARDWARE OR SOFTWARE EVEN IF SONICWALL OR ITS SUPPLIERS HAVE BEEN ADVISED OF THE POSSIBILITY OF SUCH DAMAGES. In no event shall SonicWall or its suppliers' liability to Customer, whether in contract, tort (including negligence), or otherwise, exceed the price paid by Customer. The foregoing limitations shall apply even if the above‐stated warranty fails of its essential purpose. BECAUSE SOME STATES OR JURISDICTIONS DO NOT ALLOW LIMITATION OR EXCLUSION OF CONSEQUENTIAL OR INCIDENTAL DAMAGES, THE ABOVE LIMITATION MAY NOT APPLY TO YOU. SonicWall Secure Mobile Access 200/400 Getting Started Guide...
- Page 65 SonicWall Secure Mobile Access 200/400 Getting Started Guide...
- Page 66 SonicWall Support Technical support is available to customers who have purchased SonicWall products with a valid maintenance contract and to customers who have trial versions. The Support Portal provides self‐help tools you can use to solve problems quickly and independently, 24 hours a day, 365 days a year. To access the Support Portal, go to https://support.sonicwall.com/. The Support Portal enables you to: • View knowledge base articles and technical documentation • Download software • View video tutorials • Collaborate with peers and experts in user forums • Get licensing assistance • Access MySonicWall • Learn about SonicWall professional services • Register for training and certification To contact SonicWall Support, refer to https://support.sonicwall.com/contact‐support. SonicWall Secure Mobile Access 200/400 Getting Started Guide...
- Page 67 SonicWall Secure Mobile Access 200/400 Getting Started Guide...
- Page 68 SMA 200/400 Getting Started Guide Updated ‐ March 2017 232‐003789‐50 RevA ...
Need help?
Do you have a question about the SMA 200 and is the answer not in the manual?
Questions and answers