Getac E100 User Manual
Hide thumbs
Also See for E100:
- User manual (126 pages) ,
- User manual (128 pages) ,
- User manual (141 pages)
Table of Contents
Advertisement
Advertisement
Table of Contents

Related Manuals for Getac E100


Summary of Contents for Getac E100
- Page 1 E100 USER’S MANUAL Rugged Mobile Computing Solutions...
- Page 2 All brand and product names are trademarks or registered trademarks of their respective companies. NOTE The information in this manual is subject to change without notice. For the latest version of the manual, please visit the Getac website at www.getac.com.
-
Page 3: Table Of Contents
Table of Contents Chapter 1 Getting Started ......................1-1 Getting the Tablet PC Running ..........1-2 Unpacking ................1-2 Connecting to AC Power ..........1-3 Using the Hand Strap ............1-6 Turning On and Off the Tablet PC ........1-7 Taking a Look at the Tablet PC ..........1-8 ... - Page 5 Boot Menu................5-8 Exit Menu ................5-9 System Recovery ..............5-10 Chapter 6 Using Special Utilities ....................6-1 Using TPM (Trusted Platform Module) ........6-2 Using the OSD Control Panel ..........6-3 Quick Button Setup Utility...........6-7 Using the G-Manager Utility ..........6-10 ...
- Page 6 Bluetooth Wireless Transmission Problems .......8-3 Display Problems ..............8-4 Hardware Device Problems ..........8-4 Hard Disk Drive Problems ...........8-5 LAN Problems...............8-5 Wireless LAN Problems ............8-5 Power Management Problems.........8-7 Software Problems ..............8-8 Sound Problems..............8-8 Startup Problems ..............8-9 ...
-
Page 7: Getting Started
Chapter 1 Getting Started Congratulations on purchasing this rugged tablet PC. This chapter first tells you step by step how to get the tablet PC up and running. Then, you will find a section briefly introducing the external components of the tablet PC. Getting Started... -
Page 8: Getting The Tablet Pc Running
Getting the Tablet PC Running This section guides you through the procedures for getting the tablet PC ready for operation. Unpacking After unpacking the shipping carton, you should find these standard items: Notebook tablet PC Accessories: − AC adapter − AC power cord −... -
Page 9: Connecting To Ac Power
Connecting to AC Power The tablet PC operates either on the external AC power or internal battery power. It is suggested that you use AC power when you start up the tablet PC for the very first time. CAUTION: Use only the AC adapter included with your tablet PC. Using other AC adapters may damage the tablet PC. - Page 10 4. Fit the battery pack into place ( ). Tightening the two screws ( ) is optional. The lack of the screws will not affect the rugged and waterproof feature of the tablet PC. 5. Replace the battery cover and turn the latch clockwise to the lock position.
- Page 11 6. Plug the DC cord of the AC adapter to the power connector ( ) of the tablet PC ( ). Plug the female end of the AC power cord to the AC adapter and the male end to an electrical outlet ( ). 7.
-
Page 12: Using The Hand Strap
Using the Hand Strap Align the four hooks of the hand strap with the four corresponding holes on the tablet PC and tighten the screws. The hand strap allows you to firmly hold the tablet PC by inserting your hand through the hand strap. Getting Started... -
Page 13: Turning On And Off The Tablet Pc
Turning On and Off the Tablet PC Turning On 1. Make sure that the tablet PC is connected to AC power or the battery has power. 2. Press the power button ( 3. Each time the tablet PC is turned on, it performs a Power-On Self Test (POST), and the operating system Windows XP Tablet PC edition should start (may support Windows Vista Business and Ultimate in the future). -
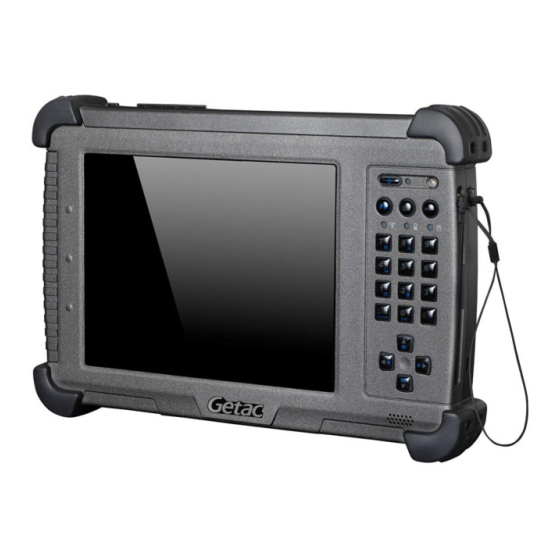
Page 14: Taking A Look At The Tablet Pc
Taking a Look at the Tablet PC NOTE: Depending on the model you purchased, the appearance of your tablet PC may not be exactly the same as those shown in this manual. CAUTION: When not using a connector, make sure that the connector cover is completely closed to ensure the waterproof integrity of the tablet PC. - Page 15 Component Description See Also Quick Buttons Toggles the Fn keylock ON and OFF. P. 2-9 Toggles the keypad lock ON and OFF by P. 2-9 pressing for three seconds to prevent accidental pressing of keypad during transport. Menu Toggles the “OSD Control Panel” utility ON P.
-
Page 17: Right-Side Components
Right-Side Components Component Description See Also Kensington Lock Locks the tablet PC to a stationary P. 7-2 object for security. Touchscreen Pen Serves as the input device by tapping P. 2-7 on the touch screen to make selections and enter information. Tether Hole Touchscreen pen tethered to this hole. -
Page 18: Top Components
Component Description See Also USB Ports Each of the two ports connects a USB P. 4-2 device, such as a USB flash disk, printer, digital camera, joystick, and more. Top Components Component Description See Also Smart Card Accepts a smart card for additional P. -
Page 21: Operating Your Tablet Pc
Chapter 2 Operating Your Tablet PC This chapter provides information about the use of the tablet PC. If you are new to tablet PCs, reading this chapter will help you learn the operating basics. If you are already a computer user, you may choose to read only the parts containing information unique to your tablet PC. -
Page 22: Starting And Stopping The Tablet Pc
Starting and Stopping the Tablet PC There are a number of ways to start and stop the tablet PC. Starting the Tablet PC You always start the tablet PC using the power button. A tablet PC starts up with an operating system (OS) existing on the storage device such as the hard disk. - Page 23 To stop in this Do this... To start up or mode... resume again Hibernation Depending on your settings in Windows, Press the power you can place the tablet PC in button. Hibernation mode by pressing the power button. If you choose to stop in Standby or Hibernation mode, you can return to where you left off the next time you start up the tablet PC.
-
Page 24: Using The Keypad
Using the Keypad Your keypad can be divided into two major categories: Numeric, Delete (Del), and Enter (Ent) keys Cursor-control keys NOTE: To use the keypad during poor lighting conditions, turn the keypad backlight ON by pressing the Fn button, then press the “8” ( ) button. -
Page 25: Cursor-Control Keys With Secondary Functions
switches the sunlight-readable mode ON and OFF. serves as the mouse right-click button. C+A+D serves as the Ctrl+Alt+Del key combination. ESC serves as the Escape key. Cursor-Control Keys with Secondary Functions The word “cursor” refers to the indicator on the screen (except for pointer on screen) that lets you know exactly where on your screen anything you type will appear. -
Page 26: Using The On-Screen Keyboard
Using the On-screen Keyboard Use the on-screen keyboard to enter text and perform various keyboard functions. 1. Click the on-screen keyboard icon ( ) located on the Windows system tray and the software keyboard will appear onscreen. 2. Tap the characters on the on-screen keyboard with the touchscreen pen. -
Page 27: Using The Touchscreen Pen
Using the Touchscreen Pen NOTE: The touchscreen function is not available when running the BIOS Setup program or when using the full screen in DOS mode. CAUTION: Do not use a sharp object such as a ballpoint pen or pencil on the touchscreen. - Page 28 Here are some common terms that you should know when using the touchscreen: Term Action Click/Point Tap gently on the touchscreen. Double-click Tap twice on the touchscreen rapidly. Drag and Press lightly on the touchscreen and move your finger drop until you reach your destination (drag).
-
Page 29: Using The Quick Buttons
Using the Quick Buttons Located on top of the keypad are three quick buttons: Fn button toggles the Fn keylock ON and OFF ( icon appears on the system tray when ON). You can use the secondary functions of keypad buttons with orange color on top of each button (as described in the “Using the Keypad”... -
Page 30: Using The Video Features
Using the Video Features The video subsystem of your tablet PC features: 8.4-inch wide TFT (Thin-Film Transistor) color LCD with SVGA transmissive display Toggle display between landscape view and portrait view using the LCD rotate button Built-in light sensor to automatically adjust the LCD brightness Manually adjust the display brightness using the LCD brightness up ) and down ( ) buttons... -
Page 31: Using The Audio Features
Using the Audio Features The audio subsystem of your tablet PC features: High density audio codec Manually adjust the sound volume using the sound volume up ( and down ( ) buttons Audio-out connector ( ) ( ) Integrated speaker ( ) Ways of playing and recording sound vary with the operating system used. -
Page 32: Connecting Audio Devices
Connecting Audio Devices For higher audio quality, you can send sound through external audio devices such as speakers, headphones, or earphone set using the audio-out connector. NOTE: After connecting an external audio device, make sure that you specify the use of the correct audio device in Windows. -
Page 33: Using The Communication Features
Using the Communication Features Using the LAN The internal 10/100/1000Base-T LAN (Local Area Network) module allows you to connect your tablet PC to a network. It supports data transfer rate up to 1000 Mbps. To connect the network cable to the LAN module, connect one end of the LAN cable to the RJ-45 connector ( ) on the tablet PC and the other end to the network hub. - Page 34 Modulation DSSS (Direct Sequence OFDM (Orthogonal Technology Spread Spectrum) Frequency Division Multiplexing) NOTE: 802.11g mode is backward compatible with 802.11b mode. Turning Off/On the WLAN Radio NOTE: The FAA (Federal Aviation Agency) has deemed it unsafe to operate wireless devices in aircraft as this may interfere with flight safety. Remember to turn off wireless LAN when using your tablet PC in the airplane.
-
Page 35: Connecting To A Wireless Network
It takes approximately 30 seconds for your tablet PC to make a successful WLAN connection and approximately 10 seconds to disconnect. Connecting to a Wireless Network To connect to a wireless network: 1. Make sure that the wireless LAN radio is “on” indicated by the wireless LAN indicator ( ) glowing in green. -
Page 36: Connecting To Another Bluetooth Device
Bluetooth Using the Wireless Feature ® Depending on your model, your tablet PC may incorporate the Bluetooth capability for short-range (about 10 meters) wireless communications between devices without requiring a cable connection. With Bluetooth, data can be transmitted through walls, pockets and briefcases as long as two devices are within range. - Page 37 3. The Add New Connection Wizard window appears. Select Express Mode (Recommended), and then click Next. 4. Select the device to connect to and click Next. 2-17 Operating Your Tablet PC...
- Page 38 5. Depending on the type of Bluetooth device that you want to connect to, you will need to enter the pertinent information. Sending a File 1. Make sure that the target Bluetooth device is turned on, discoverable and within close range. (See the documentation that came with the Bluetooth device.) icon, and then click Wireless File Transfer.
- Page 41 Unlock position 4. Remove the two screws if existing ( ). Pull on the ribbon strip to lift the battery pack off the computer ( ). 5. Locate the SIM card slot and push the SIM card into the slot. Make sure the beveled corner on the SIM card is facing towards the tablet PC and that the golden contact area on the card is facing downwards.
- Page 42 To remove the SIM card, just push in ( ) the SIM card to pop-out ( ) and remove the card. 6. Fit the battery pack into place and secure with two screws. 7. Replace the battery cover and turn the latch clockwise to the lock position.
- Page 43 WARNING: Keep all SIM cards out of the reach of small children. For availability and information on using SIM card services, contact your SIM card vendor. This may be the service provider, network operator, or other vendor. 2-23 Operating Your Tablet PC...
-
Page 45: Managing Power
Chapter 3 Managing Power Your tablet PC operates either on external AC power or on internal battery power. This chapter tells you how you can effectively manage power. To maintain optimal battery performance, it is important that you use the battery in the proper way. - Page 46 AC Adapter CAUTION: The AC adapter is designed for use with your tablet PC only. Connecting the AC adapter to another device can damage the adapter. The AC power cord supplied with your tablet PC is for use in the country where you purchased your tablet PC.
-
Page 47: Battery Pack
Battery Pack The battery pack is the internal power source for the tablet PC. It is rechargeable using the AC adapter. The operating time of a fully charged battery pack depends on how you are using the tablet PC. When your applications often access peripherals, you will experience a shorter operating time. -
Page 48: Initializing The Battery Pack
NOTE: The battery level may automatically lessen due to the self-discharge process (0.21% per day), even when the battery pack is fully charged (100%). This happens no matter if the battery pack is installed in the tablet PC. Initializing the Battery Pack You need to initialize a new battery pack before using it for the first time or when the actual operating time of a battery pack is much less than expected. -
Page 49: Replacing The Battery Pack
click the icon on the taskbar. (Click the icon if the tablet PC is using AC power.) By Gas Gauge On the exterior side of the battery pack is a gas gauge for displaying the estimated battery charge. When the battery pack is not installed in the tablet PC and you want to know the battery charge, you can press the switch with a pointed device to see the corresponding value of indicator segment that light green. - Page 50 1. Make sure that the tablet PC is not turned on or connected to AC power. 2. Place the tablet PC upside down. 3. Lift the latch handle of the battery cover and turn it counterclockwise to the unlock position. Then, detach the cover from the tablet PC. Unlock position 4.
-
Page 51: Battery Low Signals And Actions
5. Fit another battery pack into place. 6. Replace the battery cover and turn the latch clockwise to the lock position. Battery Low Signals and Actions Battery Low occurs when the battery has approximately 10% (Windows default setting) of its charge remaining. The tablet PC’s Battery Charge Indicator ( ) blinks red to alert you to take actions. - Page 52 CAUTION: If you fail to save your data when the battery completely runs out of charge, then you lose your data. Managing Power...
-
Page 53: Power Management
Power Management Your tablet PC supports ACPI (Advanced Configuration and Power Interface) for power management. The power management feature allows you to reduce the power consumption for energy saving. With an ACPI-compliant operating system such as Windows, power supply to different tablet PC components is controlled on an as-needed basis. This allows maximum power conservation and performance at the same time. - Page 54 Hibernation NOTE: Make sure that the hibernation feature is enabled in the Hibernate tab of the Power Options Properties from the Control Panel in Windows XP. Hibernation is a very useful feature. People frequently open many applications when they use computers. It takes some time to get all these applications open and running, and normally they all have to be closed before the computer can be turned off.
- Page 55 Power-Saving Tips Aside from enabling your tablet PC’s power saving mode (see previous section), you can do your part to maximize the battery’s operating time by following these suggestions. Do not disable Power Management. Decrease the LCD brightness to the lowest comfortable level. Shorten the length of time before Windows turn off the display.
- Page 57 Chapter 4 Expanding Your Tablet PC You can expand the capabilities of your tablet PC by connecting other peripheral devices. When using a device, be sure to read the instructions accompanying the device together with the relevant section in this chapter.
-
Page 58: Connecting A Usb Device
Connecting a USB Device Your tablet PC has two USB ports for connecting USB devices, such as a digital camera, scanner, printer, modem, and mouse. The USB ports support transfer rates up to 12 MB/s for USB 1.1 devices and 480 MB/s for USB 2.0 devices. -
Page 59: Using Smart Cards
Using Smart Cards Your tablet PC has a smart card slot for additional security feature, providing tamper-proof storage of user and account identity. A smart card is a type of plastic card embedded with a computer chip that stores and transacts data between you (user) and the tablet PC. You need to install third-party smart card software to take advantage of the smart card feature. - Page 60 Expanding Your Tablet PC...
-
Page 61: Using The Docking Station
Using the Docking Station A docking station is available as an option. This device eliminates the hassles of having you connect and disconnect the various cables when carrying your tablet PC around and allows a variety of peripherals to be connected including a headphone or microphone, etc. -
Page 63: System Recovery
Chapter 5 Using BIOS Setup and System Recovery BIOS Setup Utility is a program for configuring the BIOS (Basic Input/ Output System) settings of the tablet PC. BIOS is a layer of software, called firmware, that translates instructions from other layers of software into instructions that the tablet PC hardware can understand. -
Page 64: Bios Setup
BIOS Setup When to Use BIOS Setup When to Use You need to run BIOS Setup Utility when: You see an error message on the screen requesting you to run BIOS Setup Utility. You want to restore the factory default BIOS settings. You want to modify some specific settings according to the hardware . -
Page 65: Moving Around And Making Selections
The BIOS Setup Utility screen can be divided into four areas: On the top is the menu bar containing the titles of the available menus. Each menu title brings a specific menu. The left column of the menu displays the menu items. The right column of the menu provides more detailed information when a menu item is highlighted. -
Page 66: Information Menu
Function ← , → Selects a menu title. ↑ , ↓ Selects an item or option. + / – Changes the value. 1) Brings up the sub-menu when available. 2) Opens or closes the option window when an item is selected. -
Page 67: Main Menu
Main Menu The Main menu contains the system time and date, as well as the USB setting of the system. System Time sets the system time. System Date sets the system date. Power Button Delay allows you to prevent accidental pressing of the power button. -
Page 68: Advanced Menu
Advanced Menu The Advanced menu contains the advanced settings as shown next. Total Graphics Memory allows you to select the amount of total graphics memory (pre-allocated + fixed + DVMT) for use by the internal graphics device. DVMT Graphics Memory shows the size of DVMT graphics memory. HDD Preheat allows your system to automatically turn on the optional heater when temperature of the hard disk drive is lower than 5 NOTE: The optional heater can function when your tablet PC is connected to AC... -
Page 69: Security Menu
Security Menu The Security menu contains the TPM (Trusted Platform Module) setting. The TPM is a component on your tablet PC’s mainboard that is specifically designed to enhance platform security above-and-beyond the capabilities of today’s software by providing a protected space for key operations and other security critical tasks. -
Page 70: Boot Menu
Boot Menu The Boot menu sets the sequence of the devices to be searched for the operating system. The bootable devices will be automatically detected during POST and shown here, allowing you to set the sequence that the BIOS uses to look for a device from which to load the OS. -
Page 71: Exit Menu
Exit Menu The Exit menu displays ways of exiting BIOS Setup Utility. After finishing with your settings, you must save and exit so that the changes can take effect. Exit Saving Changes saves the changes you have made and exits BIOS Setup Utility. - Page 72 System Recovery You need to run System Recovery when: Your Windows operating system does not start at all. You want to restore the factory default Windows settings. WARNING: Using this feature will reinstall Windows to your system and configure it to the system’s factory default settings.
- Page 73 1. The recovery software is solely the purpose of reinstalling or restoring software associated with the hard disk of this operating GETAC machine. 2. Except the above, no other use is granted hereunder. **************************************** (1)Yes, I agree to the provisions of this agreement and wish to continue.
- Page 75 Chapter 6 Using Special Utilities Your tablet PC comes with an added security feature known as the TPM (Trusted Platform Module) – a component on your tablet PC’s mainboard that is specifically designed to enhance platform security above-and- beyond the capabilities of today’s software by providing a protected space for key operations and other security critical tasks.
- Page 76 Using TPM (Trusted Platform Module) TPM is a hardware-based security feature that can be used to create and manage computer-generated digital certificates. When combined with security software, the TPM enhances existing network and computer security by enabling features such as file protection capabilities and protected e-mail.
-
Page 77: Using The Osd Control Panel
Using the OSD Control Panel The OSD Control Panel allows you to activate or operate certain functions on your tablet PC. To open the OSD Control Panel, press the Menu button on your tablet PC. The following screen appears. Using Special Utilities... - Page 78 The following table shows the various functions on the OSD Control Panel. Operation OSD Control Panel Description Switches the keypad lock ON and OFF. Press the button one second to turn ON (lock) and continuously for more than three seconds to turn OFF (unlock). This would prevent accidental pressing of the keypad buttons during transport.
- Page 79 Operation OSD Control Panel Description station, make sure to click the Docking button to show OUT. Toggles between NORMAL, MAX, and AUTO brightness for LCD backlight. Rotates the LCD display orientation from default landscape to 90 portrait, 180 landscape, 270 portrait, and vice versa.
- Page 80 Operation OSD Control Panel Description Serves as the default Bluetooth wireless setup quick ® launch button. You can use the Quick Button Setup utility to assign a different function to this button (refer to the next section for details). Serves as the default virtual keyboard quick launch button.
-
Page 81: Quick Button Setup Utility
Operation OSD Control Panel Description volume. Press the power button ( ) to wake up the system from “black-out” mode. Quick Button Setup Utility By default, the five quick launch buttons on the OSD Control Panel have pre-assigned functions. The Quick Button Setup utility allows you to re-define the above five quick launch buttons. - Page 82 2. To re-assign a program to a button, click to select a particular button to change (e.g., Explorer), then click the folder icon. 3. The Select a File to Open dialog box appears as shown next. Select the desired program, then click Open to complete the process. Using Special Utilities...
- Page 83 4. You can change the image appearing on the button by clicking the Select Image icon. 5. The Select Picture dialog box appears as shown next. After selecting the image file, the appropriate icon will then appear in the button. 6.
-
Page 84: Starting G-Manager
Starting G-Manager You can start up G-Manager by any of the following methods: All Programs GETAC Utility G-Manager, or Click Start Right-click on the GETAC Utility icon ( ) located on the system tray and click G-Manager. 6-10 Using Special Utilities... -
Page 85: System Tab
System Tab The System tab provides an overview of the system status. The component to be viewed is selected from the tree view list on the left side of the screen. It contains eight major components namely: Summary System Sensors Disk Drives Battery Signal Strength... -
Page 86: Battery Tab
The status of the selected component is displayed on the right side of the screen. Battery Tab The Battery tab allows you to minimize deterioration of the battery thereby ensuring a longer battery life. At most two batteries may be supported. Press Battery 1 or Battery 2 to view the details and configuration settings of each battery. - Page 87 When an abnormal battery condition is detected Battery Status value will be displayed in red. Charging Mode The lower left portion of the Battery tab allows you to select the charging mode. Normal Mode – the battery will be fully charged. When remaining charge reaches below 95%, then charging will start until it is fully charged.
- Page 88 2. Click Yes to start the gauge reset session and the following screen appears. The percentage of completion will be shown on the progress bar. Depending on the number of battery, the screen will show the corresponding number of batteries to perform gauge reset. The value of Working Status will show in alternately.
-
Page 89: Light Sensor Tab
Light Sensor Tab The Light Sensor tab allows you to adjust the LCD brightness based on your surrounding’s lighting condition. Sensor Mode The left portion of the Light Sensor tab allows you to select the sensor mode. Normal – light sensor sensitivity is set at normal environment lighting condition. -
Page 90: Eco Tab
The lower left portion of the Light Sensor tab shows the selected sensor mode’s graph. The upper right portion of the Light Sensor tab shows the active profile based on your selection on sensor mode. The middle right portion of the Light Sensor tab shows the environment luminance (degree of Lux from weak to bright) as detected by your tablet PC’s light sensor. -
Page 91: Eco Information
ECO Information Depending on the system, the left portion of the ECO tab shows the available profile to manage the system’s power consumption. Active Profile The right upper portion of the ECO tab shows the name of the current profile selected. Profile Settings The lower right portion of the ECO tab contains the following: Turn on/off the following for power saving: WWAN, Bluetooth, WLAN,... -
Page 92: Ignition Tab
The amount of time between turning off your vehicle and tablet PC shutdown would depend on your setting on the next section Delay Time. This feature is only available when your tablet PC is docked to the GETAC docking station. 6-18 Using Special Utilities... -
Page 93: Monitoring Tab
Delay Time The right portion of the Ignition tab allows you to set the delay time (20 seconds, 30 seconds, 45 seconds, 1 minute, or 2 minute) to shut down the system when you turn off vehicle ignition. This will help prevent the tablet PC from using up the vehicle’s battery power thereby causing poor vehicle startup. -
Page 94: Monitoring Options
Items to Monitor The left portion of the Monitoring tab allows you to select which item to monitor by selecting on the checkbox before each item. When enabled the status of the selected Item is displayed and a live update is shown on the screen. - Page 95 Monitoring Interval – allows you to set the frequency of updates on the monitoring window (1/3/5/10/30 seconds, or 1/5/30 mi n utes, or 1 hour). Transparency – allows you to set the level of transparency of the monitoring window (10 ~ 90 %). 6-21 Using Special Utilities...
-
Page 96: Gps Status Tab
GPS Status Tab The GPS Status tab shows the GPS signal availability status of the system’s GPS module, allowing you to check if the GPS feature is working properly. You may also need to install a third-party map of your particular location (purchased separately). - Page 97 Message Log The lower left portion of the GPS Status tab shows a summary of raw data string received from satellites which can only be viewed but not editable. The Message Log window is auto-scrollable and will be cleared as soon as GPS signal is disconnected.
- Page 98 displays the message “GPS COM port not available! Please close all GPS program and try again.” to inform you to close the other GPS program to free up the COM port. After closing the other GPS program, click Open GPS button again to try. GPS COM port is somehow not functioning –...
-
Page 99: Caring For The Tablet Pc
Chapter 7 Caring for the Tablet PC Taking good care of your tablet PC will ensure a trouble-free operation and reduce the risk of damage to your tablet PC. This chapter gives you guidelines covering areas such as protecting, storing, cleaning, and traveling. Caring for the Tablet PC... -
Page 100: Protecting The Tablet Pc
Protecting the Tablet PC To safeguard the integrity of your tablet PC data as well as the tablet PC itself, you can protect the tablet PC in several ways as described in this section. Using the Cable Lock You can use a Kensington-type cable lock to protect your tablet PC against theft. -
Page 101: Taking Care Of The Tablet Pc
Taking Care of the Tablet PC Location Guidelines For optimal performance, use the tablet PC where the recommended temperature is between 10 °C (50 °F) and 35 °C (95 °F) – actual operating temperature depending on product specifications. Avoid placing the tablet PC in a location subject to high humidity, extreme temperatures, mechanical vibration, direct sunlight, or heavy dust. -
Page 102: Cleaning Guidelines
using a screen saver or other software that prevents the power management from working. Cleaning Guidelines Never clean the tablet PC with its power on. Use a soft cloth moistened with water or a non-alkaline detergent to wipe the exterior of the tablet PC. Gently wipe the display with a soft, lint-free cloth. -
Page 103: Touchscreen Guidelines
It is recommended that you do not charge the battery pack more than once a day. It is recommended that you charge the battery pack with the tablet PC’s power off. To maintain the battery pack’s operating efficiency, store it in a cool dark place removed from the tablet PC and with 30 % ~ 40 % charge remaining. - Page 104 Avoid using excessive force that may cause damage to the display. Use a soft cloth to remove dirt on the display. The touchscreen surface has a special protective coating that prevents dirt from sticking to it. Not using a soft cloth may cause damage to the special protective coating on the touchscreen surface.
-
Page 105: When Traveling
When Traveling Before traveling with your tablet PC, make a backup of your hard disk data into flash disks or other storage devices. As an added precaution, bring along an extra copy of your important data. Make sure that the battery pack is fully charged. Make sure that the tablet PC is turned off. -
Page 107: Chapter 8 Troubleshooting
Chapter 8 Troubleshooting Tablet PC problems can be caused by hardware, software, or both. When you encounter any problem, it might be a typical problem that can easily be solved. This chapter tells you what actions to take when solving common tablet PC problems. -
Page 108: Preliminary Checklist
Preliminary Checklist Here are helpful hints to follow before you take further actions when you encounter any problem: Try to isolate which part of the tablet PC is causing the problem. Make sure that you turn on all peri p heral devices before turning on the tablet PC. -
Page 109: Solving Common Problems
Solving Common Problems Battery Problems The battery does not charge (Battery Charge indicator does not light amber). Make sure that the AC adapter is properly connected. Make sure that the battery is not too hot or cold. Allow time for the battery pack to return to room temperature. -
Page 110: Display Problems
Make sure that the other device is not in “Hidden” mode. Make sure that both devices are compatible. Display Problems Nothing appears on the screen. During operation, the screen may automatically turn off as a result of power management. Press any key to see if the screen comes back. The brightness level might be too low. -
Page 111: Hard Disk Drive Problems
Hard Disk Drive Problems The hard disk drive error message appears on the screen. The hard disk drive has defects. Ask your dealer for help. The hard disk drive operations seem slow. The data files stored on the hard disk drive may be fragmented. Use a tool such as Window’s Disk Defragmenter to defragment the files. - Page 112 Transmission quality is poor. Your tablet PC may be in an out-of-range situation. Move your tablet PC closer to the Access Point or another wireless LAN device it is associated with. Check if there is high interference around the environment and solve the problem as described next.
-
Page 113: Power Management Problems
Make sure that your tablet PC is configured with the same security option (encryption) to the Access Point. Use the Web Manager/Telnet of the Access Point to check whether it is connected to the network. Reconfigure and reset the Access Point. I cannot access the network. -
Page 114: Software Problems
The tablet PC does not enter Standby or Hibernation mode immediately. If the tablet PC is performing an operation, it normally waits for the operation to finish. The tablet PC does not resume from Standby or Hibernation mode. The tablet PC automatically enters Standby or Hibernation mode when the battery pack is empty. -
Page 115: Startup Problems
The external audio device does not work. Make sure that your tablet PC is equipped with the driver needed. Click the speaker symbol on the taskbar and check the Windows volume control. Check the volume control of your tablet PC. Startup Problems When you turn on the tablet PC, it does not respond and the Power Indicator does not light green. - Page 116 PC, the RTC (Real-Time Clock) battery is at the end of its life. Call an authorized dealer to replace the RTC battery. 8-10 Troubleshooting...
-
Page 117: Resetting The Tablet Pc
Resetting the Tablet PC You may have to reset (reboot) your tablet PC on some occasions when an error occurs and the program you are using hangs up. If the tablet PC operation seems to hang up, first wait. It is possible that the tablet PC is processing data. -
Page 119: Appendix A Specifications
Appendix A Specifications NOTE: Specifications are subject to change without any prior notice. Parts Specifications Intel® A110 processor, 512 KB L2 cache, 800 MHz RAM (system) Up to 1 GB DDRII DRAM Display Panel 8.4-inch wide TFT LCD, SVGA transmissive display, integrated touchscreen, 800 Nits LCD brightness (option) Audio Features... - Page 120 Parts Specifications Environment Temperature O perating: –20 °C (–4 °F) to 60 °C (140 °F) Storage: –40 °C (–40 °F) to 75 °C (167 °F) Thermal shock: –20 °C (–4 °F) to 60 °C (140 °F) Humidity Relative: 0 % to 95 % non-condensing Compliance MIL-STD 810F and IP54 Specifications...
-
Page 121: Appendix B Regulatory Information
Appendix B Regulatory Information This appendix provides regulatory statements and safety notices on your tablet PC. NOTE: Marking labels located on the exterior of your tablet PC indicate the regulations that your model complies with. Please check the marking labels and refer to the corresponding statements in this appendix. -
Page 122: On The Use Of The System
On the Use of the System Class B Regulations Federal Communications Commission Radio Frequency Interference Statement NOTE: This equipment has been tested and found to comply with the limits for a Class B digital device pursuant to Part 15 of the FCC Rules. These limits are designed to provide reasonable protection against harmful interference in a residential installation. -
Page 123: Safety Notices
Canada Canadian Department of Communications Radio Interference Regulations Class B Compliance Notice This Class B digital apparatus meets all requirements of the Canada Interference-Causing equipment regulations. Cet appareil numérique de Classe B respecte toutes les exigences du Règlement Canadien sur le matériel brouileur. This digital apparatus does not exceed the Class B limits for radio noise emissions from digital apparatus set out in the Radio Interference Regulations of the Canadian Department of Communications. - Page 124 FINNISH VAROITUS: Paristo voi räjähtää, jos se on virheellisesti asennettu. Vaihda paristo ainoastaan valmistajan suosittelemaan tyyppiin. Hävitä käytetty paristo valmistajan ohjeiden mukaisesti. ENGLISH CAUTION: Danger of explosion if battery is incorrectly replaced. Replace only with the same or equivalent type recommended by the equipment manufacturer.
- Page 125 adapter with paper or other objects that will reduce cooling. Do not use the AC adapter while it is inside a carrying case. Connect the adapter to a proper power source. The voltage requirements are found on the product case and/or packaging. Do not use the adapter if the cord becomes damaged.
-
Page 126: On The Use Of The Rf Device
On the Use of the RF Device NOTE: The information in this section applies to models with the wireless LAN module. USA and Canada Safety Requirements and Notices IMPORTANT NOTE: This tranmitter must not be colocated or operating in conjunction with any other antenna or transmitter. - Page 127 The use of wireless devices on airplanes is governed by the Federal Aviation Administration (FAA). The use of wireless devices in hospitals is restricted to the limits set forth by each hospital. Explosive Device Proximity Warning WARNING: Do not operate a portable transmitter (such as a wireless network device) near unshielded blasting caps or in an explosive environment unless the device has been modified to be qualified for such use.
- Page 128 EMC Requirements This device complies with part 15 of the FCC Rules. Operation is subject to the following Operation is subject to the following to the following two conditions: (1) This device may not cause harmful interference, and (2) this device must accept any interference received, including interference that may cause undesired operation.
-
Page 129: European Union Ce Marking And Compliance Noticesb-9
Canada Radio Frequency Interference Requirements To prevent radio interference to the licensed service, this device is intended to be operated indoors and away from windows to provide maximum shielding. Equipment (or its transmit antenna) that is installed outdoors is subject to licensing. Pour empêcher que cet appareil cause du brouillage au service faisant l'objet d'une licence, il doit être utilisé... - Page 130 German Dieses Produkt entspricht den Bestimmungen der Europäischen Richtlinie 1999/5/EC. Greek To προϊόν αυτό πληροί τις προβλέψεις της Ευρωπαϊκής Οδηγίας 1999/5/EC. Icelandic Þessi vara stenst reglugerð Evrópska Efnahags Bandalagsins númer 1999/5/EC. Italian Questo prodotto è conforme alla Direttiva Europea 1999/5/EC. Norwegian Dette produktet er i henhold til bestemmelsene i det europeiske direktivet 1999/5/EC.
- Page 131 The European variant is intended for use throughout the European Economic Area. However, authorization for use is further restricted in particular countries or regions within countries, as follows: General European standards dictate maximum radiated transmit power of 100 mW Effective Isotropic Radiated Power (EIRP) and the frequency range 2400 –...
- Page 132 25 Doubs 61 Orne 90 Territoire de Belfort 26 Drôme 63 Puy du Dôme 94 Val de Marne 32 Gers 64 Pyrénées Atlantique Departments in Which the Wireless LAN Module’s Maximum EIRP Not Shown in the Previous Table Frequency Ranges Indoors Outdoors (MHz)
Need help?
Do you have a question about the E100 and is the answer not in the manual?
Questions and answers