
Related Manuals for Küppersbusch IKE 4580-1-4T


Summary of Contents for Küppersbusch IKE 4580-1-4T
- Page 1 Gebruiks- Notice Benutzer- User manual aanwijzing d'utilisation information Koel-vries- Réfrigérateur- Kühl-Gefrier- Fridge-Freezer combinatie congélateur schrank IKE4580-1-4T...
-
Page 2: Table Of Contents
CONTENTS Safety instructions Care and cleaning Control panel What to do if… First use Technical data Daily Use Installation Helpful hints and tips Environmental concerns Subject to change without notice. SAFETY INSTRUCTIONS In the interest of your safety and to ensure lid, be sure to make that spring lock un- the correct use, before installing and first usable before you discard the old appli-... -
Page 3: Care And Cleaning
If the refrigerant circuit should become • Frozen food must not be re-frozen once damaged: it has been thawed out. – avoid open flames and sources of igni- • Store pre-packed frozen food in accord- tion ance with the frozen food manufacturer's –... -
Page 4: Control Panel
• The appliance must not be located close in either its refrigerant circuit or insula- to radiators or cookers. tion materials. The appliance shall not • Make sure that the mains plug is accessi- be discarded together with the urban ble after the installation of the appliance. - Page 5 Temperature indicator When the Alarm reset switch is pressed, the warmest temperature reached in the During normal functioning the Temperature compartment flashes on the Temperature indicator shows the temperature setting. indicator . Important! Difference between the If the power has been off for a long time, temperature inside the compartment and frozen food should be consumed as quickly temperature setting is normal.
-
Page 6: First Use
Supercool function The Supercool light will light up. The maximum performance is obtained by Important! The internal temperature goes setting the Supercool function. It’s recom- down to +2°C. mended when loading large quantities of After about 6 hours the Supercool function food. - Page 7 Important! When use the Fast Freezing characteristics chart under "rising time", the defrosted food must be consumed quickly function: or cooked immediately and then re-frozen about 6 Introducing small quantities of (after cooling). hours be- fresh food (about 5 kg) fore Ice-cube production about 24...
-
Page 8: Movable Shelves
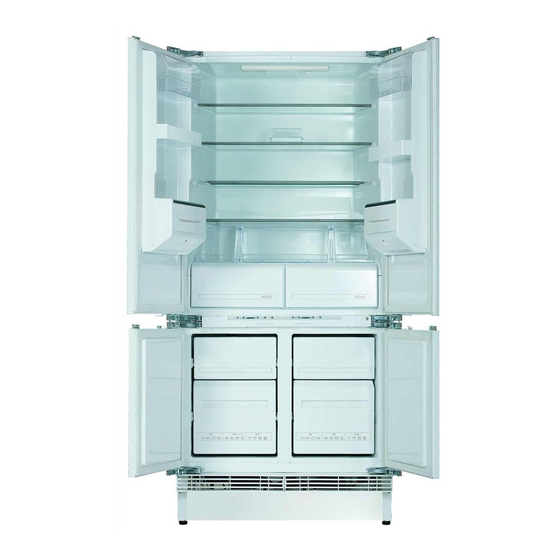
Movable shelves The walls of the refrigerator are equipped with a series of runners so that the shelves can be positioned as desired. For better use of space, the front half- shelves can lie over the rear ones. Fridge Doors For proper opening and closing, it is advis- able to act on both doors simultaneously (as shown in the figure). -
Page 9: Helpful Hints And Tips
Superchill compartment The temperature in this compartment (from 0°C to +3°C) is kept constant by a special sensor. No adjustment is needed. Products stored in this compartment will keep fresh and in peak condition. It is ad- visable to wrap foods in aluminium foil or plastic film. -
Page 10: Care And Cleaning
• water ices, if consumed immediately after • be sure that frozen foodstuffs are trans- removal from the freezer compartment, ferred from the foodstore to the freezer in can possibly cause the skin to be freeze the shortest possible time; burnt;... -
Page 11: Defrosting Of The Freezer
Defrosting of the freezer • disconnect the appliance from elec- tricity supply The freezer compartment of this model, on • remove all food the other hand, is a "no frost" type. This • defrost (if foreseen) and clean the appli- means that there is no buildup of frost ance and all accessories when it is in operation, neither on the inter-... -
Page 12: Technical Data
Problem Possible cause Solution Products prevent that water Make sure that products do not flows into the water collector. touch the rear plate. Water flows on the The melting water outlet does Attach the melting water outlet to ground. not flow in the evaporative tray the evaporative tray. -
Page 13: Installation
The technical information are situated in the rating plate on the internal left side of the appliance and in the energy label. INSTALLATION Positioning The appliance must be earthed. The power supply cable plug is provided with a contact Install this appliance at a location where the for this purpose. - Page 14 Before installing the appliance between units, adjust the height of the feet and rear 820 mm wheels. The wheels are factory set for a height of 820 mm. To align the appliance to a height of 870 mm, raise it by adjust- ing the feet with a spanner, then remove the wheels and refit them in the lowest position.
- Page 15 Apply spacers to the hinges before instal- ling the appliance into the cabinet . See picture. Rest the panels against the appliance. Fit the rear brackets, taking into account the thickness of the panels (maximum width of unit 900 mm). For a correct alignment make sure that the distance between the appliance and the cabinet is of 45 mm.
-
Page 16: Fitting The Door Panels
If necessary, door opening angle max 90° can be obtained by introducing the pivots supplied separately. See picture. Fitting the door panels Open a door a remove the bracket cover. Undo the nuts with washers and remove the bracket from the door. 10 mm Drill the small doors as shown in the figure. - Page 17 Fix the bracket to the door with the screws contained in the bag. Refit the bracket on the ad- justment screws and screw the nuts with washers with- out tightening them down. Close the door and check that the small door is posi- tioned at the required height, operating the adjustment screws if necessary.
- Page 18 Fix the bracket located under the door to the panel with the two plastic washers con- tained in the box of accesso- ries. Then refit the bracket cover. Building the appliance in Fit the appliance into the recess. Rotate the bracket of 180° in order to ob- tain the right position ( 2).
-
Page 19: Fitting The Plinth
The top of the appliance must be kept clear to allow better air circulation. If a wall unit is fitted above the appliance, there 50 mm 50 mm must be a gap of 50 mm between this unit and the wall and it must be at least 50 mm below the ceiling. -
Page 20: Environmental Concerns
If using a 100 mm plinth, fit the complete height compensation strip. 140-190 mm Alignment height of 870 mm If using a 190 to 220 mm plinth, make a shown. If using a plinth higher than 150 mm but less than 190 mm, cut the height compensation strip supplied with the appliance to the required depth and fit it be-... - Page 21 product is disposed of correctly, you will about recycling of this product, please help prevent potential negative contact your local council, your household consequences for the environment and waste disposal service or the shop where human health, which could otherwise be you purchased the product.
- Page 25 222318846-B-112013...
Need help?
Do you have a question about the IKE 4580-1-4T and is the answer not in the manual?
Questions and answers