Table of Contents
Advertisement
Advertisement
Table of Contents

Related Manuals for Vertex Standard VZ-30-G6-4


Summary of Contents for Vertex Standard VZ-30-G6-4
- Page 1 Two Way Raido User Guide Frequency:400-470MHz FCC ID:2ADPVVZ-30-G6-4...
- Page 2 THANK YOU! We are grateful that you chose for your land mobile radio applications. We believe this easy-to-use transceiver will provide dependable reliable communication to personal operating at peak efficiency. transceivers incorporate the latest in advanced technology. As a result, we feel strongly that you will be pleased with the quality and features of this product!
-
Page 3: Table Of Contents
CONTENT SAFETY AND GENERAL INFORMATION ......1 UNPACKING AND CHECKING EQUIPMENT ....10 Supplied Accessories ..........10 PREPARATION ..............11 Charging the Battery Pack .......... 11 Attaching/Removing the Antenna ....... 12 GETTING ACQUAINTED............ 13 Orientation ..............13 Programmable Auxiliary Functions ......15 Status Indication ............ - Page 4 Squelch Off ..............22 Squelch Off Momentary ..........22 Busy Channel Lock Out (BCLO) ......... 23 Time-Out Timer (TOT)..........23 Squelch Tail Elimination (STE) ........23 Talk Around ..............24 Scramble ..............24 Calling Back ..............24 Only Receiving ............25 VOX ................
-
Page 5: Safety And General Information
SAFETY AND GENERAL INFORMATION Important Information on Safe and Efficient Operation Read This Information Before Using Your Radio. The information provided in this document supersedes the general safety information contained in user guides published before. Transmit and Receive Procedure Your two-way radio contains a transmitter and a receiver .To control your exposure and ensures compliance with the occupational/controlled environment exposure limits, always adhere to the following procedure:... - Page 6 Portable Radio Operation and EME Exposure Antenna Care Use only the supplied or an approved replacement antenna. DO NOT hold the antenna when the radio is “IN USE”. Holding the antenna affects the effective range. Two-Way Radio Operation When using your radio as a traditional two way radio, hold the radio in a vertical position with the microphone 1 to 2 inches (2.5 to 5 cm) away from the lips.
-
Page 7: Medical Devices
Electromagnetic interference/Compatibility NOTE: Nearly every electronic device is susceptible to electromagnetic interference (EM) if inadequately shielded, designed, or otherwise configured for electromagnetic compatibility. Facilities To avoid electromagnetic interference and /or compatibility conflicts, turn off your radio in any facility where posted notices instruct you to do so. - Page 8 pacemaker .These recommendations are consistent with the independent research by and recommendations of the U.S. Food and Drug Administration. Persons with pacemakers should: ALWAYS keep the radio more than six inches (15cm)from their pacemaker when the radio is turned ON. Not carry the radio in the breast pocket.
-
Page 9: Safety And General Use While Driving
Safety and General Use While Driving Check the laws and regulations on the use of radios in the area where you drive .Always obey them. When using your radio while driving, please: Give full attention to driving and to the road, Use hands-free operation, if available. -
Page 10: Operational Warnings
Operational Warnings Warnings For Vehicles with an Air Bag Do not place a portable radio in the area over an air bag or in the air bag deployment area. Air bags inflate with great forces. If a portable radio is placed in the air bag deployment area and the air bag inflates, the radio may be propelled with great force and cause serious injury to occupants of the vehicle. -
Page 11: Operational Cautions
Operational Cautions Antenna Do not use any portable radio that has a damaged antenna. If a damaged antenna comes into contact with your skin, a minor burn can result. Batteries All batteries can cause property damage and /or bodily injury such as burns if a conductive material such as jewelry, keys, or beaded chains touches exposed terminals. -
Page 12: Battery Charger Safety Instructions
Battery Charger Safety Instructions Save these instructions 1.Do not expose the charger to rain or snow. 2.Do not operate or disassemble the charger if it has received a sharp blow, or has been dropped or damage in any way. 3.Never after the AC cord or plug provide with the unit .If the plug will not fit the outlet, have the proper outlet installed by a qualified electrician. - Page 13 in 9 a risk of fire and /or electric shock. If an extension cord must be used, make sure that: The pins on the plug of the extension cord are the same number, size, and shape as those on the plug of the charger.
-
Page 14: Unpacking And Checking Equipment
UNPACKING AND CHECKING EQUIPMENT Carefully unpack the transceiver. We recommend that you identify the items listed in the following table before discarding the packing material. If any items are missing or have been damaged during shipment, file a claim with the carrier immediately. -
Page 15: Preparation
PREPARATION Charging the Battery Pack 1. Using the Battery Pack. The battery pack is not charged at the factory, please charge it before use. To extend the battery pack lifetime, please power off the transceiver and remove the battery pack when not in use and leave the battery in hot or cold place. -
Page 16: Attaching/Removing The Antenna
Please charge the battery pack as follows: 1. Make sure the battery pack contacts are in contact with the charging terminals. 2. Slide the battery pack or transceiver with a battery pack into the desktop charger. 3. The charging LED lights red and charging begins. 4. -
Page 17: Getting Acquainted
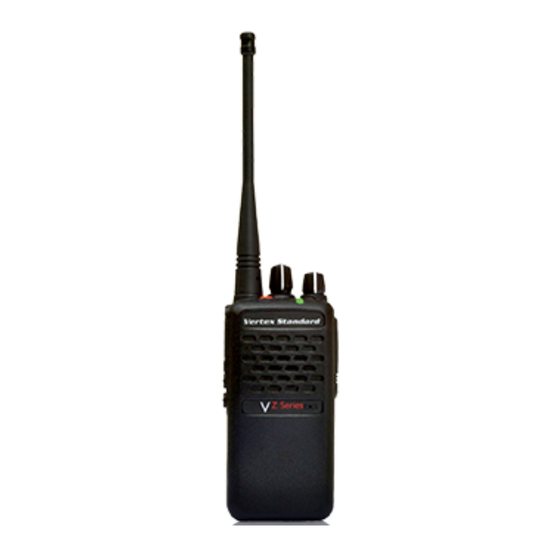
GETTING ACQUAINTED Orientation... - Page 18 1. Power/Volume Switch Rotate clockwise to switch power On or to increase the audio output; Rotate counter-clockwise to switch power Off or to reduce the audio output level. 2. Tuning Control To select an operating frequency, channel or others. 3. Antenna Rubber antenna using for receiving or transmitting a signal.
-
Page 19: Programmable Auxiliary Functions
11. Battery Pack Supply the power to the transceiver. 12. Battery Lock Button Use to lock/unlock the battery pack. 13. Earphone/Data Cable Jack Connects an earphone or connects a data cable for PC software programming. Programmable Auxiliary Functions Your dealer may program the [P1], [P2] (long press or short press) with one of the following auxiliary functions respectively. -
Page 20: Status Indication
[P1],[P2]] you press anyone of keys, the time of pressing is over your setting time, then it’s a long time key, otherwise, it’s a short Squelch Off and Squelch Off Momentary feature only to be enabled for analog channels. Status Indication LED Indicator LED Indicator Radio Status... -
Page 21: Basic Operation
BASIC OPERATION Switch Power On/Off Turn the Power switch/Volume control clockwise to switch the transceiver ON. Turn the Power switch/Volume control counter clockwise switch transceiver OFF. Adjusting the Volume otate the Volume control to adjust the volume. Clockwise increases the volume and counter clockwise decreases it. -
Page 22: Transmitting
Transmitting You can transmit on an analog channel or digital channel but should be in the same format when communicate, an analog channel can’t communicate with a digital channel. 1.On analog channel, press the [PTT] switch and speak into the microphone in your normal speaking voice. - Page 23 All other calls will not be heard. If your selected channel is not set up with a signaling type, you will hear calls made by any party (not just those in your system). On digital channels, only the same tone or directly call the radio ID to be received.
-
Page 24: Advanced Operations
ADVANCED OPERATIONS (The following features should be programmed by your dealers). Channel Number Annunciation There are 3 kinds of the channel number annunciation: “Chinese Male Voice, English Male Voice(Default Setting), None”. When you turn the [Tuning Control], the transceiver sounds the current corresponding channel number. -
Page 25: Low Battery Alert
pressed and no switches are being turned) While the channel is not busy and no operation is performed for 5 seconds (5~60 seconds available), battery save function activates. When a signal is received or an operation is performed, battery save is disabled. The default setting is ON. -
Page 26: Sql Change
SQL Change The purpose of the squelch level is to mute the speaker when no signals are present. With the squelch level correctly set, you will hear sound only while actually receiving signals. You can select from level 1~ 3 cycles. The default setting is “2”. Squelch Off Press the Squelch Off key to open noise squelch, press it again to close. -
Page 27: Busy Channel Lock Out (Bclo)
Busy Channel Lock Out (BCLO) When receiving a signal, if BCLO feature is enabled, you are prevented from transmitting on a channel that is already in use. Press the PTT on a channel that is already in use, the transceiver will sound alert tone and turn back to the receive mode. -
Page 28: Talk Around
you can use this feature to eliminate. The default setting is OFF. This feature is only for analog channel. Talk Around This feature is only enabled when there are different frequency between Press programmed function key to activate the Talk Around feature. -
Page 29: Only Receiving
and hold [PTT] switch to call contact preset for the current digital channels. Only Receiving When this feature to be active, the transmission is prohibited, but can still receive the signals. The default setting is OFF. Press programmed transmit hands-free with the transceiver or thru a headset. Re-press the programmed key to exit this feature. -
Page 30: Table 1 - Standard Ctcss Tones Table
Table 1 - Standard CTCSS Tones Table 1 – 63.0 14 - 100.0 27 - 156.7 40 - 196.6 2 - 67.0 15 - 103.5 28 - 159.8 41 - 199.5 3 - 69.3 16 - 107.2 29 - 162.2 42 - 203.5 4 - 71.9 17 - 110.9... -
Page 31: Troubleshooting Guide
TROUBLESHOOTING GUIDE Problem Solution z The battery pack may be dead. Recharge or replace the battery pack. No power. z The battery pack may not be installed correctly. Remove the battery pack and install it again. Battery power z The battery pack life is finished. dies shortly Replace the battery pack with a new after charging. - Page 32 SAFETYTRAINING INFORMATION Your radio generates RF electromagnetic Vertex Standard LMR, Inc. energy during transmit mode. This radio is designed for and classified as “Occupational Use Only”, meaning it must be used only during the course of employment by individuals aware of the hazards, and the ways to minimize such hazards. This radio is NOT intended for use by the “General Population” in an uncontrolled environment. This radio has been tested and complies with the FCC RF exposure limits for “Occupational Use Only”. In addition, your radio complies with the following Standards and Guidelines Vertex Standard LMR, Inc. with regard to RF energy and electromagnetic energy levels and evaluation of such levels for exposure to humans: FCC OET Bulletin 65 Edition 97-01 Supplement C, Evaluating Compliance with FCC Guidelines for Human Exposure to Radio Frequency Electromagnetic Fields.
Need help?
Do you have a question about the VZ-30-G6-4 and is the answer not in the manual?
Questions and answers