Table of Contents
Advertisement
Quick Links
Advertisement
Table of Contents

Summary of Contents for Tangent Mini V
-
Page 2: Symbol Description
User’s Manual V1.1 for Tangent Mini V. Symbol description Caution: refers to important information that can help you properly use the Mini V, and how to avoid problems. Warning: indicates that a potential risk of hardware damage or physical injury may exist. -
Page 3: Safety Notice
Before using this product please read the safety notices, below, carefully. This will help to extend the product’s lifecycle, and ensure normal operation. When Mini V is working, please make sure its ventilation system is working. The power adapter is dissipating heat during normal use, please be sure not to cover it and keep it away from your body to prevent discomfort or injury by heat exposure. - Page 4 Accessory List Thank you for choosing the Tangent Mini V. Please check the accessories listed below. If there is anything broken or lost, please contact Tangent as soon as possible. Power Adapter Power Cord Magnet Rubber Foot Vesa Mount Seatbase...
-
Page 5: Table Of Contents
...................... 7 RONT 1.3 B ......................8 1.4 B ......................9 OTTOM CHAPTER 2 ........................10 PLACEMENT AND CONNECTION OF MINI V ............10 2.1 O ......................10 N THE 2.2 O ..................11 N THE ACK OF A MONITOR ONNECTION OF 2.3 C... -
Page 6: Chapter 1
C hapter Introduc ing Mini V 1.1 Top View Name Description Attach a Kensington security system or a Kensington Lock compatible lock to secure your Mini V. -
Page 7: Front Side View
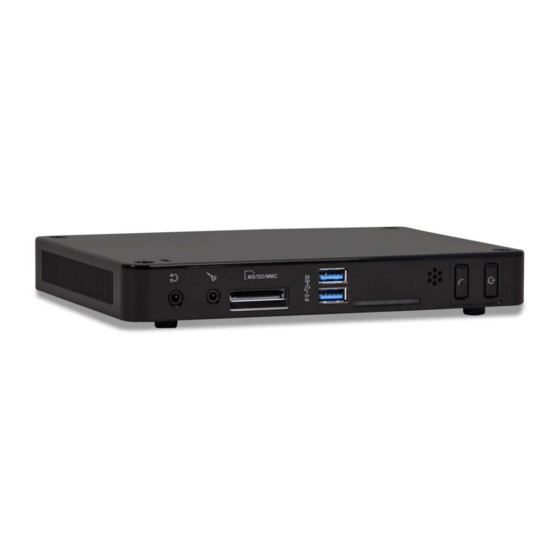
1.2 Front Side View Name Description Headphone Port Connects to a headphone Connects to a microphone or playback Microphone In and S/PDIF In Port devices with optical connectors(3.5mm jack) Support SD/SDHC/SDXC/MS/MS Pro/MMC Multi-Function Card Reader memory cards Connect to USB devices Caution:Before using it, you need to install USB 3.0 Ports the “ASMedia USB3.0 driver”... -
Page 8: Back Side View
1.3 B ac k S ide View Name Description USB 2.0 Ports Connects to USB devices Display Output Port (VGA) Connects to display device HDMI Port Connects to HDMI audio and video Network Port Standard RJ-45 network port Connects to powered analog speakers or Line Out and S/PDIF Out Port recording devices with optical connectors(3.5mm jack) -
Page 9: Bottom View
1.4 B ottom View There are four Magnet-Metal-Feet in the package. Just align them to the sheet metal on the bottom. The feet can seat and protect the Mini V when it is placed on a tabletop. -
Page 10: Chapter 2
C hapter P lac ement of the Mini V 2.1 On a Desk 2.1.1. You can install your Mini V in the Seatbase, as shown below:... -
Page 11: On The Back Of A Monitor
2.1.2. If there is enough space on your desk, you can simply put your Mini V on the tabletop as shown below. 2.2 On the Back of a Monitor This is the best space-saving way. 2.2.1. Use four screws to fasten the VESA Mount onto the display back. - Page 12 2.2.2. Fit the Mini V into the VESA Mount with power button located at the top for easy access. Slide up the Mini V to take it out.
-
Page 13: Connect The Monitor
Connecting the Mini V 2.3.1. Connect the Monitor Connect a monitor to the Mini V through the VGA connector. 2.3.2. Connect the USB Devices Connect USB devices to the USB ports of the Mini V, for example, mouse and keyboard. -
Page 14: Connect The Network Cable
Connect LAN cable to the RJ-45 port, with the other end connected to a hub or switch. 2.3.4. Connecting the Power Cord Connect the power adapter to the power input port of the Mini V, and push the power button to start it.


Need help?
Do you have a question about the Mini V and is the answer not in the manual?
Questions and answers