TP-Link Archer C2600 User Manual
Ac2600 wireless dual band gigabit router
Hide thumbs
Also See for Archer C2600:
- User manual (114 pages) ,
- Quick installation manual (2 pages) ,
- User manual (89 pages)
Table of Contents
Advertisement
Quick Links
Download this manual
See also:
User Manual
Advertisement
Table of Contents

Related Manuals for TP-Link Archer C2600


Summary of Contents for TP-Link Archer C2600
-
Page 1: User Guide
Archer C2600 User Guide AC2600 Wireless Dual Band Gigabit Router... - Page 2 No part of the specifications may be reproduced in any form or by any means or used to make any derivative such as translation, transformation, or adaptation without permission from TP-LINK TECHNOLOGIES CO., LTD. Copyright © 2015 TP-LINK TECHNOLOGIES CO., LTD. All rights reserved.
-
Page 3: Fcc Statement
FCC STATEMENT This equipment has been tested and found to comply with the limits for a Class B digital device, pursuant to part 15 of the FCC Rules. These limits are designed to provide reasonable protection against harmful interference in a residential installation. This equipment generates, uses and can radiate radio frequency energy and, if not installed and used in accordance with the instructions, may cause harmful interference to radio communications. -
Page 4: Canadian Compliance Statement
(e.i.r.p.) is not more than that permitted for successful communication. This radio transmitter (IC: 8853A-C2600 / Model: Archer C2600) has been approved by Industry Canada to operate with the antenna type listed below with maximum permissible gain indicated. Antenna types not included in this list, having a gain greater than the maximum gain indicated for that type, are strictly prohibited for use with this device. -
Page 5: Industry Canada Statement
Approved antenna(s) list Antenna Type:External omni-directional antenna Gain: 2412-2462MHz: 3.04dBi 5150-5250MHz: 4.95dBi 5745-5825MHz: 4.15dBi Industry Canada Statement Complies with the Canadian ICES-003 Class B specifications. Cet appareil numérique de la classe B est conforme à la norme NMB-003 du Canada. CAN ICES-3 (B)/NMB-3(B) Caution : (i) the device for operation in the band 5 180-5 240 MHz is only for indoor use to reduce the potential... -
Page 6: Safety Information
• 請使用原裝電源供應器或只能按照本產品注明的電源類型使用本產品。 • 清潔本產品之前請先拔掉電源線。請勿使用液體、噴霧清潔劑或濕布進行清潔。 • 注意防潮,請勿將水或其他液體潑灑到本產品上。 • 插槽與開口供通風使用,以確保本產品的操作可靠並防止過熱,請勿堵塞或覆蓋開口。 • 請勿將本產品置放於靠近熱源的地方。除非有正常的通風,否則不可放在密閉位置中。 • 請不要私自打開機殼,不要嘗試自行維修本產品,請由授權的專業人士進行此項工作。 Продукт сертифіковано згідно с правилами системи УкрСЕПРО на відповідність вимогам нормативних документів та вимогам, що передбачені чинними законодавчими актами України. Safety Information When product has power button, the power button is one of the way to shut off the product; when there ... - Page 7 DECLARATION OF CONFORMITY For the following equipment: Product Description: AC2600 Wireless Dual Band Gigabit Router Model No.: Archer C2600 Trademark: TP-LINK We declare under our own responsibility that the above products satisfy all the technical regulations applicable to the product within the scope of Council Directives:...
-
Page 8: Table Of Contents
Contents Chapter 1. Get to Know About Your Router ....................... 1 Product Overview ....................................2 Main Features ......................................2 Panel Layout ......................................4 1.3.1 Top View ........................................4 1.3.2 The Back Panel ......................................6 Chapter 2. Connect the Hardware ........................... 7 Requirements for Operation ................................ - Page 9 Media Sharing ...................................... 32 8.3.1 Access the USB disk .................................... 32 8.3.2 Customize Your Settings .................................. 33 Printer Sharing ..................................... 34 Chapter 9. Parental Controls .............................. 38 Chapter 10. Guest Network ..............................41 10.1 Create a Network for Guests ................................ 42 10.2 Limit the Network Authorities and Bandwidth for Guests ..................
- Page 10 13.5 System Log ......................................73 13.6 Local Management ................................... 74 13.7 Remote Management ..................................74 13.8 CWMP Settings ....................................75 13.9 SNMP Settings ...................................... 76 Appendix A: Specifications ..............................77 Appendix B: Troubleshooting Guide & FAQ ........................78 Appendix C: Configure the PC ............................... 84...
-
Page 11: Chapter 1. Get To Know About Your Router
Chapter 1. Get to Know About Your Router This chapter introduces what the router can do and shows its main features and appearance. This chapter contains the following sections: Product Overview Main Features Panel Layout Chapter 1 Get to Know About Your Router1... -
Page 12: Product Overview
Wi-Fi access codes or other personal data. IPv6 Supported Archer C2600 supports IPv6, which is the foundation of the next generation of the Internet and enables a range of new services and improved user experience. - Page 13 2 dual band fixed external antennas and high power amplifiers provide stable signals and optimal wireless coverage Supports USB Storage Sharing, Print Server, FTP Server, Media Server. Share a printer locally and files & media with networked devices or remotely via FTP server Ethernet WAN (EWAN) offers another broadband connectivity option for connecting VDSL, cable or fiber ...
-
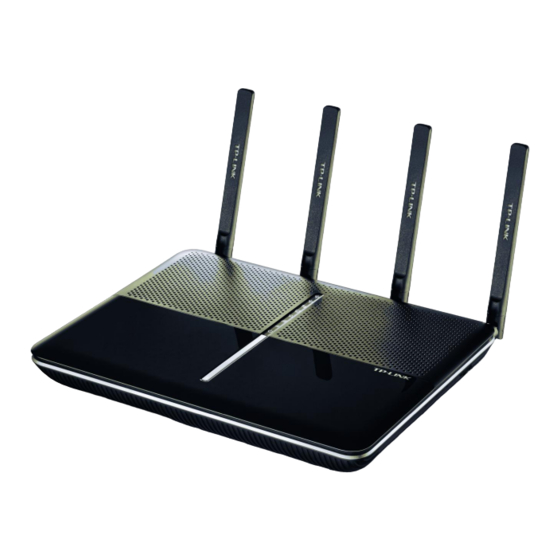
Page 14: Panel Layout
Panel Layout 1.3.1 Top View The router’s LEDs are located on the top panel (view from top to bottom). You can check the router’s working status by following the LED Explanation table. LED Explanation: Name Status Indication System initialization complete. System initializing or firmware upgrading is in process. - Page 15 mode. Please refer to Note 2 for troubleshooting. The wireless 2.4GHz band is working properly. (Wireless) The wireless 2.4 GHz band is disabled. The wireless 5GHz band is working properly. (Wireless) The wireless 5GHz band is disabled. At least one LAN port is connected. (LAN) No LAN port is connected.
-
Page 16: The Back Panel
1.3.2 The Back Panel The router’s back panel shows the connection ports, buttons and antennas (view from left to right). Refer to the following for detailed instructions. Item Description LAN1, LAN2, LAN3, These ports (1, 2, 3, 4) connect the router to the local PC(s). LAN4/WAN This port is where you will connect the DSL/cable Modem, or Ethernet. - Page 17 1.3.3 The Side Panel The router’s side panel shows the connection ports, buttons (view from left to right). Refer to the following for detailed instructions. Item Description For connecting to a USB storage device or a USB printer. WiFi ON/OFF For turning on/off the WiFi function.
-
Page 18: Chapter 2. Connect The Hardware
Chapter 2. Connect the Hardware This chapter contains the following sections: Requirements for Operation Position Your Router Connect Your Router Chapter 2 Connect... -
Page 19: Requirements For Operation
Requirements for Operation To connect and use the router for Internet sharing, you must have the following: • Broadband Internet Access Service (DSL/Cable/Ethernet). • PCs with an active Ethernet Adapter and an Ethernet cable with RJ45 connectors. • TCP/IP protocol on each PC. •... - Page 20 Install the antennas and position them vertically for best signal reception. Turn off the modem, and remove the backup battery if it has one. Connect the modem to the Internet port on your router with an Ethernet cable. Turn on the modem, and then wait about 2 minutes for it to restart. Turn on the router.
- Page 21 Option 2: Wirelessly Connect wirelessly by using the SSID (Network Name) and Wireless Password/PIN printed on the product label at the bottom of the router. Option 3: Use the WPS button If your computer or wireless adapter has a physical WPS button, you can use the WPS button to quickly connect the router.
-
Page 22: Chapter 3. Log Into Your Router
Chapter 3. Log into Your Router With a Web-based utility, it is easy to configure and manage the Archer C2600 AC2600 Wireless Dual Band Gigabit Router AC2600 Wireless Dual Band Gigabit Router. The Web-based utility can be used on any Windows, Macintosh or UNIX OS with a Web browser, such as Microsoft Internet Explorer, Mozilla Firefox or Apple Safari. -
Page 23: Chapter 4. Set Up Internet Connection
Chapter 4. Set Up Internet Connection This chapter introduces how to connect your router to the Internet. The router is equipped with a web-based Quick Setup wizard. It has many ISP information built in, automates many of the steps and verifies that those steps have been successfully completed. -
Page 24: Use Quick Setup Wizard
Use Quick Setup Wizard To set up my router with several easy steps quickly: Visit http://tplinkwifi.net, and log in with the username and password you set for the router. Create a new username and password, then click Confirm. Re-login using the new credentials. Click Quick Setup, Select your region and time zone, and click Next. - Page 25 Note: If you change the default SSID and password, write down the new wireless settings. Confirm your settings, and then click Save to continue or Back to make changes. Test your Internet connection, then click Finish to quit the Quick Setup. Chapter 4 Set Up Internet Connection15...
-
Page 26: Manually Set Up An Internet Connection
Note: 1. If you don’t find your ISP in the ISP list, please select Other and then enter the information provided by your ISP. 2. During the quick setup process, you can change the preset wireless network name (SSID) and wireless password. Once done, all your wireless devices must use the new SSID and password to connect to the router. -
Page 27: Set Up Ipv6 Connection
Set up IPv6 Connection If your ISP provided also supports IPv6 connection and your ISP has provided some detailed IPv6 parameters, you can configure the router to permit IPv6 connection. 1. Configure the WAN settings. Visit http://tplinkwifi.net, and log in with the username and password you set for the router. Advanced >... - Page 28 Dynamic IP: Click Advanced to have more configuration if ISP requires. Click Save to save the settings and then click Renew to finish the configuration. PPPoE: Fill in the Username and Password. Click Advanced to have more configuration if ISP requires. ...
- Page 29 Pass-Through (Bridge): The screen adjusts, but no additional fields display. Click the Save button. Configure the IPv6 LAN settings. Windows users are recommended to choose from the first two types. Fill in Address Prefix provided by ISP, and click Save to save the settings. Click Status to check whether you succeed or not.
-
Page 30: Mac Clone
configuration. Completed. IPv6 service is available for your network. MAC Clone Your ISP allows only one Ethernet MAC address to connect to Internet and might check for your computer’s MAC address. In this case, do one of the following: - Inform your ISP that you have bought a new network device, and ask them to use the router’s MAC address. - Configure your router to clone your computer’s MAC address. -
Page 31: Chapter 6. Network Security
Select security options. The security options use the newest standard for the strongest security, but some older computers and wireless devices cannot use it. TP-LINK recommends that you select the WPA/WPA2-Personal button. This setting protects your WiFi network and lets computers and wireless devices can connect to the WiFi network. - Page 32 Click Save. Now users in your guest network can enjoy only the network authorities and bandwidth you assigned. Completed! Now users in your guest network can enjoy only the network authorities and bandwidth you assigned. Chapter 5 Guest Network22...
-
Page 33: Chapter 8. Usb Application
Chapter 6. USB Application This chapter describes how to share and access USB devices connected to the router among different clients. There are three submenus under the USB Settings menu (shown in Figure 5-44): Device Settings, File Sharing, and Print Server. -
Page 34: Device Settings
Device Settings 1. Visit http://tplinkwifi.net, and log in with the username and password you set for the router. Advanced USB Settings Device Settings, 2. Select > > you can configure the USB disk drive attached to the router and view the information. 3. - Page 35 You can customize the server name and use the name to access your USB disk. Visit http://tplinkwifi.net, and log in with the username and password you set for the router. Advanced USB Settings Sharing Access Select > > Make sure Network Neighborhood is ticked, and enter a Network/Media Server Name as you like, such as MyShare, then click...
- Page 36 If you do not have the driver, contact the printer manufacturer. 3. Install the TP-LINK USB Printer Controller Utility TP-LINK USB Printer Controller Utility helps you access the shared printer. Download and Install the utility on each computer that needs printer service.
- Page 37 4. Access the Printer You should set the shared printer as Auto-Connect Printer on every computer that needs printer service. Double-click the icon on your desktop to launch the USB Printer Controller. Highlight the printer you share. Windows Click the Auto-Connect for printing tab to pull down a list, then select Set Auto-Connect...
- Page 38 Select the printer you share, then click Apply. Windows Chapter 6 Application28...
- Page 39 Windows Note: The Print Server also allows different clients to share the scan feature of MFPs (Multi-Function Printers). To scan with TP-LINK USB Printer Controller, right-click the printer and select Network Scanner. Then, a scanning window will pop up. Finish the scanning process following on-screen instructions.
-
Page 40: Chapter 9. Parental Controls
This function allows you to block inappropriate, explicit and malicious websites; restrict access by certain times of day (for example, client devices can only visit www.tp-link.com during office hours); and at the same time it protects every device on your home network against malware and phishing through one central control point. - Page 41 Note: To reset the Internet Access Time, click Reset. Enter the Description. Select the check box enable this entry and click OK. Specify the Content Restriction Chapter 7 Parental Controls31...
- Page 42 You can add up to 200 keywords for both Blacklist and Whitelist. Below are some sample entries to allow access. Enter a web address (e.g. www.tp-link.com) or a web address keyword (e.g. wikipedia) to only allow or block access to the websites containing that keyword.
- Page 43 Chapter 8. Security This chapter contains three functions to protect your home network security from intruders. It allows you to block or allow some specific client devices to access your wireless network, or both wired and wireless network (Access Control). It also can prevent ARP Spoofing and ARP Attacks (IP & MAC Binding). Settings ...
- Page 44 Settings This function exploits the uniqueness of the MAC (Medium Access Control) address, a unique 12-digit hexadecimal address (for example, D8:5D:4C:B4:46:EA) of every network device, to determine if the device can or cannot access your wireless network. Prevent unauthorized users from accessing my wireless network by utilizing the network I want to: device’s MAC address and IP address.
- Page 45 Access Control I want to: Block or allow some specific client devices to access my network (wired or wireless) using a list of blocked devices or a list of allowed devices. Visit http://tplinkwifi.net, and log in with the user name and password you set for the How can I router.
- Page 46 Select the device(s) to be blocked. Click Block. The selected device(s) will be added to Devices in Blacklist automatically. Whitelist mode: only devices (wired or wireless) added to the Devices in Whitelist will be allowed to access the network. It is recommended to select this mode if you want to grant exclusive access to specific devices.
- Page 47 Click to add a new entry. Enter the Device Name MAC address (You can copy and paste the information from Devices Online list if the device is connected to your network). Click to save the settings. Completed! Now you can block or allow specific client devices to access your network (wired or wireless) using the Blacklist Whitelist.
-
Page 48: Ip & Mac Binding
IP & MAC Binding IP & MAC Binding, namely, ARP (Address Resolution Protocol) Binding, is used to map network device's IP address to its MAC address. This will prevent ARP Spoofing and ARP Attacks by denying any other device other than the bound one to access the network using the bound IP address. - Page 49 Enter the MAC address IP address that you want to bind. Select the checkbox to enable the entry. Click OK. Completed! Now you don’t need to worry about ARP Spoofing and ARP Attacks. Chapter 8 Security39...
-
Page 50: Chapter 11. Nat Forwarding
TP-LINK router includes four forwarding rules. If two or more rules are set, the priority of implementation from high to low is Virtual Servers, Port Triggering, UPNP and DMZ. -
Page 51: Share Local Resources In The Internet By Virtual Server
Share Local Resources in the Internet by ALG It is recommended to enable Application Layer Gateway (ALG) because ALG allows customized Network Address Translation (NAT) traversal filters to be plugged into the gateway to support address and port translation for certain application layer "control/data"... - Page 52 How can I Visit http://tplinkmodem.net, and log in with the password you set for the router. do that? Advanced NAT Forwarding > Virtual Server Go to > . Click Add. Click View Existing Services, and select HTTP in the prompt page. The external port, internal port and protocol will be automatically filled with contents.
-
Page 53: Open Ports Dynamically By Port Triggering
Open Ports Dynamically by Port Triggering Port triggering can specify a triggering port and its corresponding external ports. When a host in the local network initiates a connection to the triggering port, all the external ports will be opened for subsequent connections. The router can record the IP address of the host. -
Page 54: Make Applications Free From Port Restriction By Dmz
Make Applications Free from Port Restriction by DMZ When a PC is set to be a DMZ (Demilitarized Zone) host in the local network, it is totally exposed to the Internet, which can realize the unlimited bidirectional communication between internal hosts and external hosts. The DMZ host becomes a virtual server with all ports opened. - Page 55 example, when you connect your Xbox to the router which has connected to the Internet to play online games, UPnP will send request to the router to open the corresponding ports allowing the following data penetrating the NAT to transmit. Therefore, you can play Xbox online games without a hitch. If necessary, you can follow the steps to change the status of UPnP.
-
Page 56: Prioritize Internet Traffic With Quality Of Service
Chapter 10. QoS By default, the Internet bandwidth is shared by connected devices and applications, which means that the bandwidth of each device or application is uncontrollable while they are sharing the Internet. When some device is streaming video on Internet or downloading with P2P software, it will affect the Internet experience of other applications. - Page 57 2 Add QoS Rules Note: In the QoS Rule List field, displays three priority. In the QoS rule field,displays three rule.type: By device, By application and By physical port. Set a high priority rule for the ftp server: Select By Application and then select ftp in the list. Click OK. Chapter 10 QoS47...
- Page 58 Note: If your application isn't listed on the screen, click Custom Application to add application manually. Name: Type in a name for your applicaiton. Protocol: Select the protocol for your application, if your are not sure, select ALL. Port: Enter the destination port for your application, usually each application has a fixed port, please ensure you enter the correct the port.
- Page 59 In the Application list, we may not list all of the applications, a new database version may contain more applications. New database versions are posted at www.tp-link.com and can be downloaded for free. There is no need to upgrade the database unless the new database has a new application you need.
- Page 60 Select Advanced > QoS >Database. Click Browse to select your download database upgrade file, then click Upgrade. Wait until the upgrade is completed and do not operate during the process. Chapter 10 QoS50...
-
Page 61: Lan Settings
Chapter 11. Specify the Network Settings This chapter introduces how to change the default settings or adjust the basic configuration of the router using the web-based management page. This chapter contains the following sections: Change LAN Settings Wireless Settings ... - Page 62 Change LAN Settings 11.1 11.1.1 Change the LAN IP address The router is preset with a default LAN IP 192.168.0.1, which you can use to log in to its web-based management page. The LAN IP address together with the Subnet Mask also defines the subnet that the connected devices are on. If the IP address conflicts with another device on your local network or your network requires a specific IP subnet, you can change it.
- Page 63 After configuring IGMP proxy, IPTV can work behind your router now. You can connect your set-top box to any of the router's LAN port. If IGMP is not the technology your ISP apply to provide IPTV service, you can clear the IGMP Proxy check box and complete the following steps: Select the Enable IPTV check box.
-
Page 64: Specify Dhcp Server Settings
Specify DHCP Server Settings 11.3 By default, the DHCP (Dynamic Host Configuration Protocol) Server is enabled and the router acts as a DHCP server; it dynamically assigns TCP/IP parameters to client devices from the IP Address Pool. You can change the settings of DHCP Server if necessary, and you can reserve LAN IP address for specified client device. - Page 65 To reserve an IP address for a specified client device: Click the button. Type in the MAC address of the client device. Type in the IP address to set to the client device. Enter the description for the rule. Select the Enable check box. Click OK.
-
Page 66: Dynamic Dns
Dynamic DNS 11.4 To manage the router remotely, the remote device needs to log in to http://Router’s WAN IP:port number, which requires the remote user to know the router’s WAN IP. The ISP (Internet Service Provider), however, usually assigns a dynamic IP to the router. -
Page 67: Static Routing
lisadns.ddns.net). Click Login and Save. Now on the PC that can manage the router remotely, log in to http://domain Completed! name: port number (such as http://lisa.ddns.net:1024) to manage the router. Static Routing 11.5 Static routing is a form of routing that is configured manually by a network administrator or a user by adding entries into a routing table. - Page 68 Destination Network: is the destination IP address that you want to assign to a static route. This IP address cannot be on the same subnet with the WAN IP or LAN IP of the router. In the example, the IP address of the company network is the destination IP address, so here enters 172.30.30.1.
- Page 69 Open a web browser on your PC. Enter the company server’s IP address to visit Completed! the company network. Specify Wireless Settings 11.6 The router’s wireless network name (SSID) and password, and security option are preset in the factory. The preset SSID and password can be found on the product label.
- Page 70 11.7 Wi-Fi Protected Setup (WPS) gives consumers an easier approach to set up a security-protected Wi-Fi connection. Visit http://tplinkwifi.net, and log in with the username and password you set for the router and go to Advanced > Network > Wireless page. Toggle on the Router’s PIN (On by default) to allow wireless devices to connect to the router using the router’s PIN.
- Page 71 Push Button (Recommended): Click the Connect button on the screen. Within two minutes, push the WPS button on the client device. PIN: Enter the client’s PIN, and click Connect. The router WPS screen displays confirmation message and the WPS LED on the router will keep on for five minutes if the client has been successfully added to the network.
-
Page 72: Chapter 13. Administrate Your Network
Chapter 12. Administrate Your Network This chapter introduces how to change the system settings and administrate your router’s network. This chapter contains the following sections: Set Up System Time Test the Network Connectivity Upgrade the Firmware Backup and Restore Configuration Settings ... - Page 73 Set Up System Time 12.1 System time is the time displayed while the router is running. The system time you configure here will be used for other time-based functions like Parental Controls. You can manually set how to get the system time.
- Page 74 To setup Daylight Saving time: Select Enable Daylight Saving. Select the correct Start date and time when daylight saving time starts at your local time zone. Select the correct End date and time when daylight saving time ends at your local time zone. Click Save.
-
Page 75: Upgrade The Firmware
Upgrade the Firmware 12.3 TP-LINK R&D is dedicated to improving and richening the product features, giving you a better network experience. We will release the latest firmware at TP-LINK official website, you can download the latest firmware file from our website: www.tp-link.com... -
Page 76: Backup And Restore Configuration Settings
Note: Before upgrading the firmware, it's better to back up your current settings. During the upgrading process, do not turn off or reset the router. The upgraded firmware version must correspond to the hardware. Backup and Restore Configuration Settings 12.4 The configuration settings are stored as a configuration file in the router. -
Page 77: Change The Administrator Account
Note: During the resetting process, do not turn off or reset the modem router. We strongly recommend you back up the current configuration settings before resetting the modem router. Change the Administrator Account 12.5 I want to: Change the login username and password of the web-based management page. -
Page 78: Password Recovery
Password Recovery 12.6 I want to: Recover my login username and password in case I forget them. How can I do Visit http://tplinkwifi.net, and log in with the username and that? password you set for the router. Go to Advanced > System Tools > Administration. Finish the settings in Password Recovery section. -
Page 79: Remote Management
Go to Advanced > System Tools > Administration. In Local Management section, finish the settings according to your needs. Allow all LAN connected devices to manage the router Toggle on Access for All LAN Connected Devices. TIPS: This function is enabled by default. Allow specific devices to manage the router 1) Toggle off Access for All LAN Connected Devices. - Page 80 Chapter 12 Administrate Your Network70...
- Page 81 Visit http://tplinkwifi.net, and log in with the username and password How can I do you set for the router. that? Go to Advanced > System Tools > Administration. In Remote Management section, finish the settings according to your needs. Forbid all devices to manage the router remotely: Select Disable Remote Management and click Save.
-
Page 82: System Log
1) Select Enable Remote Management for Specified Devices. 2) Enter Web Management Port (1024-65535 or 80). 3) In Remote Management IP address, enter the IP address of the remote device to manage the router. 4) Click Save. Devices using this WAN IP can manage the router by logging in http://Router’s IP:port number... - Page 83 Completed! System log is saved successfully. Now you can send it to the technical support for troubleshooting. To Send the System Log at a Fixed Time: For example: I want to check my router’s working status at a fixed time every day. However, it’s too much trouble to login to the web interface every time I want to go checking.
- Page 84 from the sender’s email address; SMTP Server: enter the SMTP server address; Tip: SMTP server is available for users in most webmail systems. For example, the SMTP server address of Hotmail is smtp-mail.outlook.com. You can refer to their Help page to learn the SMTP server address. Select Enable Authentication;...
-
Page 85: Reboot The Router
The configuration is complete. You will receive the system log automatically sent from the router at 8am every day. Reboot the Router 12.10 When the Logout 12.11 Chapter 12 Administrate Your Network75... -
Page 86: Appendix A: Specifications
Appendix A: Specifications General ANSI T1.413, ITU G.992.1, ITU G.992.3, ITU G.992.5, Standards and Protocols IEEE 802.11a, IEEE 802.11b, IEEE 802.11g, IEEE 802.11n, IEEE 802.11ac, IEEE 802.3, IEEE 802.3u, TCP/IP, PPPoA, PPPoE, SNTP, HTTP, DHCP, ICMP, NAT Safety & Emission FCC, CE Four 10/100M Auto-Negotiation RJ45 ports(Auto MDI/MDIX) Ports... -
Page 87: Appendix B: Troubleshooting Guide & Faq
Appendix B: Troubleshooting Guide & FAQ T1. How do I restore my router’s configuration to its factory default settings? With the router powered on, press and hold the RESET button on the rear panel for 8 to 10 seconds before releasing it. Note: Once the router is reset, the current configuration settings will be lost and you will need to re-configure the router. - Page 88 4) Double-click Internet Protocol Version 4 (TCP/IPv4). Select Obtain an IP address automatically, choose Obtain DNS server address automatically and then click OK. 2) Configure your IE browser. Open your IE browser, click Tools tab and you will see the following screen.
- Page 89 Note: For more details about Troubleshooting and Technical Support contact information, please log on to our Technical Support Website: http://www.tp-link.com/en/support T5. How to configure MAC Clone? You can manually change the MAC address of the router. It is helpful when your Internet access account provided by your ISP is bound to one specific MAC address, in other words, your ISP just permits only one computer with the authenticated MAC address to access the Internet.
- Page 90 Select the Wireless Router Mode option and click Save to make the settings effective. Note: IPTV function is not supported in wireless router mode. T7. How to change the connection mode? If your connection type is PPPoE or PPPoA, you can control when to establish connection via the connection mode. 1.
- Page 91 1. Visit http://tplinkmodem.net, and log in with password you set for the router. 2. Configure the LAN IP address of the router in the same subnet as the root router. For example, the IP address of the root router is 192.168.0.1, the IP address of the extended router should be from 192.168.0.2 to 192.168.0.254.). Advanced Wireless Settings 3.
- Page 92 6. Click Save to make the settings effective. Advanced > Network > LAN Setting 7. Go to page to disable DHCP. Now, the root’s wireless network is extended and you can use the router’s SSID and password to enjoy the network. The extended router (router) can have different SSID and password from the root router, you can change your router’s Basic >...
-
Page 93: Appendix C: Configure The Pc
Appendix C: Configure the PC In this section, we’ll introduce how to install and configure the TCP/IP correctly in Windows 7. First make sure your Ethernet Adapter is working, refer to the adapter’s manual if needed. Install TCP/IP component On the Windows taskbar, Right-click Network icon , and select Open Network and Sharing Center >... - Page 94 Select Obtain an IP address automatically and Obtain DNS server address automatically. Click OK to save the settings. Verify the network connection between your PC and the router ping 192.168.1.1 Open a command prompt, and type , and then press Enter. If the result displayed is similar to the figure below, it means the connection between your PC and the router has ...
- Page 95 Please check the connection following these steps: Is the connection between your PC and the router correct? Note: The 1/2/3/4 LEDs of Ethernet ports which you link to on the router and LEDs on your PC's adapter should be lit. Is the TCP/IP configuration for your PC correct? Note: If the router's IP address is 192.168.1.1, your PC's IP address must be within the range of 192.168.1.2 ~ 192.168.1.254.