TP-Link Archer C2 User Manual
Ac750 wireless dual band gigabit router
Hide thumbs
Also See for Archer C2:
- User manual (143 pages) ,
- Quick installation manual (19 pages) ,
- Quick installation manual (2 pages)
Table of Contents
Advertisement
Quick Links
Advertisement
Table of Contents

Related Manuals for TP-Link Archer C2


Summary of Contents for TP-Link Archer C2
- Page 1 User Guide AC750 Wireless Dual Band Gigabit Router Archer C2 REV5.0.0 1910012133...
-
Page 2: Table Of Contents
Contents About This Guide ......................1 Chapter 1. Get to Know About Your Router ......2 1. - Page 3 4. 7. 2. Port Triggering ............36 4.
-
Page 4: About This Guide
• The Quick Installation Guide can be found where you find this guide or inside the package of the router. • Specifications can be found on the product page at http://www.tp-link.com. • A Technical Support Forum is provided for you to discuss our products at http://forum.tp-link.com. -
Page 5: Chapter 1. Get To Know About Your Router
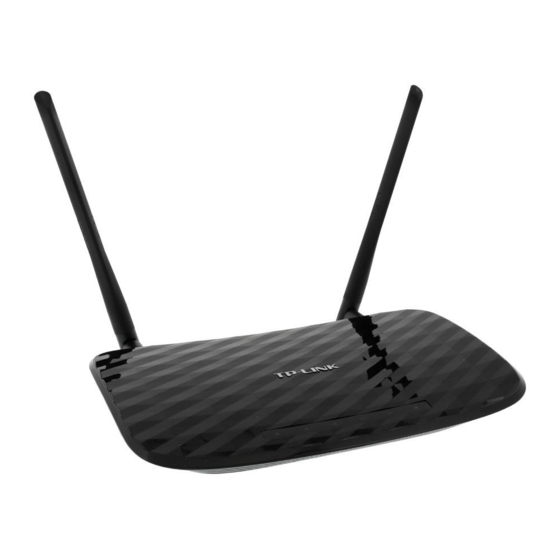
Chapter Get to Know About Your Router This chapter introduces what the router can do and shows its appearance. It contains the following sections: • Product Overview • Panel Layout... -
Page 6: Product Overview
Ethernet ports supply high-speed connection to your wired devices. Moreover, it is simple and convenient to set up and use the TP-Link router due to its intuitive web interface and the powerful Tether app. -
Page 7: The Back Panel
Chapter 1 Get to Know About Your Router LED Explanation Name Status Indication The system has started up successfully. The system is starting up or firmware is being upgraded. Do not Flashing (Power) disconnect or power off your router. Power is off. The 2.4GHz wireless band is enabled. - Page 8 Chapter 1 Get to Know About Your Router The following parts (view from left to right) are located on the back panel. Item Description Ethernet Ports (4/3/2/1) For connecting your PCs or other wired network devices to the router. WAN Port For connecting to a DSL/Cable modem, or an Ethernet port.
-
Page 9: Chapter 2. Connect To The Internet
Chapter Connect to the Internet This chapter contains the following sections: • Position Your Router • Connect Your Router... -
Page 10: Position Your Router
Chapter 2 Connect to the Internet 2. 1. Position Your Router • The product should not be located in a place where it will be exposed to moisture or excessive heat. • Place the router in a location where it can be connected to multiple devices as well as to a power source. - Page 11 Chapter 2 Connect to the Internet 4 ) Connect the power adapter to the router and turn on the router. 5 ) Verify that the hardware connection is correct by checking these LEDs. Power Internet 2.4G Note: If the 2.4G and 5G Wi-Fi LEDs are off, press and hold the Wi-Fi/WPS button on the rear panel for more than 5 seconds to turn them on.
- Page 12 Chapter 2 Connect to the Internet 1 ) Tab the WPS icon on the device’s screen. Here takes an Android phone as an example. 2 ) Immediately press the WPS button on your router. WLAN TP-Link_2017 TP-Link_Home My Home My Network Home Network TP-Link_Network Close to...
-
Page 13: Chapter 3. Log In
Chapter Log In This chapter introduces how to log in to the web management page of router. - Page 14 Chapter 3 Log In With the web-based utility, it is easy to configure and manage the router. The web- based utility can be used on any Windows, Macintosh or UNIX OS with a Web browser, such as Microsoft the Internet Explorer, Mozilla Firefox or Apple Safari. Follow the steps below to log in to your router.
-
Page 15: Chapter 4. Configure The Router
Chapter Configure the Router This chapter presents how to configure the various features of the router. It contains the following sections: • Status • Parental Controls • Network • Access Control • Dual Band Selection • Advanced Routing • Wireless(2.4GHz or 5GHz) •... -
Page 16: Status
Chapter 4 Configure the Router 4. 1. Status 1. Visit http://tplinkwifi.net, and log in with the username and password you set for the router. 2. Go to Status. You can view the current status information of the router. • Firmware Version - The version information of the router’s firmware. -
Page 17: Network
Chapter 4 Configure the Router • Operation Mode - The current wireless working mode in use. • Wireless Radio - Indicates whether the wireless radio feature of the Router is enabled or disabled. • Name(SSID) - The SSID of the Router. •... - Page 18 Chapter 4 Configure the Router Click Renew to renew the IP parameters from your ISP. Click Release to release the IP parameters. • MTU Size - The normal MTU (Maximum Transmission Unit) value for most Ethernet networks is 1500 Bytes. It is not recommended that you change the default MTU size unless required by your ISP.
- Page 19 Chapter 4 Configure the Router • IP Address - Enter the IP address in dotted-decimal notation provided by your ISP. • Subnet Mask - Enter the subnet mask in dotted-decimal notation provided by your ISP. Normally 255.255.255.0 is used as the subnet mask. •...
- Page 20 Chapter 4 Configure the Router your internet connection active all the time, please enter 0 in the Max Idle Time field. Otherwise, enter the number of minutes you want to have elapsed before your internet access disconnects. • Connect Manually - You can click Connect/Disconnect to connect/disconnect...
- Page 21 Chapter 4 Configure the Router • Primary DNS/Secondary DNS - If your ISP does not automatically assign DNS addresses to the router, please select Set DNS server manually and enter the IP address in dotted-decimal notation of your ISP’s primary DNS server. If a secondary DNS server address is available, enter it as well.
- Page 22 Chapter 4 Configure the Router • Connect on Demand - In this mode, the internet connection can be terminated automatically after a specified inactivity period (Max Idle Time) and be re- established when you attempt to access the internet again. If you want to keep your internet connection active all the time, please enter 0 in the Max Idle Time field.
- Page 23 Chapter 4 Configure the Router • Addressing Type - Choose the addressing type given by your ISP, either Dynamic IP or Static IP. Click the Connect button to connect immediately. Click the Disconnect button to disconnect immediately. • MTU(Bytes) - The default MTU size is “1460” bytes, which is usually fine. It is not recommended that you change the default MTU Size unless required by your ISP.
- Page 24 Chapter 4 Configure the Router BigPond Cable If your ISP provides BigPond cable connection, please select BigPond Cable. • User Name/Password - Enter the user name and password provided by your ISP. These fields are case-sensitive. • Auth Server - Enter the authenticating server IP address or host name. •...
-
Page 25: Lan
Chapter 4 Configure the Router on Demand mode. The internet connection can be disconnected automatically after a specified inactivity period (Max Idle Time) and not be able to re-establish when you attempt to access the internet again. 4. 2. 2. 1. -
Page 26: Dual Band Selection
Chapter 4 Configure the Router • WAN MAC Address - This field displays the current MAC address of the WAN port. If your ISP requires you to register the MAC address, please enter the correct MAC address in this field. Click Restore Factory MAC to restore the MAC address of WAN port to the factory default value. -
Page 27: Wps
Chapter 4 Configure the Router 2. Go to Wireless > Basic Settings. 3. Configure the basic settings for the wireless network and click Save. • Wireless - Enable or disable wireless network. • Wireless Network Name - Enter a value of up to 32 characters. The same Name (SSID) must be assigned to all wireless devices in your network. - Page 28 Chapter 4 Configure the Router Method ONE: Press the WPS Button on Your Client Device 1. Keep the WPS Status as Enabled and click Device. 2. Select Press the WPS button of the new device within the next two minutes and click Connect.
-
Page 29: Wireless Security
Chapter 4 Configure the Router 3. A success message will appear on the WPS page if the client device has been successfully added to the router’s network. Method THREE: Enter the Router’s PIN 1. Keep the WPS Status as Enabled and get the Current PIN of the router. - Page 30 Chapter 4 Configure the Router • Disable Wireless Security - The wireless security function can be enabled or disabled. If disabled, wireless clients can connect to the router without a password. It’s strongly recommended to choose one of the following modes to enable security. •...
-
Page 31: Wireless Mac Filtering
Chapter 4 Configure the Router • Radius Server Password - Enter the password for the Radius server. • Group Key Update Period - Specify the group key update interval in seconds. The value should be 30 or above. Enter 0 to disable the update. •... -
Page 32: Wireless Advanced
Chapter 4 Configure the Router 5. Delete all or disable all entries if there are any entries already. 6. Click Add New and fill in the blank. 1 ) Enter the MAC address 00-0A-EB-B0-00-0B/00-0A-EB- 00-07-5F in the MAC Address field. 2 ) Enter wireless client A/B in the Description field. - Page 33 Chapter 4 Configure the Router • Transmit Power - Select High, Middle which you would like to specify for the router. High is the default setting and recommended. • Beacon Interval - Enter a value between 40-1000 milliseconds for Beacon Interval here.
-
Page 34: Wireless Statistics
Chapter 4 Configure the Router • Enable WMM - WMM function can guarantee the packets with high-priority messages being transmitted preferentially. It is strongly recommended to enable this function. 4. 4. 6. Wireless Statistics 1. Visit http://tplinkwifi.net, and log in with the username and password you set for the router. -
Page 35: Dhcp
Chapter 4 Configure the Router • Allow Guest To Access My Local Network - If enabled, guests can access the local network and manage it. • Guest Network Isolation - If enabled, guests are isolated from each other. • Enable Guest Network Bandwidth Control - If enabled, the Guest Network Bandwidth Control rules will take effect. -
Page 36: Dhcp Settings
Chapter 4 Configure the Router 4. 6. 1. DHCP Settings 1. Visit http://tplinkwifi.net, and log in with the username and password you set for the router. 2. Go to DHCP > DHCP Settings. 3. Specify DHCP server settings and click Save. •... -
Page 37: Dhcp Client List
Chapter 4 Configure the Router • When you choose Smart IP (DHCP) Network > LAN, the DHCP Server function will be disabled. You will see the page as below. 4. 6. 2. DHCP Client List 1. Visit http://tplinkwifi.net, and log in with the username and password you set for the router. -
Page 38: Forwarding
LAN and realize some specific functions. The TP-Link router includes four forwarding rules. If two or more rules are set, the priority of implementation from high to low is Virtual Servers, Port Triggering, UPNP and DMZ. - Page 39 Chapter 4 Configure the Router I want to: Share my personal website I’ve built in local network with my friends through the internet. example, the personal website has been built in my home PC (192.168.0.100). I hope that my friends on the internet can visit my website in some way.
- Page 40 Chapter 4 Configure the Router • Some specific service ports are forbidden by the ISP, if you fail to visit the website, please use another service port. 4. 7. 2. Port Triggering Port triggering can specify a triggering port and its corresponding external ports. When a host in the local network initiates a connection to the triggering port, all the external ports will be opened for subsequent connections.
- Page 41 Chapter 4 Configure the Router all ports opened. When you are not clear about which ports to open in some special applications, such as IP camera and database software, you can set the PC to be a DMZ host. Note: DMZ is more applicable in the situation that users are not clear about which ports to open.
- Page 42 Chapter 4 Configure the Router Tips: • UPnP is enabled by default in this router. • Only the application supporting UPnP protocol can use this feature. • UPnP feature needs the support of operating system (e.g. Windows Vista/ Windows 7/ Windows 8, etc. Some of operating system need to install the UPnP components).
- Page 43 Chapter 4 Configure the Router • Firewall - A firewall protects your network from internet attacks. • SPI Firewall - SPI (Stateful Packet Inspection, also known as dynamic packet filtering) helps to prevent cyber attacks by tracking more state per session. It validates that the traffic passing through the session conforms to the protocol.