
Related Manuals for MUTOH ROCKHOPPER 62 inch


Summary of Contents for MUTOH ROCKHOPPER 62 inch
-
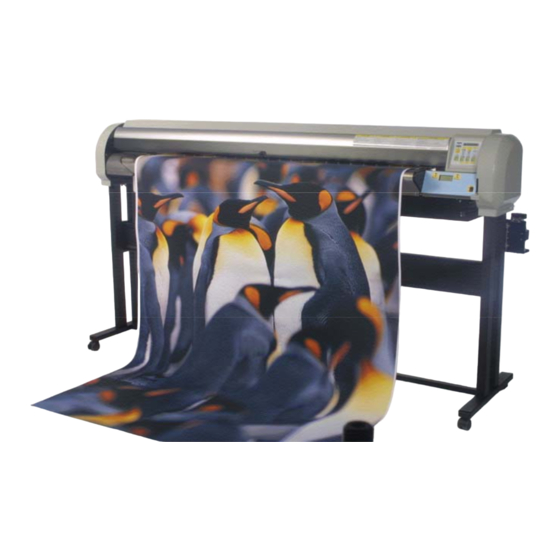
Page 1: Rockhopper Eco-Solvent Printer Operation Instructions
ROCKHOPPER ECO-SOLVENT PRINTER OPERATION INSTRUCTIONS Part n°: AP-75024 MUTOH EUROPE N.V. Rev. 1.2 – 18/08/2002... -
Page 3: Copyright Notice
This document may not be reproduced by any means, in whole or in part, without written permission of the copyright owner. This document is furnished to support the Mutoh Rockhopper (48”& 62”) Eco-Solvent Inkjet Printers. In consideration of the furnishing of the information contained in this... - Page 4 Operation Instructions Rockhopper Printer AP-75024 Rev. 1.2. – 18/08/2002...
- Page 5 360 x 180 dpi, 3.6 m²/h at 720 x 720 dpi and 0.68 m²/h at 1440 x 1440 dpi. For the Rockhopper, Mutoh will be offering certified media such as banner and vinyl, optimised for use with the Mutoh Eco-solvent inks. As standard, Mutoh Rockhopper...
- Page 6 Operation Instructions Rockhopper Printer AP-75024 Rev. 1.2. – 18/08/2002...
-
Page 7: Table Of Contents
Operation Instructions Rockhopper Printer TABLE OF CONTENTS ROCKHOPPER ECO-SOLVENT PRINTER OPERATION INSTRUCTIONS................1 Regulatory and Safety Information ............9 EMC Statement for CE Marking ...................9 FCC Compliance ......................9 Safety Labels Safety Labels, Symboles de sécurité, Sicherheitssymbole ....10 Installation Procedures ................17 Installation requirements: Selecting an adequate place for setting up your Equipment ...........................17 Unpacking your Rockhopper printer ................19... - Page 8 Operation Instructions Rockhopper Printer AP-75024 Rev. 1.2. – 18/08/2002...
-
Page 9: Regulatory And Safety Information
Regulary & Safety Information Operation Instructions Rockhopper Printer REGULATORY AND SAFETY INFORMATION EMC STATEMENT FOR CE MARKING Warning: • This is a class A product. In a domestic environment this product may cause radio interference in which case you may be required to take adequate measures. -
Page 10: Safety Labels Safety Labels, Symboles De Sécurité, Sicherheitssymbole
Regulary & Safety Information Operation Instructions Rockhopper Printer SAFETY LABELS SAFETY LABELS, SYMBOLES DE SÉCURITÉ, SICHERHEITSSYMBOLE Safety Labels are attached to the internal and external area of the printer to alert you to potentially hazardous situations or conditions. The following safety labels are used in and on the printer: La partie externe et interne de l’imprimante porte des symboles de sécurité... - Page 11 Regulary & Safety Information Operation Instructions Rockhopper Printer CAUTION ♦ The corner edge of the Cutter Guide is sharp. Be careful not to cut your fingers. ♦ The edge of the cutting tool such as knife is very sharp. When cutting roll media with knife manually, handle it with care.
- Page 12 Regulary & Safety Information Operation Instructions Rockhopper Printer CAUTION Precautions when the hold lever is up. ♦ Don't put the hold lever up while the head is operating (printing, media size detection,cutting,etc..) The head and media keeper blade may touch, causing damage and poor image quality. ♦...
- Page 13 Regulary & Safety Information Operation Instructions Rockhopper Printer CAUTION ♦ The cutter blade is a consumable item. When its cutting performance deteriorates it should be replaced in accordance with the User Manual. ♦ The media sensor section and printing board should be cleaned regurarly as detailed under daily maintenance in the User Manual.
- Page 14 Regulary & Safety Information Operation Instructions Rockhopper Printer LOADING ROLL MEDIA Remove the tape from the Insert the end of the roll media between the roll media and pull out a rather pressure roller and the drive roller and pull long length of roll media.
- Page 15 Regulary & Safety Information Operation Instructions Rockhopper Printer ADJUSTING ROLL MEDIA POSITION If the position of the roll media is incorrect, adjust the position of the roll media as shown in the diagram below. Si la position du rouleau est incorrecte, réglez-la de la manière indiquée sur le schéma ci-dessous.
- Page 16 Regulary & Safety Information Operation Instructions Rockhopper Printer AP-75024 Rev. 1.2. – 18/08/2002 Page...
-
Page 17: Installation Procedures
♦ Do not use thinner, benzene or similar agents on the printer. ♦ Only use original Mutoh ink cassettes. Use of different ink cassettes might cause damage to your printer. When using non Mutoh ink cassettes, the ink supply system, the heads as well as the cleaning system will be considered out of warranty. - Page 18 Installation Procedures Operation Instructions Rockhopper Printer ♦ Protect your printer from moisture, dust, draughts and direct sunlight. ♦ It is best to keep your machine away from open windows and air-conditioners. ♦ See to it that there is an adequate space around the printer so that ventilation is not obstructed.
-
Page 19: Unpacking Your Rockhopper Printer
Installation Procedures Operation Instructions Rockhopper Printer UNPACKING YOUR ROCKHOPPER PRINTER The printer body and printer Take-up system are packed in two separate boxes. Unpack the printer body first. Caution: • When unpacking the printer, check whether all parts described in the parts list are included in the box. -
Page 20: What's In The Box
• Printer stand • 2 media scrollers (2” / 3”) including plastic flanges • Scroller Slip Ring • 1 Sheet-off knife, pre-installed in head • Onyx PosterShop™ Lite – Mutoh Edition Accessories kit consisting of: • Power cable • User’s Guide •... -
Page 21: Getting To Know The Printer Parts And Components
Installation Procedures Operation Instructions Rockhopper Printer GETTING TO KNOW THE PRINTER PARTS AND COMPONENTS Front Cover Front Cover Y-rail Cover Y-rail Cover Operating Panel Operating Panel Right Cover Right Cover Left Cover Left Cover Heater Panel Heater Panel Pressure Lever Pressure Lever Front Paper Front Paper... - Page 22 Installation Procedures Operation Instructions Rockhopper Printer Part Description Covers The protective covers protect the action environment. Opening a cover immediately pauses printing which resumes when the cover is closed. Operation Panel Positive Touch keyboard with integrated LCD-Display. Heater Panel To control the pre- and post heaters with integrated LCD- Display.
-
Page 23: Assembling The Printer
Installation Procedures Operation Instructions Rockhopper Printer ASSEMBLING THE PRINTER Caution: • Before lifting the printer body out of the box, make sure to remove all plastic wrapping materials first, in order to avoid that the machine slips from your hands. Step 1: Unpack the stand and assemble it by screwing the left and right stand legs to the cross beam (upper bar)(1) and to the cross bar (lower bar)(2). - Page 24 Installation Procedures Operation Instructions Rockhopper Printer Hook the left end plate between the leg assembly. Turn the left end plate diagonally, so that you can put it in-between the left leg and then turn it right to fix it into place by means of the hooks.
- Page 25 Installation Procedures Operation Instructions Rockhopper Printer Step 3 : Hook the right end plate between the leg assembly. To do so, follow the same procedure as for the left end plate. Hook the right end plate between the leg assembly. Turn the right end plate diagonally, so that you can put it in-between the right leg and then turn it right to fix it into place by means of the hooks.
- Page 26 Installation Procedures Operation Instructions Rockhopper Printer Step 4: Caution: • For safety, at least four people are needed for assembling the printer. • When taking the main unit out of the carton, remove the vinyl first and handle the printer directly. There is a risk of your hands slipping if the main unit is handled with the vinyl on.
- Page 27 Installation Procedures Operation Instructions Rockhopper Printer Step 5 : The sensor assembly should be mounted on the right side of the stand. Take the sensor bracket and put it through the outer slothole of the sensor assy. Now you can fix the sensor assy. Fix the sensor assembly smoothly to the motor box, using 2 bolt + washers (use upper holes) (detail A).
- Page 28 Installation Procedures Operation Instructions Rockhopper Printer Step 6: Loosen the wing screw which is fixed to the printing table (4) and remove the metal fixing plate (5), which blocks the printer head during transportation. (See 4 & 5 on figure below). Keep the metal fixing plate and wing screw, since the printing head needs to be blocked during any transportation of your printer.
-
Page 29: The Parallel Interface
OFF. Note: • For optimum output, please use a cable recommended by Mutoh. The printer can use the Centronics interface (IEEE1284 compatible, Nibble, ECP). Connect to the printer as shown in the following diagram with an interface cable (option) for the connection system you will use. -
Page 30: Tips To Use High-Speed Ecp Parallel Communication
Installation Procedures Operation Instructions Rockhopper Printer TIPS TO USE HIGH-SPEED ECP PARALLEL COMMUNICATION • If the parallel port setting on the printer is set to BI CENTRO (See Menu Mode Operation – Menu Structure Overview) your printer is ready for high-speed bi- directional communication. -
Page 31: Installation Of Network Interface Board
Installation Procedures Operation Instructions Rockhopper Printer INSTALLATION OF NETWORK INTERFACE BOARD The standard interface for the Rockhopper printer has a parallel Centronics compatible interface as standard equipment. The network interface board, RJ-ETH14TX, for connection to EtherNet is also available as an option. The following procedure explains how to install the network interface board. - Page 32 Installation Procedures Operation Instructions Rockhopper Printer Step 4 : Connect a Category 5 EtherNet cable compatible with both 10BASE-T and 100BASE-TX to the connector on the interface board. Connect the other end of the Ethernet cable to the 10BASE-T or 100BASE-TX network hub. 10BASE-T/100BASE-TX Compatible Ethernet Cable (Category 5) AP-75024 Rev.
-
Page 33: Connecting The Power Cable / Disconnect Device
Installation Procedures Operation Instructions Rockhopper Printer CONNECTING THE POWER CABLE / DISCONNECT DEVICE 1) Make sure the printer’s power switch is turned OFF. 2) Make sure the power of the Heating System and the Roll Take-Up System are turned OFF. 3) Plug the printer-end of the power cable into the connector at the back of the printer. - Page 34 Installation Procedures Operation Instructions Rockhopper Printer AP-75024 Rev. 1.2. – 18/08/2002 Page...
-
Page 35: Preparing For A Job
• Once you have worked with eco-solvent inks, it is forbidden to change to another ink type. • Do not use other ink cassettes but the exclusive Mutoh Rockhopper ink cassettes. When using non Mutoh ink cassettes, the ink supply system, the heads as well as the cleaning system will be considered out of warranty if damage occurs. - Page 36 INSTALLING THE INK CASSETTES IN A MUTOH ROCKHOPPER : Important: • Before using Eco-Solvent ink, perform a head wash. Tubes, heads and filters must be clean.
- Page 37 Preparing for a job Operation Instructions Rockhopper Printer Step 2: The printer starts up its initialization routine and the printer display shows the following message: [Y M C K O G] No cartridge Y: Yellow M: Magenta C: Cyan K: Black O: Orange or Light Cyan G: Green or Light Magenta Note :...
- Page 38 • Slots 5 and 6 however are NOT CODED. Please check carefully not to put the ink cassettes into an incorrect slot. All RIP software drivers developed according to Mutoh guidelines require: Slot 5 to contain: Light Cyan or Orange Slot 6 (leftmost slot) to contain: Light Magenta or Green •...
- Page 39 If the ink replenish does not commence after several head cleaning cycles, contact your dealer. • If the display shows “not original ink” please contact your ink supplier and make sure to get original Mutoh Rockhopper ink. B. Installing Ink Cassettes. Step 1: The power switch is located at the right side of the printer, below the printer body.
- Page 40 • Slots 5 and 6 however are NOT CODED. Please check carefully not to put the ink cassettes into an incorrect slot. All RIP software drivers developed according to Mutoh guidelines require: Slot 5 to contain: Light Cyan or Orange Slot 6 (leftmost slot) to contain: Light Magenta or Green •...
- Page 41 If the ink replenish does not commence after several head cleaning cycles, contact your dealer. • If the display shows “not original ink” please contact your ink supplier and make sure to get original Mutoh Rockhopper ink. AP-75024 Rev. 1.2. – 18/08/2002 Page...
-
Page 42: Adjusting Head Height
Photo quality output on photo paper type Thick media or media with fibres (Fabrics) media which may touch the printhead during (Mutoh Photo Great Piezo Media, Paper, printing. Vinyl, Synthetic paper,…) (Canvas, Art Paper, Cardboard,…) AP-75024 Rev. 1.2. – 18/08/2002... -
Page 43: Loading Media
It also affects the printing quality. • With media recommended by Mutoh, you should be aware that a 1% variation in humidity may cause the media to expand or contract by the proportions shown below. -
Page 44: Loading Roll Media
Preparing for a job Operation Instructions Rockhopper Printer 2. LOADING ROLL MEDIA Step 1: Open the cover, check that the head is in a position where it will not touch the media keeper blade and put the hold lever up. Step 2: Selecting the media •... - Page 45 • Do not drop the media roll over the scroller as this might damage the scroller end caps. • All Mutoh recommended roll media are rolled up with the printable side facing the outside, so that you can load the roll media easily.
- Page 46 Preparing for a job Operation Instructions Rockhopper Printer Step 9: Loading roll media • Pull some media off the roll, feed it into the media feed gap and between the pressure rollers and the drive roller. • Pull out the media at the front side and make sure at least 0.5 meters hangs out in front of the printer.
- Page 47 Preparing for a job Operation Instructions Rockhopper Printer • Turn the scroller receiver screw clockwise to move the roll media to the left (when standing in front of the printer). Important: • The guide line (holes) is a guide. There is a possibility of a jam if the pressure roller is not holding the left edge of the media and the pressure roller is near the right edge.
- Page 48 Preparing for a job Operation Instructions Rockhopper Printer Step 13: During the media detection sequence, check if the media runs straight. After media detection, check the position of the right side of the roll media. If the position is almost on the same line as it was before closing the cover, media loading was performed successfully.
- Page 49 Preparing for a job Operation Instructions Rockhopper Printer Step 2 : Selecting roll take-up system • Press the Media-key to select media loading sequence with roll take-up system (Both LEDs ON). • By pressing the key you will see the LEDs alternate between three choices (sheet, roll and take-up).
- Page 50 Damaged end caps may cause media tracking problems. • All Mutoh recommended roll media are rolled up with the printable side facing the outside, so that you can load the roll media easily. Step 7: Installing the scroller slip ring Install the scroller slip ring onto the scroller.
- Page 51 Preparing for a job Operation Instructions Rockhopper Printer Step 9: Locking the scroller slip ring Lock the scroller by sliding the scroller slip ring onto the scroller rollers. The scroller slip ring will prevent unwinding of the roll media from the scroller when roll media is still not loaded in the machine.
- Page 52 Preparing for a job Operation Instructions Rockhopper Printer Guide line (holes) can be seen Guide line (holes) is hidden Step 12 : Fine-tuning the roll media position. If the guide line (holes) can be seen, the roll media must be moved to the right. If the guide line (holes) is hidden, the roll media must be moved to the left.
- Page 53 Preparing for a job Operation Instructions Rockhopper Printer Step 13 : • Before lowering the media hold lever, hold the media on the front side and turn the media feeding scroller slightly backward, making sure that there is an even tension across the full media width.
- Page 54 Preparing for a job Operation Instructions Rockhopper Printer Once the printer has printed as much as shown on the figure below, the sensors will be activated and the take-up system will start winding up the media. Once your print is finished and dry you can wind up your print via a manual feed button. If you want to sheet off the print push the cancel button for 2 seconds and confirm the sheet-off request.
-
Page 55: Using Pre- And Post-Heaters
FAINT nor with THIN ink density mode which both use the micro-dot printing mode. • If you have a RIP software in which media profiles are available for the Mutoh ink/media combination, the software normally should disable the micro-dot mode as soon as a profile for pigmented ink is selected. -
Page 56: Print Origin Control
Preparing for a job Operation Instructions Rockhopper Printer PRINT ORIGIN CONTROL. The Origin-Reset function allows you to move the horizontal origin, effectively changing the offset versus the right border. The value can be set ranging from 0 mm to the media width minus the left and right margins (20 mm), in 1mm increments. - Page 57 Preparing for a job Operation Instructions Rockhopper Printer Step 3 : * Menu * Command > Press the [ENTER] key to confirm the “Command” menu and shift to the next level. Step 4 : OriginReset : Bring up the “OriginReset” item by pressing the [Menu up] key or [Menu Down] key.
-
Page 58: Micro-Banding Elimination
Preparing for a job Operation Instructions Rockhopper Printer MICRO-BANDING ELIMINATION. The nominal paper movement accuracy is ± 0.1 percent, or ±1 mm per meter of moving distance. Different media types may show different behavior and when the paper movement error exceeds the target specification, banding can occur. This banding can take the form of thin dark horizontal bands, or thin white horizontal bands. - Page 59 Preparing for a job Operation Instructions Rockhopper Printer Step 3 : * Menu * Function > Press the [ENTER] key to enter the “Function” menu and shift to the next level. Step 4 : Step Adjustment : Change Bring up the “Step Adjustment” item by pressing the [Menu up] key or [Menu Down] key.
- Page 60 Preparing for a job Operation Instructions Rockhopper Printer Note : To find the optimum correction value for a certain media, you will need to go through a series of test cycles. Preferably send to the plotter a small test image such as a neutral grey square (between 50% and 70% Grey) and check the micro-banding as described above.
-
Page 61: Daily Maintenance
Step 2: Unpack a new ink cassette. Note: • Only use original Mutoh ink cassettes. • For each cassette, there is a correct place and a correct inserting direction. • Open the ink cassette just before inserting it into the slot. -
Page 62: Switching Between Dye Inks And Pigmented Inks Or Changing To Eco-Solvent Ink
Daily Maintenance Operation Instructions Rockhopper Printer SWITCHING BETWEEN DYE INKS AND PIGMENTED INKS OR CHANGING TO ECO-SOLVENT INK. Use the INK CHANGE procedure to switch from DYE ink to PIGMENTED ink or from PIGMENTED ink to DYE ink. Use the INK CHANGE procedure to switch from Dye or Pigmented Ink to ECO-SOLVENT INK. - Page 63 Daily Maintenance Operation Instructions Rockhopper Printer Step 8 : ConfirmChange Press the [Value/+] or [Value/-] key to select “Yes” and press ENTER. Step 9 : Remove Cart Remove ink cartridges from the slot. Step 10 : Set Wash Cart Insert the cleaning cartridge to the ink cartridge slots.
- Page 64 Daily Maintenance Operation Instructions Rockhopper Printer Important : After using Eco-Solvent ink it is not possible to change to other type of ink (pigmented and dye Inks). Step 17 : Ink Refill The initial fill is executed when installing cartridges. Ink Refill The display will show the following messages : Ink Refill...
-
Page 65: Cleaning The Head Cleaning Wiper
Daily Maintenance Operation Instructions Rockhopper Printer CLEANING THE HEAD CLEANING WIPER. When the head is cleaned and the type of ink is changed frequently, waste matter clinging to the cleaning wiper may cause the printing to become faint or blemished. In such case, you should clean the cleaning wiper. -
Page 66: Replacing The Cutting Blade
Daily Maintenance Operation Instructions Rockhopper Printer REPLACING THE CUTTING BLADE Depending on the kind of roll media used, paper dust gathers in the cutter slot and on the cutter blade edge. This may cause bad sheeting off quality. In this case, replace or clean the cutting blade or/and clean the cutter slot. - Page 67 Daily Maintenance Operation Instructions Rockhopper Printer Caution: • The edge of the cutting blade is very fragile, while replacing it, handle it with care. Step 4: Put the head manually back into its capping position, and turn the power switch ON. Note: •...
-
Page 68: Periodical Maintenance
You have to change the absorbents every week. IMPORTANT : Note that the x-marks in month 6 and month 12 are only to be done by authorized Mutoh technicians. Maintenance cycle on Rockhopper 48 “ Monthly Description 10 11 12... -
Page 69: Understanding The Control Panel & Printer Controls
Control Panel Operation Instructions Rockhopper Printer UNDERSTANDING THE CONTROL PANEL & PRINTER CONTROLS GUIDED TOUR AROUND THE CONTROL PANEL Your printer is equipped with a direct access control panel, meaning that all frequently used functions can be addressed directly from the keyboard. Description Data LED : The DATA LED monitors DATA status :... - Page 70 Control Panel Operation Instructions Rockhopper Printer Cancel Key : The [CANCEL] key is a special key, controlling both the CANCEL FUNCTION as well as the ROLL MEDIA sheet-off function. Printer Condition Result by pressing CANCEL Idle Status Roll media is cut at the current position Receiving Status Process stops...
- Page 71 Control Panel Operation Instructions Rockhopper Printer Resolution : Pressing RESOLUTION will change the output resolution between 360 DPI, 720 DPI or 1440 DPI. The set-up can only be changed in idle status. When pressed together with the [shift] key (9) it allows reverse manual roll feed.
- Page 72 Control Panel Operation Instructions Rockhopper Printer Shift-button : Shift button to activate Head Adjustment, manual roll feed (forward or reverse), Nozzle check print, Test print or Set-Up List. Back out of menu levels or switch back to ONLINE level from top level (Menu mode operation).
- Page 73 Control Panel Operation Instructions Rockhopper Printer Note : • When the data light is ON (receiving) or blinking (processing), all the keys are disabled, except the head cleaning key. The keys will be operational in case of receiving data while you are in the setup menu.
-
Page 74: Heater System Control Panel
Control Panel Operation Instructions Rockhopper Printer HEATER SYSTEM CONTROL PANEL. 1 = Controls Front Heater 2 = Controls Rear Heater 3 = Power Switch Power Switch: Control for power ON or OFF the Heater System. Controls Front Heater: Set temperature for the front heater. Real (RT) and set (ST) temperature are displayed on the LCD screen. The maximum temperature is 50 °C. -
Page 75: Menu Mode Operation
Control Panel Operation Instructions Rockhopper Printer MENU MODE OPERATION. The Menu Mode Operation is used to access settings, which cannot be controlled via the direct access keys. As soon as media is loaded, the printer is ONLINE and ready to receive data. -
Page 76: Control Panel
Control Panel Operation Instructions Rockhopper Printer Menu Structure – overview. Online Command Command MH-GL2 / MHGL, GL2 / Printer command language RTL-PASS selection PlotArea Normal / Expend Set-up hard clip area depending of media size. Position P1 / Full / LL Set-up initial pen position in MH-GL, GL2 and MH-GL2. -
Page 77: Print Modes Accessible Via The Control Panel
Daily Maintenance Operation Instructions Rockhopper Printer PRINT MODES ACCESSIBLE VIA THE CONTROL PANEL. The following print modes are predefined as Draft, Normal and Quality. These modes may be overwritten from the host computer using the printer manager commands. Panel LEDs Print Mode m²/h Output Resolution (dpi) - Page 78 Daily Maintenance Operation Instructions Rockhopper Printer AP-75024 Rev. 1.2. – 18/08/2002 Page...
Need help?
Do you have a question about the ROCKHOPPER 62 inch and is the answer not in the manual?
Questions and answers