Table of Contents
Advertisement
Available languages
Available languages
Quick Links
Advertisement
Table of Contents

Related Manuals for JB-Lighting P8


Summary of Contents for JB-Lighting P8
- Page 1 Bedienungsanleitung | Operating Instructions Version 1.3 Software 1.23...
- Page 2 - 02 -...
-
Page 3: Table Of Contents
Inhalt / Content 1. Maße ..............04 Deutsch 2. -
Page 4: Maße
1. Maße - 04 -... -
Page 5: Produktübersicht
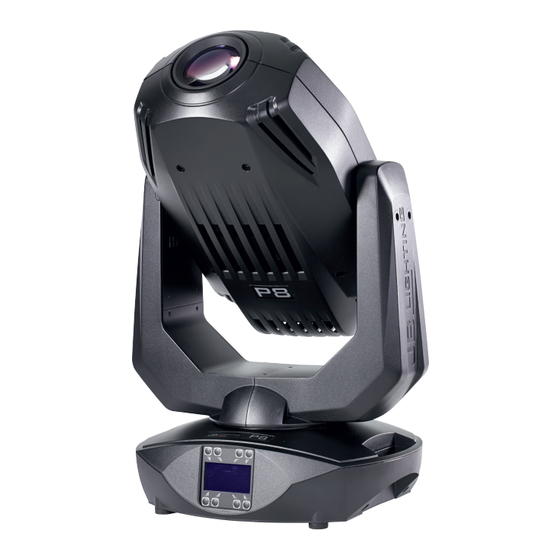
2. Produktübersicht Objektiv Frostfilter Prisma Zoom Fokus Animationsrad Goborad 2 Goborad 1 Iris Projektorkopf 800W LED-Engine Display mit Funktionstasten Projektorfuß mit DMX-Ein-/Ausgängen, Netzteil, Stromversorgung über PowerCon - 05 -... -
Page 6: Einleitung
Dem Scheinwerfer P8 liegt ein teilkonfektioniertes Stromkabel mit dem PowerCon Anschluß bei (in US-Ausführung ist das Anschlußkabel nicht enthalten). Die Montage des Schutzkontaktste- cker, bzw. der Anschluss des P8 an die Stromversorgung (100-240 Volt, 50 - 60 Hertz), muß von einem autorisierten Fachmann durchgeführt werden. -
Page 7: Montage Der Geräte
Anschluß außerhalb der EU: Weltweit gibt es unterschiedliche ortsbezogene Netzausführungen. Der P8 darf nur an folgenden Stromnetzen betrieben werden: ACHTUNG: Netz Der P8 darf in Kanada nur im 2 2 Leiter, 1 Phase Leiter, 1 Phasen Netz maximal mit 120V betrieben werden! -
Page 8: Netzstrom Verkabeln
Verbinden Sie nun den DMX-Ausgang Ihres Controllers mit dem 1. P8 (Controller DMX-Out -> P8 DMX-In). Anschließend den 1. P8 mit dem 2. P8 (P8 DMX-Out -> P8 DMX-In) und so weiter. Alle DMX-Ein/Ausgänge sind durchkontaktiert, d.h. Sie können den 3-poligen DMX-In in Kombinati- on mit dem 5-poligen DMX-Out Anschluss benutzen. -
Page 9: Bedienfeld
5. Bedienfeld Der P8 verfügt über ein grafisches Display, dass bei hängender Installation um 180° gedreht werden kann. Drehen des Displays Die aktuelle Ausrichtung des Displays wird durch Drücken der Display-Tasten bestimmt. Die Dis- play-Beschriftung orientiert sich immer zu der Tastenreihe, die zuletzt benutzt wurde. -
Page 10: Menü-Übersicht
5.1 Menü-Übersicht ENTER ENTER ENTER FACTORY DEF. LOAD DEFAULTS SURE? USER DEFAULTS LOAD DEFAULTS SURE? SAVE DEFAULTS SURE? PASSWORD DMX ADDRESS ADDRESS +/- DMX INPUT MODE WIRED PERSONALITY WIRED/WIRELESS DMX MODE MODE 1 MODE 2 PAN / TILT RESOLUTION 16 BIT 8 BIT PAN INVERS NORMAL... - Page 11 EDIT STEP NR. +/- MODIFY FADE TIME FADE TIME +/- STANDALONE CAPT DMX NEXT TIME NEXT TIME +/- INSERT PAN +/- DELETE TILT TILT +/- RESET STEP CONTROL CONTROL +/- CLEAR ALL SHUTTER SHUTTER +/- DIMMER DIMMER +/- IRIS IRIS +/- FOCUS FOCUS +/- GOBO1...
-
Page 12: Factory Defaults - Werkseinstellungen
Unter RESOLUTION lässt sich die Bewegungsauflösung von 16 Bit auf 8 Bit einstellen. In der Werkseinstellung ist diese auf 16 Bit eingestellt. In der 8 Bit Auflösung lässt sich der P8 weniger exakt positionieren, je nach Lichtkonsole jedoch schneller bedienen. Die Menüpunkte PAN INVERS und TILT INVERS ermöglichen ein Invertieren der Bewegungsrichtung. -
Page 13: Standalone Betrieb
Einstellung sollte begrenzt sein und nur in ausreichend belüfteten Räumen benutzt werden. Bei Festinstallationen, sowie schlecht belüfteten Räumen sollte der HI POWER Mode eingestellt wer- den. Eine Gefahr für die Lebensdauer des Geräts besteht in keinem Modus, da der P8 über eine Temperatur-Sicherheitsabschaltung verfügt. -
Page 14: Info
“ENTER”. Das Menü springt eine Ebene zurück und RUN wird im Display dargestellt. Betrieb über Master-Slave Funktion: Verbinden Sie die P8 über DMX Leitungen, aktivieren Sie bei allen Slave-Geräten den Menüpunkt REMOTE. Navigieren Sie dazu im STANDALONE-Menü bis zum Untermenü REMOTE. Aktivieren Sie die Funktion REMOTE durch die Tastenkombination “ENTER”... -
Page 15: Kanalbelegung
6. Kanalbelegung Der P8 verfügt über 3 unterschiedliche DMX-Modi. Der jeweilige Modus lässt sich im Menüpunkt PERSONALITY, DMX MODE einstellen. Der eingestellte Mode wird im Hauptmenü angezeigt. Mode 1(M1) Mode 2 (M2) Mode 3 (M3) Kanal 1 Kanal 2 Pan fein... - Page 16 Funktion Pan (X) Bewegung 430° 000-255 Pan (X) fein 000-255 Tilt (Y) Bewegung 300° 000-255 Tilt (Y) fein 000-255 Steuerkanal 100% Ausgangsleistung der LED-Stränge 000-007 Fade out über Fader (langsam - schnell) Licht- Grundabgleich RGB 008-015 mischpult Fade out über Fader (langsam - schnell) Mode1 Weißabgleich RGB (Weiß...
- Page 17 Sicherheit 160-207 Camera Mode, 50Hz (nach 2 Sekunden) 208-215 Camera Mode, 60Hz (nach 2 Sekunden) 216-223 Camera Mode, FLEX (nach 2 Sekunden) 224-231 Sicherheit 232-239 Reset (nach 2 Sekunden) 240-247 Sicherheit 248-255 Shutter Shutter zu 000-015 Shutter auf 016-095 Shutter pulsierend öffnen >10Hz (0,6sec - 4,8sec) 096-110 Shutter auf 111-111...
- Page 18 Goborad 1 Gobo 0 (offen 23mm) 000-007 Gobo 1 008-015 Gobo 2 016-023 Gobo 3 024-031 Gobo 4 032-039 Gobo 5 040-047 Gobo 6 048-055 Gobo 7 (offen 25mm) 056-255 Gobopositionierung / -dreh 1 Gobopositionierung 000-191 Goborotation rechts (schnell - langsam) 192-222 Goborotation Stop 223-224...
- Page 19 Farbrademulation Inaktiv, Farbmischung nur über RGB 000-001 Weiss 002-003 Weiss / Rot 004-007 008-011 Rot / Gelb 012-015 Gelb 016-019 Gelb / Magenta 020-023 Magenta 024-027 Magenta / Grün 028-031 Grün 032-035 Grün / Orange 036-039 Orange 040-043 Orange / Blau 044-047 Blau 048-051...
-
Page 20: Farbmischung
Blau fein (16 Bit) 0-100% 000-255 6.1 Farbmischung Der P8 verfügt über einen Farbkanal mit festen Farben, RGB Farbmischung sowie einen CTC Kanal. Um die Funktionen zu überschauen sind diese mit unterschiedlichen Prioritäten belegt. Der Farbradkanal (Voll/-Halbfarben entsprechend der JB-Lighting Produktpalette) hat erste Prio- rität vor den RGB Kanälen (RGB-Farbmischung). -
Page 21: Service
7.1 Servicemenü RESET FIXTURE Auf den Befehl „Reset“ führt der P8 eine Initialisierung auf seine Startwerte aus. Es ist der gleiche Vorgang wie nach dem Einschalten des P8. Sollte eine Fehlermeldung im Display erscheinen könnte dies eine erste Massnahme sein, diese zu beheben. -
Page 22: Gerät Reinigen
Sie sollten in regelmäßigen Abständen die Funktion der Lüfter im Kopf und Fuß überprüfen. Vor allem sollten Sie darauf achten, daß die Lufteinlässe sowie das Innere des P8 frei von Fusseln und Staub sind. Hierzu öffnen Sie die Kopfabdeckung (4x Kreuzschlitzschraube mit Bajonettverschluß) und die Bodenplatte am Fuß. -
Page 23: Spezifikationen
8. Spezifikationen Maße und Gewicht Länge ..............308 mm Breite . -
Page 24: Konformitätserklärung
Konformitätserklärung im Sinne der Richtlinie 89/336/EWG (Richtlinie 89/336/EWG des Rates vom 03.05.1989 zur Angleichung der Rechtsvorschriften der Mitgliedsstaaten über die elektromagnetische Verträglichkeit) Der Hersteller JB-lighting Lichtanlagentechnik GmbH Sallersteigweg 15 89134 Blaustein-Wippingen erklärt, dass das Produkt Varyscan P8 den wesentlichen Schutzanforderungen der Richtlinie entspricht. - Page 25 English Contains also french warnings! Comprend les avertissements en langue francais - 25 -...
-
Page 26: Dimensions
1. Dimensions - 26 -... -
Page 27: Product Overview
2. Product overview objektiv frost filter rotating prism zoom focus rotating animation wheel rotating gobo 2 rotating gobo 1 iris projektor head 800W LED-Engine display with function keys projector feet with DMX-In/Out, power supply, mains connectors - 27 -... -
Page 28: Introduction
- EMV 89 /336 3.2 Unpacking This package contains the P8, two omega brackets with 1/4 turn fasteners, this manual as well as a power cable with PowerCon connector (no cable in US model). Open the top of the box and remove the inlay. Remove the unit from the box. For any damage occuring during transport, report to the transport company immediately. -
Page 29: Rigging The Fixture
The P8 is supplied with a power cable with a Neutrik PowerCon connector. Install a 3-prong grounding type plug that fits your supply. US model comes without power cable and connectors. Required cable type see 3.5 page 24. Connected load: voltage 100-240 V, frequency 50 - 60 Hz... -
Page 30: Dmx Wiring
Connect the DMX-out of the control desk to the first P8 in line. (lighting control desk DMX-Out -> P8 DMX-In). Connect the second P8 to the first in line, and so on (P8 no. 2 DMX-In -> P8 no. 1 DMX-Out). All 3-pin and 5-pin connectors are wired parallel. Do not use this fixture as a DMX splitter! The DMX-Out of the last unit in line is not occupied unless problems occur. -
Page 31: Control Panel
The value of P8 in chain depends on the local power network. Never use more than three in one line. Power throughput cable must be rated 20A min., have three conductors 1,5mm² min. conductor size and a outer cable diameter of 5-15mm. Use only original PowerCon plug from Neutrik. -
Page 32: Menu Navigation
5.1 Menu navigation ENTER ENTER ENTER FACTORY DEF. LOAD DEFAULTS SURE? USER DEFAULTS LOAD DEFAULTS SURE? SAVE DEFAULTS SURE? PASSWORD DMX ADDRESS ADDRESS +/- DMX INPUT MODE WIRED PERSONALITY WIRED/WIRELESS DMX MODE MODE 1 MODE 2 PAN / TILT RESOLUTION 16 BIT 8 BIT PAN INVERS... - Page 33 EDIT STEP NR. +/- MODIFY FADE TIME FADE TIME +/- STANDALONE CAPT DMX NEXT TIME NEXT TIME +/- INSERT PAN +/- DELETE TILT TILT +/- RESET STEP CONTROL CONTROL +/- CLEAR ALL SHUTTER SHUTTER +/- DIMMER DIMMER +/- IRIS IRIS +/- FOCUS FOCUS +/- GOBO1...
-
Page 34: Factory Defaults
DMX MODE The P8 offers 3 different operating modes (see DMX protocol page 34). Mode 1 is an 8 bit mode with which you can controll all features of your P8. For using the full range of DMX channels use the Mode 2 - 16 BIT. -
Page 35: Standalone Mode
The fans start to run faster with more airflow which produces more noise. There is in no mode danger for the lifetime of the P8. If the temperature rise to much the fixture switches off automatically. -
Page 36: Info
DMX-signal is being received or REMOTE ACTIVE if a DMX-signal is being received. To lea- ve this function press “ESC” (keep it down) and press “ENTER” in addition. Connect the P8 with DMX cables. Select STANDALONE -> RUN with the master fixture. Start function by pressing “ENTER”... -
Page 37: Dmx Protocol
6. DMX protocol The P8 offers 3 different channel modes. In the menu area PERSONALITY -> DMX MODE you can select your mode. The used mode will be displayed in the main menu. Mode 1 (M1) Mode 2 (M2) Mode 3 (M3) - Page 38 Function Pan (X) movement 430° 000-255 Pan (X) fine 000-255 Tilt (Y) movement 300° 000-255 Tilt (Y) fine 000-255 Control Full output power on LEDs 000-007 Fade out with fader (slow - fast) Lighting Basic adjustment RGB 008-015 desk Fade out with fader (slow - fast) mode1 White balance RGB (same white as fixed colors color 0) 016-023...
- Page 39 Safe 160-207 Camera mode, 50Hz (after 2 seconds) 208-215 Camera mode, 60Hz (after 2 seconds) 216-223 Camera mode, FLEX (after 2 seconds) 224-231 Safe 232-239 Reset (after 2 seconds) 240-247 Safe 248-255 Shutter Shutter closed 000-015 Shutter open 016-095 Shutter pulse opening >10Hz (0,6 sec - 4,8 sec) 096-110 Shutter open 111-111...
- Page 40 Gobo wheel 1 Gobo 0 (open 23mm) 000-007 Gobo 1 008-015 Gobo 2 016-023 Gobo 3 024-031 Gobo 4 032-039 Gobo 5 040-047 Gobo 6 048-055 Gobo 7 (open 25mm) 056-255 Gobo positioning / rotation 1 Gobo positioning 000-191 Gobo rotation right 192-222 Gobo rotation stop 223-224...
- Page 41 Fixed colors Inactive: RGB color mixing active 000-001 White 002-003 White / red 004-007 008-011 Red / yellow 012-015 Yellow 016-019 Yellow / magenta 020-023 Magenta 024-027 Magenta / green 028-031 Green 032-035 Green / orange 036-039 Orange 040-043 Orange / blue 044-047 Blue 048-051...
-
Page 42: Color Mixing
000-255 6.1 Color mixing The P8 features a color wheel channel, main RGB and CTC channel. The colour wheel channel has priority. Only if the color wheel channel is set to DMX value 000-001 it is possible to operate the RGB channels. The CTC channel can be combined with both, the RGB channels and the colour wheel channel. -
Page 43: Service
Some lighting desks have a delay during DMX refreshing and DMX values get missed during a fade out or using the fader. That means the P8 with his fast reaction time rate this happen as a shutter and shows flickering in the beam. To avoid this you can select 5 different modes. Depen- ding on the modus, the reaction time of the P8 gets lower. -
Page 44: Cleaning The Fixture
Zoom & focus: The zoom and focus in all P8 is calibrated at the factory. But if necessary it is possible to fine adjust the zoom and focus using the OFS ZOOM and OFS FOCUS command. RECEIVESOFT Use the RECEIVE SOFT command to prepare the P8 for a software upload. See 7.3 software update and the uploader device documentation. -
Page 45: Specifications
8. Specifications Dimension and weight Length ..............308 mm Width . -
Page 46: Declaration Of Conformity
In terms of directive 89/336/EWG (Directive 89/336/EWG of the council from 3 May 1989 for approximation of agreed Regulations of the member states regarding electromagnetic compatibility) Manufacturer JB-lighting Lichtanlagentechnik GmbH Sallersteigweg 15 89134 Blaustein-Wippingen Declare that the product Varyscan P8 Is in agreement with the safety requirements of this directive. - Page 47 - 47 -...
- Page 48 JB-Lighting Lichtanlagentechnik GmbH Sallersteig 15 89134 Blaustein Tel. +49 7304 9617-0 Fax. +49 7304 9617-99 info@jb-lighting.de www.jb-lighting.de...
Need help?
Do you have a question about the P8 and is the answer not in the manual?
Questions and answers