Table of Contents
Advertisement
Quick Links
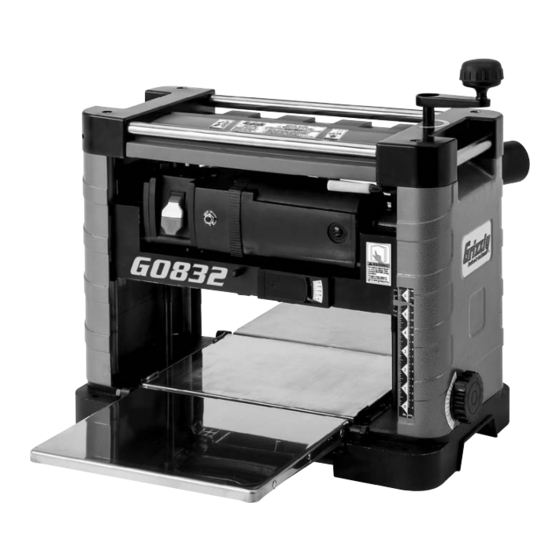
MODEL G0832
13" BENCHTOP PLANER
w/BUILT-IN DUST COLLECTION
OWNER'S MANUAL
(For models manufactured since 04/17)
3092372
COPYRIGHT © APRIL, 2017 BY GRIZZLY INDUSTRIAL, INC.
WARNING: NO PORTION OF THIS MANUAL MAY BE REPRODUCED IN ANY SHAPE
OR FORM WITHOUT THE WRITTEN APPROVAL OF GRIZZLY INDUSTRIAL, INC.
#JH18509 PRINTED IN CHINA
V2.05.17
Advertisement
Table of Contents

Related Manuals for Grizzly G0832


Summary of Contents for Grizzly G0832
- Page 1 (For models manufactured since 04/17) 3092372 COPYRIGHT © APRIL, 2017 BY GRIZZLY INDUSTRIAL, INC. WARNING: NO PORTION OF THIS MANUAL MAY BE REPRODUCED IN ANY SHAPE OR FORM WITHOUT THE WRITTEN APPROVAL OF GRIZZLY INDUSTRIAL, INC. #JH18509 PRINTED IN CHINA V2.05.17...
- Page 2 This manual provides critical safety instructions on the proper setup, operation, maintenance, and service of this machine/tool. Save this document, refer to it often, and use it to instruct other operators. Failure to read, understand and follow the instructions in this manual may result in fire or serious personal injury—including amputation, electrocution, or death.
-
Page 3: Table Of Contents
Table of Contents INTRODUCTION ..........2 SECTION 5: ACCESSORIES ......27 Contact Info............ 2 SECTION 6: MAINTENANCE ......29 Manual Accuracy ........... 2 Schedule ............29 Identification ........... 3 Cleaning & Protecting ........29 Controls & Components ......... 4 Lubrication ........... 29 Internal Components........ -
Page 4: Introduction
ID label (see below). This information is required for us to provide proper tech support, and it helps us determine if updated documenta- tion is available for your machine. Manufacture Date Serial Number Model G0832 (Mfd. Since 04/17) -
Page 5: Identification
ON/OFF Switch Port Column Lock Lever Reset Button Table Cutterhead Depth Stop Dial Depth-of-Cut Cutterhead Motor Brush Gauge Elevation Scale Housing To reduce your risk of serious injury, read this entire manual BEFORE using machine. Model G0832 (Mfd. Since 04/17) -
Page 6: Controls & Components
Cutterhead Depth Stop Dial: Quickly adjusts D. Depth-of-Cut Gauge: Shows depth of cut headstock height from ⁄ "–1 ⁄ " per factory (from 0"– ⁄ ") when workpiece contacts detents. indicator at bottom of gauge. Model G0832 (Mfd. Since 04/17) -
Page 7: Internal Components
Use this machine with respect and caution to decrease the risk of operator injury. If normal safety precautions are overlooked or ignored, serious personal injury may occur. Model G0832 (Mfd. Since 04/17) -
Page 8: Machine Data Sheet
MACHINE DATA SHEET Customer Service #: (570) 546-9663 · To Order Call: (800) 523-4777 · Fax #: (800) 438-5901 MODEL G0832 13" BENCHTOP PLANER WITH BUILT‐IN DUST COLLECTION Product Dimensions: Weight................................66 lbs. Width (side-to-side) x Depth (front-to-back) x Height............... 23-1/2 x 33-1/2 x 22 in. - Page 9 The information contained herein is deemed accurate as of 5/26/2017 and represents our most recent product specifications. Model G0832 PAGE 2 OF 2 Due to our ongoing improvement efforts, this information may not accurately describe items previously purchased. Model G0832 (Mfd. Since 04/17)
-
Page 10: Section 1: Safety
Everyday ery. Never operate under the influence of drugs or eyeglasses are NOT approved safety glasses. alcohol, when tired, or when distracted. Model G0832 (Mfd. Since 04/17) - Page 11 EXPERIENCING DIFFICULTIES. If at any time debris. Make sure they are properly installed, you experience difficulties performing the intend- undamaged, and working correctly BEFORE ed operation, stop using the machine! Contact our operating machine. Technical Support at (570) 546-9663. Model G0832 (Mfd. Since 04/17)
-
Page 12: Additional Safety For Planers
GRAIN DIRECTION. Planing across the grain adjusted before operation. is hard on the planer and may cause kickback. Plane in the same direction or at a slight angle with the wood grain. -10- Model G0832 (Mfd. Since 04/17) -
Page 13: Section 2: Power Supply
-11- Model G0832 (Mfd. Since 04/17) -
Page 14: Extension Cords
Two-prong outlets do not meet the grounding requirements for this machine. Do not modify or use an adapter on the plug provided—if it will not fit the outlet, have a qualified electrician install the proper outlet with a verified ground. -12- Model G0832 (Mfd. Since 04/17) -
Page 15: Section 3: Setup
Grizzly or the shipping agent. You MUST have the original pack- aging to file a freight claim. It is also extremely helpful if you need to return your machine later. -
Page 16: Hardware Recognition Chart
Hardware Recognition Chart USE THIS CHART TO MATCH UP HARDWARE DURING THE INVENTORY AND ASSEMBLY PROCESS. Flat Head Screw -14- Model G0832 (Mfd. Since 04/17) -
Page 17: Site Considerations
Children and visitors may be seriously injured if unsuper- vised around this machine. Lock entrances to the shop " or disable start switch or power connection to prevent unsupervised use. " Figure 7. Minimum working clearances. -15- Model G0832 (Mfd. Since 04/17) -
Page 18: Bench Mounting
Bench Mounting Assembly Number of Mounting Holes ......4 The Model G0832 comes partially assembled. Dia. of Mounting Hardware Needed ..⁄ " The cutterhead elevation crank, cord wraps, and dust port must be installed before operating the The base of this machine has mounting holes planer. -
Page 19: Dust Collection
Tug hose to make sure it does not come off. death, or machine/property damage. Note: A tight fit is necessary for proper performance. Figure 12. Dust hose installed onto dust port. -17- Model G0832 (Mfd. Since 04/17) - Page 20 OFF. Motor should run smoothly and without unusual problems or noises. Remove switch disabling key, as shown in Figure 13. Figure 13. Removing key from paddle switch to disable switch and prevent unauthorized use. -18- Model G0832 (Mfd. Since 04/17)
-
Page 21: Section 4: Operations
Read books/magazines or get formal training before beginning any proj- ects. Regardless of the content in this sec- tion, Grizzly Industrial will not be held liable for accidents caused by lack of training. -19- Model G0832 (Mfd. Since 04/17) -
Page 22: Workpiece Inspection
Workpieces with slight cupping can be safely common wood species. supported if the cupped side is facing the table. Avoid planing a workpiece bowed side-down, which can cause rocking during planing and potential kickback. -20- Model G0832 (Mfd. Since 04/17) -
Page 23: Planing Tips
• Always true cupped or warped stock on a jointer before planing. -21- Model G0832 (Mfd. Since 04/17) -
Page 24: Setting Depth Of Cut
Problem: Regularly spaced indentations across 1 Turn face of workpiece are caused by excessive ⁄ " outfeed roller pressure or excessive feed rate. Figure 15. Crank elevation increments. Solution: Reduce outfeed roller pressure; reduce feed rate. -22- Model G0832 (Mfd. Since 04/17) -
Page 25: Feeding Workpiece
⁄ ". However, as long as you move the handle in the same Depth direction during operation, backlash will not Stop be a factor. Dial Scale Figure 17. Depth stop dial and scale. -23- Model G0832 (Mfd. Since 04/17) -
Page 26: Adjusting Table Alignment
Recheck table height from side to side, then tighten stop nut to secure the set- Tools Needed ting. Open-End Wrench 10mm ........2 Precision Straightedge 24" ........ 1 -24- Model G0832 (Mfd. Since 04/17) -
Page 27: Adjusting/Replacing Knives
The condition of the knives on the Model G0832 will affect the precision of the cut. During opera- tion, watch for the following signs of dulled knives: •... - Page 28 Repeat Steps 2–3 for remaining knives, then Installing Knives replace dust hood. DISCONNECT MACHINE FROM POWER! Using included magnets, align knife with two pins on cutterhead. Be sure knife is oriented with beveled edge up, as shown in Figure 23. -26- Model G0832 (Mfd. Since 04/17)
-
Page 29: Section 5: Accessories
Especially important if you or serious personal injury or machine damage. employees operate for hours at a time. To reduce this risk, only install accessories recommended for this machine by Grizzly. H4978 NOTICE T20446 Refer to our website or latest catalog for additional recommended accessories. - Page 30 45° bevel adjustment. Great for job sites or shops with lim- ited space! Figure 29. G2857 Thickness Gauge. Figure 31. G0821 Benchtop Jointer. www.grizzly.com 1-800-523-4777 order online at or call -28- Model G0832 (Mfd. Since 04/17)
-
Page 31: Section 6: Maintenance
Protecting Figure 32. Location of cutterhead elevation leadscrews. Cleaning the Model G0832 is relatively easy. Vacuum excess wood chips and sawdust, and Use mineral spirits, stiff brush, and shop rags wipe off the remaining dust with a dry cloth. If any to remove old lubricant. - Page 32 Use mineral spirits, stiff brush, and shop rags to clean old grease from chains. Tilt machine back onto base. Apply light coating of grease to chain linkage and sprockets. Re-install side cover. -30- Model G0832 (Mfd. Since 04/17)
-
Page 33: Replacing Motor Brushes
Replacing Motor Cleaning Infeed & Brushes Outfeed Rollers The motor on the G0832 is equipped with two Saw dust and workpiece grime can accumulate long-life carbon brushes—one on the front and on the infeed and outfeed rollers, creating incon- one on the back of the motor. The brush life is sistent pressure on the workpiece as it is fed affected by motor loads and usage. -
Page 34: Cleaning Feed Rollers
Remove any trapped material from between roller assembly and bracket. Bracket Bushing Block Figure 37. Sawdust can get trapped between the bushing block and the bracket. -32- Model G0832 (Mfd. Since 04/17) -
Page 35: Tensioning/Replacing Drive Belt
Steps 6–8 until they Pulley are. Motor Tension Cap Screw 10. Replace side panel, secure top cover, and re-install cutterhead depth stop dial. Cutterhead Pulley Belt Figure 38. Drive belt and pulleys. -33- Model G0832 (Mfd. Since 04/17) -
Page 36: Section 7: Service
6. Knives/gibs at fault. 6. Resharpen/replace knives; set knife alignment correctly (Page 25). 7. Motor bearings at fault. 7. Test by rotating shaft; rotational grinding/loose shaft requires bearing replacement. 8. Cutterhead bearings at fault. 8. Replace bearing(s). -34- Model G0832 (Mfd. Since 04/17) - Page 37 2. Increase depth of cut (Page 22). 2. Cutting depth too shallow. Infeed/outfeed 1. Chain and sprockets are worn, 1. Adjust chain and sprockets; replace if necessary. rollers not rotating. misadjusted, disconnected, or broken. -35- Model G0832 (Mfd. Since 04/17)
-
Page 38: Calibrating Headstock Elevation Scale
Check cutterhead contact with wood blocks. calibrate thickness reading. — If cutterhead makes even contact between wood blocks, no adjustment is needed. — If cutterhead only touches one wood block, continue to Step 5. -36- Model G0832 (Mfd. Since 04/17) -
Page 39: Adjusting Cutterhead Lock Lever
For consistent planing, ensure the lock lever exerts even pressure to keep the headstock stationary during the cut. Tools Needed Open-End Wrenches 8mm ........ 2 Hex Wrench 5mm ..........1 -37- Model G0832 (Mfd. Since 04/17) -
Page 40: Calibrating Depth Stop Dial
(see Figure 44). Repeat Steps 2–6 as needed until both Cutterhead Elevation Scale scales match. Depth Stop Dial Figure 44. Removing dial from machine body. Remove top assembly and side panels. -38- Model G0832 (Mfd. Since 04/17) -
Page 41: Replacing Table Height Chain
Hex Wrench 6mm ..........1 To replace table height chain: DISCONNECT MACHINE FROM POWER! Gently tilt machine onto its side to expose Figure 46) and table height chain (see sprokets. Cotter Pin Figure 46. Table height chain. -39- Model G0832 (Mfd. Since 04/17) -
Page 42: Section 8: Wiring
Technical Support at (570) 546-9663. The photos and diagrams included in this section are best viewed in color. You can view these pages in color at www.grizzly.com. -40- Model G0832 (Mfd. Since 04/17) -
Page 43: Wiring Diagram & Electrical Components
Always use the wiring diagram inside the motor junction box. Figure 47. Paddle switch. Neutral 110 VAC 5-15 Plug (As Recommended) Ground Paddle Switch (viewed from behind) Figure 48. Circuit breaker. Circuit Breaker Ground 125/250VAC 2 HP Motor -41- Model G0832 (Mfd. Since 04/17) -
Page 44: Section 9: Parts
SECTION 9: PARTS Main Parts 21-1 15-1 141 142 44-1 30 31 42 43 78 79 80 82 83 84 85 -42- Model G0832 (Mfd. Since 04/17) - Page 45 GEARBOX P0832087 POLY-V BELT 130J2 P0832042 PINION P0832088 CAP SCREW M5-.8 X 10 P0832043 BALL BEARING 6203ZZ P0832089 TORSION SPRING P0832044 COMPRESSION PLATE P0832090 CUTTER LOCK PLATE 44-1 P0832044-1 CAP SCREW M5-.8 X 12 -43- Model G0832 (Mfd. Since 04/17)
- Page 46 Please Note: We do our best to stock replacement parts whenever possible, but we cannot guarantee that all parts shown here are available for purchase. Call (800) 523-4777 or visit our online parts store at www.grizzly.com to check for availability.
-
Page 47: Motor
BUTTON HD CAP SCR M5-.8 X 20 P0832227 WAVY WASHER 25 X 0.3MM P0832213 MOTOR HOUSING (REAR) P0832231 INT RETAINING RING 32MM P0832214 BALL BEARING 6201ZZ P0832229 SUPPORT ROD 10 X 365MM P0832215 BUTTON HD CAP SCR M5-.8 X 8 -45- Model G0832 (Mfd. Since 04/17) -
Page 48: Labels & Cosmetics
Safety labels help reduce the risk of serious injury caused by machine hazards. If any label comes off or becomes unreadable, the owner of this machine MUST replace it in the original location before resuming operations. For replacements, contact (800) 523-4777 or www.grizzly.com. -46-... -
Page 49: Warranty Card
Would you recommend Grizzly Industrial to a friend? _____ Yes _____No Would you allow us to use your name as a reference for Grizzly customers in your area? Note: We never use names more than 3 times. _____ Yes _____No 10. - Page 50 FOLD ALONG DOTTED LINE Place Stamp Here GRIZZLY INDUSTRIAL, INC. P.O. BOX 2069 BELLINGHAM, WA 98227-2069 FOLD ALONG DOTTED LINE Send a Grizzly Catalog to a friend: Name_______________________________ Street_______________________________ City______________State______Zip______ TAPE ALONG EDGES--PLEASE DO NOT STAPLE...
-
Page 51: Warranty & Returns
WARRANTY & RETURNS Grizzly Industrial, Inc. warrants every product it sells for a period of 1 year to the original purchaser from the date of purchase. This warranty does not apply to defects due directly or indirectly to misuse, abuse, negligence, accidents, repairs or alterations or lack of maintenance.
Need help?
Do you have a question about the G0832 and is the answer not in the manual?
Questions and answers