
Subscribe to Our Youtube Channel
Related Manuals for Monoprice Blackbird21875


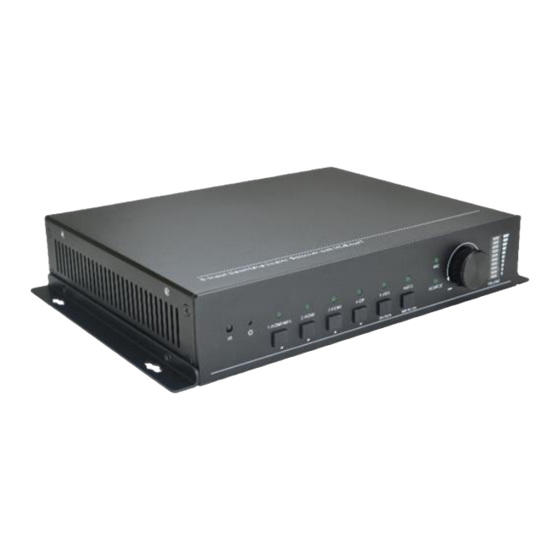
Summary of Contents for Monoprice Blackbird21875
- Page 1 MONOPRICE Blackbird™ HDBaseT™ 5x1 Seamless Presentation Scaler/Switch P/N 21875 User's Manual...
-
Page 2: Table Of Contents
CONTENTS SAFETY WARNINGS AND GUIDELINES ............................4 INTRODUCTION ........................................ 5 FEATURES ..........................................5 PACKAGE CONTENTS ....................................6 CUSTOMER SERVICE ....................................7 PRODUCT OVERVIEW ....................................7 Scaler/Switch Front Panel ................................7 Rear Panel ........................................9 IR Remote Control ....................................10 INSTALLATION ......................................... 11 CONFIGURING FOR TCP/IP CONTROL ............................ - Page 3 WEB-BASED GUI UPDATING ................................45 TECHNICAL SUPPORT ....................................45 SPECIFICATIONS ......................................46 REGULATORY COMPLIANCE ................................47 Notice for FCC ......................................47 Notice for Industry Canada ................................. 48...
-
Page 4: Safety Warnings And Guidelines
SAFETY WARNINGS AND GUIDELINES Please read this entire manual before using this device, paying extra attention to these safety warnings and guidelines. Please keep this manual in a safe place for future reference. This device is intended for indoor use only. ... -
Page 5: Introduction
INTRODUCTION Thank you for purchasing this Blackbird™ HDBaseT™ 5x1 Seamless Presentation Scaler/Switch! This 5x1 Scaler/Switch features two standard HDMI® inputs, a combination HDMI/MHL® input, a DisplayPort input, and a combination VGA/Component/Composite video input. The DisplayPort and VGA inputs have corresponding 3.5mm stereo analog audio inputs, which the unit combines with the video for normal output of video and audio. -
Page 6: Package Contents
PACKAGE CONTENTS Please take an inventory of the package contents to ensure you have all the items listed below. If anything is missing or damaged, please contact Monoprice Customer Service for a replacement. 1x 5x1 HDBaseT™ scaler/switch 1x HDBaseT receiver... -
Page 7: Customer Service
If you have any problem with your order, please give us an opportunity to make it right. You can contact a Monoprice Customer Service representative through the Live Chat link on our website www.monoprice.com during normal business hours (Mon-Fri: 5am-7pm PT, Sat-Sun: 9am-... - Page 8 5. HDMI/UP BUTTON AND LED: Press the button to select the 3-HDMI input. The LED will illuminate when the input is selected. When using the OSD menu, press the button to simulate the UP arrow button on the included remote control. 6.
-
Page 9: Rear Panel
Rear Panel 1. INPUTS: One HDMI/MHL video input, two HDMI® video inputs, a DisplayPort (DP) input with corresponding 3.5mm audio input, and a combination VGA video input with corresponding 3.5mm audio input. The VGA input supports Component (YPbPr) and Composite (CVBS) inputs using the included VGA to 3x RCA video cable. 2. -
Page 10: Ir Remote Control
event that a firmware update is available. Connect the included RS232 cable to the RS232 terminal block if you want to control the scaler/switch using your computer and a third party RS232 software. Connect an Ethernet cable to the TCP/IP RJ45 jack to a network router or switch if you want to control the scaler/switch using a web browser. -
Page 11: Installation
7. EXIT BUTTON: Press the button to exit the OSD menu or to cancel the current operation. 8. MENU BUTTON: Press the button to access the built-in OSD menu. INSTALLATION Perform the following steps to install the scaler/switch and HDBaseT™ receiver. 1. - Page 12 3. Using a High Speed HDMI® Cable (not included), plug one end into the HDMI input on your remote display, then plug the other end into the HDMI port on the HDBaseT receiver. 4. (Optional) If you want to control the video source devices from the remote location, plug the included IR receiver or another wideband IR receiver into the IR IN jack on the HDBaseT™...
- Page 13 11. Using a High Speed HDMI® Cable (not included), plug one end into the 2-HDMI INPUT, then plug the other end into the HDMI output on your HDMI video source device. 12. Using a High Speed HDMI® Cable (not included), plug one end into the 3-HDMI INPUT, then plug the other end into the HDMI output on your HDMI video source device.
- Page 14 19. (Optional) If you want to control the scaler/switch using a web browser, plug one end of an Ethernet cable into the TCP/IP CONTROL RJ45 jack on the scaler/switch, then plug the other end into a router or Ethernet switch in your Ethernet network. Alternatively, you can connect directly to the Ethernet jack on your computer, but will need to configure its network settings to communicate with the scaler/switch.
-
Page 15: Configuring For Tcp/Ip Control
CONFIGURING FOR TCP/IP CONTROL If you connected the matrix/transmitter to an existing network, there is no special configuration required. However, if you connected your PC's network interface directly to the TCP/IP jack on the matrix/transmitter, you will need to configure your PC's network settings to communicate with the matrix/transmitter. -
Page 16: Vga Input
VGA INPUT The VGA input can accept VGA, Component (YPbPr), and Composite (CVBS) video signals. The unit will automatically detect the input type and will convert and scale it to the HDMI® output. When connecting to a VGA input, use a standard HD15 VGA cable. ... -
Page 17: Microphone Connection
MICROPHONE CONNECTION Condenser Microphones When using a condenser microphone, which requires +48V Phantom Power, slide the MIC switch to the 48V position and wire the microphone to the 3-pin MIC terminal block as shown below: Dynamic Microphones Dynamic microphones can be connected using an unbalanced or balanced type connection. -
Page 18: Line Connection
Line Connection In addition to dynamic and condenser microphones, you can connect line level audio sources, such as a wireless microphone, a mixer, etc. Line level inputs can be made using unbalanced or balanced type connections. When using a line level connection, first slide the MIC switch to the LINE position, then wire the terminal block as shown in one of the following diagrams. -
Page 19: Cec Functionality
CEC FUNCTIONALITY The scaler/switch supports the HDMI® CEC function, which allows connected HDMI® devices to be controlled using a single remote control. The CEC function can be turned on or off using RS232 control. To turn it on, send the command 50686% and to turn it off send the command 50687%. -
Page 20: Operation
OPERATION Front Panel Controls Press the 1-HDMI/MHL®, 2-HDMI®, 3-HDMI, 4-DP, and 5-VGA buttons to select that input. The corresponding LED will illuminate to indicate that it is active input. Press the AUTO button to toggle Auto Switching on or off. The LED will illuminate when Auto Switching is enabled. -
Page 21: Remote Control
Remote Control Press the STANDBY (1) button to enter or exit Standby mode. Press one of the five INPUT (2) buttons to select that input. Press the AUTO (3) button to enable or disable Auto Switching. Press the MUTE (4) button to turn volume muting on or off. - Page 22 Send the command 50616% using either third party RS232 control software or from the RS232 Control screen in the TCP/IP menu system. Use the arrow buttons on the included remote control or on the front panel to navigate the OSD menu system. Use the OK button on the remote control or the ENTER button on the front panel to confirm the selection.
- Page 23 User EDID Load(USB): Allows you to update the EDID settings after inserting a flash drive with the update file into the FIRMWARE port on the rear panel. Resolution: Allows you to set the output resolution. You may set it to 1920x1200, 1920x1080, 1600x1200, 1360x768, 1280x720, or 1024x768.
- Page 24 Use the Picture screen in the OSD system to adjust the following parameters and settings. Picture Mode: Allows you to select one of the image mode presets or to set the individual settings directly. The available options are Dynamic, Standard, Mild, and User.
- Page 25 Use the Setup screen in the OSD system to adjust the following parameters and settings. OSD Language: Allows you to select one of the 7 languages used in the OSD menu system. Restore Factory Default: Select this option to restore all settings to their factory default values.
-
Page 26: Tcp/Ip Control
TCP/IP Control If you have connected the matrix/transmitter to your Ethernet network or if you connected your PC's network card directly to the TCP/IP port on the matrix/transmitter, you can access the built-in TCP/IP Graphical User Interface (GUI) by opening your internet browser and typing the IP address into the address field. - Page 27 Once you have logged in, you will be presented with the Control screen. Source: Click the 1-HDMI/MHL®, 2-HDMI®, 3-HDMI, 4-DP, and 5-VGA buttons to select that input. AUTO: Click the AUTO button to enable or disable Auto Switching. VGA Adjust: Click the VGA Adjust button to adjust the positioning of the VGA image on screen.
- Page 28 Click the button on the Control menu to access the Configuration Setting menu. Network: Click the Network radio button to display the Network Configuration screen. Source Label: Click the Source Label radio button to display the Source Label Configuration screen. Output Resolution: Click one of the radio buttons next to the desired resolution, then click the Confirm button to make the change.
- Page 29 Click the Network radio button from one of the other Configuration screens to display the Network Configuration screen. Setting: Click the Setting radio button to display the Setting Configuration screen. Source Label: Click the Source Label radio button to display the Source Label Configuration screen.
- Page 30 Click the Source Label radio button from one of the other Configuration screens to display the Source Label Configuration screen. Setting: Click the Setting radio button to display the Setting Configuration screen. Network: Click the Network radio button to display the Network Configuration screen. 1-HDMI/MHL: Click inside the 1-HDMI/MHL®...
- Page 31 Click the RS232 Control tab to display the RS232 Control screen. Port: Use the pull-down list box to select Local, which refers to the RS232 port of the scaler/switch, or HDBT, which refers to the RS232 port of the HDBaseT™ receiver. Baud Rate: Use the pull-down list box to set the baud rate.
- Page 32 Click the Password tab to display the Password screen. User Name: Displays and allows editing of the default username. The default is username is user. User Password: Displays and allows editing of the default password. The default password is user. GUI: Displays the GUI version number.
-
Page 33: Rs232 Control
RS232 Control If you wish to control the matrix/transmitter from your PC using an RS232 connection, you will need to use a third party RS232 control software package, such as CommWatch.exe, whose interface is depicted below. Set the communications parameters to the following: Baud Rate: 9600 Data Bits:... - Page 34 Command Function Feedback Example Switching Commands 50701% Switches to the 1-HDMI/MHL® input. Switch to HDMI 1 50702% Switches to the 2-HDMI® input. Switch to HDMI 2 50703% Switches to the 3-HDMI input. Switch to HDMI 3 50704% Switches to the 4-DP input. Switch to DP Switch to VGA1 (or AV1 or 50705%...
- Page 35 Command Function Feedback Example 50722% Enables microphone audio muting. MIC Mute 50723% Disables microphone audio muting. MIC Unmute 50726% Enables VGA audio muting. VGA audio Mute 50727% Disables VGA audio muting. VGA audio Unmute 50728% Enables DisplayPort audio muting. DP audio Mute 50729% Disables DisplayPort audio muting DP audio Unmute...
- Page 36 Command Function Feedback Example Setup Commands 50604% Locks the front panel buttons. Front Panel lock 50605% Unlocks the front panel buttons. Front Panel Unlock 502xx% Sets the brightness to xx. (xx=00~ 99) Brightness: xx (xx=00~99) 503xx% Sets the contrast to xx. (xx=00~99) Contrast: xx (xx=00~99) 504xx% Sets the saturation to xx.
- Page 37 Command Function Feedback Example Disables display of the mute icon of the 50763% MIC Mute Icon: disable MIC audio. Enables display of the mute icon of the MIC 50764% MIC Mute Icon: enable audio. 50765% Enables display of the freeze icon. Freeze Icon: enable 50766% Disables display of the freeze icon.
- Page 38 Command Function Feedback Example Upload custom EDID data to the 50769% EDID: user scaler/switch. EDID: xxxx (xxxx=initial, 50770% Query the EDID status. bypass, or user) EDID manage EDID management. Copies the resolution Resolution: xx 50782% data of the connected display to the (xx=1920x1200, 1920x1080, HDMI®...
- Page 39 Command Function Feedback Example Auto Switch Mode: Set no Auto Switch Mode: Sets the automatic 50718% input to power off time: 10 power off time with no input to 10 minutes. minute Auto Switch Mode: Set no input to power off time: X minutes (X=1, 2, 5, or 10) Displays the automatic power off 50719%...
- Page 40 Command Function Feedback Example Performs a software update using an 50698% update file on a flash drive plugged into Software update the FIRMWARE port. Resets all settings on the scaler/switch to 50617% Factory Reset their factory default values. Menu Commands Simulates pressing the OK button on the 50609% Key: ok...
- Page 41 Command Function Feedback Example Resolution: xx (xx=1920x1200, 1920x1080, 50632% Displays the output resolution. 1600x1200, 1360x768, 1280x720, or 1024x768) Picture Mode: xx 50633% Displays the image picture mode. (xx=Dynamic, Standard, Mild, or User) Aspect Ratio: xx 50635% Displays the image aspect ratio. (xx=16:9, 4:3, or auto) Brightness: xx 50636%...
- Page 42 Command Function Feedback Example Freeze: xx 50753% Displays the freeze status. (xx=enable or disable) Front Panel xx 50754% Displays the panel lock status. (xx=Lock or Unlock) Source Volume: xx MIC Volume: xx Input: xxxx Resolution: yyyy LINE: yy MIC: yy Switch status: zzzz VGA: yy DP: yy...
- Page 43 Command Function Feedback Example Adjustment Commands Enter output Position 50678% Enables screen output adjusting. Adjust 50679% Disables screen output adjusting. Exit Output Position Adjust 50670% Moves the image to the left. Output Position Adjust X xx 50671% Moves the image to the right. Output Position Adjust X xx 50672% Moves the image up.
- Page 44 Command Function Feedback Example CEC Commands 50686% Enables HDMI® CEC functionality. HDMI CEC ON 50687% Disables HDMI CEC functionality. HDMI CEC OFF 50901% Sends the CEC Play/Pause command. CEC: cmd: play&pause 50902% Sends the CEC Stop command. CEC: cmd: stop 50903% Sends the CEC Menu command.
-
Page 45: Web-Based Gui Updating
6. Click the Apply button, then follow the on-screen instructions. TECHNICAL SUPPORT Monoprice is pleased to provide free, live, online technical support to assist you with any questions you may have about installation, setup, troubleshooting, or product recommendations. If you ever need assistance with your new product, please come online to talk to one of our friendly and knowledgeable Tech Support Associates. -
Page 46: Specifications
SPECIFICATIONS Model 21875 1x HDMI/MHL®, 2x HDMI®, 1x DisplayPort, Video Inputs 1x VGA/YPbPr/CVBS Video Outputs 1x HDMI, 1x HDBaseT™ 1920x1200, 1920x1080, 1600x1200, 1600x900, Supported Video Resolutions 1360x768, 1280x800, 1280x720, 1024x768 Supported HDMI Version 1.4 with HDCP 2.2 2x 3.5mm analog stereo for DP and VGA Audio Inputs inputs Audio Outputs... -
Page 47: Regulatory Compliance
Modifying the equipment without Monoprice’s authorization may result in the equipment no longer complying with FCC requirements for Class B digital devices. In that event, your right to use the equipment may be limited by FCC regulations, and you may be required to correct any interference to radio or television communications at your own expense. -
Page 48: Notice For Industry Canada
This Class B digital apparatus complies with Canadian ICES-003. Cet appareil numérique de la classe B est conforme à la norme NMB-003 du Canada. Blackbird™ is a trademark of Monoprice Inc. HDMI®, the HDMI Logo, and High-Definition Multimedia Interface are trademarks or registered trademarks of HDMI Licensing LLC in the United States and other countries.
Need help?
Do you have a question about the Blackbird21875 and is the answer not in the manual?
Questions and answers