Advertisement
Quick Links
Advertisement

Subscribe to Our Youtube Channel
Related Manuals for EcoWater ESM9


Summary of Contents for EcoWater ESM9
- Page 1 Owners Manual How to maintain and operate your EcoWater digital demand water system 07/04 400485...
- Page 2 Please read it carefully. Due to continued product enhancement, EcoWater Systems Limited reserve the right to alter the technical specification of their products at any time.
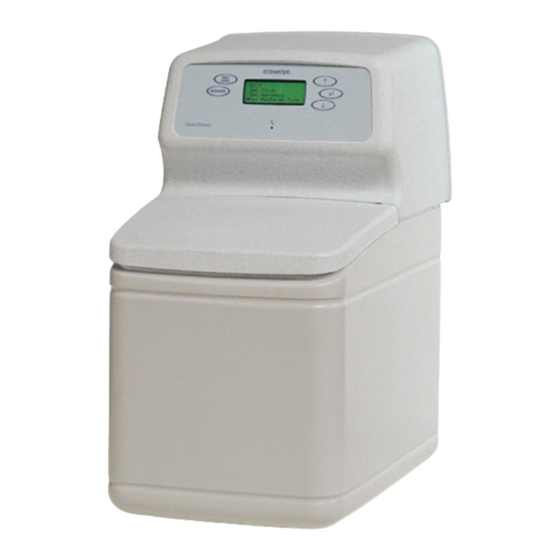
- Page 3 Unpacking your water softener 1 Control Valve Cover and Electronic Faceplate 2 Salt Lid 3 Salt Cabinet 4 Resin Cylinder 5 Brine Well Cover 6 Brine Valve 7 Overflow Connection rear of Brinetank 8 Drain Connection on Control Valve Notes 1 Serial Number and Date Code are in faceplate cover.
- Page 4 Unpacking your water softener (cont) Description Quantity Part Number Drain/Overflow Tubing 7108118 Overflow Elbow 1103200 Overflow Grommet 9003500 Hose Clips 900431 Transformer 98124612 Adapter Clips 1205500 Adapter ‘O’Rings 900535 Adapter Elbows (3 ⁄4") 7255583 Silicone Grease Please Remember – Only use tablet or pellet salt in your softener!
-
Page 5: Installation Of Your Water Softener
The water softener requires a 240 volt 50 Hz electrical supply taken off a power that this work is undertaken by an EcoWater dealer or plumber. Where supply not a lighting circuit. Power is supplied via a 24 volt 50 Hz transformer. - Page 6 Minimum working pressure 1.7 BAR (25 psi) Minimum system flow 0.06m3/hr Maximum system flow 3.18m3/hr If a pressure-reducing valve is required this may be ordered from EcoWater: Quote Part No.800220 for 1/2’’ or 15mm pipework Quote Part No.800223 for 3/4’’ or 22mm pipework...
- Page 7 Step-by-step guide to plumbing the softener PLUMBING outlet and the black valve as the bypass. Before turning the water back Turn off the water supply at the incoming main and begin plumbing as per on, make sure the bypass is open and the inlet and outlet valves are the installation instructions on pages 4 and 5.
- Page 8 Step-by-step guide to plumbing the softener (cont) SECURE THE ADAPTOR ELBOW Ensure o-rings are lubricated and in place before snapping the two large hold clips into place, from the top down (see top illustration opposite). Be sure they snap firmly into place so that the adaptors will not pull out.
- Page 9 Step-by-step guide to plumbing the softener (cont) CONNECT TRANSFORMER 1. Connect the power cable leads to the two terminals on the transformer. NOTE: Check to be sure all lead wire connections are secure on the back of the faceplate. CAUTION: Be sure all wiring is away from the valve gear and motor area, which rotates during recharges.
- Page 10 Programming the digital demand faceplate controller THE FOLLOWING STEPS ARE FOR FIRST TIME SET UP ONLY. When the transformer is plugged in, a ‘beep’ will sound, followed by the factory set model code display and software version for a few seconds. Then, 12:00 PM present time display. 1.
- Page 11 Programming the digital demand faceplate controller 3. SET WATER HARDNESS: The controller is factory set to 430 WATER HARDNESS ppm (25 gpg). Hardness varies from one location to another. Unit Setting (Grains) Use the kit provided to determine your water hardness in ppm. (200) If necessary change to the unit setting indicated as follows: (220)
- Page 12 This process may take up to 1 hours INSTALLATION OF THE DIGITAL DEMAND ECOWATER SOFTENER IS NOW COMPLETE. Additional faceplate controller features and options are described on following pages. Please Remember – Only use tablet or pellet salt in your softener!
- Page 13 Faceplate controller – features/options NORMAL SCREEN VIEWS PROVIDING INFORMATION (ROLLING SCREEN) The display will scroll through as many as 5 screens at an interval of 4 seconds each. • Soft Water Available will show a percent of available soft water and a bar graph at the bottom of the display.
- Page 14 (cont) PROGRAM MEMORY: If electrical power to the EcoWater softener is interrupted, the display is blank, but the face-plate controller keeps the correct time for at least two days. If electricity is off for more than two days when electrical power comes on again, you have to verify clock time is correct. The MODEL CODE, HARDNESS and RECHARGE TIME never need resetting unless a change is desired.
- Page 15 RECHARGE TONIGHT: Press the Recharge keypad to go to the recharge menu. Move cursor down to Set/Cancel Recharge Tonight. Press SELECT/EXIT keypad to return to Normal Screen Views and the recharge tonight time indicated. When this feature is set, the EcoWater softener will recharge at the next programmed start time.
- Page 16 Recharge Time. Press the SELECT/EXIT ( ) keypad once to display a flashing 2:00am. At this setting, the EcoWater softener begins recharge, or recharge, at 2:00am, ending no later than 5:30am. This is a good time in most households because water is not being used.
- Page 17 Faceplate controller – features/options (cont) Primary Menu, continued Send E.A.S.E. Message: Enter Primary Menu. Press the ( ) or ( ) keypads until cursor is next to Send E.A.S.E. Message. Press the SELECT/EXIT ( ) keypad. The unit will automatically start sending E.A.S.E.
- Page 18 Faceplate controller – features/options (cont) Primary Menu, continued Water FlowRate: Enter Primary Menu. Press the ( ) or ( ) keypads until cursor is next to Water Flow Rate. Press the SELECT/EXIT ( ) keypad. When selected,this screen will show the water flow rate in litres per minute (LPM) or gallons per minute (GPM) with the moving bar graph at the bottom of the display.
- Page 19 Faceplate controller – features/options (cont) Primary Menu, continued Set 12/24 Hour Clock: Enter Primary Menu. Press the ( ) or ( ) keypads until cursor is next to Set 12/24 Hour Clock. Press the SELECT/EXIT ( ) keypad. Moving the ( ) or ( ) keypads will change clock display from 12 hour (AM&...
-
Page 20: Troubleshooting
Troubleshooting If you are experiencing poor water flow, please check all plumbing first as it is extremely rare for a softener to cause flow rate problems. Page Checklist Solution PROBLEM: Hard water or, intermittently hard water 1. Is salt level above level 2. 1. - Page 21 Troubleshooting (cont) Page Checklist Solution PROBLEM: No recharge occurring or, little or no salt usage 1. Is the water soft? 1. If yes,no action is required. 2. Is the water level in the salt cabinet high? 2. If yes,check the drain link is not frozen or blocked. Initiate an immediate recharge.
- Page 22 Troubleshooting (cont) Page Checklist Solution PROBLEM: Electronic faceplate 1. Is the faceplate blank? 1. Check the power is turned on and all connections are secure. 2. Does an error code appear, e.g.‘‘ERR03’’? 2. Check all electrical connections are secure. Turn the power off for ten seconds,and then switch back on.
- Page 23 Guarantee, service and general information All EcoWater softeners are fully covered by a one year parts guarantee against manufacturing defect from the date of purchase. Please read below for details on Labour/guarantee. This guarantee does not effect the statutory rights of the consumer. Any faults which are not attributable to the water softener but to faulty installation or operation will be chargeable.
Need help?
Do you have a question about the ESM9 and is the answer not in the manual?
Questions and answers