Table of Contents
Advertisement
Advertisement
Table of Contents

Subscribe to Our Youtube Channel
Related Manuals for Decagon Devices EM50


Summary of Contents for Decagon Devices EM50
- Page 1 Operator’s Manual Decagon Devices, Inc. Version: December 16, 2015 — 15:02:36...
- Page 2 Decagon Devices, Inc. 2365 NE Hopkins Court Pullman WA 99163 Phone: 509-332-5600 Fax: 509-332-5158 Website: www.decagon.com Email: support@decagon.com or sales@decagon.com Trademarks: “ECH O” is a registered trademark of Decagon Devices, Inc. All Rights Reserved c 2007-2013 Decagon Devices, Inc. All Rights Reserved...
-
Page 3: Table Of Contents
2.4 Software ......2.5 How the Em50 Stores Data .... - Page 4 8 Troubleshooting 9 Declaration of Conformity 9.1 Em50 CE Compliance ....67 9.2 Em50R/DataStation/Rm-1 CE Compliance ..68 9.3 FCC Compliance .
-
Page 5: Introduction
Note: Except where specified, all functions and specifications relating to the Em50 also relate to the Em50R and the Em50G. Customer Support There are several ways to contact Decagon if you ever need assis- tance with your product, have any questions, or feedback. -
Page 6: Warranty
1 INTRODUCTION Em50 Series Warranty The Em50 series of loggers all have a 30-day satisfaction guarantee and a one-year warranty on parts and labor. Your warranty is auto- matically validated upon receipt of the instrument. Note: The one year service plan activates when Decagon ships the instrument and not at the time of software installation. -
Page 7: About The Em50 Logger Series
(no programming needed). The Em50 series loggers are 5-port, self contained data loggers espe- cially suited for field research and commercial agriculture. The Em50 logger series includes three models: the Em50, the Em50R and the Em50G. -
Page 8: Specifications
Decagon Devices Functionality Reset Button All Em50 logger types have a “Reset” button. If your logger does not respond to connection attempts or does not appear to be work- ing, press the reset button. This reboots the logger and the Status light turns on momentarily. - Page 9 2 ABOUT THE EM50 LOGGER SERIES Em50 Series Status Lights The green and red lights indicate the current status of your Em50/Em 50G logger and the logger self test function. A short, single blink of the green light every five seconds indicates the Em50/Em50R/Em50G is configured to log sensor data.
-
Page 10: Software
DataTrac 3 transforms endless columns and rows of raw data into meaningful, easily-interpreted graphs. DataTrac 3 comes with the Em50 system as a 30-day trial version. If you would like to con- tinue to use DataTrac 3, contact Decagon to purchase a DataTrac 3 registration code. - Page 11 Section 4 for logger configuration information. Em50 Series Data Logging Scheme The Em50 does not make sensor measurements until you set a “mea- surement interval.” You also need to configure the Em50 ports with the type of sensor plugged into each port. You can set these values using either ECH2O Utility or DataTrac 3.
-
Page 12: How The Em50 Stores Data
Em50 Series to internal data storage. The interval you choose applies to all five ports on the Em50. So, it is impossible to have one port measuring sensors more or less frequently than another port. The measurement interval works relative to the Em50 internal real- time, 24-hour clock. -
Page 13: Compatible Sensors
Em50 can hold based on the measure- ment interval that you have chosen. You can determine how many days of data your Em50 can hold by dividing the size of the data memory (36,864 scans) by the measurement interval. For example, an Em50 set on an hourly measurement interval stores 1,500 days, or about four years, worth of data. - Page 14 2 ABOUT THE EM50 LOGGER SERIES Em50 Series Soil Water Content Sensors 10HS, EC-5, GS1 High Frequency Soil Moisture 5TM Soil Moisture and Soil Temperature 5TE, GS3, RS3 Soil Moisture, Soil Temperature, Soil EC Soil Water Potential Sensor MPS-2, MPS-6 Water Potential and Temperature Sensor...
- Page 15 Em50 Series 2 ABOUT THE EM50 LOGGER SERIES DS-2 Sonic Anemometer Note: The DS-2 Sonic Anemometer only works with those Em50 Series loggers manufactured after January 01, 2013. Deep Drainage Sensors G1/G2 Drain Gauge G3 Drain Gauge Irrigation Switch PS-1 Pressure Switch...
-
Page 16: Setup And Installation
Installing the Batteries Figure 1: Batteries and Indicators With the exception of the solar-powered Em50 and Em50G, all Em50 series loggers ship with a new set of AA alkaline batteries. Open the case and install the batteries in the proper orientation as indicated in the battery locations. -
Page 17: Installing Software
You can check the battery level status when the Em50 is connected using any ECH2O software. When the battery life indicator shows that your Em50 batteries are less than 5%, you should replace them. Installing Software... -
Page 18: Configuring In Ech20 Utility
Follow steps 1 through 6 to configure the logger. 1. Open the ECH20 Utility program. 2. Plug the USB cable (included with your Em50) into the logger COM port and then the USB port of your computer. Figure 2: Port Diagram 3. -
Page 19: Field Installation
Note: To watch a five minute video on installing soil moisture sen- sors with an Em50 logger, visit www.decagon.com/install. The Em50 can serve as a collection station for up to five sensors. The Em50 is compatible only with sensors made by Decagon such as the ECH O water content probes, rain gauge, temperature sensors, etc. - Page 20 3 SETUP AND INSTALLATION Em50 Series 4. On the top and bottom of the Em50, there are two loopholes. Use these holes to fasten the Em50 to a mounting post using the included zip-ties or a similar fastener. Make sure it is installed in an upright position, with the five input ports underneath.
-
Page 21: Software & Configuration
4 SOFTWARE & CONFIGURATION Software & Configuration We designed the Em50 series data loggers to have a simple configu- ration and no data logger programming. The software packages are key to the effectiveness and ease of the Em50 Series data loggers. -
Page 22: Ech20 Utility
Em50), the Download button that downloads data saved on the Em50 onto your computer, and the Scan button, which scans all of the sensors connected to each port on the Em50 and returns a real-time reading. This Section covers these functions in... -
Page 23: Common Tasks In Ech20 Utility
Common Tasks in ECH20 Utility 4.2.1 Configuring the Em50/Em50R/Em50G The Em50 does not require any programming, but it does have sev- eral parameters that control identity and function. To change a parameter, connect to your device, change the parameter, then click Apply to send the parameter changes to your device. -
Page 24: Downloading Data When Directly Connected
4.2.2 Downloading Data when Directly Connected Once you properly configure and install the Em50, it is ready to begin making and storing sensor measurements. Stored data can be downloaded from the logger starting at two places in the logger mem- ory. - Page 25 Em50 Series 4 SOFTWARE & CONFIGURATION option as described above. 4. When saving data, the File Save dialog suggests a name based on the connected logger name and the time and date. However, you can enter any name by typing it into the “File name”...
-
Page 26: Other Data Download Options
4.2.4 Erasing Data If you need to erase the data on your Em50, go to Data Erase Stored Data. You should erase your data if you change the Em50 configuration settings, such as what type of sensor is in each port. -
Page 27: Instantaneous Measurements (Scan)
Instantaneous Measurements (Scan) ECH20 Utility gives you the ability to take real-time sensor measure- ments with your Em50 logger. This is most useful as a troubleshoot- ing feature to test if a sensor is reading properly. You can also see how sensors react to environmental changes. -
Page 28: Ech20 Utility Menus
4 SOFTWARE & CONFIGURATION Em50 Series Note: The Em50 does not store data that it measures with the scan function. ECH20 Utility Menus ECH20 Utility features six menus that allow you to access the pro- gram features. These six menus are the File, Edit, Data, Actions, Window, and Help Menus. - Page 29 Em50 Series 4 SOFTWARE & CONFIGURATION Figure 5: ECH2O Utility Preferences: Measurements Tab 1. Measurements Tab The Measurement Units feature is the main function of the Mea- surement tab. These field entries determine the unit values that display when you save downloaded data as Excel, processed, or raw data files.
- Page 30 4 SOFTWARE & CONFIGURATION Em50 Series it. Click “Close” to apply the changes. The Power Noise Filter is the other feature of the Measurements tab. The AC electrical power in your office or home can add a subtle amount of noise to the data logger sensor measurements. The log- ger Power Noise Filter setting is designed to eliminate this electrical noise that comes from the AC power distribution system.
- Page 31 Close to apply the changes. 3. Communications Tab The Communications tab has items that control how the serial com- munication works between ECH20 Utility and your Em50. Gener- ally you should not adjust these settings unless you are experiencing problems communicating with your Em50.
- Page 32 Figure 7: ECH2O Utility Preferences: Communications Tab The Command Retries feature sets the number of automatic retry commands the ECH20 Utility automatically sends to your Em50 when there are errors. For most circumstances, the default retries work well. If you experience unreliable communication with your Em50, you can try increasing the Direct Connect Retries.
- Page 33 Em50 Series 4 SOFTWARE & CONFIGURATION USB to Serial adapters are not found by the serial port enumeration feature of ECH20 Utility. If your model of USB to Serial adapter is not recognized, enable Force find all Communication Ports in the Preferences Menu by going to the Communication tab, and enabling the check box at the bottom of the screen.
-
Page 34: Data Menu
The Date and Time Display in the ECH20 Utility controls how the EM50 displays the date and time in the toolbar status area. By default, the time and date use the settings in the Windows Re- gional &... -
Page 35: Actions Menu
SDI-12 capabilities. The Set the Date/Time command instructs the ECH20 Utility to set the Em50 time and date according to the time and date on your computer. Use Communication Test when you connect to the Em50R or Em50G loggers using ECH20 Utility to see how well the logger wire- less communication is working. -
Page 36: Window Menu
All your measurement data is erased. This option is useful for troubleshooting a logger that is not working as expected. Note: Initializing your Em50 deletes all stored data. Make sure any data has been downloaded out of the Em50 before initiating a reset. 4.3.5 Window Menu The Window menu contains the “Show Terminal”... -
Page 37: Em50G Webviewer
Internet for this feature to work. The Check for Device Firmware Updates menu item is only available when you are connected to an Em50 (or other ECH O device). It compares the firmware version of your Em50 with the latest version available from Decagon. You can download a firmware updater when a new version is available. - Page 38 4 SOFTWARE & CONFIGURATION Em50 Series Adding a User The Em50G WebViewer requires you to either sign in or add an account. If you have already made an account with the Decagon Data Service through either the old Em50G downloader or Data- Trac3, your account is already set up and you just have to enter your credentials to sign in to the WebViewer.
-
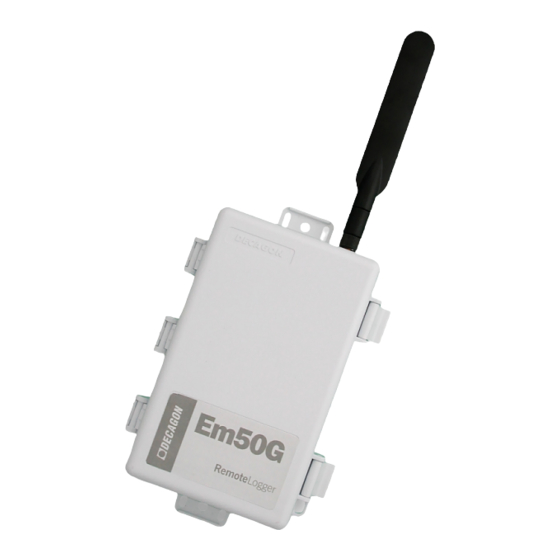
Page 39: Em50G Cellular Communication
Em50 Series 5 EM50G CELLULAR COMMUNICATION Em50G Cellular Communication The Em50G data logger has a GSM/GPRS cellular module that enables the logger to upload sensor measurement data to Decagon Data Service. Your measurement data is available for download di- rectly to your Windows computer at any time, anywhere in the world where you have Internet access. -
Page 40: Cellular Coverage
5 EM50G CELLULAR COMMUNICATION Em50 Series The SIM card and associated service Decagon provides is only for use with the Em50G as outlined by the usage agreement in Appendix C. Note: Please check with Decagon before moving an Em50G from one country to another to make sure your service plan is appropriate for the new location. - Page 41 Em50 Series 5 EM50G CELLULAR COMMUNICATION logging by choosing a measurement interval. The Em50G uploads data according to the default schedule (uploading between 6-7 AM, 10-11 AM, 1-2 PM, 4-5 PM each day). Figure 9: Em50G Cellular Configuration Window Use ECH20 Utility to change these default settings. To turn the Em50G cellular network on, off, or to change the upload times,...
-
Page 42: Communication Testing
5 EM50G CELLULAR COMMUNICATION Em50 Series Click “OK” after making configuration changes. Click Apply to save communication settings in your Em50G. Your current settings show up in the communications option field. Note: Sensor data recorded by the Em50G while it is configured not to upload data to the Data Service is stored in the logger, but does not upload to the Data Service. - Page 43 Em50 Series 5 EM50G CELLULAR COMMUNICATION Figure 10: Em50G Communication Test Window The test takes approximately 30 to 60 seconds while the Em50G establishes a connection with the cellular network and sends test packets to the Decagon Data Service. Once the tests are finished, the “Connection Quality”...
-
Page 44: Downloading Data
Direct Download Like all Em50 loggers, the Em50G stores more than 36,800 sensor readings for each of the five sensor ports. You can use any ECH O system software to directly connect to the logger for data down-... -
Page 45: Downloading With Datatrac 3
Em50 Series 5 EM50G CELLULAR COMMUNICATION a backup in the unlikely event of data loss on your computer. For downloading instructions when directly connected, see “Download- ing Data” in Section 4. Internet Downloading The Em50G and Decagon Data Service make downloading your mea- surement data over the Internet convenient and easy. - Page 46 Em50G loggers. Remember that during the subscription process you must be connected to the Internet. Follow steps 1 through 5 to subscribe using DataTrac 3. 1. Click Set-up New and then “Em50 subscription.” The The Add Subscription Window appears.
- Page 47 Em50 Series 5 EM50G CELLULAR COMMUNICATION Figure 12: Add Subscription Window 2. Enter the unique device ID and password for your Em50G. You can find this information on the brightly colored card that came with your Em50G logger. Keep this card in a safe place.
- Page 48 5 EM50G CELLULAR COMMUNICATION Em50 Series cesses the files in this directory by appending this data to the appro- priate logger. Note: DataTrac 3 lists loggers in the New Devices section by the logger name when it encounters a logger it has not seen before. Se- lect your Em50G by its name, and choose the Configure button on...
- Page 49 Em50 Series 5 EM50G CELLULAR COMMUNICATION to the data published by your Em50G logger. There is no limit to the number of people who can subscribe to each Em50G. Each subscriber either runs their own copy of the DataTrac 3, or uses their own Decagon Data Service account on the Em50G WebViewer web application.
-
Page 50: Em50R Radio Telemetry
6 EM50R RADIO TELEMETRY Em50 Series Em50R Radio Telemetry This Section gives you a brief overview of the radio telemetry avail- able in the ECH O system. This information only applies to Em50R. The ECH O system supports two types of radio telemetry: “two- way”... -
Page 51: Transmit Radio Modes
Em50 Series 6 EM50R RADIO TELEMETRY The Transmit radio modes use less battery power because the radio is off most of the time. The Em50R is designed to work approxi- mately 12 months in Transmit mode. Note: A DataStation is a receiver. It does not cause the remote logger to send data. -
Page 52: Transmit Best Practices
6 EM50R RADIO TELEMETRY Em50 Series 6.1.2 Transmit Best Practices Transmit modes are most useful when you have three or more loggers installed within radio range of each other. There is no set limit to the number of radio loggers broadcasting to a DataStation. Use this mode for as few as one logger and as many as 50 or more loggers. -
Page 53: Two-Way Radio Modes
Em50 Series 6 EM50R RADIO TELEMETRY press the disconnect button. ECH20 Utility sends a logout command to the remote logger to indicate the end of the communication ses- sion. When the remote logger hears the logout command, it waits for ten minutes before listening for additional connection attempts via the radio (you can always direct connect to your logger). -
Page 54: Two-Way Best Practices
6 EM50R RADIO TELEMETRY Em50 Series 6.2.2 Two-Way Best Practices Two-way modes is most useful when you have a small number (one, two, or three) of remote radio loggers you wish to contact. If you have three or more loggers installed within radio range of each other, consider using one of the Transmit modes. -
Page 55: Radio Performance
Em50 Series 6 EM50R RADIO TELEMETRY Radio Performance The maximum range of the radio modules in the radio logger and DataStation are affected by the environment, installation method, and antenna choice. Maximizing the range of your radio network requires you to consider these factors. -
Page 56: Connecting Via Rm-1 Radio Modem
Em50R Channel, Subchannel, and Radio Mode. See the section on Configuring in ECH20 Utility for additional informa- tion on configuring the Em50 series loggers. The Channel can be set from 0 to 6 inclusive (default is 0). The Subchannel can be set from 0 to 65534 inclusive (default is 0). - Page 57 Em50 Series 6 EM50R RADIO TELEMETRY Figure 13: Logger Query Configuration The Logger Query Configuration form appears. To connect to a spe- cific Em50R, type the logger Name, Channel, and Subchannel. After typing the name, click the Query button. If you want to connect to any available Em50R, pick the correct Channel and Subchannel, but leave the Name field blank.
-
Page 58: Datastation Networks
6 EM50R RADIO TELEMETRY Em50 Series see the signal strength percent in the message area. See Section 8if ECH20 Utility fails to connect to your remote logger. Once ECH20 Utility establishes a two-way radio connection with a remote logger, you can interact with the logger just like a direct connection. -
Page 59: Communication Test
Em50 Series 6 EM50R RADIO TELEMETRY in ECH20 Utility for additional details on configuring the Em50 se- ries. After setting the Radio Mode, click the Apply button. Note: ECH20 Utility only shows the radio modes compatible with your radio logger model and firmware version. If you do not see the “Confirmed Delivery Transmit”... - Page 60 Test in order to find the best connection quality. Once you have found the radio logger location that provides the best connection quality, install the radio logger at that location. Note: Communication Test only works with Em50 loggers running firmware 1.12 or newer.
-
Page 61: Download Collected Data
Em50 Series 6 EM50R RADIO TELEMETRY Download Collected Data After you configure the DataStation, it automatically collects data from those Em50R loggers that are within range and share the same Channel and Subchannel. After collecting data, you can retrieve it for permanent storage and analysis. -
Page 62: Caring For The Em50
Set the logger clock to ensure the recorded measurement time and date remain correct. Long-Term Maintenance When caring for the Em50 over an extended period of time, be sure to check the logger periodically. Check the battery holders and make sure they are clean and free of corrosion. - Page 63 Em50 Series 7 CARING FOR THE EM50 Figure 15: Send Feedback to Decagon Window In the Send Feedback to Decagon menu, enter your name, company name, and other contact information. Tell us what type of feed- back you are sending (General Feedback, Feature Suggestions, Bug Report, or Other).
- Page 64 7 CARING FOR THE EM50 Em50 Series You can send Decagon a file using this form too. This is useful for sending data files that you have questions about. If you work directly with a Decagon representative, put their Email address in the field at the bottom of the form.
-
Page 65: Troubleshooting
Em50 Series 8 TROUBLESHOOTING Troubleshooting Although Decagon designed the Em50 for durability and built to the highest manufacturing standards, problems may occasionally occur. This Troubleshooting Section details the major problems that you may encounter and their solutions. If you have a problem that this troubleshooting guide does not cover, then contact Decagon by email at support@decagon.com or call us at at 509-332-5600. - Page 66 8 TROUBLESHOOTING Em50 Series 2. PROBLEM: My USB to Serial adapter is not showing in the communication port picker. SOLUTION: Enable “Force find all Communication Ports” in the Preferences menu by going to the Edit menu, clicking Preferences, then the Com- munication tab, and enabling the check box at the bottom of the screen.
- Page 67 Em50 Series 8 TROUBLESHOOTING be the problem, try connecting to a second logger. If you can con- nect, the problem is probably the first logger. If you cannot connect to the second logger either, the problem may be your cable. Try using a spare Decagon Serial Cable Adapter or the USB cable if you are having trouble connecting to a logger.
- Page 68 8 TROUBLESHOOTING Em50 Series 2. Make sure you are within radio range of the remote logger by performing a telemetry test. If this is the problem, increase the radio signal strength to your logger by moving closer to your logger or using a high-gain antenna to see if you can establish a radio connection.
- Page 69 509-332-5600 or by email at support@Decagon.com. Troubleshooting Logger Issues 11. PROBLEM: My logger stopped making measurements. SOLUTION: Make sure the measurement interval is not set to 0. The Em50 does not make any measurements when the measurement interval is set to zero.
- Page 70 8 TROUBLESHOOTING Em50 Series Try pushing the reset button or initializing your Em50 if a reset is not enough to get the logger measuring sensors again. Connect to the logger and choose “Initialize Device...” from the Device Tools sub-menu in the Actions menu. Initializing your Em50 erases any stored data so you should download any data you want to keep be- fore choosing this option.
-
Page 71: Declaration Of Conformity
Em50 Year of First Manufacture: 2002 This is to certify that the Em50, manufactured by Decagon Devices, Inc., a corporation based in Pullman, Washington, USA meets or ex- ceeds the standards for CE compliance as per the Council Directives noted above. All instruments are built at the factory at Decagon and... -
Page 72: Em50R/Datastation/Rm-1 Ce Compliance
Authority. Outdoor use on public property is currently prohibited. For more information, see www.ero.dk. FCC Compliance The following FCC statement applies to the Em50, Em50R, Em50G, DataStation, and Rm-1. This device complies with part 15 of the FCC Rules. Operation is subject to the following conditions: 1. - Page 73 The Em50G contains the following module: FCC ID: IHDT56HQ1 IC: 109O-HQ1 Information for users: Changes or modifications to the EM50 series loggers not expressly approved by Decagon Devices, Inc. could void FCC compliance and thus the user’s authority to operate the equipment.
-
Page 74: Em50G Ce Compliance
Em50G CE Compliance Application of Council Directive: 2004/108/EC Standards to which conformity is EN61326-1:2013 and 2011/65/EU declared: Manufacturer’s Name: Decagon Devices, Inc 2365 NE Hopkins Ct. Pullman, WA 99163 Type of Equipment: Data Collection System Model Number: Em50G Year of First Manufacture:... -
Page 75: Em50G User License Agreement
Em50 Series 10 EM50G USER LICENSE AGREEMENT Em50G User License Agreement Contract Formation These terms and conditions govern the use of the Em50G (“Device”). Please read these terms and conditions carefully. If you use or ac- tivate the equipment you agree to be bound by these terms and conditions. - Page 76 10 EM50G USER LICENSE AGREEMENT Em50 Series specifically indicated otherwise, you may not sell, rent, lease, dis- tribute, broadcast, sublicense or otherwise assign any rights to wire- less services. You may use the Em50G Software only on the Em50G. You may not sell, rent, lease, lend, distribute or sublicense or other- wise assign any rights to the Software in whole or in part.
- Page 77 Em50 Series 10 EM50G USER LICENSE AGREEMENT pose. You acknowledge that the sale of the Em50G to you does not transfer to you title to or ownership of any intellectual property rights of Decagon or its suppliers. All of the Software is licensed, not sold, and such license is non-exclusive.
- Page 78 10 EM50G USER LICENSE AGREEMENT Em50 Series you are responsible for all payments under the data services through the end of the term. Disclaimer of Warranties You expressly acknowledge and agree that use of the EM50G, soft- ware and data storage is at your sole risk. Except for the one-year limited warranty, the Em50G, software and data storage are pro- vided “as is”...
- Page 79 Em50 Series 10 EM50G USER LICENSE AGREEMENT Dispute Resolution By using the Em50G you agree to jurisdiction and venue of any dispute arising out of this agreement by the Whitman County Court unless the parties agree to a different dispute resolution process in writing.
- Page 80 Data Storage Size, 9 FCC Compliance, 68 Measurement Interval, 7 Field Installation, 15 Measurement Span, 9 ECH O System Overview Installation About the Em50, 3 Cautions, 16 DataLogging Scheme, 7 Software, 6 Radio ECH20 Utility, 6 Connecting via Rm-1, 52...
- Page 81 Em50 Series INDEX Status Lights, 5 Telemetry Test, 48 Transmit Best Practices, 48, Transmit Modes, 47 Two-Way Radio, 48 Troubleshooting Data Issues, 64 Direct Connection, 62 Logger Issues, 65 Radio Connections, 63 Troubleshooting Quick Guide, 61 USB Adapter (UCA) Driver In-...
Need help?
Do you have a question about the EM50 and is the answer not in the manual?
Questions and answers