Table of Contents
Advertisement
Owner's Manual
Mode d'emploi
Manual de instrucciones
Thank you for purchasing this Yamaha Clavinova!
We recommend that you read this manual carefully so that you can fully take advantage of the advanced and
convenient functions of the instrument. We also recommend that you keep this manual in a safe and handy place
for future reference.
Before using the instrument, be sure to read "PRECAUTIONS" on pages 5-6.
For information on assembling the instrument, refer to the instructions at the end of this manual.
Nous vous remercions d'avoir choisi le Clavinova de Yamaha !
Nous vous conseillons de lire attentivement ce mode d'emploi afin de tirer pleinement profit des fonctions
avancéeset pratiques de votre instrument. Nous vous recommandons également de garder ce manuel à portée de
main pour toute référence ultérieure.
Avant d'utiliser l'instrument, lisez attentivement la section « PRÉCAUTIONS D'USAGE » aux pages 5 et 6.
Pour plus d'informations sur l'assemblage de l'instrument, reportez-vous aux instructions figurant à la fin de ce
manuel.
Gracias por adquirir el Yamaha Clavinova
La lectura detenida de este manual le permitirá disfrutar de las útiles y avanzadas funciones del instrumento.
Recomendamos guardar el manual en un lugar seguro y accesible, para futuras consultas.
Antes de utilizar el instrumento, lea las "PRECAUCIONES", en las páginas 5-6.
Para obtener más información sobre el montaje del instrumento, consulte las instrucciones que encontrará al final
de este manual.
C S P - 1 7 0
C S P - 1 5 0
EN FR ES
English
Français
Español
Advertisement
Table of Contents

Related Manuals for Yamaha Clavinova


Summary of Contents for Yamaha Clavinova
- Page 1 For information on assembling the instrument, refer to the instructions at the end of this manual. Nous vous remercions d’avoir choisi le Clavinova de Yamaha ! Nous vous conseillons de lire attentivement ce mode d’emploi afin de tirer pleinement profit des fonctions avancéeset pratiques de votre instrument.
-
Page 2: Special Message Section
Implied warranties may also be affected. SPECIFICATIONS SUBJECT TO CHANGE: The information contained in this manual is believed to be correct at the time of printing. However, Yamaha reserves the right to change or modify any of the specifications without notice or obligation to update Model existing units. - Page 3 The above statements apply ONLY to those products distrib- tronic devices. Compliance with FCC regulations does not uted by Yamaha Corporation of America or its subsidiaries. * This applies only to products distributed by YAMAHA CORPORATION OF AMERICA. (class B) COMPLIANCE INFORMATION STATEMENT...
-
Page 4: Important Safety Instructions
Explanation of Graphical Symbols The lightning flash with arrowhead symbol within an equilateral triangle is CA UTION intended to alert the user to the presence RISK OF ELECTRIC SHOCK of uninsulated “dangerous voltage” DO NOT OPEN within the product's enclosure that may be of sufficient magnitude to constitute a risk of electric shock to persons. -
Page 5: Precautions
If you notice any abnormality inspected by qualified Yamaha service personnel. • When one of the following problems occur, immediately turn off the power switch and disconnect the electric plug from the outlet. Then have the device inspected by Yamaha service personnel. - Page 6 Yamaha cannot be held responsible for damage caused by improper use or modifications to the instrument, or data that is lost or destroyed. Always turn the power off when the instrument is not in use.
-
Page 7: Notice
• This product incorporates and bundles contents in which • Do not use the instrument in the vicinity of a TV, radio, Yamaha owns copyrights or with respect to which Yamaha stereo equipment, mobile phone, or other electric devices. has license to use others’ copyrights. Due to copyright laws Otherwise, the instrument, TV, or radio may generate noise. -
Page 8: About The Manuals
For information on release dates and other details, see the website below. To obtain these manuals, access the Yamaha Downloads https://www.yamaha.com/kbdapps/ website, select your country, enter “CSP-170” in the Model Name box, then click [Search]. -
Page 9: Table Of Contents
Included Accessories .................................. 8 Panel Controls and Terminals CSP – A New World of Piano Performance and Control with Smart Devices – Playing the Clavinova as a Piano Turning the power on or off ............................14 Using the sheet music braces...........................17 Adjusting the Master Volume ..........................17... -
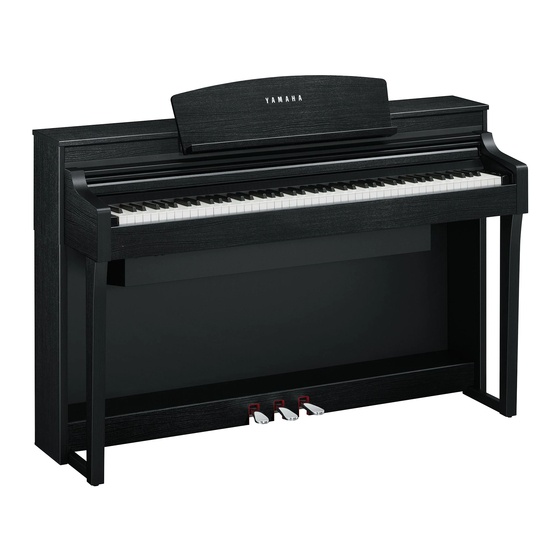
Page 10: Panel Controls And Terminals
Panel Controls and Terminals 8 , 9 This illustration shows the CSP-170. 1 [FUNCTION] button (page 24) 3 [iPad] terminal (page 22) Holding this down and pressing a specified key For connection to iOS device. This allows you to call up various functions. terminal can be charged iOS device. - Page 11 ) I/O connectors (near side) side) Left (lower-key side) AUX OUT [R], [L/L+R] jacks (page 32) For outputting the sound of the Clavinova to an external speaker system. [INPUT VOLUME] knob (page 33) [AUX PEDAL] jack (page 33) For adjusting the input volume from microphone or For connection to a separately sold foot controller or other devices connected to [MIC/LINE IN] jacks.
-
Page 12: Csp – A New World Of Piano Performance And Control With Smart Devices
– A New World of Piano Performance and Control with Smart Devices – The Clavinova CSP series lets you use a dedicated smart device app for advanced, detailed control and convenient access to various functions, such as playing along with a favorite song, performing in an ensemble. - Page 13 Concert grand piano sound at your fingertips The piano Voices have been created with samples of Yamaha’s flagship CFX concert grand piano and the world renowned Bösendorfer* concert grand piano. With keys that support rapid repetitive capability, this instrument achieves the feel of an actual grand piano.
-
Page 14: Playing The Clavinova As A Piano
Use only the AC power cord supplied with your instrument. If the supplied cord is lost or damaged and needs to be replaced, contact your Yamaha dealer. The use of an inappropriate replacement can pose a fire and shock hazard! CAUTION When setting up the product, make sure that the AC outlet you are using is easily accessible. - Page 15 Turn down the volume. Turn down the [MASTER VOLUME] slider located at the right of the panel to “MIN. ” Turn the power on. Press the [P] (Standby/On) switch located at the right of the panel to turn the power on. The power indicator located below the left end of the panel lights up.
-
Page 16: Auto Power Off Function
Close the key cover With both hands, hold the hand grip. Then slide the cover toward you and gently lower the cover over the keys. CAUTION Be careful to avoid catching your fingers when opening or closing the cover. NOTICE Any recorded Songs which are not saved will be lost if the power automatically turns off. -
Page 17: Using The Sheet Music Braces
Using the sheet music braces Raise the sheet music braces toward yourself as far as they will go. The sheet music braces allow you to hold the pages of music books in place. Using a smart device, put on the music rest. Then make sure the smart device is fully resting against the music rest and raise the sheet music braces. -
Page 18: Using Headphones
Using headphones Connect a pair of headphones to the [PHONES] jacks. Since this instrument is equipped with two [PHONES] jacks, you can connect two pairs of headphones. If you are using only one pair, insert the plug into either of these jacks. Standard stereo phone plug CAUTION Do not use the headphones for a long period of time at a high or uncomfortable volume level, since this can cause permanent... -
Page 19: Using The Pedals
Using the headphone hanger A headphone hanger is included in the instrument package so that you can hang the headphones on the instrument. Install the headphone hanger by following the instructions at the end of this manual. NOTICE Do not hang anything other than the headphones on the hanger. Otherwise, the instrument or the hanger may be damaged. Using the pedals This instrument is equipped with three foot pedals: damper pedal (right), sostenuto pedal (center), and soft pedal (left). -
Page 20: Taking Advantage Of The Smart Pianist App
Piano Room This instrument lets you perform on Voices using piano sounds including Yamaha’s flagship CFX concert grand piano and the famed Bösendorfer* concert grand piano. You can also make sonic changes to the piano Voice as you like, including the brilliance of the sound depending on the lid position of a grand piano or the reverberation in a concert hall. -
Page 21: Song Menu
Style Menu The app gives you a wide variety of accompaniment and rhythmic backing patterns (called Styles) in various different musical genres. The Style functions app can automatically detect the chord and create dynamic accompaniment. Song Menu With the app, you can play back song data (called “Song”) such as Preset songs and commercially available songs. -
Page 22: Connecting To A Smart Device
This application corresponds to iOS and Android devices. For information on release dates and other details, see the website below. https://www.yamaha.com/kbdapps/ Necessary items May not be included depending on your area. Check with your Yamaha dealer. Connecting with a USB Cable iOS device • Lightning - USB cable Android device If the device’s connector is USB micro B... -
Page 23: About The Stream Lights
Displaying the Wi-Fi connection status The Stream Lights indicates the Wi-Fi connection status while setting up using an access point supports the WPS to connect your smart device to your instrument. While setting up using an access point unsupports the WPS or without the WPS, the Stream Lights do not light. -
Page 24: Functions
Voice Voice description CFX Grand Yamaha’s CFX flagship concert grand piano sound with a wide dynamic range for maximum expressive control. Suitable for playing in any music genre and style. Bösendorfer The famed sound of the Vienna-made Bösendorfer full concert grand piano. Its spacious sound evokes the size of the instrument, and is ideal for expressing tenderness in compositions. - Page 25 Voice: Instrument sound for playing from the keyboard. Song: Data of songs. Style: Automatic accompaniment and rhythmic backing pattern. Number keys Beat Style Part Reverb MIDI Tuning (page 28) Depth Channel (page 30) Metronome Metronome Reverb Type (page 29) Transpose Touch Tempo Volume...
-
Page 26: Selecting Preset Voices
Selecting Preset Voices You can select and play various preset Voices. To reset to the default Voice (CFX Grand), press the [FUNCTION] button. Lowest key Playback of Songs You can play back preset Songs. To stop playback, press the [FUNCTION] button. During Song playback, the Stream Lights indicate the particular keys and the timing (page 23). -
Page 27: Using The Metronome
Using the Metronome By using the metronome, you can practice with an accurate tempo, and confirm the actual tempo by hearing it. While holding down the [FUNCTION] button, press the C3 key to start the metronome. To stop the metronome, press again the C3 key while holding down the [FUNCTION] button. F#4 (Default volume) C3 (On/Off) G4 (Volume up 1) -
Page 28: Selecting The Reverb
Selecting the Reverb You can select and apply a reverb effect to the sound, which simulates the natural reverberation of a concert hall. G#5 (Default depth) A5 (Depth up 1) Highest key G5 (Depth down 1) Reverb Type List Reverb type Reverb description Recital Hall Simulates clear reverberation in a mid-sized hall suitable for piano recital. -
Page 29: Changing The Midi Channel
Changing the MIDI channel You can change the MIDI channel for transmitting MIDI messages from [USB TO HOST] or MIDI [OUT] to a connected MIDI device. To change the channel in steps, simultaneously hold down the [FUNCTION] button and press the D6 or E6 key. To reset to the default channel, simultaneously hold down the [FUNCTION] button and press the D#6 key. -
Page 30: Fine-Tuning The Pitch
Fine-tuning the pitch You can fine-tune the pitch of the entire instrument in roughly 0.2 Hz steps. This lets you accurately match the keyboard pitch to that of other instruments or recorded music. The setting range is 414.8 Hz – 466.8 Hz. -
Page 31: Connections
USB device may differ depending on the type of data or the status of the instrument. The instrument does not necessarily support all commercially available USB devices. Yamaha cannot guarantee operation of USB devices that you purchase. Before purchasing a USB device for use with this instrument, visit the following web page: http://download.yamaha.com/... -
Page 32: Connecting Audio Devices ([Aux In] Jack, Aux Out [R]/ [L/L+R] Jacks)
Connecting audio devices ([AUX IN] jack, AUX OUT [R]/ [L/L+R] jacks) Playing a portable audio player with the built-in speakers You can connect the headphone jack of a portable audio player to the instrument’s [AUX IN] jack, and listen to the sound of that audio player through the built-in speakers of the instrument. NOTICE To avoid damage to the devices, first turn on the power to the external device, then to the instrument. -
Page 33: Connecting A Footswitch/Foot Controller ([Aux Pedal] Jack)
Set the [MIC/LINE] switch to “MIC” or “LINE” depending on the instrument to be connected. Turn on the power of the Clavinova. (If necessary, turn on the microphone) Adjust the [INPUT VOLUME] knob while singing into the microphone or playing the guitar. -
Page 34: Connecting To A Computer ([Usb To Host] Terminal)
Connecting to a computer ([USB TO HOST] terminal) By connecting a computer to the [USB TO HOST] terminal, you can transfer data between the instrument and the computer via MIDI. For details on using a computer with this instrument, refer to the “Computer- related Operations”... -
Page 35: Assembly
Assembly This illustration shows the CSP-170. CAUTION • Assemble the unit on a hard and flat floor with ample space. Power cord Headphone hanger • Be careful not to confuse parts, and be sure to install all parts in the correct orientation. Please assemble the unit in accordance with the sequence given below. - Page 36 Attach B. Secure A. 1 Adjust the position of A so that the left and right ends of A will project beyond D and E equally (as seen from the Depending on the model of digital piano you purchased, front). the surface color of one side of B may be different from the other side.
- Page 37 3 Use a vinyl tie to take up any slack in the pedal cord. 2 Install the brackets of F onto J, and slide them so that J fit into the smaller ends of the keyhole slots. 4 Insert the plug of the power cord into the power connector. Set the adjuster.
- Page 38 CAUTION When moving the instrument after assembly, always hold the bottom of A. Do not hold the key cover or top portion. Improper handling can result in damage to the instrument or personal injury. Do not hold any part other than the bottom surface of A. Hold the bottom of A.
-
Page 39: Troubleshooting
Troubleshooting For troubleshooting information on the app settings, refer to the included Help Menu within the app. Problem Possible Cause and Solution The instrument does not turn on. The instrument has not been plugged in properly. Securely insert the female plug into the socket on the instrument, and the male plug into a proper AC outlet (page 36). -
Page 40: Specifications
Key Cover Style Sliding Music Rest Music Brace Voices Tone Generation Piano Sound Yamaha CFX, Bösendorfer Imperial Binaural Sampling* Yes (Yamaha CFX Voice only) Piano Effect Key-off Samples Smooth Release Polyphony (max.) Preset Number of Voices* 692 Voices + 29 Drum/SFX Kits... - Page 41 CSP-170 CSP-150 Styles Preset Number of Styles* 470 Styles Featured Styles* 396 Pro Styles, 34 Session Styles, 4 Free Play Styles, 36 Pianist Styles Style Control INTRO x 1, ENDING x 1, MAIN x 4, FILL IN x 4 Songs (MIDI) Preset Number of Preset Songs* Recording...
- Page 42 USB wireless MIDI adaptor MD-BT01/UD-BT01 The contents of this manual apply to the latest specifications as of the publishing date. To obtain the latest manual, access the Yamaha website then download the manual file. Since specifications, equipment or separately sold accessories may not be the same in every locale, please check with your Yamaha dealer.
-
Page 43: Index
Index MIDI terminals ...............34 Music braces ..............17 Access point ..............22 App ................... 20 Assembly ................. 35 Pedals ................19 Audio To Score ............... 12 Power ................14 Auto Power Off .............. 16 Power cord ...............14 AUX IN ................32 Reverb ................28 Backup ................ - Page 44 The followings are the titles, credits and copyright notices for thirty seven (37) of the songs pre-installed in this instrument (CSP-170/CSP-150): All I Want For Christmas Is You Eternal Flame Words and Music by Mariah Carey and Walter Afanasieff Words and Music by Billy Steinberg, Tom Kelly and Susanna Hoffs Copyright ©...
- Page 45 It Must Have Been Love Someone Like You Words and Music by Per Gessle Words and Music by Adele Adkins and Dan Wilson Copyright © 1986 Jimmy Fun Music AB Copyright © 2011 MELTED STONE PUBLISHING LTD., BMG All Rights Administered by Songs Of Kobalt Music Publishing MONARCH and SUGAR LAKE MUSIC All Rights Reserved Used by Permission All Rights for MELTED STONE PUBLISHING LTD.
- Page 46 Information for users on collection and disposal of old equipment: This symbol on the products, packaging, and/or accompanying documents means that used electrical and electronic products should not be mixed with general household waste. For proper treatment, recovery and recycling of old products, please take them to applicable collection points, in accordance with your national legislation.
- Page 48 Yamaha Global Site https://www.yamaha.com/ Yamaha Downloads Manual Development Group Published 07/2017 MWZC*.*- **B0 http://download.yamaha.com/ ZW35430 © 2017 Yamaha Corporation Printed in Indonesia...
Need help?
Do you have a question about the Clavinova and is the answer not in the manual?
Questions and answers
keys make a thunking noise when released. How to adjust?