Table of Contents
Advertisement
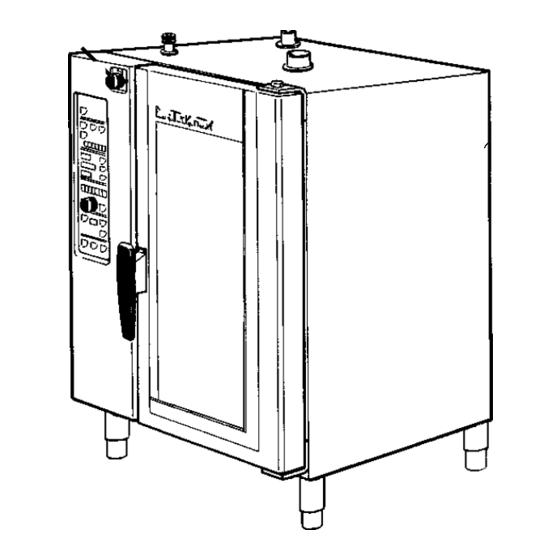
General product description
These operating instructions apply to Combi-ovens
CS 7 worktop model, CS 10 and CS 20.
Cooking information can be found in our Cooking guide*.
* Not supplied. Can be ordered from the supplier or the supplier's
representative.
General instructions
The safety of the product can be jeopardized and the
supplier's warranty and product responsibility invalid
if the directives in the equipment and other documen-
tation are not followed.
•
Read carefully through the instructions in this docu-
ment as they contain important safety information
regarding installation, operating safety, use and main-
tenance of the product. Keep the document so that
it's available to all users.
•
All service, maintenance and repairs must be carried
out by a purpose trained technician. Only genuine
spare parts may be used for replacement. Refer to
the Ser vice instructions* and the Spare part
catalogue*.
•
Operating and care of this product should only be car-
ried out by trained personnel (operator).
* Not supplied. Can be ordered from the supplier or the supplier's
representative.
Application area
The oven is intended for cooking food and, under no
circumstances, may be used in any other way or for
any other purpose than described in these operating
instructions and in the Cooking Guide or any other
cook book.
Using CS 7, CS 10 and CS 20 Combi-ovens you can
roast, grill, braise, bake, boil and heat. Heat transfer takes
place through circulating hot air and/or steam.
The water injection feature allows the injection time to be
set between a manual, variable time and a fixed time of
30 seconds, which means that you can always create the
perfect level of humidity in the oven. In turn, this means
that raw materials will always keep their succulence and
weight reduction will be minimal.
The ovens are easy to keep clean and rational to work
with and all significant components are manufactured of
stainless materials.
Maximum food weight per preparation occasion:
CS 7
50 kgs
CS 10
65 kgs
CS 20
130 kgs
CS 7 has removable guide stays for 7 GN 1/1-40 or 4 GN
1/1-65 mm containers.
6
CS 10 (7 GN 1/1-65 mm or 10 GN 1/1-40 mm con-
tainers) and CS 20 (14 GN 1/1-65 mm or 20 GN 1/1-40 mm
containers) use an easy-to-handle shelf stand that can
serve as a trolley. The trolley is not parked in the oven but
is available for handling the slide racks.
CE - Directive (fig. 1)
CS 7, CS 10 and CS 20 are manufactured in accordance
with the EU directives, LVD 73/23/EEC + Annexes, EMC
89/336/EEC + Annexes and is CE marked.
The oven's electrical safety is V.D.E. approved.
Safety instructions
Switch off the power before faults or breakdowns are
rectified.
• Press the "On/Off" button.
• Switch off the "Main power switch" (Not ON the oven).
Warning!
Electricity! (fig. 2)
Label the oven junction box. Cover plates on the junction
box and other cover plates may only be opened by a spe-
cifically trained technician.
Warning! (fig. 3)
Warning for heat and steam.
Note that the glass in the oven door can become extre-
mely hot and could cause injury if touched. Be careful
when opening the oven door. Hot currents of escaping
air could result in burns.
Warning!
Care should be exercised as high temperatures can come
into question when taking containers in and out of the
slide racks.
Warning!
The ventilation holes on the underside of the machine
should not be blocked as this can cause the machine to
overheat.
Warning!
•
The oven may not be flushed or cleaned in the
corresponding way exteriorly (i.e. highpressure
•
Water coming into contact with live components re-
sults in direct mortal danger. Always exercise care
when cleaning, especially around electrical
connections.
•
Use a dampened cloth when cleaning.
In general refer to the Cleaning section.
Technical data
Rating plate (fig. 4)
The machine's product number is displayed on the rating
plate, which is located on the lower part of the left-hand
side of the machine, as well as in the connection room,
and on the Manufacturer´s declaration which accompa-
nies the machine on delivery.
Noise level: < 70 dB
Advertisement
Table of Contents

Related Manuals for Electrolux CS 7


Summary of Contents for Electrolux CS 7
- Page 1 CS 20 130 kgs and on the Manufacturer´s declaration which accompa- nies the machine on delivery. CS 7 has removable guide stays for 7 GN 1/1-40 or 4 GN 1/1-65 mm containers. Noise level: < 70 dB...
- Page 2 - Service trolley for CS 10 and CS 20 - Slide rack for CS 7, CS 10, CS 20 Codes that mean a purpose trained technician - Stand CS 7, CS 10, shelf or guide compartment covered should be contacted or open...
-
Page 3: Oven Ventilation
CS 7, CS 10, CS 20 Oven ventilation For information on Oven ventilation open - close, see the Cooking Guide* Half open Open Closed... - Page 4 le Chef Starting the oven The steam generator's water Press "On/Off" The actual oven temperature automatically empties at set LED lights. is shown. intervals. The oven lighting comes on. A change of water never takes place while a program is in progress, but when the water in the steam generator has fallen below 50°C.
- Page 5 Steam, Combi and Hot air Choose cooking mode: The last set oven temperature, time or core temperature flashes for 5 sec. Press "Steam" , "Combi" or "Hot air" The LED indicates the previous steam level.* The LED lights. Steam Combi Hot air Press "Start"...
-
Page 6: Meat Probe
Meat probe When the core temperature is reached: Choose the cooking mode and insert the meat probe The buzzer sounds. LED goes out. in the food. Cooking stops. The time displays. Make the setting as described under the cooking Press "Stop" modes Steam, Combi and Hot air. - Page 7 Setting new values Start Cooking finished Press "Start" When cooking is finished: Press "Oven temperature" "Time" The LED lights The buzzer sounds. LED goes out. Cooking stops. "Meat probe" Time display flashes. (core temperature) Press "Stop" When the button's LED lights, it isactivated for setting.
- Page 8 Proving Proving is started by setting The last set oven temperature, time or core temperature flashes the oven temperature for 5 seconds. between 0 - 49°C in Combi mode. The LED marks the previous steam level in Combi mode* Press "Combi" The LED lights Setting new values Start...
- Page 9 Reheating The last set oven temperature, time or core temperature flashes Press "Reheating" for 5 seconds. The LED lights The LED marks the previous steam level in Combi mode* Press "Start" to select the pre-set values. Setting new values Start Reheating finished Press "Oven temperature", "Time"...
- Page 10 Gourmet and le Chef Cooking combinations Cooking combinations offer up to five possibili- Choose the cooking mode and make a setting. ties to successively link different cooking modes. Steps for cooking combinations Press "Step 2". The settings are now saved as step 1. The set values for step 1 are dimmed in the displays.
- Page 11 Possible actions during cooking combinations Cancel cooking: Check or change the mode and settings in the subsequent cooking steps. Press the actual step. Press "Stop" LED goes out. For 5 seconds flash set Oven temperature remaining Time set Core temperature set Oven temperature NOTE! If correction of "flashing"...
- Page 12 Setting new values Delete Hold settings Start Press "Start" Press "Oven temperature" Press "Stop" for 1.5 seconds. The LED lights. LEDs and displays are dimmed. The actual temperature is shown Press "Meat probe" (core temperature) When the button's LED lights, it isactivated for setting.
-
Page 13: Delayed Start
Delayed start le Chef Set the delay using Delayed start is appropriately The time display shows the "Setting knob" when set last in combination with the delay time + the button's LED is lit. other modes. any set cooking time. Press "Delayed start". - Page 14 Possible actions during the delay and cooking Check or change the delay time. Cancel delay + mode/s: Press "Stop" Press "Delayed start. For 5 seconds flash The LED goes out remaining delay time Change of delay time Press "Time" Set the new value using the "Setting knob"...
- Page 15 Retrieve program le Chef Press "Retrieve program" Press "Start" Select another stored Press "Start" The LED lights. The LED lights. to select program using the The program starts. the displayed program. "Setting knob" A used program number is shown on "Store program display".
- Page 16 le Chef Descaling After 2-3 mins. Press "Descaling" Descaling should be Check that the the buzzer sounds. for 1.5 seconds. carried out when the LED water supply is on. in the button "Descaling" (tap/valve open) The time display flashes "SOAP". is on or at appropriate, The LED is on during descaling.
- Page 17 Descaling Menu and Gourmet Descaling should be carried Empty the steam generator by opening Close the valve after approx. out when the LED in the drain valve. 0.5 min. when emptying has the symbol "Descaling" When the water level in the steam taken place.
- Page 18 Cleaning The oven should be cleaned daily after use. Apply a cleaning agent on Press "Stop" The oven door should be closed. the oven walls. The LED goes out. The oven ventilation should be closed. Close the door. Press "Clean" for 1.5 seconds. Automatic cleaning starts.
Need help?
Do you have a question about the CS 7 and is the answer not in the manual?
Questions and answers