
Related Manuals for Electrolux COH4P46BX0


Summary of Contents for Electrolux COH4P46BX0
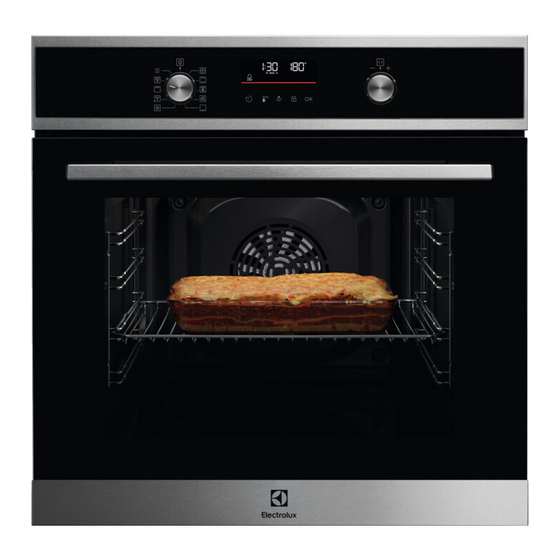
- Page 1 COH4P46BX0 EOF4P46BX EOF6P46BX EOFDP46BK Oven User Manual Four Notice d'utilisation...
-
Page 2: Table Of Contents
WE’RE THINKING OF YOU Thank you for purchasing an Electrolux appliance. You’ve chosen a product that brings with it decades of professional experience and innovation. Ingenious and stylish, it has been designed with you in mind. So whenever you use it, you can be safe in the knowledge that you’ll get great results every time. -
Page 3: Safety Information
SAFETY INFORMATION 7. DAILY USE..........13 11.4 Cooking tables for test institutes..23 7.1 How to set: Heating functions..13 12. CARE AND CLEANING......25 7.2 Standard heating functions.... 14 12.1 Notes on cleaning......25 7.3 Notes on: Moist Fan Baking...15 12.2 How to remove: Shelf supports ...26 7.4 How to set: Assisted Cooking.. -
Page 4: General Safety
SAFETY INFORMATION Children should be supervised to ensure that they do not • play with the appliance. Keep all packaging away from children and dispose of it • appropriately. WARNING: The appliance and its accessible parts become • hot during use. Keep children and pets away from the appliance when in use and when cooling down. -
Page 5: Safety Instructions
SAFETY INSTRUCTIONS Always use oven gloves to remove or insert accessories or • ovenware. To remove the shelf supports first pull the front of the shelf • support and then the rear end away from the side walls. Install the shelf supports in the opposite sequence. Do not use a steam cleaner to clean the appliance. -
Page 6: Electrical Connection
SAFETY INSTRUCTIONS Width of the back of the appliance 558 mm Depth of the appliance 561 mm Built in depth of the appliance 540 mm Depth with open door 1007 mm Ventilation opening minimum size. Opening placed 560x20 mm on the bottom rear side Mains supply cable length. -
Page 7: Use
SAFETY INSTRUCTIONS Cable types applicable for installation or replacement for Europe: H07 RN-F, H05 RN-F, H05 RRF, H05 VV-F, H05 V2V2-F (T90), H05 BB-F For the section of the cable refer to the total power on the rating plate. You can also refer to the table: Total power (W) Section of the cable (mm²) -
Page 8: Care And Cleaning
SAFETY INSTRUCTIONS • Discoloration of the enamel or stainless steel has no effect on the performance of the appliance. • Use a deep pan for moist cakes. Fruit juices cause stains that can be permanent. • Always cook with the appliance door closed. •... -
Page 9: Internal Lighting
INSTALLATION 2.6 Internal lighting WARNING! Risk of electric shock. • Concerning the lamp(s) inside this product and spare part lamps sold separately: These lamps are intended to withstand extreme physical conditions in household appliances, such as temperature, vibration, humidity, or are intended to signal information about the operational status of the appliance. -
Page 10: Securing The Oven To The Cabinet
INSTALLATION (*mm) min. 550 min. 560 3.2 Securing the oven to the cabinet 10/72... -
Page 11: Product Description
PRODUCT DESCRIPTION 4. PRODUCT DESCRIPTION 4.1 General overview Control panel Knob for the heating functions Display Control knob (for the temperature) Air vents for the cooling fan Heating element Lamp Shelf support, removable Cavity embossment Shelf positions 4.2 Accessories • Wire shelf For cookware, cake tins, roasts. -
Page 12: Control Panel Sensor Fields
BEFORE FIRST USE 5.2 Control panel sensor fields Fast Confirm Timer Light Lock Press Turn the knob Heat Up setting Select a heating function to turn on the oven. Turn the knob for the heating functions to the off position to turn the oven off. Display with key functions. -
Page 13: Initial Cleaning
DAILY USE 6.1 Initial cleaning Before first use clean the empty oven and set the time: 00:00 Set the time. Press 6.2 Initial preheating Preheat the empty oven before the first use. Step 1 Remove all accessories and removable shelf supports from the oven. Step 2 Set the maximum temperature for the function: Let the oven operate for 1 h. -
Page 14: Standard Heating Functions
DAILY USE Start cooking Set the temperature. Press Select a heating function. 7.2 Standard heating functions Heating function Application To bake on up to three shelf positions at the same time and to dry food. Set the temperature 20 - 40 °C lower than for Conventional Cooking. True Fan Cooking To bake and roast food on one shelf position. -
Page 15: Notes On: Moist Fan Baking
DAILY USE Heating function Application To grill thin pieces of food and to toast bread. Grill To roast large meat joints or poultry with bones on one shelf position. To make gratins and to brown. Turbo Grilling To enter the Menu: Assisted Cooking, Cleaning, Settings. Menu 7.3 Notes on: Moist Fan Baking This function was used to comply with the energy efficiency class and ecodesign requirements... -
Page 16: Assisted Cooking
DAILY USE 7.5 Assisted Cooking Legend Weight Automatic available. Preheat the appliance before you start cooking. Shelf level. The display shows P and a number of the dish that you can check in the table. When the function ends check if the food is ready. Dish Weight Shelf level / Accessory... - Page 17 DAILY USE Dish Weight Shelf level / Accessory Chicken breast 180 - 200 g per 2; baking tray piece Use your favourite spices. Meat loaf 1 kg 2; baking tray Use your favourite spices. Whole fish, gril‐ 0.5 - 1 kg per 2;...
-
Page 18: Clock Functions
CLOCK FUNCTIONS Dish Weight Shelf level / Accessory Quiche 1; baking tin on wire shelf Baguette / Cia‐ 0.8 kg 3; baking tray lined with baking paper batta / White More time needed for white bread. bread 8. CLOCK FUNCTIONS 8.1 Clock functions Clock Function Application... - Page 19 CLOCK FUNCTIONS How to set: Minute minder Step 1 Step 2 Step 3 The display shows: 0:00 Set the Minute minder Press: Press: Timer starts counting down immediately. How to set: Cooking time Step 1 Step 2 Step 3 Step 4 The display shows: 0:00...
-
Page 20: Using The Accessories
USING THE ACCESSORIES 9. USING THE ACCESSORIES WARNING! Refer to Safety chapters. 9.1 Inserting accessories A small indentation at the top increases safety. The indentations are also anti-tip devices. The high rim around the shelf prevents cookware from slipping of the shelf. Wire shelf: Push the shelf between the guide bars of the shelf support and make sure that the... -
Page 21: Automatic Switch-Off
HINTS AND TIPS This function prevents an accidental change of the appliance function. - flashes when the lock is turned on. 10.2 Automatic switch-off For safety reasons the oven turns off after some time, if a heating function works and you do not change any settings. - Page 22 HINTS AND TIPS (°C) (min) Sweet rolls, 12 baking tray or dripping 35 - 40 pieces Rolls, 9 pieces baking tray or dripping 35 - 40 Pizza, frozen, wire shelf 35 - 40 0.35 kg Swiss Roll baking tray or dripping 30 - 40 Brownie baking tray or dripping...
-
Page 23: Moist Fan Baking - Recommended Accessories
HINTS AND TIPS (°C) (min) Muffins, 12 pieces baking tray or dripping 30 - 40 Savory pastry, 16 baking tray or dripping 35 - 45 pieces Short crust bis‐ baking tray or dripping 40 - 50 cuits, 20 pieces Tartlets, 8 pieces baking tray or dripping 20 - 30 Vegetables,... - Page 24 HINTS AND TIPS ( °C) (min) Small Conven‐ Baking 25 - 35 cakes, 16 tional Cook‐ tray per tray Small True Fan Baking 20 - 30 Preheat the oven cakes, 16 Cooking tray for 10 min. per tray Small True Fan Baking 1 and 20 - 30...
-
Page 25: Care And Cleaning
CARE AND CLEANING ( °C) (min) Short True Fan Baking 1 and 15 - 25 bread Cooking tray Toast Grill Wire max. 5 - 7 Preheat the oven shelf until set tempera‐ ture is reached. Beef bur‐ Grill Wire max. 15 - 30 Put the wire shelf ger, 6... -
Page 26: How To Remove: Shelf Supports
CARE AND CLEANING Clean all accessories after each use and let them dry. Use only a microfibre cloth with warm water and a mild detergent. Do not clean the accessories in a dishwasher. Do not clean the non-stick accessories using abrasive cleaner or sharp-edged Accessories objects. -
Page 27: Cleaning Reminder
CARE AND CLEANING Pyrolytic Cleaning Step 1 Enter menu: Cleaning Option Duration C1 - Light cleaning Step 2 - press to start the cleaning. Step 3 After cleaning, turn the knob for the heating functions to the off posi‐ tion. When the cleaning starts, the oven door is locked and the lamp is off. - Page 28 CARE AND CLEANING Step 1 Open the door fully and hold both hinges. Step 2 Lift and pull the latches until they click. Step 3 Close the oven door halfway to the first opening position. Then lift and pull to remove the door from its seat. Step 4 Put the door on a soft cloth on a sta‐...
-
Page 29: How To Replace: Lamp
CARE AND CLEANING Step 6 First lift carefully and then remove the glass panels one by one. Start from the top panel. Step 7 Clean the glass panels with water and soap. Dry the glass panels carefully. Do not clean the glass panels in the dishwasher. Step 8 After cleaning, install the glass panels and the oven door. -
Page 30: Troubleshooting
TROUBLESHOOTING Before you replace the lamp: Step 1 Step 2 Step 3 Turn off the oven. Wait until Disconnect the oven from the Put a cloth on the bottom of the oven is cold. mains. the cavity. Back lamp Step 1 Turn the glass cover to remove it. -
Page 31: Service Data
Do not remove the rating plate from the appliance cavity. We recommend that you write the data here: Model (MOD.) ......... Product number (PNC) ......... Serial number (S.N.) ......... 14. ENERGY EFFICIENCY 14.1 Product Information and Product Information Sheet Supplier's name Electrolux 31/72... -
Page 32: Energy Saving
ENERGY EFFICIENCY COH4P46BX0 944068318 EOF4P46BX 944068309 Model identification EOF6P46BX 944068324 EOFDP46BK 944068373 Energy Efficiency Index 81.7 Energy efficiency class Energy consumption with a standard load, conventional 0.94 kWh/cycle mode Energy consumption with a standard load, fan-forced 0.67 kWh/cycle mode Number of cavities... -
Page 33: Menu Structure
MENU STRUCTURE Residual heat The fan and lamp continue to operate. When you turn off the appliance, the display shows the residual heat. You can use that heat to keep the food warm. When the cooking duration is longer than 30 min, reduce the appliance temperature to minimum 3 - 10 min before the end of cooking. -
Page 34: Environmental Concerns
MENU STRUCTURE Settings Uptimer On / Off Light On / Off Fast Heat Up On / Off Cleaning Reminder On / Off Demo mode Activation Software version Check code: 2468 Reset all settings Yes / No 16. ENVIRONMENTAL CONCERNS Recycle materials with the symbol . - Page 35 NOUS PENSONS À VOUS Merci d’avoir choisi un appareil Electrolux. Vous avez choisi un produit qui bénéficie de décennies d'expérience professionnelle et d'innovation. Ingénieux et élégant, il a été pensé pour vous. C'est la raison pour laquelle vous pouvez avoir la certitude d'obtenir d'excellents résultats à...
-
Page 36: Information Sur La Sécurité
INFORMATION SUR LA SÉCURITÉ 6. AVANT LA PREMIÈRE UTILISATION..46 11.3 Chaleur Tournante Humide - accessoires recommandés....57 6.1 Nettoyage initial......46 11.4 Tableaux de cuisson pour les 6.2 Préchauffage initial......46 instituts de tests........57 7. UTILISATION QUOTIDIENNE....46 12. -
Page 37: Sécurité Générale
INFORMATION SUR LA SÉCURITÉ physiques, sensorielles ou mentales réduites ou dénuées d’expérience ou de connaissance, s'ils sont correctement surveillés ou si des instructions relatives à l'utilisation de l'appareil en toute sécurité leur ont été données et s’ils comprennent les risques encourus. Les enfants de moins de 8 ans et les personnes ayant un handicap très important et complexe doivent être tenus à... -
Page 38: Consignes De Sécurité
CONSIGNES DE SÉCURITÉ Si le câble d’alimentation secteur est endommagé, son • remplacement doit être confié exclusivement au fabricant, à son service après-vente ou à toute autre personne qualifiée afin d’éviter tout danger électrique. AVERTISSEMENT : Assurez-vous que l'appareil est éteint •... -
Page 39: Branchement Électrique
CONSIGNES DE SÉCURITÉ • L’appareil est équipé d’un système de refroidissement électrique. Il doit être utilisé avec l’alimentation électrique. Hauteur minimale du meuble (Hauteur minimale 590 (600) mm du meuble sous le plan de travail) Largeur du meuble 560 mm Profondeur du meuble 550 (550) mm Hauteur de l’avant de l’appareil... -
Page 40: Utilisation
CONSIGNES DE SÉCURITÉ • Ne laissez pas les câbles d'alimentation entrer en contact ou s'approcher de la porte de l'appareil ou de la niche d'encastrement sous l'appareil, particulièrement lorsqu'il est en marche ou que la porte est chaude. • La protection contre les chocs des parties sous tension et isolées doit être fixée de telle manière qu'elle ne puisse pas être enlevée sans outils. -
Page 41: Entretien Et Nettoyage
CONSIGNES DE SÉCURITÉ • N'exercez pas de pression sur la porte ouverte. • N'utilisez pas l'appareil comme plan de travail ou comme espace de rangement. • Ouvrez la porte de l'appareil avec précaution. L'utilisation d'ingrédients avec de l'alcool peut provoquer un mélange d'alcool et d'air. •... -
Page 42: Nettoyage Par Pyrolyse
CONSIGNES DE SÉCURITÉ 2.5 Nettoyage par pyrolyse AVERTISSEMENT! Risque de blessures, d'incendie, d'émissions chimiques (fumées) en mode pyrolyse. • Avant d'effectuer un nettoyage par pyrolyse et un préchauffage initial, retirez de la cavité du four : – tout résidu alimentaire excessif, déversement et dépôt d'huile ou de graisse. –... -
Page 43: Mise Au Rebut
INSTALLATION 2.8 Mise au rebut AVERTISSEMENT! Risque de blessure ou d'asphyxie. • Contactez votre service municipal pour obtenir des informations sur la marche à suivre pour mettre l’appareil au rebut. • Débranchez l'appareil de l'alimentation électrique. • Coupez le câble d'alimentation au ras de l'appareil et mettez-le au rebut. •... -
Page 44: Fixation Du Four Au Meuble
DESCRIPTION DE L'APPAREIL 3.2 Fixation du four au meuble 4. DESCRIPTION DE L'APPAREIL 4.1 Vue d’ensemble Bandeau de commande Manette de sélection des modes de cuisson Affichage Manette de commande (pour la température) Fentes d’aération du ventilateur de refroidissement Résistance Éclairage Chaleur tournante Support de grille, amovible... -
Page 45: Bandeau De Commande
BANDEAU DE COMMANDE • Plat à rôtir Pour cuire et rôtir ou comme plat pour récupérer la graisse. 5. BANDEAU DE COMMANDE 5.1 Manettes rétractables Pour utiliser l'appareil, appuyez sur la manette. La manette sort alors de son logement. 5.2 Touches tactiles du bandeau de commande Pré‐... -
Page 46: Avant La Première Utilisation
AVANT LA PREMIÈRE UTILISATION 6. AVANT LA PREMIÈRE UTILISATION AVERTISSEMENT! Reportez-vous aux chapitres concernant la sécurité. 6.1 Nettoyage initial Avant la première utilisation, nettoyez le four à vide et réglez la durée : 00:00 Réglez l’heure. Appuyez sur la tou‐ 6.2 Préchauffage initial Préchauffez le four à... -
Page 47: Modes De Cuisson Standard
UTILISATION QUOTIDIENNE Pour lancer la cuisson Réglez la température. Appuyez sur la touche Sélectionnez un mode de cuisson. 7.2 Modes de cuisson standard Mode de cuisson Application Pour faire cuire sur 3 niveaux en même temps et pour sécher des ali‐ ments. -
Page 48: Remarques Sur : Chaleur Tournante Humide
UTILISATION QUOTIDIENNE Mode de cuisson Application Cette fonction est conçue pour économiser de l'énergie en cours de cuis‐ son. Lorsque vous utilisez cette fonction, la température à l’intérieur de la cavité peut différer de la température sélectionnée. La chaleur résiduelle Chaleur Tournante est utilisée. -
Page 49: Cuisson Assistée
UTILISATION QUOTIDIENNE P1 - P25 Accédez au menu. Sélectionner Cuisson Sélectionnez le plat. Placez le plat dans le assistée. Appuyez Appuyez sur la tou‐ four. Confirmez la configuration. 7.5 Cuisson assistée Légende Poids automatique disponible. Préchauffez l’appareil avant de commencer la cuisson. Niveau de grille. - Page 50 UTILISATION QUOTIDIENNE Plat Poids Niveau/Accessoire Rôti de porc - 1.5 - 2 kg 2; plat à rôtir sur grille métallique collet ou épaule Retournez la viande à la moitié du temps de cuisson. Longe, fraîche 1 - 1.5 kg ; 5 à 2 ;...
-
Page 51: Fonctions De L'horloge
FONCTIONS DE L'HORLOGE Plat Poids Niveau/Accessoire Pommes de terre 1 kg 2 ; plateau de cuisson au four Placez les pommes de terre entières avec la peau sur un plateau de cuisson. Croquettes sur‐ 0.5 kg 3 ; plateau de cuisson gelées Pommes, surge‐... -
Page 52: Comment Régler : Fonctions De L'horloge
FONCTIONS DE L'HORLOGE Fonctions de l’horlo‐ Application Lorsque le minuteur termine le décompte, le signal sonore retentit et le mode de cuisson s’arrête. Heure de cuisson Pour reporter le début et / ou la fin de la cuisson. Départ différé Le maximum est de 23 h 59 min. -
Page 53: Utilisation Des Accessoires
UTILISATION DES ACCESSOIRES Comment régler Heure de cuisson Étape 1 Étape 2 Étape 3 Étape 4 L’affichage in‐ dique : 0:00 Choisissez le mo‐ Appuyez à plu‐ de de cuisson et Réglez le temps sieurs reprises : Appuyez sur réglez la tempéra‐ de cuisson. -
Page 54: Fonctions Supplémentaires
FONCTIONS SUPPLÉMENTAIRES Grille métallique: Poussez la grille entre les barres de guida‐ ge des supports de grille et assurez-vous que les pieds sont orientés vers le bas. Plat à rôtir: Poussez la plaque entre les rails du sup‐ port de grille. 10. -
Page 55: Ventilateur De Refroidissement
CONSEILS (°C) 30 - 115 12.5 120 - 195 200 - 245 L'arrêt automatique ne fonctionne pas avec les fonctions : Eclairage four, Départ différé. 10.3 Ventilateur de refroidissement Lorsque l'appareil fonctionne, le ventilateur de refroidissement se met automatiquement en marche pour refroidir les surfaces de l'appareil. - Page 56 CONSEILS (°C) (min) Petits pains, 9 piè‐ Plateau de cuisson ou 35 - 40 plat à rôtir Pizza, surgelée, grille métallique 35 - 40 0,35 kg Gâteau Roulé Plateau de cuisson ou 30 - 40 plat à rôtir Brownie Plateau de cuisson ou 30 - 40 plat à...
-
Page 57: Chaleur Tournante Humide - Accessoires Recommandés
CONSEILS (°C) (min) Muffins, 12 pièces Plateau de cuisson ou 30 - 40 plat à rôtir Petite pâtisserie Plateau de cuisson ou 35 - 45 salée, 16 pièces plat à rôtir Biscuits à pâte sa‐ Plateau de cuisson ou 40 - 50 blée, 20 pièces plat à... - Page 58 CONSEILS ( °C) (min) Petits gâ‐ Chauffage Plateau 25 - 35 teaux, 16 Haut/Bas de cuis‐ par pla‐ Petits gâ‐ Chaleur Plateau 20 - 30 Préchauffez le teaux, 16 tournante de cuis‐ four pendant 10 par pla‐ min. Petits gâ‐ Chaleur Plateau 1 et 3...
-
Page 59: Entretien Et Nettoyage
ENTRETIEN ET NETTOYAGE ( °C) (min) Sablé Chaleur Plateau 20 - 30 tournante de cuis‐ Sablé Chaleur Plateau 1 et 3 15 - 25 tournante de cuis‐ Pain grillé Gril Grille max. 5 - 7 Préchauffez le métalli‐ four jusqu’à ce que la températu‐... -
Page 60: Comment Retirer : Supports De Grille
ENTRETIEN ET NETTOYAGE Nettoyez la cavité après chaque utilisation. L’accumulation de graisse ou d’au‐ tres résidus peut provoquer un incendie. De l'humidité peut se déposer dans l'enceinte de l'appareil ou sur les vitres de la porte. Pour diminuer la condensation, laissez fonctionner l'appareil pendant 10 minutes avant la cuisson. -
Page 61: Nettoyage Conseillé
ENTRETIEN ET NETTOYAGE Avant le Nettoyage par pyrolyse : Éteignez le four et atten‐ Retirez les accessoires . Nettoyez la sole du four et la vitre dez qu’il soit froid. interne de la porte avec de l’eau tiède, un chiffon doux et un dé‐ tergent doux. -
Page 62: Comment Démonter Et Installer : Couvercle
ENTRETIEN ET NETTOYAGE 12.5 Comment démonter et installer : Couvercle La porte du four dispose de quatre panneaux de verre. Vous pouvez retirer la porte du four et la vitre interne pour les nettoyer. Lisez toutes les instructions du chapitre « Retrait et installation de la porte »... - Page 63 ENTRETIEN ET NETTOYAGE Étape 5 Faites pivoter les fixations de 90° et retirez-les de leurs logements. 90° Étape 6 Soulevez d’abord avec précaution, puis retirez les panneaux de verre un par un. Commencez par le panneau supérieur. Étape 7 Nettoyez les vitres à l'eau savonneuse. Essuyez soigneusement les panneaux de ver‐ re.
-
Page 64: Comment Remplacer : Éclairage
DÉPANNAGE 12.6 Comment remplacer : Éclairage AVERTISSEMENT! Risque d'électrocution. L'éclairage peut être chaud. Avant de remplacer l'éclairage : Étape 1 Étape 2 Étape 3 Éteignez le four. Attendez que Débranchez le four de l'ali‐ Placez un chiffon au fond de le four ait refroidi. -
Page 65: Données De Maintenance
DÉPANNAGE Le four ne fonctionne pas ou ne chauffe pas Le four ne chauffe pas. Le verrouillage est désactivé. Composants Problème Vérifiez si... L'éclairage est éteint. La Chaleur Tournante Humide est activée. L’éclairage ne fonctionne pas. L’ampoule est grillée. Codes d'erreur L’affichage indique…... -
Page 66: Rendement Énergétique
Nous vous recommandons d’écrire les informations ici : Numéro de série (SN) ......... 14. RENDEMENT ÉNERGÉTIQUE 14.1 Informations produits et fiche d’informations produits Nom du fournisseur Electrolux COH4P46BX0 944068318 EOF4P46BX 944068309 Identification du modèle EOF6P46BX 944068324 EOFDP46BK 944068373 Indice d’efficacité énergétique 81.7 Classe d’efficacité... -
Page 67: Économie D'énergie
STRUCTURE DES MENUS 14.2 Économie d'énergie Cet appareil est doté de caractéristiques qui vous permettent d'économiser de l'énergie lors de votre cuisine au quotidien. Assurez-vous que la porte de l'appareil est fermée lorsque l'appareil est en fonctionnement. Évitez d'ouvrir l'appareil trop souvent pendant la cuisson. Nettoyez régulièrement le joint de porte et assurez-vous qu’il est bien en place. -
Page 68: Matière De Protection De L'environnement
Structure du Menu Cuisson assistée Nettoyage Configurations Configurations Heure actuelle Modifier Affichage Luminosi‐ 1 - 5 té Son touches 1 - Bip Volume alarme 1 - 4 2 - Clic 3 - Son dés‐ activé Compteur Marche / Ar‐ Eclairage four Marche / Arrêt rêt Préchauffage rapide... - Page 72 www.electrolux.com/shop...
Need help?
Do you have a question about the COH4P46BX0 and is the answer not in the manual?
Questions and answers