Table of Contents
Advertisement
Advertisement
Table of Contents

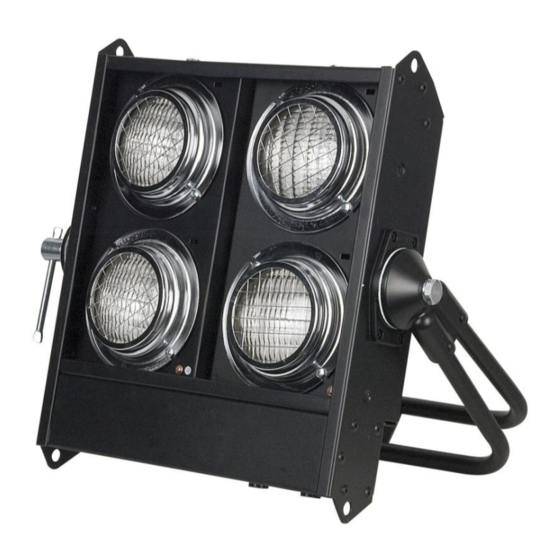
Summary of Contents for SHOWTEC Stage Blinder 4 DMX Black
- Page 1 Stage Blinder 4 DMX Black ORDERCODE 30772...
- Page 2 For more information: iwant@showtec.info You can get some of the best quality, best priced products on the market from Showtec. So next time, turn to Showtec for more great lighting equipment. Always get the best -- with Showtec ! Thank you!
-
Page 3: Table Of Contents
Showtec Showtec Stage Blinder 4 Product Guide ™ Warning ....................................2 Safety Instructions ................................. 2 Operating Determinations ............................4 Rigging .................................... 4 Return Procedure ................................5 Claims ....................................5 Description of the device ..............................6 Overview ..................................6 Backside ..................................7 Installation ................................... -
Page 4: Warning
Warning FOR YOUR OWN SAFETY, PLEASE READ THIS USER MANUAL CAREFULLY BEFORE YOUR INITIAL START-UP! Unpacking Instructions Immediately upon receiving this product, carefully unpack the carton and check the contents to ensure that all parts are present, and have been received in good condition. Notify the dealer immediately and retain packing material for inspection if any parts appear damaged from shipping or the carton itself shows signs of mishandling. - Page 5 If your Showtec device fails to work properly, discontinue use immediately. Pack the unit securely (preferably in the original packing material), and return it to your Showtec dealer for service.
-
Page 6: Operating Determinations
Operating Determinations • This device is not designed for permanent operation. Consistent operation breaks will ensure that the device will serve you for a long time without defects. • The minimum distance between light-output and the illuminated surface must be more than 1 meter. •... -
Page 7: Return Procedure
Return Procedure Returned merchandise must be sent prepaid and in the original packing, call tags will not be issued. Package must be clearly labeled with a Return Authorization Number (RMA number). Products returned without an RMA number will be refused. Highlite will not accept the returned goods or any responsibility. Call Highlite 0031-455667723 or mail aftersales@highlite.nl and request an RMA prior to shipping the fixture. -
Page 8: Description Of The Device
Description of the device Features Stage Blinder 4 is a LED system from Showtec. • Active version of the already popular Stage Blinder 4 • Built-in 2 channel dimmer so that the Stage Blinder can be controlled and dimmed by DMX •... -
Page 9: Backside
Backside Fig. 2 9 10 3) DMX LED 4) Fuse 10A 5) DMX Dispwitches 6) Fuse 10A 7) 3-pin DMX signal connector (IN) 8) 3-pin DMX signal connector (OUT) 9) Earth 10) Powercable Installation Remove all packing materials from the Stage Blinder 4. -
Page 10: Installing The Lamp
Installing the Lamp The Showtec Phantom uses the GE Par 36 G53 Screw MFL 120V 650W (ordercode 80117) bulb as manufactured by all popular manufacturers. Use only the appropriate lamp for your unit. Note that, product versions that use other lamps, may be offered in the future. Check your product specification label for information. -
Page 11: Control Modes
Control Modes There is only 1 Mode: 1) Stand-alone DMX512 (2 Channels) One Stage Blinder (Stand-alone) 1. Fasten the effect light onto firm trussing. Leave at least 0,5 meter on all sides for air circulation. 2. Always use a safety cable (ordercode 70140 / 70141). Plug the end of the electric mains power cord into a proper electric power supply socket. - Page 12 Multiple Stage Blinders DMX Set Up Fig. 4 Note : Link all cables and set dip switches before connecting electric power After switching on, the Stage Blinder will automatically detect whether DMX 512 data is received or not. there is no data received, the problem may be: •...
-
Page 13: Dipswitch Setting For Dmx Mode
Addresses on the controller are set by flipping the appropriate DMX dip switches #1 - #9. You need to know that DMX address settings are the sum of the dip switch values. A standard DMX address for a Showtec Stage Blinder, which has 2 channels is as follow: Example... -
Page 14: Dmx Quick Reference Chart
DMX Quick Reference Chart... -
Page 15: Fixture Linking
Fixture Linking You will need a serial data link to run light shows of one or more fixtures using a DMX-512 controller or to run synchronized shows on two or more fixtures set to a master/slave operating mode. The combined number of channels required by all the fixtures on a serial data link determines the number of fixtures the data link can support. -
Page 16: Maintenance
3. Mechanically moving parts like axles, eyes and others may not show any traces of wearing. 4. The electric power supply cables must not show any damages or material fatigue. The Showtec Stage Blinder 4 requires almost no maintenance. However, you should keep the unit clean. Otherwise, the fixture’s light-output will be significantly reduced. - Page 17 Problem Probable cause(s) Remedy No power to the fixture • Check that power is switched on One or more and cables are plugged in. fixtures are Primary fuse blown. • Replace fuse. completely dead. Fixtures reset The controller is not connected. •...
-
Page 18: Product Specification
Product Specification Model: Showtec Stage Blinder 4 • Active version of the already popular Stage Blinder 4 • Built-in 2 channel dimmer so that the Stage Blinder can be controlled and dimmed by DMX • Voltage: 240V/50 Hz • Power: 2600W •...


Need help?
Do you have a question about the Stage Blinder 4 DMX Black and is the answer not in the manual?
Questions and answers