Rointe KYROS Instruction Manual
Towel rails
Hide thumbs
Also See for KYROS:
- Instruction manual (72 pages) ,
- Instruction manuals (32 pages) ,
- Installation and user manual (32 pages)

Related Manuals for Rointe KYROS


Summary of Contents for Rointe KYROS
- Page 1 KYROS INSTRUCTION MANUAL TOWEL RAILS Mounting, installation, starting and operation Class II...
- Page 2 KYROS Thank you. Many thanks for your confidence in our Rointe products. Before you start to use the low-consumption Kyros towel rails we recommend that you read this manual carefully in order to use the product correctly with the maximum guaranteed results.
-
Page 3: Table Of Contents
INDEX OF CONTENTS 1. DESCRIPTION OF THE KYROS TOWEL RAILS .......4 1.1. Description of the front panel ..........5 1.2. Switch On and Off (Stand By) ..........8 1.3. Select Temperature .............9 1.4. Lock the Control Panel ............9 1.5. Adjust Date and Time ............10 1.6. -
Page 4: Description Of The Kyros Towel Rails
KYROS 1. DESCRIPTION OF THE D SERIES TOWEL RAILS... -
Page 5: Description Of The Front Panel
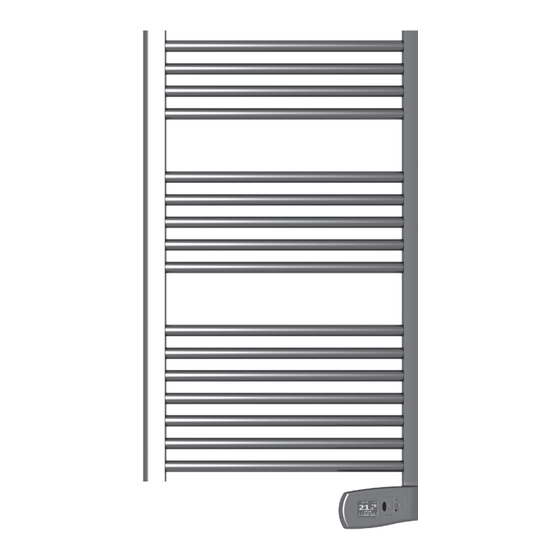
1.1. Description of the front panel ICON INDICATION On / Off - Accept Decrease temperature - Move left Increase temperature - Move right Access/Back to menu - Move up Manual / Automatic - Move down 1.1.1 Parts of the TFT screen... - Page 6 KYROS NUM. INDICATION Hours programmed - AUTO Days of the week Time Selected temperature Locking the control panel Manual / Automatic / Pilot wire functions Comfort / Economy / Anti-frost modes Heating Element in operation Consumption behaviour indicator Open Window function...
- Page 7 Towel Rail Heating element on Comfort Mode activated Eco mode activated Anti-frost mode activated Automatic mode activated Manual mode activated Pilot Wire Control mode activated Not available in Spain. Only upon demand Automatic function activated in USER mode Manual function activated in USER mode Pilot Wire Control function activated in USER mode Not available in Spain.
-
Page 8: Switch On And Off (Stand By)
KYROS 1.2. Switch On and Off (Stand-by) The Kyros technology towel rail is switched on or off using the button. The following welcome appears on the TFT screen when the towel rail is switched on. The main temperature screen will appear after 5 seconds. -
Page 9: Select Temperature
1.3. Temperature selection You can change the desired temperature using the keys . If the temperature of the room is less than is desired then the towel rail will begin to heat up and the symbol will appear. 1.4. Locking the control panel You can lock the product from the actual control panel of the towel rail or remotely via the Air Control remote. -
Page 10: Adjust Date And Time
KYROS If we lock the product via the application or remote control then the remote locked icon will appear on the screen . When you press any button on the towel rail control panel, the image on the right will appear on the screen. If the product is locked in this way, you can only unlock the towel rail via the Air Control remote. -
Page 11: Main Menu
1.6. Main menu Press the button to access the main menu of your Kyros technology towel rail. You can move between the different options on the menu by pressing the buttons. The sub- menu which you have selected will be highlighted with a frame. - Page 12 KYROS 1.6.1. Configuration sub-menu The configuration sub-menu consists of 4 technical parameters of the product. To access this menu, press on the main menu screen. The screen on the right will appear and Clear we can move between the various options of the...
- Page 13 • Language You can select the language you wish using this LANGUAGE ENGLISH function. Select the language you wish by pressing FRANÇAIS buttons. Press the button to ESPAÑOL PORTUGUÊS confirm the language highlighted. • Adjust date / time This function allows you to change the hour, minutes and day of the week on the product control panel.
- Page 14 KYROS • Open Window Function This option allows you to turn on or turn off the Open Window function. Select ON to activate it or OFF to desactivate it by using the buttons. To confirm the desired option and exit, press the button.
- Page 15 Once the towel rail is set on this mode, and until the period of time haves finished or the key is pressed again, the display will show this image. • Effective Power Function This function shows the working time and total time that the product has been connected on the main screen.
- Page 16 KYROS 1.6.3. Balance Sub-menu The balance sub-menu forces the towel rail to work in manual mode at a constant 19ºC. Select the icon from the main menu using buttons. Press the button to confirm. By pressing this button the towel rail will return to the main screen with a set temperature of 19ºC and the “Manual”...
- Page 17 What are the manual, automatic and pilot wire modes? Manual Mode This mode allows you to change between comfort, eco and anti-frost modes changing the temperature as described in section 1.3. Automatic Mode This mode activates the programming which has been set in the towel rail.
- Page 18 KYROS • Manual/Automatic Function Press the button to change between the Manual and Automatic modes. On the main screen the symbol will appear in Automatic mode and the symbol will appear in Manual mode. The Automatic Mode will activate the programming which you have already set in the product.
- Page 19 With keys is exchanged between presets and programming custom home. With confirmed with key and screen appears with all 4 presets. Select the COMFORT temperature Use the keys to select the COMFORT temperature, between 19ºC and 30ºC. The symbol and the temperature will flash. Once selected, press to confirm.
- Page 20 KYROS Asign mode to each HOUR To access the hourly programming of the chosen days press until you pass day number 7. You can move back and forward between the hours by using the buttons. The hours are shown as 0h, 1h, 2h…...
- Page 21 USER Function This allows the user to establish a limited working temperature range (maximum and minimum temperature). By way of a 4 digit code you can access a menu where you can activate or deactivate this function, change the password and fix a maximum and minimum temperature range for the product When the product is working with this function one of the following symbols will appear on the main screen...
- Page 22 KYROS When the PIN number has been entered correctly the main screen of the basic configuration will appear. The following icons allow access to the various sub-menus which we will now describe: Activate/ Maximum Minimum Change Deactivate Temperature Temperature Password...
- Page 23 • Change the PIN code NEW PIN You can change the access PIN code for this feature. CANCEL Use the buttons. To introduce the current PIN code. To confirm select OK. The screen will show PIN CHANGED. CHANGED • Maximum temperature This allows you to set the maximum working temperature of the towel rail.
- Page 24 KYROS • Minimum temperature This allows you to set the minimum working temperature of the towel rail. Using the LOWER TEMPERATURE buttons you can increase or reduce the LIMIT 10.0ºC temperature between 7.5ºC and 18.5ºC. Press to exit once the desired temperature has been chosen.
-
Page 25: Open Window Function
1.7. Open Window Function This function is activated when the towel rail sensor detects a drop of 4ºC in the set temperature within a period of half an hour. When this function is activated the image on the right will appear on the towel rail screen for 5 seconds: When the “Open Window”... - Page 26 KYROS 4. Insert the rawl plugs in the holes made. 5. Screw the plastic fastener to the wall with the 5.5 x 50 mm screw. 6. Screw the two brackets for supporting the heated towel rail and the plastic fastener to the horizontal tube of the heated towel rail like in Figure 1 with the 8 x 26 mm screw.
-
Page 27: Connecting Instructions
3. Connecting Instructions Connection to the mains must be made observing the voltage stated on the product technical data label. This appliance is designed to be permanently installed connected to fixed facilities. The heated towel rail power supply circuit must have an all-pole circuit breaker switch with a separation of at least 3 mm between the contacts. -
Page 28: Kyros Towel Rail Technical Characteristics
• This device must never be installed with its control panel at the top. • This device must not be installed horizontally. • During installation, use wedges so that the control panel will not be in contact with the floor. 3.1. KYROS Towel Rail technical characteristics. Figure 2. Measures and technical characteristics... -
Page 29: Specific Regulations For Bathrooms
REFERENCE KTN030 *** 500 mm 300 mm 800 mm 640 mm 49 mm KTN050 *** 500 mm 300 mm 1,200 mm 1,040 mm 49 mm KTN075 *** 500 mm 300 mm 1,600 mm 1,360 mm 128 mm KTN100 *** 500 mm 300 mm 1,800 mm 1,360 mm... -
Page 30: Maintenance & Cleaning
ROINTE on its TECHNICAL ASSISTANCE HELPLINE 01432 598 024 or e-mail us at support@rointe.co.uk 5.2. ROINTE guarantees this product is free from defects in materials, design and workmanship at the time of its purchase and for the immediately following period of 120 months regarding steel and leak-tightness, and 24 months for electric and electronic parts. - Page 31 (on the technical data label) and its date of purchase. ROINTE reserves the right to refuse the guarantee service when this information has been removed or changed following the original purchase of the product.
- Page 32 The symbol of the container crossed out over a horizontal line is marked on all of ROINTE’s products to remind the consumer of the obligation to separate them on disposal.
- Page 36 ROINTE ESPAÑA Y PORTUGAL ROINTE UK P.I. Vicente Antolinos Catalyst House C/ E, parc. 43, 30140 Santomera 720 Centennial Court, Centennial Park Murcia, España Elstree, Herts, WD6 3SY T. 902 158 049 T. 01432 598 019 F. 968 277 125 F.
Need help?
Do you have a question about the KYROS and is the answer not in the manual?
Questions and answers